What is Live Preview? #
Live Preview allows customers to see their customizations in real time — like engraved text or a chosen charm stone — appearing directly on the product image as they make their selections. No imagination needed. What they see is what they’ll get.
🎯 How this helps you get that first order: First-time buyers are often nervous about customizing products. “Will it look right?” “What if I make a mistake?” Live Preview removes that fear instantly. When customers can see their personalization come to life before they pay, they feel confident — and that confidence leads to a faster first purchase.
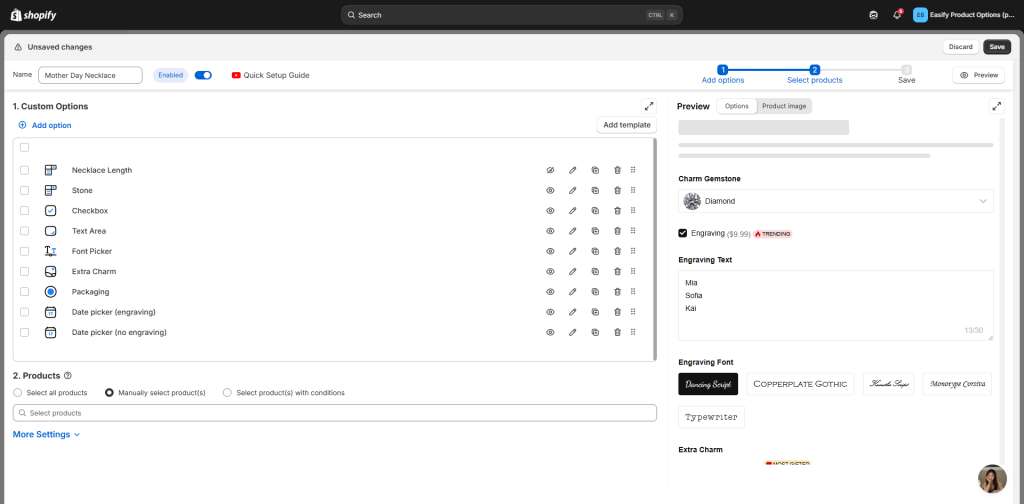
Supported Option Types #
- Text fields: Text Box, Text Area, Number Box – can be combined with Font Picker, Color Picker, or Color Swatch
- Image upload: File Upload
- Other types: Dropdown, Color Swatch, Image Swatch, Checkbox, Button, Radio Button, Switch, Product List
Step-by-Step Setup #
Step 1: Set up your options first #
Configure your option’s label, pricing, conditional logic, etc. — just like you normally would. Don’t worry about live preview yet.
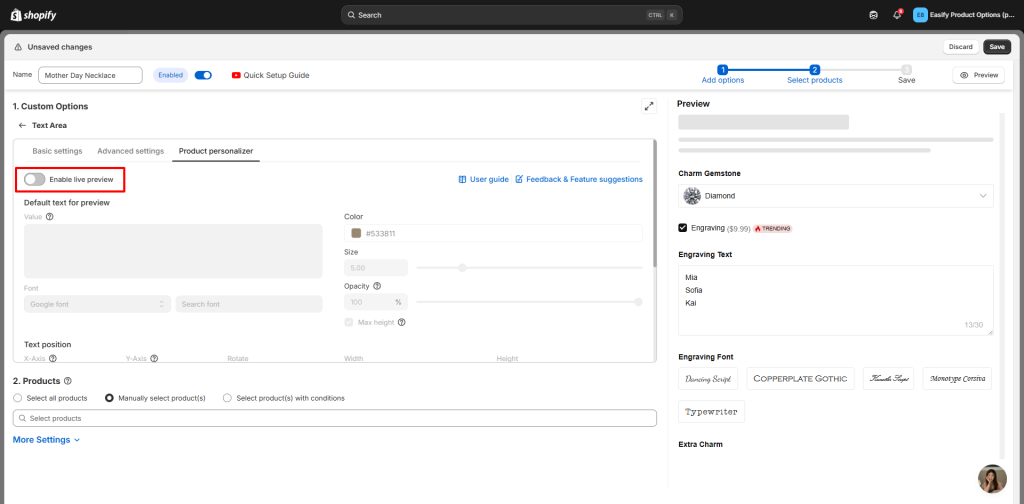
Step 2: Enable live preview in the Product personalizer tab #
Open the Product personalizer tab (top right of each option’s settings area) and turn on live preview for the options that need it.
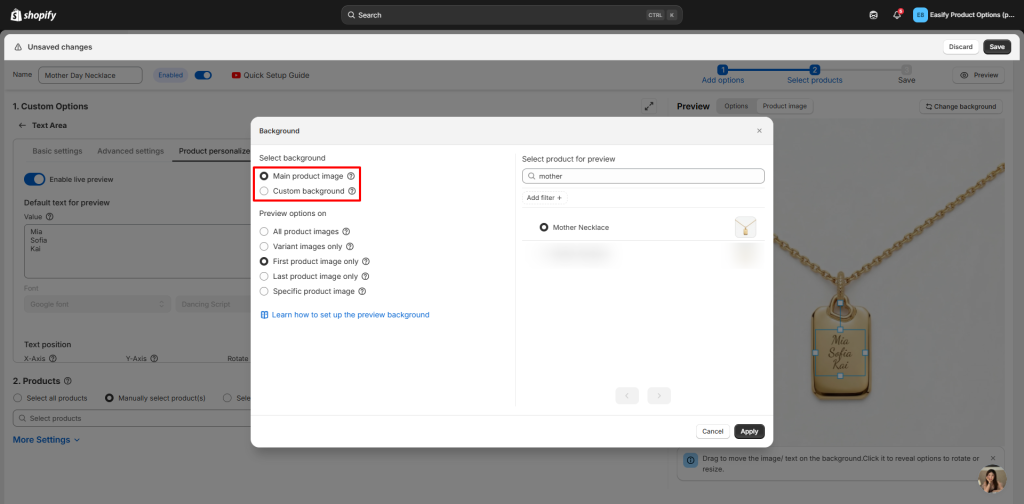
Step 3: Choose your background #
Select either:
- Main product image – preview appears directly on your product’s main photo
- Custom background – upload a blank version (e.g., a plain phone case or empty necklace) for cleaner customization
Step 4: Position text or image on the preview #
Drag, resize, or rotate elements directly on the preview panel. Or adjust X-axis, Y-axis, Rotate, and Arc manually.
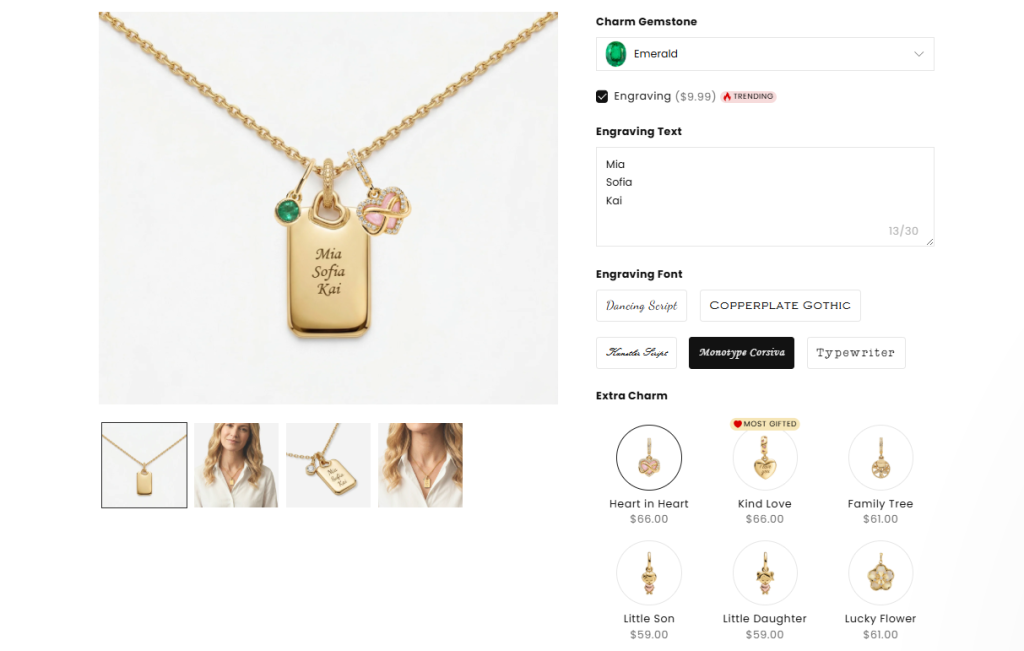
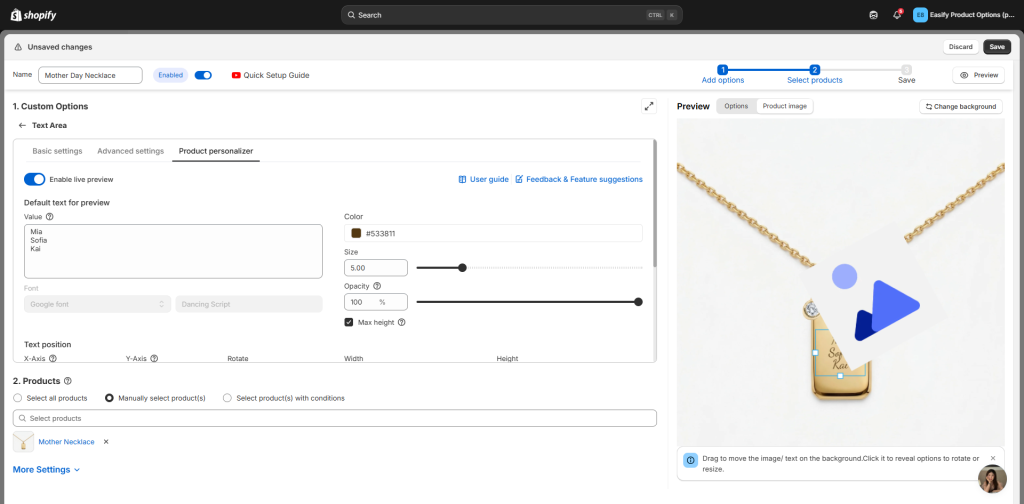
Example – Mother’s Day Necklace:
- Add a Text Box for engraving. In the Product personalizer tab, set default text to “Mom”, choose a font and color, then drag the text to sit nicely on the necklace pendant.
- Add an Image Swatch for charm stones. Upload a small image for each stone (heart, star, birthstone). Drag each one to the correct position on the necklace.
- Link the Text Box to a Font Picker and Color Swatch so customers can change font and color if you allow it.
Step 5: Assign the option set to your product(s) and save #
Select which products should show this option set. If you’re assigning to multiple products, make sure their images are similar so your text and image positions still look good. Then, remember to click Save to view it live!
If you want to explore live preview in more depth, check out the full guide here: Product Personalizer (Live Preview)
You’ve set up live preview to help customers customize with confidence. But once your product is ready to sell, you need to get it in front of more eyes — not just the ones already on your store.
That’s where the next guide comes in: “Create AI Videos to Sell Your Custom Products” — a powerful way to spread the word and showcase your personalized products across social media, ads, and beyond.
Need Assistance? #
If you run into any challenges while hiding your products, feel free to reach out to us for assistance through our convenient in-app live chat. We’re here to help!