What is Text Effects? #
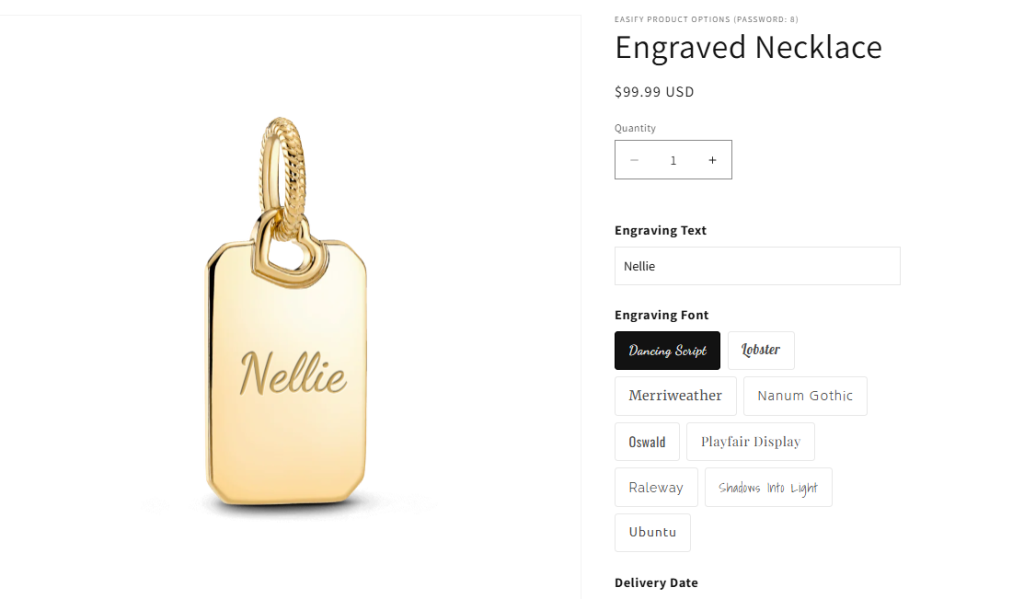
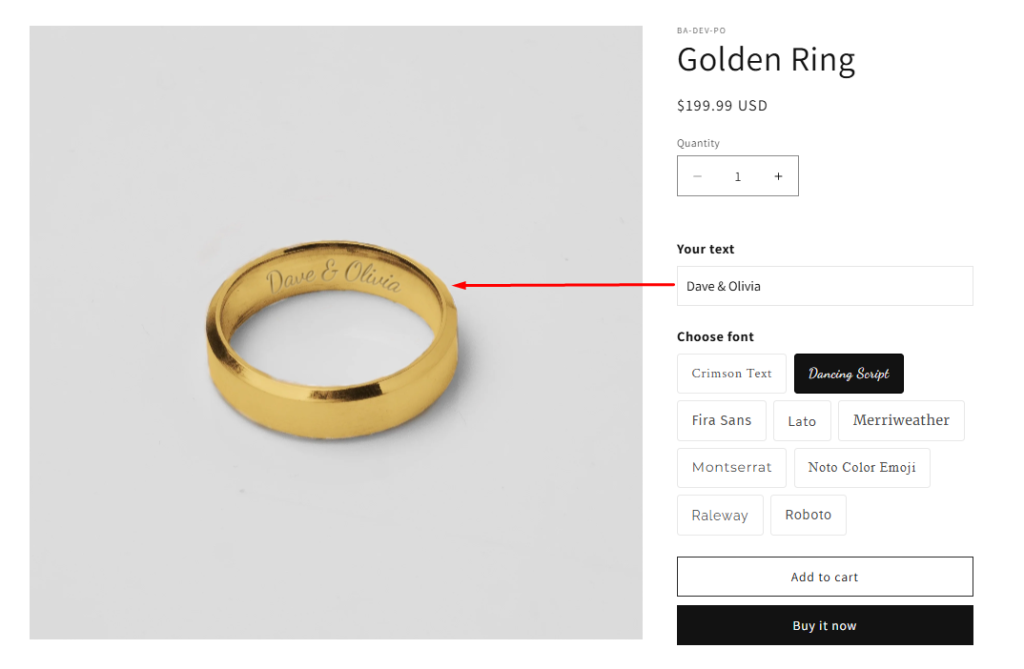
Text Effects lets you display customer-entered text in a more realistic visual style directly on the product page.
Instead of showing plain text only, this feature helps simulate how the final personalized text may look when applied to the actual product. Depending on the effect you choose, customers can preview text that looks engraved, embossed, outlined, or glowing.
💡 Customers do not have to guess how their customization might appear on the final item, which can help them feel more confident before adding the product to cart.
This is especially helpful for stores selling personalized products where the appearance of the text is an important part of the purchase decision!
Where it Applies #
Text Effects is available for these option types:
- Text Box
- Text Area
- Number Box
💡 This feature is available on the Premium plan.
Common Use Cases #
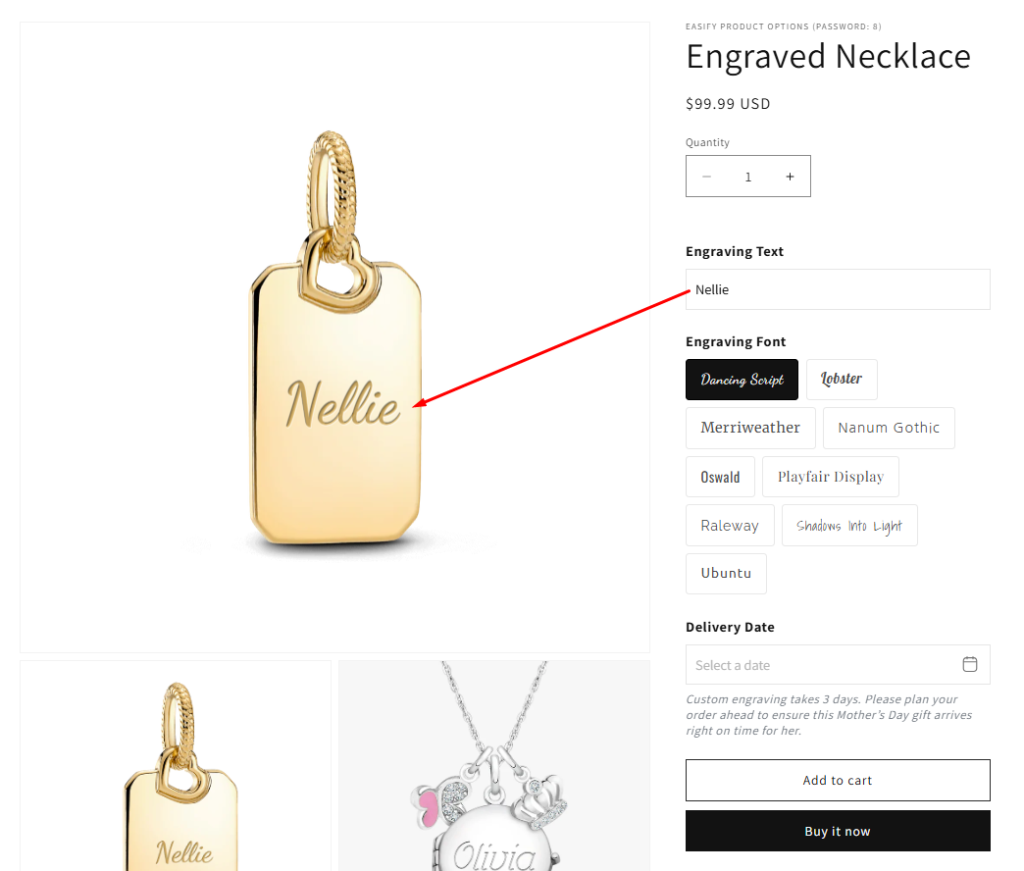
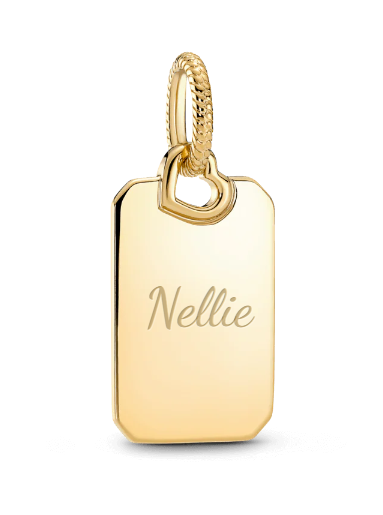
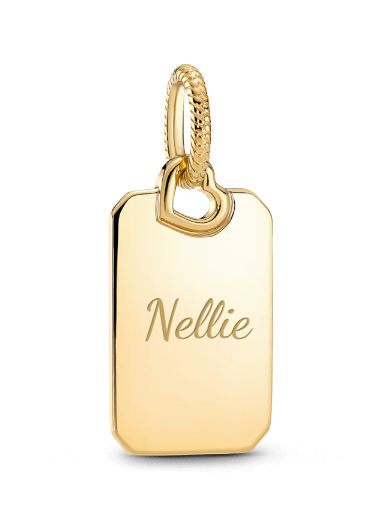
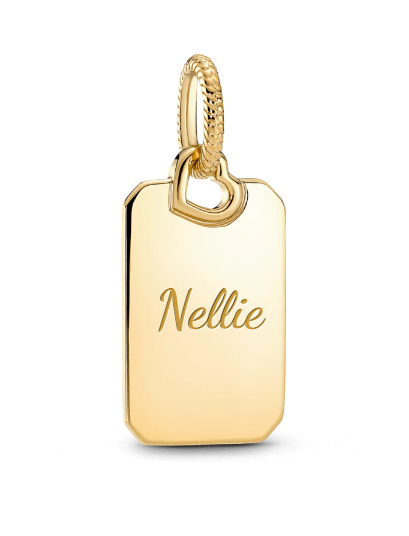
Engraved text #
Best for products where text is carved into the surface.
👉 Examples: jewelry, jewelry charms, metal tags, wooden products…
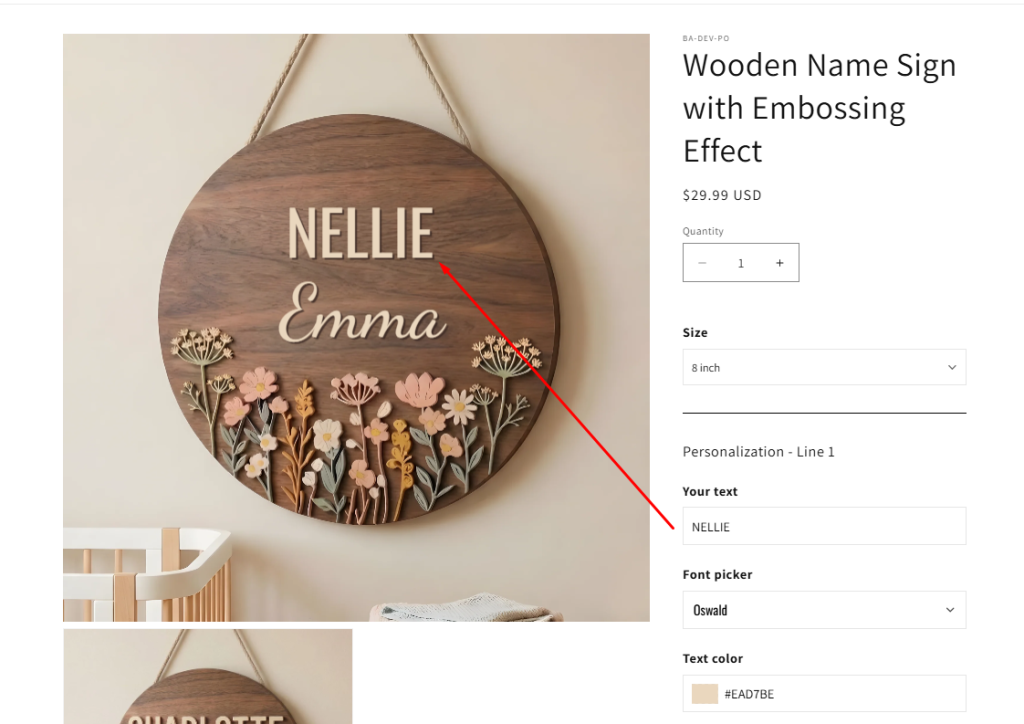
Embossed text #
Best for products where text appears raised or pressed into the material.
👉 Examples: wedding invitations, wooden name sign, greeting cards, luxury packaging, labels…
Stroke text #
Best for products that need a clear outline around the text.
👉 Examples: stroke text on Tshirt, acrylic name tags or bold decorative personalization

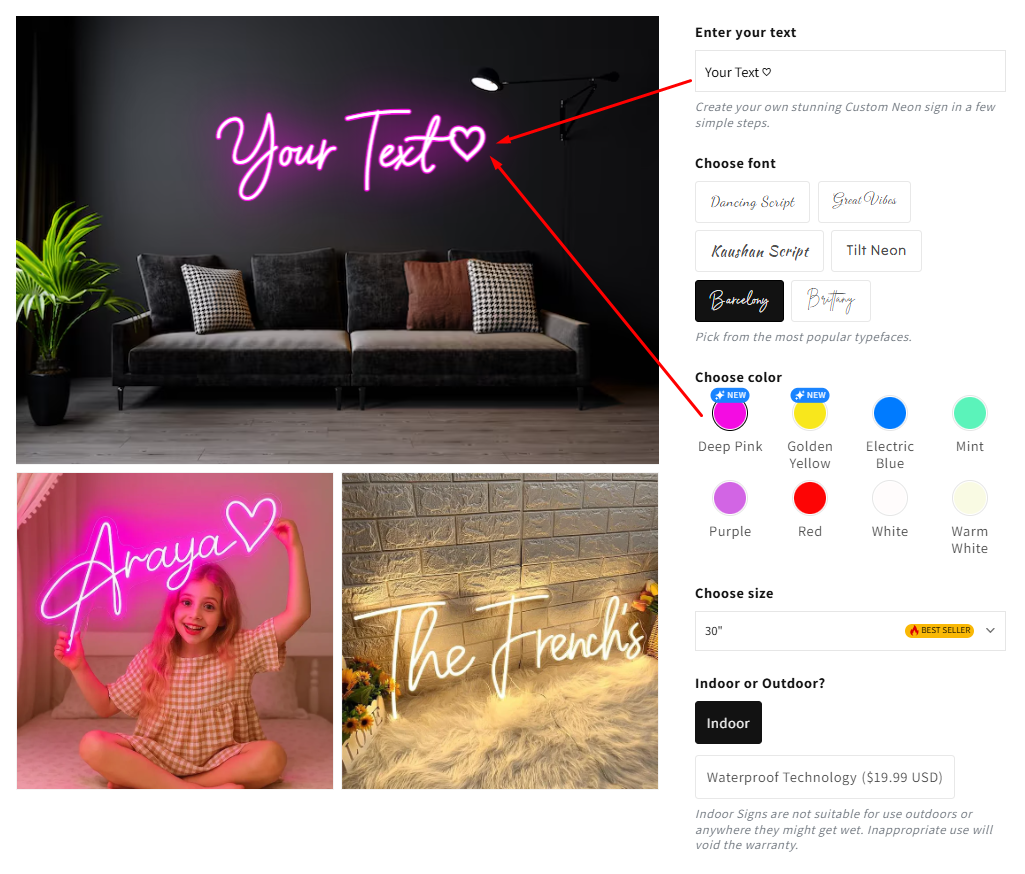
Neon text #
Best for products that need a glowing text appearance.
👉 Examples: neon signs, LED-style custom decor…
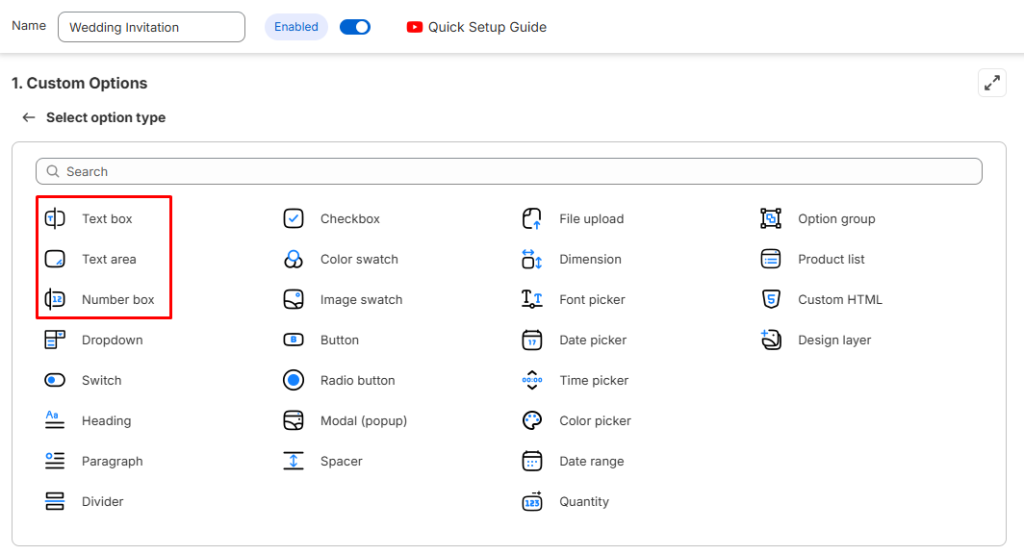
How to Set Up Text Effects #
To enable and configure Text Effects:
- Open your Option set.
- Add or edit one of these option types:
- Text Box
- Text Area
- Number Box
3. Open Product Personalizer
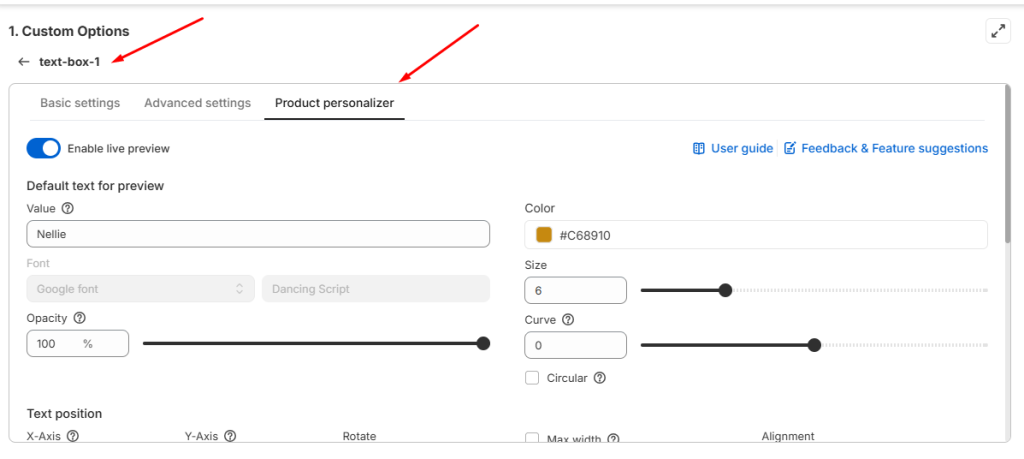
4. Choose the effect you want to apply in Text Effects
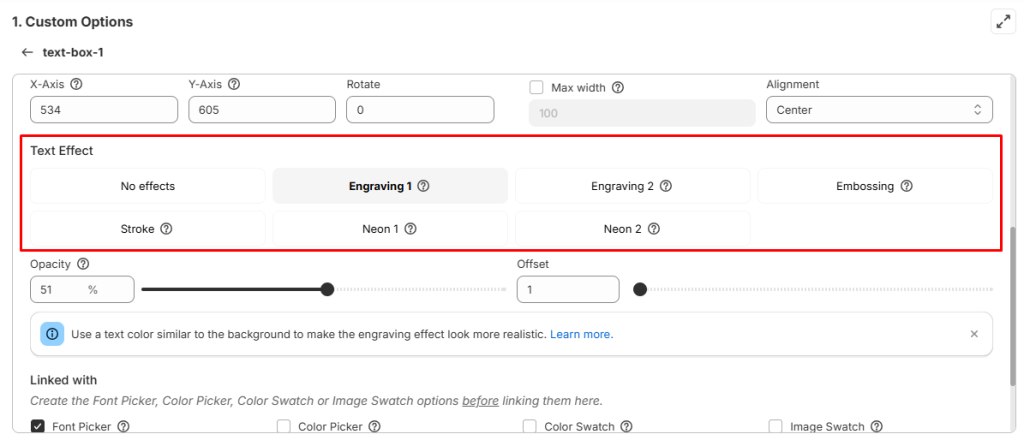
5. Adjust other text settings if needed, such as: Opacity, Offset, Blur…
6. Preview the result on your storefront.
Available text effects #
| Text effects | Description |
| Engraving 1 | A realistic engraving effect that simulates carved text on many common surfaces |
| Engraving 2 | An engraving effect with a stronger depth and gradient feel. Works with curved text |
| Embossing | Creates an embossed or pressed look, suitable for elegant and soft-surface designs |
| Stroke | Outline effect around text |
| Neon 1 | Glowing outlined text |
| Neon 2 | Glowing filled text |
Best Practices & Tips #
1. Choose the Right Text Color #
For Engraving 1, Engraving 2, and Embossing, the text usually looks most realistic when the text color is close to the background color.
This is because engraved and embossed effects often rely on light, shadow, and subtle contrast rather than strong color difference.
✅ Choose a text color that blends naturally with the material or surface behind it.
❌ Using a color that is too different from the background may make the preview look flat or unrealistic.
💡 Example #
If you are engraving text on a gold jewelry charm, use a golden or warm metallic tone rather than a very dark or very bright contrasting color.
If you are embossing text on a cream invitation card, choose a similar cream, beige, or slightly darker paper-like shade.
2. Adjust Opacity #
Opacity can make a big difference in how natural the text effect looks.
Some backgrounds work better with a softer effect, while others need stronger visibility.
✅ Test different opacity levels on the storefront preview and compare the result.
Example: Engraving text on a jewelry charm:
| 30% opacity | 50% opacity | 80% opacity |
 |  |  |
💡 Important notes:
There is no single best opacity for all products. The right setting depends on:
- background color
- texture
- image brightness
- material style
- overall product design
3. Use the Right Effect for Curved Text #
If you are using curve text and want the result to look engraved on a rounded object, we recommend using Engraving 2.
Need Assistance? #
If you run into any challenges while using the Option/ Option Set Templates, feel free to reach out to us for assistance through our convenient in-app live chat. We’re here to help!