Stop manually flagging and re-typing the same order details. Order Automation lets you tag orders by the options customers chose and pull those details straight into your Shopify order notes — automatically, every time.
✨ This feature is available on the Premium plan and above.
Why Order Automation Matters #
✅ Find the Orders That Need Special Handling Auto-tag orders by option set, option, or value — like “Rush,” “Engraving,” or “Gift Wrap” — so you can filter your order list instantly instead of opening each order to check.
🛒 Cut Down on Production Mistakes Order notes pull customer choices straight into Shopify, formatted clearly by product, so whoever’s fulfilling the order doesn’t have to dig through option summaries to know what to make.
🎨 Build Your Own Workflow Triggers Tags can mark orders as “Needs attention,” feeding directly into the Fulfillment Snapshot so the orders that matter most always surface first.
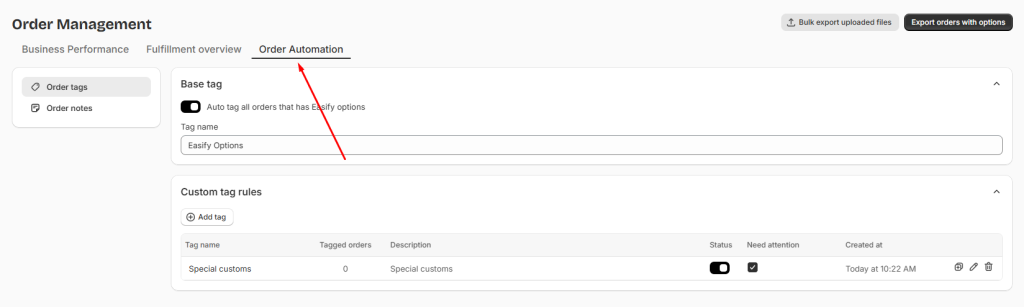
How It Works #
Order Automation has two parts, both configured from the Order Automation section of the Fulfillment Hub:
- Order Tags — automatically tags orders based on rules you define, so you can filter and group them in your order list.
- Order Notes — automatically writes a summary of an order’s options into its Shopify order note, so the details are visible wherever you normally manage orders.
Setting Up Order Tags #
Step 1: Turn On the Base Tag #
Go to: Order page → Order Automation → Order Tags
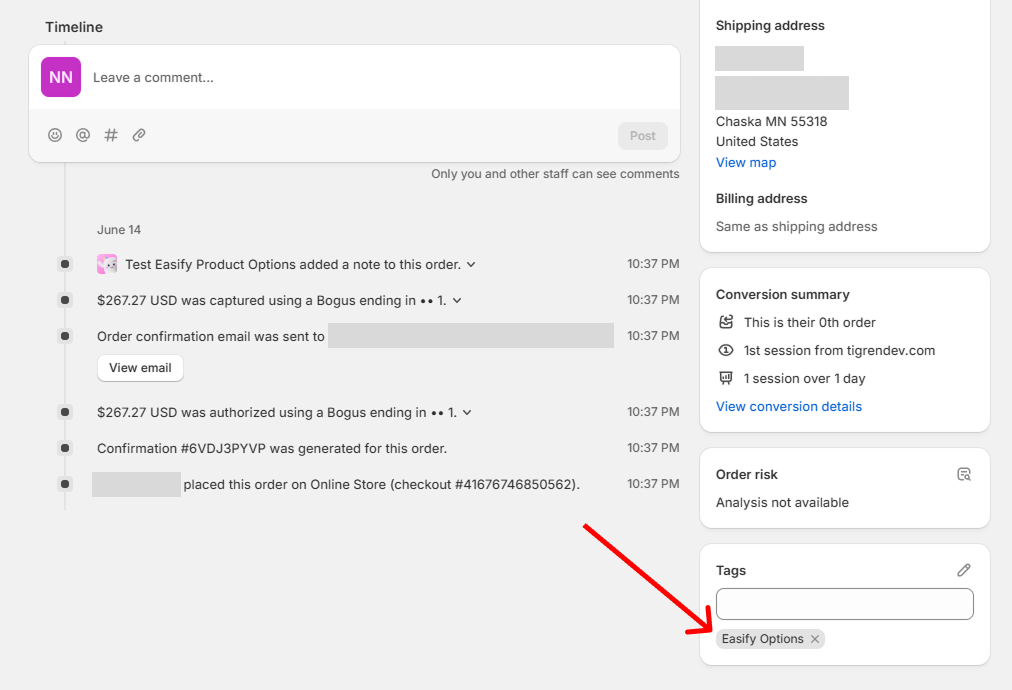
Switch on Auto tag all orders that has Easify options. This applies a single tag — named Easify Options by default — to every order containing Easify options, so you always have one tag to filter by even before setting up anything custom.
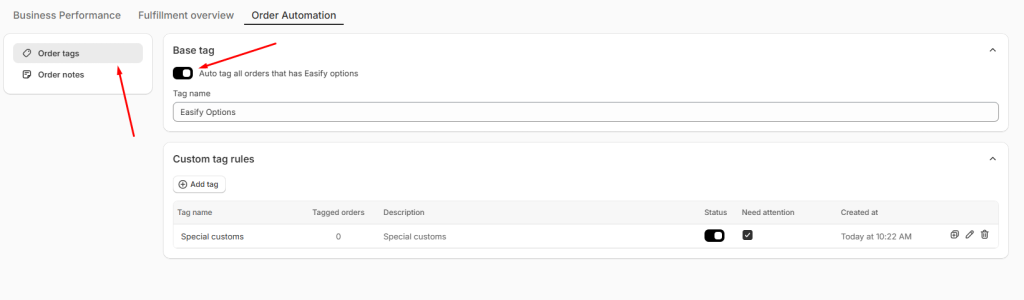
📝 Note: You can rename this tag at any time directly from this row.
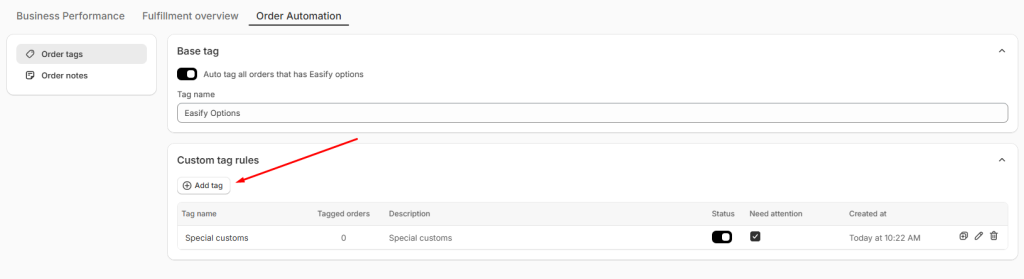
Step 2: Create a Custom Tag Rule #
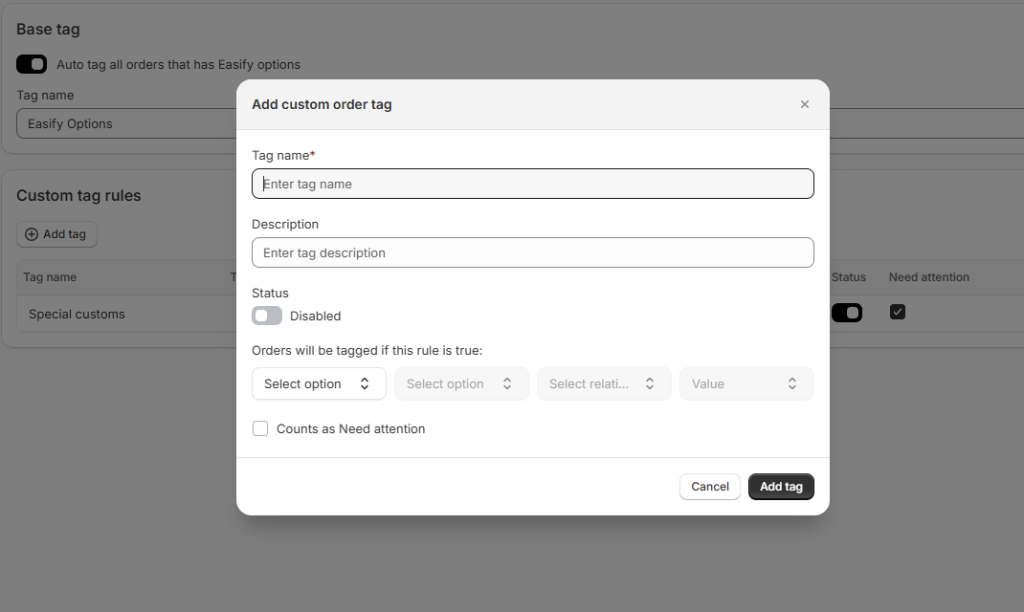
Once the base tag is set, click Add custom order tag to build rules based on the actual options and values you’ve set up in your store.
- Tag name — enter a name for the tag.
- Description — add a short note describing what the tag is for (helpful once you have several rules running).
- Rule condition — choose:
- Option set — the option set this rule checks.
- Option — the specific option within that set.
- Relation — the comparison to apply (varies by option type — see below).
- Value — the value to match, if the relation requires one.
- Count as Needs Attention — turn this on if you want orders tagged by this rule to show up in your Fulfillment Snapshot’s “Orders Needing Attention” card.
- Switch the rule to Enabled to start tagging orders, then click Add tag.
📝 Note: Available relations depend on the option type.
- Text fields support “is equal to,” “contains,” and “is not empty.”
- Dropdowns and similar selection-based options support “is equal to,” “contains,” and “is selected.”
- Layout elements like headings and dividers only support “is active.”
- File upload only supports “is not empty.”
- If a relation is “is not empty,” there’s no value to select — the rule just checks whether the customer filled in that option at all.
Managing Your Tag Rules #
Once you’ve created at least one custom rule, you’ll see a table listing every rule with its tag name, the number of orders it has tagged so far, its description, an enable/disable switch, and whether it counts toward Needs Attention. From here you can add, duplicate, or delete rules as your needs change.
📝 Note:
- Rules only ever add tags — they never overwrite or remove tags already on an order.
- Once a custom tag rule is created, its tag name can’t be changed afterward — double-check the name before you click Add.
- Disabling a rule stops it from tagging new orders, but tags already applied stay in place — they’re not removed automatically.
- Deleting a rule works the same way: any tags it already added remain on those orders.
Setting Up Order Notes #
Order Notes takes the option choices a customer made and writes them into that order’s Shopify note, formatted and grouped so anyone reading it — you, your support team, or a production partner — can understand what to make without opening the app.
Step 1: Open Order Notes Settings #
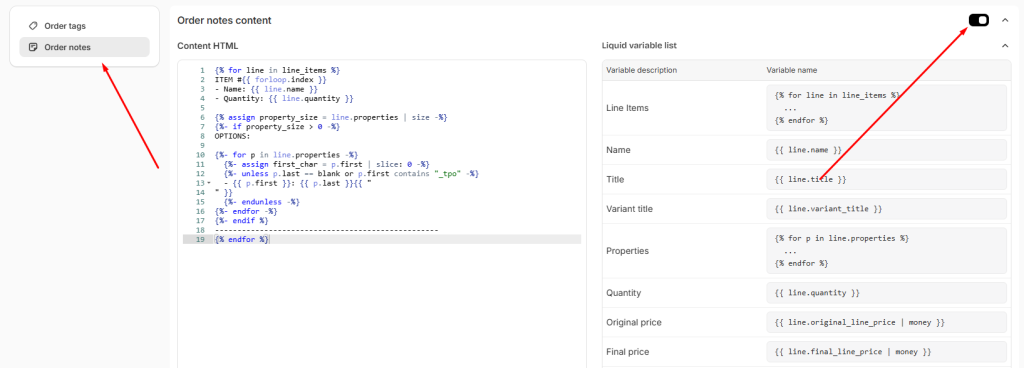
Go to: Order page → Order Automation → Order Notes
You’ll see a card titled Customize order notes, which lets you edit exactly what gets written into your Shopify order notes using HTML and Liquid variables.
📝 Note: If you’d rather not build this yourself, click Chat with Easify support — our team offers free setup help.
Step 2: Customize the Note Content #
In the Content field, write or edit the HTML template for your order notes. You can pull in details about the order using these Liquid variables: Name, Title, Variant title, Properties, Quantity, Original price, Final price, Total Discount, SKU, Vendor, and Image. The full list is available in the Liquid variable list accordion if you need a refresher while editing.
Use the Preview option to see how your note will look with sample order data before saving.
Remember to switch the Notes on to activate the feature inyour store!
📝 Note: If you ever want to start over, click Reset the order notes to default. This only resets your template going forward — it won’t touch notes that have already been synced to existing orders.
Best Practices #
A little structure around tags and notes pays off as your order volume grows:
- Start with one or two attention tags, not ten. A handful of meaningful tags like “Rush” or “Needs Proof” is far easier to act on than a dozen overlapping ones that all compete for your attention.
- Reserve “Needs Attention” for things that genuinely need a human decision. If everything counts as needing attention, the Fulfillment Snapshot card stops being useful as a triage tool.
- Match your tag names to how your team actually talks about orders. If your production team already calls certain orders “rush jobs,” name the tag that, not something more formal that nobody recognizes at a glance.
- Keep your order note template scannable. Production teams skimming a printed packing slip benefit from short, clearly labeled lines more than a dense paragraph of every possible detail.
- Review your tag rules occasionally as your options change. A rule built around an option set you’ve since redesigned may quietly stop matching anything — worth a periodic check, especially after a catalog refresh.
Need Assistance? #
If you run into any issues setting up Order Tags or Order Notes, or they aren’t working as expected in your store, our support team is ready to help. Reach out anytime via the in-app live chat for prompt assistance.