(Linking Custom Product Options with Product Images)
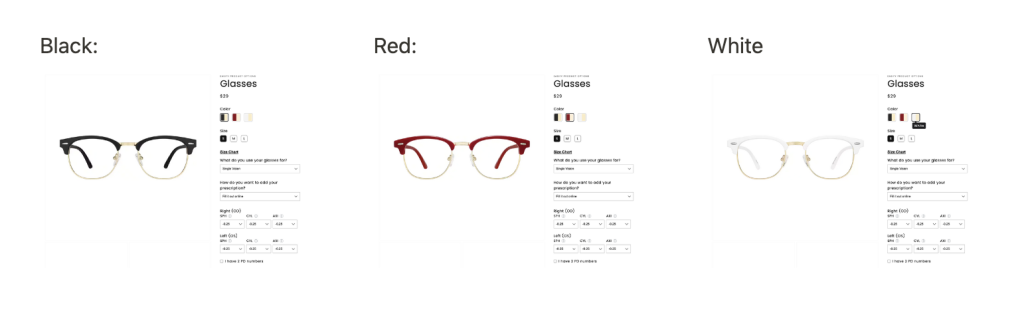
The Image Switcher feature enables you to connect your custom product options to specific product images. When customers select an option on your Shopify product pages, the product image will automatically update to reflect their choice.
Notes: This feature is applicable for the following option types: Dropdown, Radio Button, Button, Checkbox, Color Swatch, and Image Swatch.
How To Set Up Image Switcher For Your Options #
1. Add Option Values #
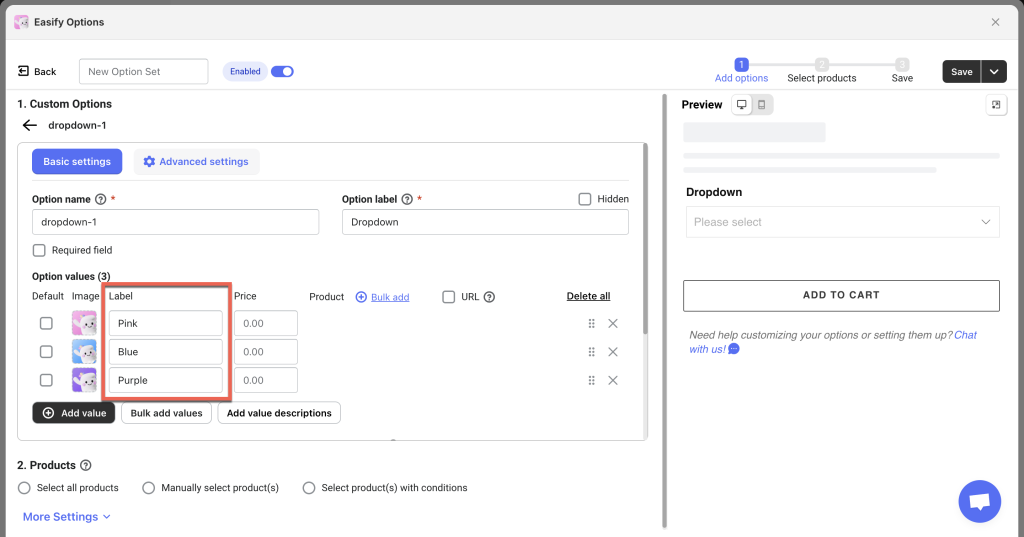
In the Basic settings tab, enter all the necessary information for your options as you normally would.
The Option value labels you create for the option values will be used in later steps.
2. Enable Image Mapping #
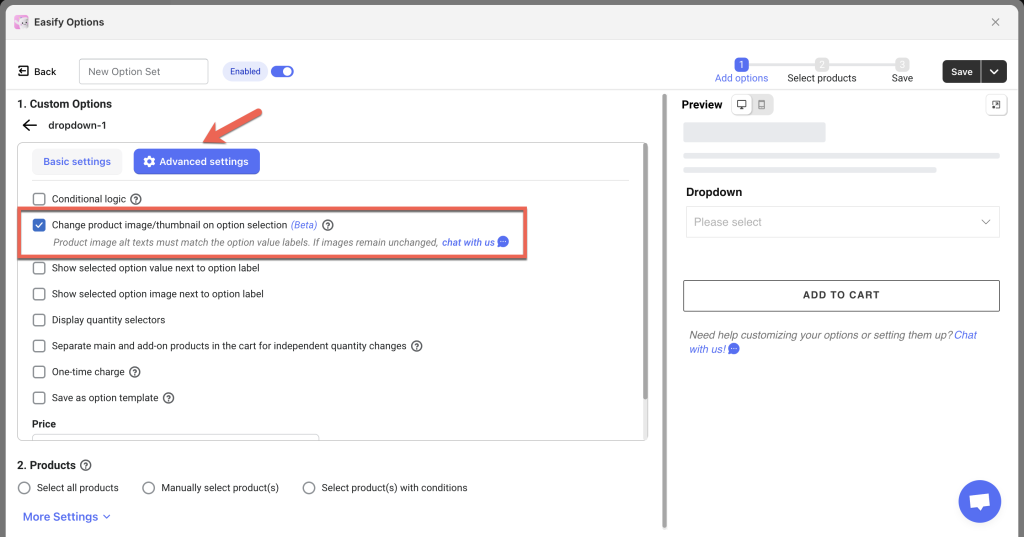
After adding your option values, switch to the Advanced settings tab.
Find the checkbox labeled Change product image/thumbnail on option selection and select it.
Notes: This checkbox is not selected by default, so be sure to check it to enable the image mapping feature.
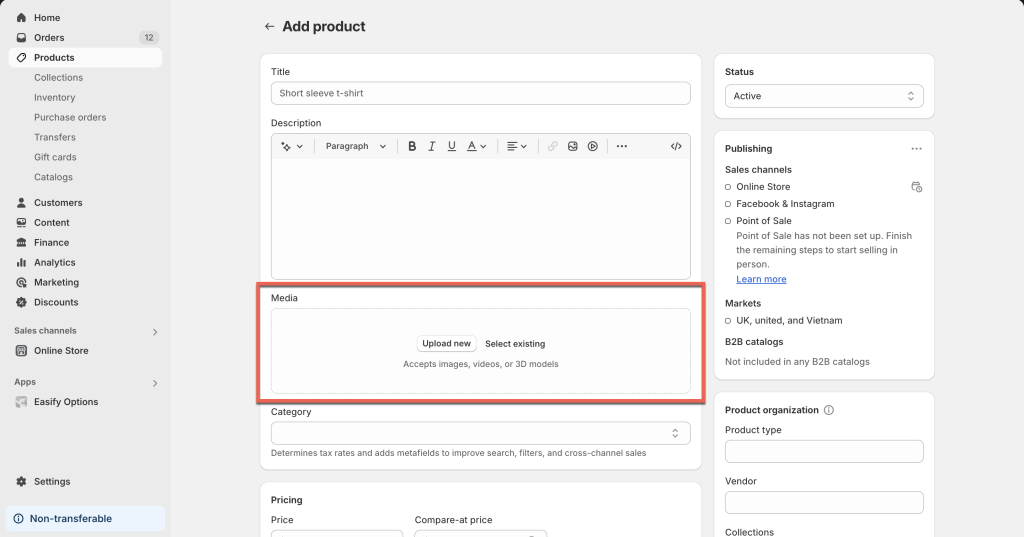
3. Upload Product Images #
Upload the product images that correspond to your custom options on the Shopify product editing page.
4. Set Alt Tags for Images #
After uploading your images, click on each one to add Alt text.
The Alt text for each image must match the Label of the corresponding option value you created earlier.
This ensures that when customers select an option, the product image switches accordingly.
For example, if your option values are labeled “Pink”, “Blue”, and “Purple”, assign the Alt texts to the images as “Pink”, “Blue”, and “Purple” respectively.
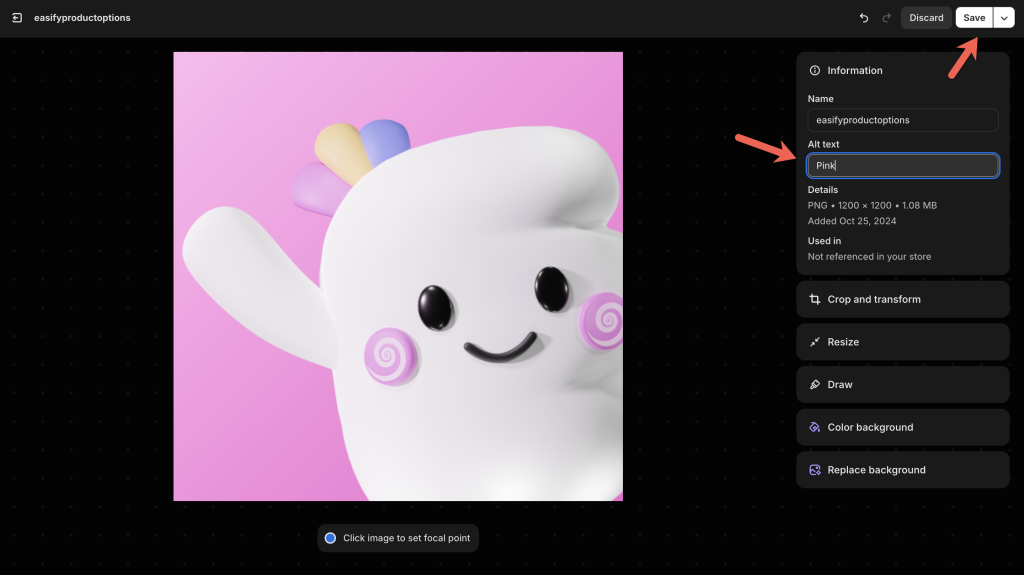
After entering the Alt text, remember to click Save to save your settings.
Notes:
The option value labels must match the Alt text exactly, including capitalization.
Any discrepancies will prevent the image-switching function from working properly.
5. Verify Image Changes #
After completing the steps above, visit the product page to ensure that the product images change correctly based on the selected options.
Need Assistance? #
This guide is designed to work with most stores. However, if you’ve configured everything correctly and the product image still doesn’t change as expected, there may be a minor adjustment needed in your theme.
Don’t worry! Just reach out to our support team via the in-app live chat, and we’ll assist you quickly!