Table of Contents
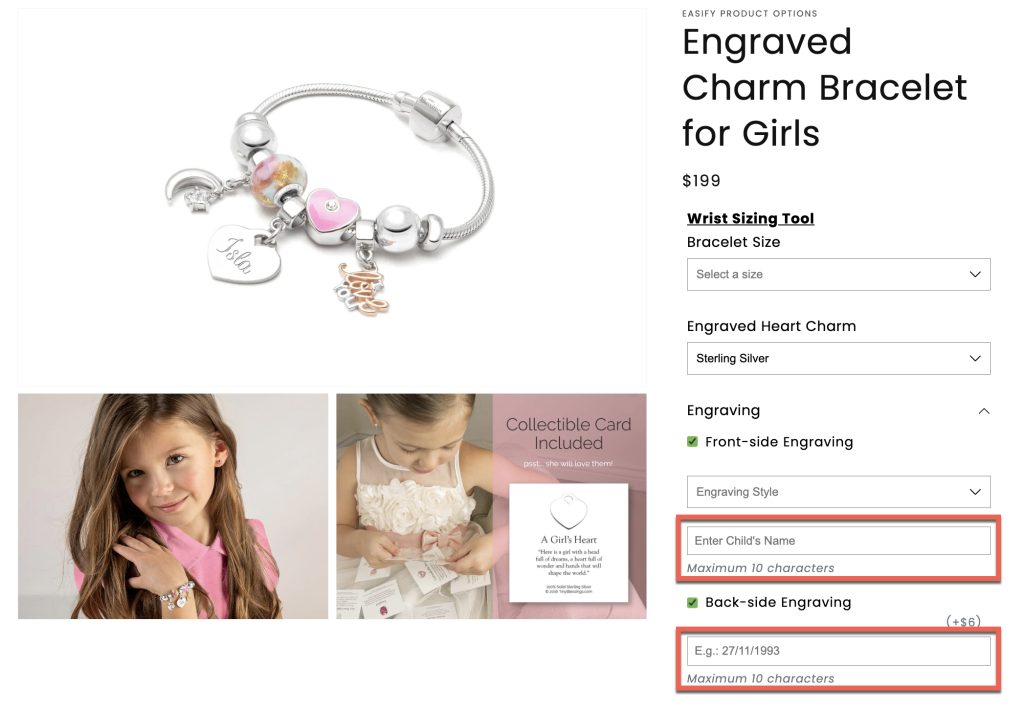
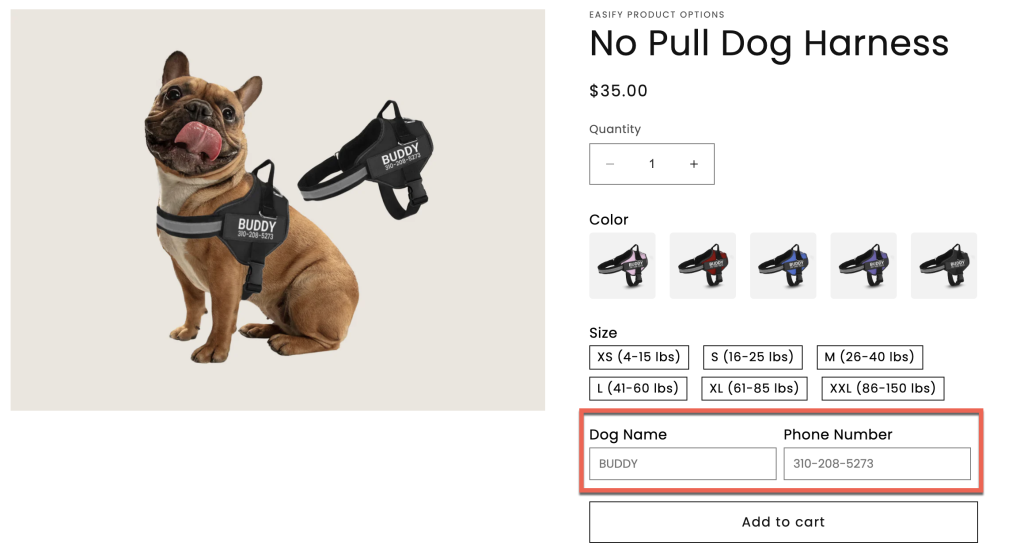
The Text Box option type allows customers to enter a short text or a single line of information, such as their name or custom text for printing or engraving.
Examples:
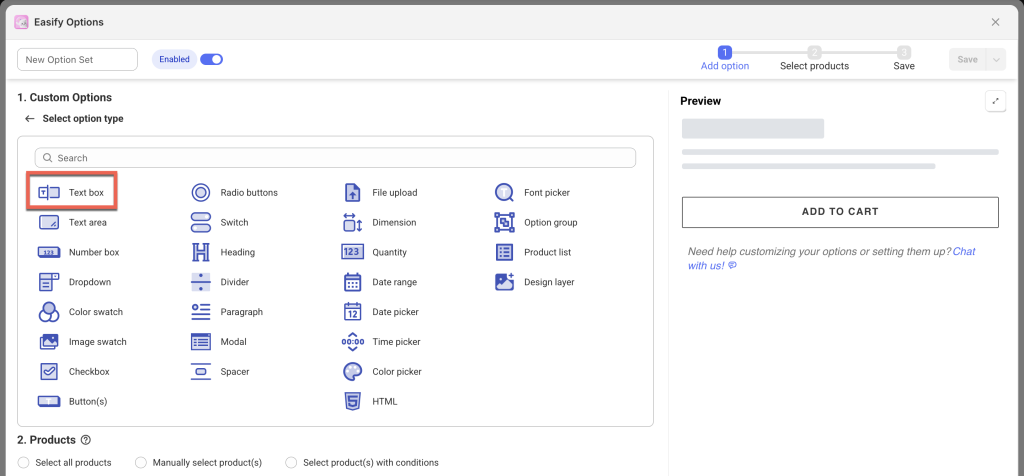
Option Settings #
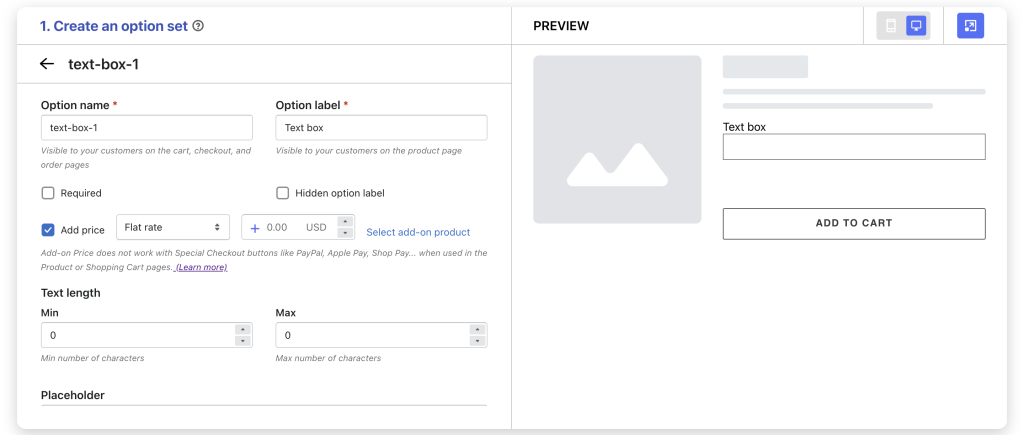
- Option name: Give your Text Box option a unique internal name, which will also be visible to your customers. Ensure that different options in the option set have distinct names.
- Option label: Add a label that is visible to your customers, such as “Your Name”, “Engraving Text”, etc., describing what kind of information users should input. Option labels can be the same or different for various options in the option set.
- Hidden option label: Hide the option label if you want to keep the interface cleaner or don’t want it to be visible to users.
- Required: Make the text box a mandatory field, ensuring users provide input before proceeding. This is especially useful for collecting essential information.
- Add price (Pro): Attach an additional price to this text box. There are 3 different pricing strategies for you to choose from:
- Flat Rate (demo): The additional cost for custom text remains fixed (e.g.: $15), irrespective of the number of letters/ characters entered by customers.
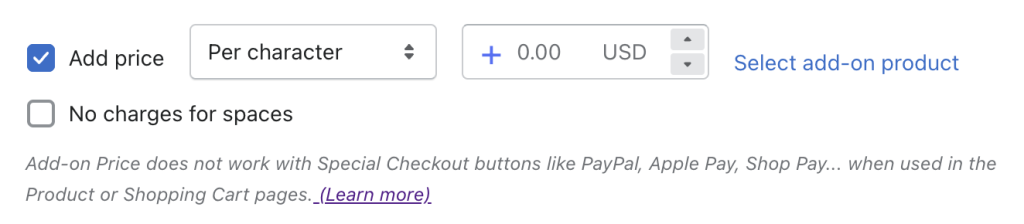
- Per Character (demo): The added cost for custom text is based on the precise number of characters entered by customers (e.g., $5 per character).
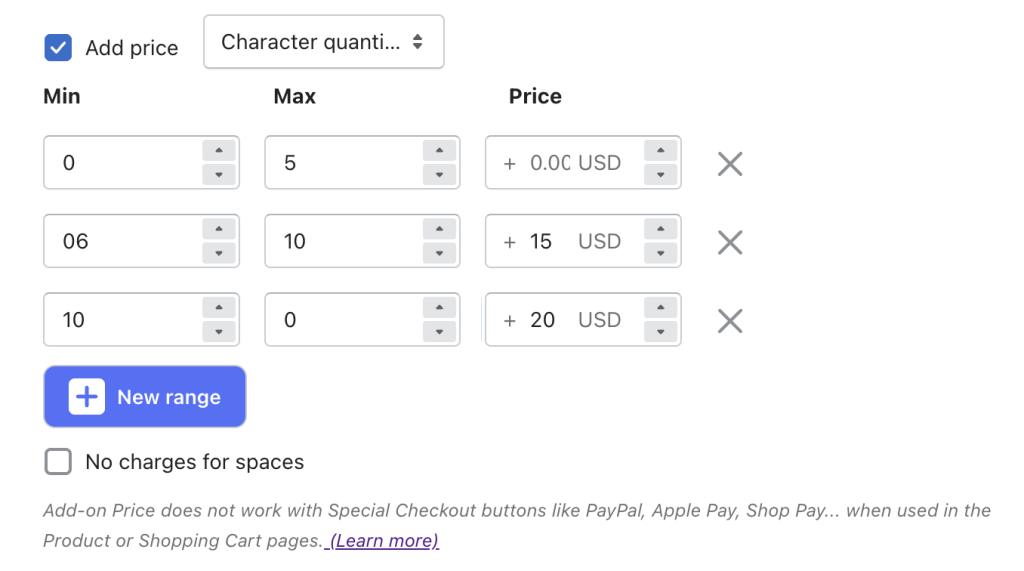
- Character Quantity (demo): The extra charge for custom text is computed according to the number of characters entered by customers, employing a tiered pricing structure (e.g., up to 5 characters incur no additional cost, 6-10 characters are charged a flat rate of $15, and 11 characters and beyond are priced at a flat rate of $20).

Notes:
- When using the “Per Character” and “Quantity Range” pricing types, you have the flexibility to calculate pricing based on either Characters (including spaces) or Letters (excluding spaces). By default, the calculation is based on Characters. If you prefer to calculate based on Letters, simply select the “No charges for spaces” checkbox.
- Additional prices can be incorporated using either the Add-on Price or Add-on Product feature. Each approach has its own set of advantages and disadvantages, which you can explore further here, then choose the one that aligns best with your setup.
- Text length: Specify the minimum and maximum number of characters that the user can input. This is great for controlling the length of responses and preventing extremely short or long entries.
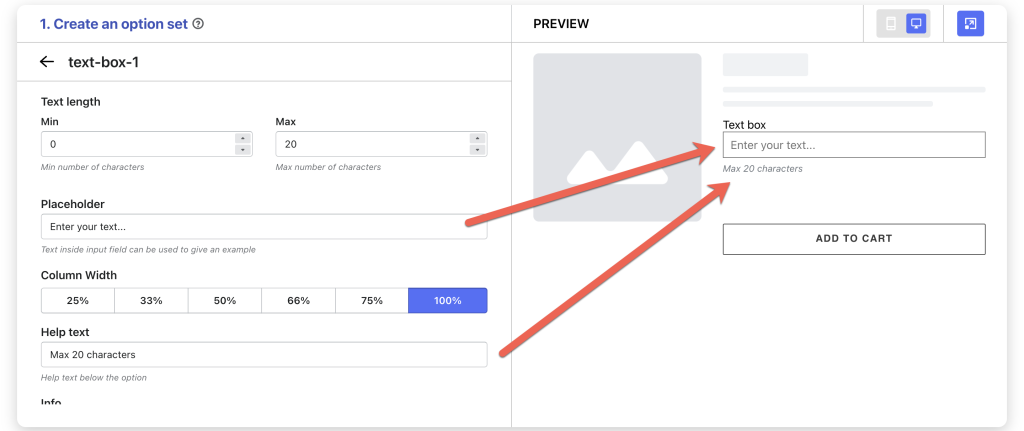
- Placeholder: Provide a hint or example inside the text box that guides users on what kind of information to enter (E.g.: “Enter your text…”). It disappears once users start typing.
- Help text: If you want to offer additional instructions or clarifications, you can add help text that appears under the text box (E.g.: “Max 20 characters”).
- Info: Create an informative tooltip that appears when users hover over a small icon, providing more context or assistance.
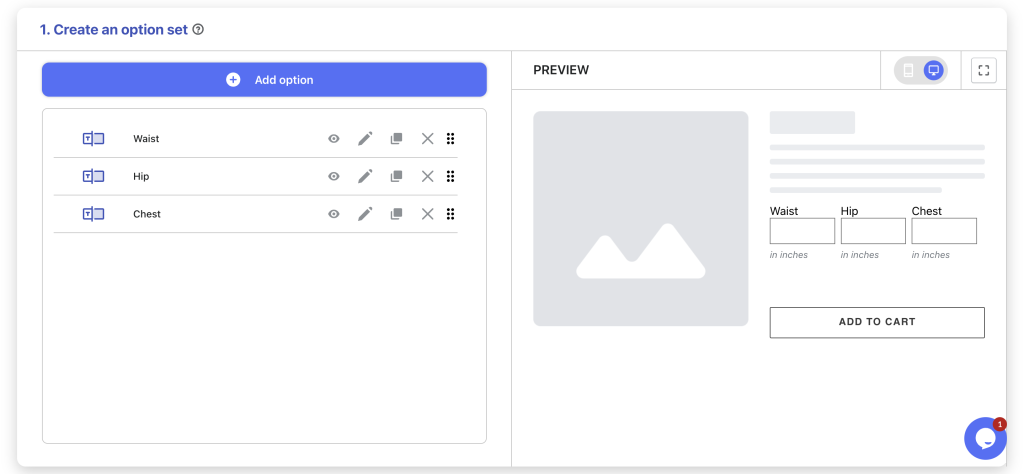
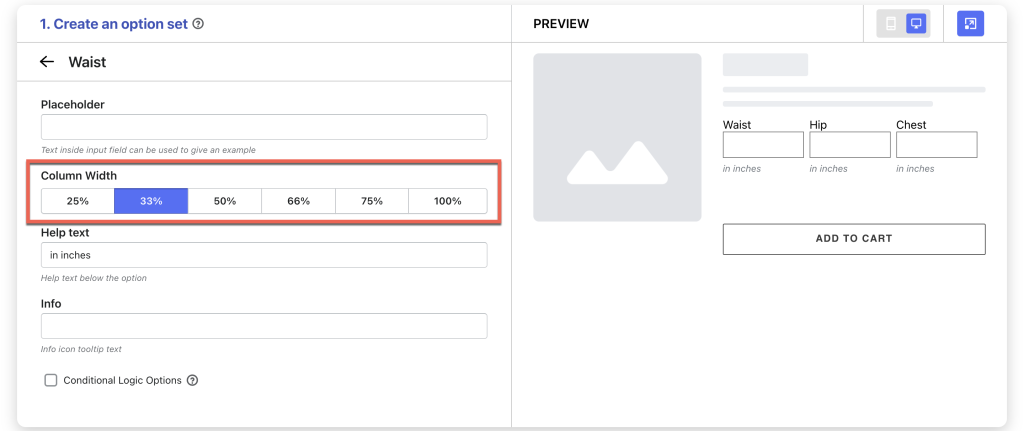
- Column width: Adjust the width of the text field; choose from 25-33-50-66-75-100%. This feature is particularly beneficial when you have multiple text fields, and customers are required to enter concise values for each field. Example: Imagine you have 3 text fields prompting customers to enter their Custom Measurements (waist, hip, chest). By setting each field width to 33%, all 3 fields neatly arrange themselves in a single line.
- Conditional logic options: Determine the visibility of the Text Box, ensuring it appears only when specific custom options or Shopify variants are selected. To set up the condition logic for your Text Box, follow this guide.

Need Assistance? #
If you run into any challenges while configuring your custom options, feel free to reach out to us for assistance through our convenient in-app live chat. We’re here to help!