By default, when you export orders from Shopify’s Orders page, the exported file will not include Easify product options. However, you can still view all option details directly on each order page.
For many stores, exporting orders with custom options is crucial for managing orders in bulk. That’s why the Easify Product Options app offers an advanced feature to export orders with Easify options included.
✨ The Orders page is available to all app users, regardless of your plan. However, the features you can access will vary based on your plan:
- Free Plan: You’ll have access to the analytics on the Orders page, but the detailed order list will not be visible.
- Pro Plan: You can view the full order list, giving you greater insight into each order, though exporting them is not available.
- Premium Plan: Unlock the full potential with Premium. You’ll gain access to all analytics, the ability to view the entire order list, and the option to export your orders & order files with Easify options for streamlined bulk management.
Step 1: Go to the Orders Page #
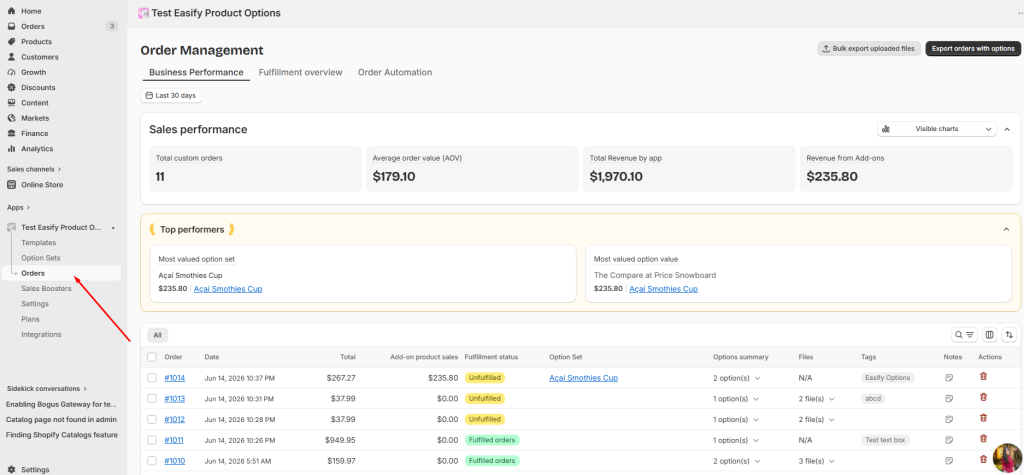
From the app’s navigation menu, click on Orders to access the Orders page.
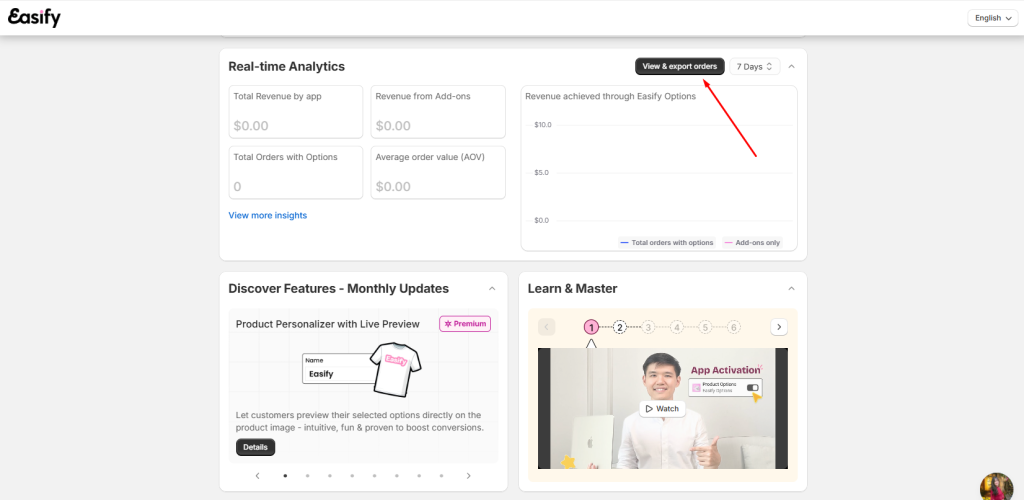
Alternatively, you can quickly access this page by clicking View and Export Orders in the Real-time Analytics section on the app dashboard.
Step 2: View Orders with Options #
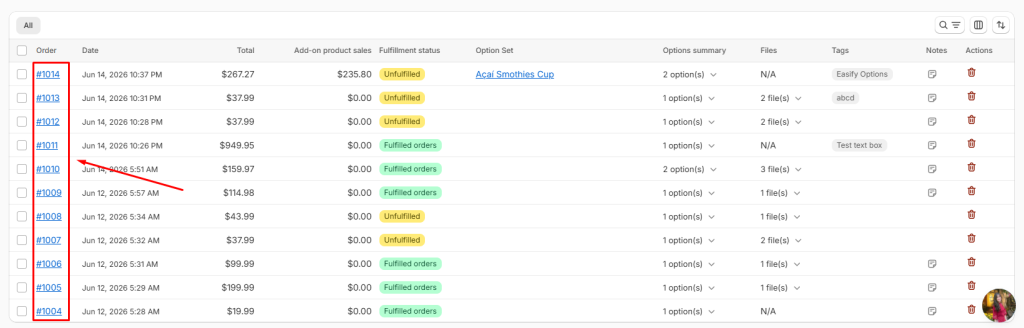
On the Orders page, you’ll find a table listing all orders that include Easify options. Click on any order to view its details. Use the search box to find an order by its number.
Narrow the list further with these filters:
- Fulfillment status — Unfulfilled, Partially fulfilled, Fulfilled, or All.
- File Uploads — orders that have uploads, or orders missing uploads (handy for catching orders you can’t fulfill yet because a customer hasn’t sent their file).
- Add-ons — orders with add-on price, add-on products, or both.
- Tagged With — filter by any tag, whether it’s an Easify-generated tag or one of your own custom tags.
- Overdue Orders — Unfulfilled orders older than your overdue threshold.
- Needs Attention — orders carrying any tag marked “Needs attention.” Shows N/A if you haven’t created any tags yet.
Sort the list by date, total revenue, add-on revenue, or chronologically (oldest to latest or latest to oldest).
📝 Note: This same list appears the same inside the Business Performance and Fulfillment Snapshot tabs, automatically filtered to match whatever date range or filter you’ve set up.
Checking an Order’s Details Without Leaving the Page #
Each row gives you quick access to everything about that order:
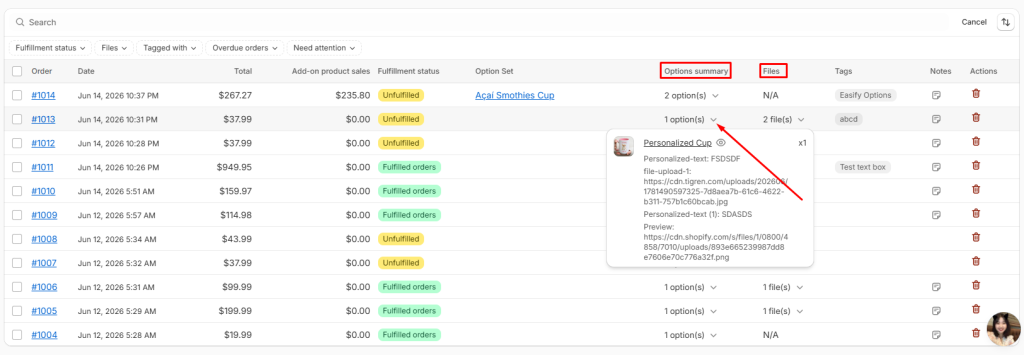
Option Summary — click an order’s options summary to open a modal showing every product in the order, with its image, name, and quantity, plus the options and add-ons the customer selected. If an order includes multiple products, each one gets its own block in the modal. Longer inputs like text fields show a short preview rather than the full entry if it runs long.
Files — click into an order’s Files cell to see a modal with every uploaded file and preview image, grouped by product. From here, click Download all files to grab everything for that order at once as a single .zip. If an order has no uploads, this cell is simply blank.
Notes — click the Notes icon to see any notes saved on that order. If there aren’t any, the cell stays blank.
Bulk Actions #
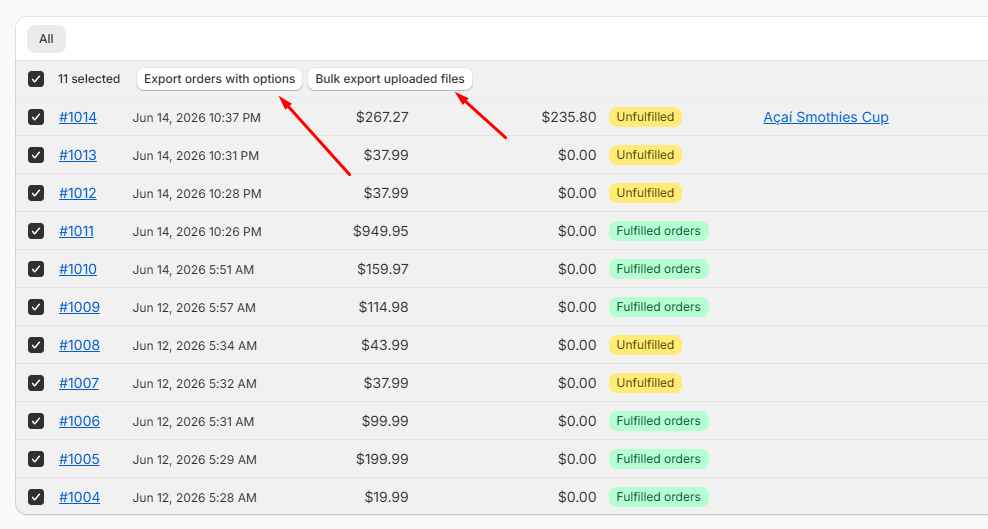
Tick the checkbox next to any number of orders and a bulk action bar appears with two options:
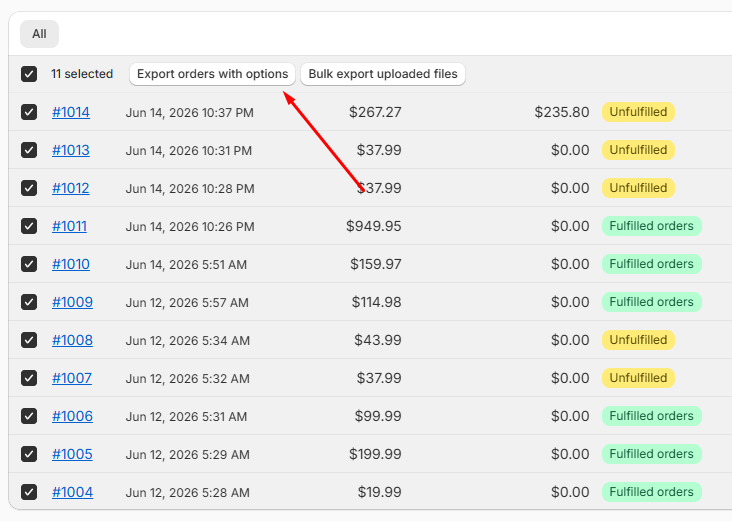
- Bulk export selected orders — opens an export modal scoped to just your selection, letting you export order data and details for those orders.
- Bulk export files — opens the same export popup as the Export order files button below, pre-scoped to your selected orders.
Step 3: Export Orders #
You can also export the order and option details themselves — useful for record-keeping, sharing with a production partner, or processing a large date range without slowing down the page you’re working in.
Starting an Export #
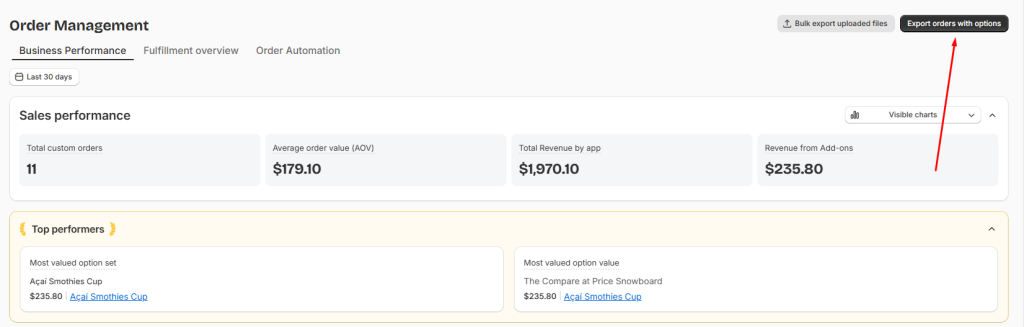
You can click the Export orders with options at the top right of the screen. Or select your orders one by one then use Bulk export selected orders from the bulk action bar.
What You Get #
Your export includes basic order info and a summary of each order’s options, with the option to include references to uploaded files where relevant.
📝 Note: For larger exports, it may take a little time. You can keep doing your business while the app compile all necessary data and automatically download it for you.
Step 4: Export Order Files #
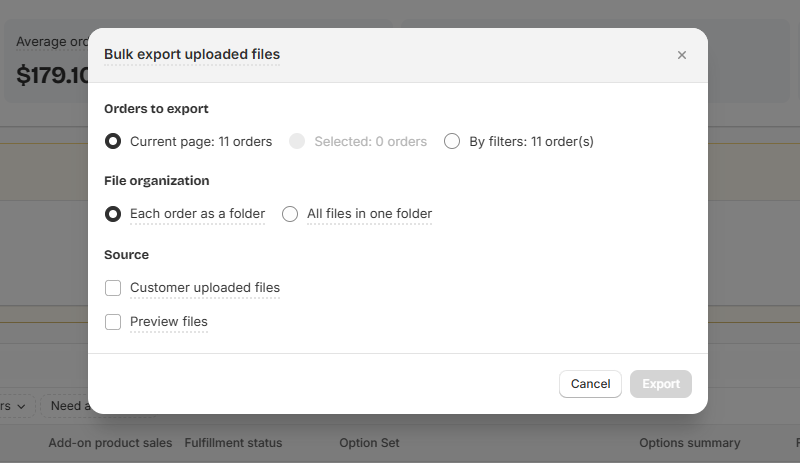
Need every customer-uploaded file and preview image from a batch of orders, organized and properly named? The Export order files button — found in the top left corner — handles it in a few clicks.
Choosing What to Export #
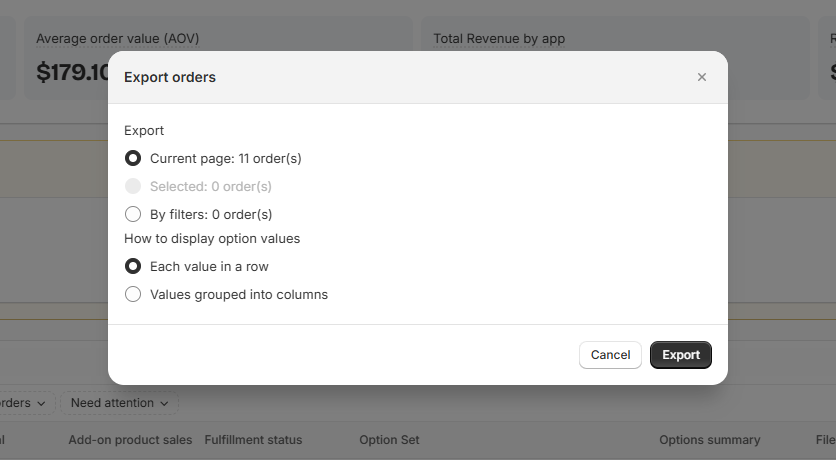
When you open the export popup, pick which orders to include:
- Current page — whatever’s showing on your screen right now.
- Selected — only the orders you’ve ticked in the list (this option is disabled until you’ve selected at least one).
- By filters — a date range like Today, Last 7 days, Last 30 days, or a custom range.
Choosing Your File Organization #
Pick how you want the export structured:
- Each order as a folder — every order gets its own folder, with a sub-folder per product inside, keeping everything tidy for handoff to a production team.
- All files in one folder — every file lands together in a single folder, useful if you’re processing files in bulk through another tool.
Choosing Your Source Files #
Select which files to include:
- Customer uploaded files — the original files or images customers uploaded with their orders.
- Preview files — the preview images Easify generated showing how the product looks with the selected options.
Once you’re ready, Easify packages everything into a single .zip file. You’ll see a confirmation toast once it’s done.
Need Assistance? #
If you have any questions or run into issues while exporting your orders with Easify options, don’t hesitate to reach out through our in-app live chat. We’re always here to help!
