Free gifts are one of the most effective ways to reward customers and make your box stand out. If you want customers to choose their own free gift, you need more than just a discount — you need a place to show them what’s available.
The Product List: Gift element handles exactly that, displaying all selectable gifts directly inside your box.
💡 If you’d prefer a broader overview and want to explore real use cases first, check out our Add Free Gifts to Box guide.
How to Set up Product List: Gift #
The Product List: Gift is used when customers select their free gift manually.
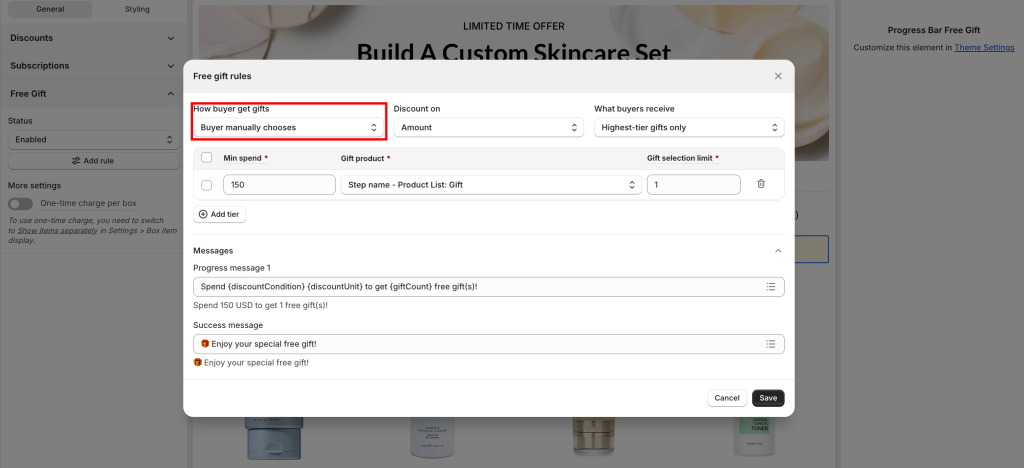
💡 Make sure your Free Gift setting is set to Customer chooses manually.
Otherwise, the Product List: Gift will not appear on the storefront.
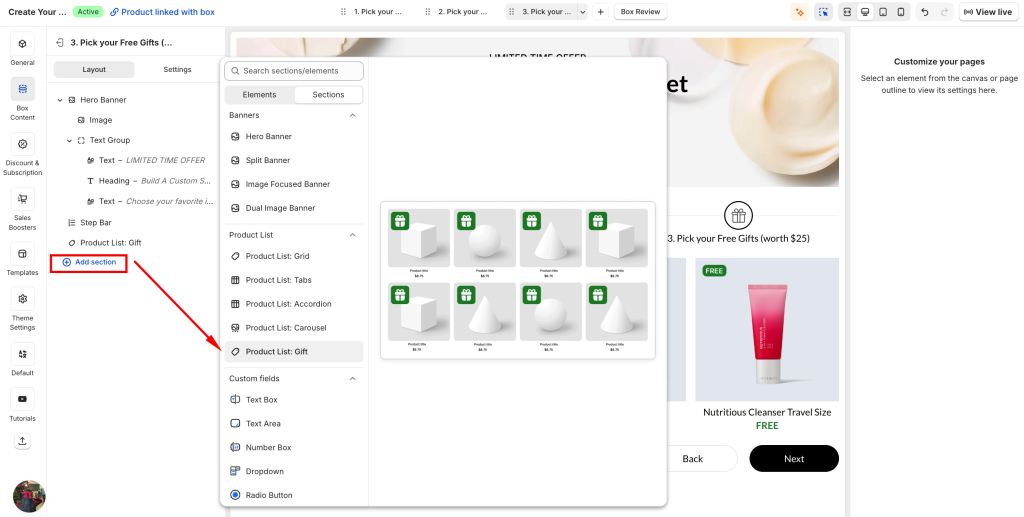
1. Add Product List: Gift #
Add a new Product List: Gift section in Box Content
This section is where all selectable free gifts will be displayed to customers.
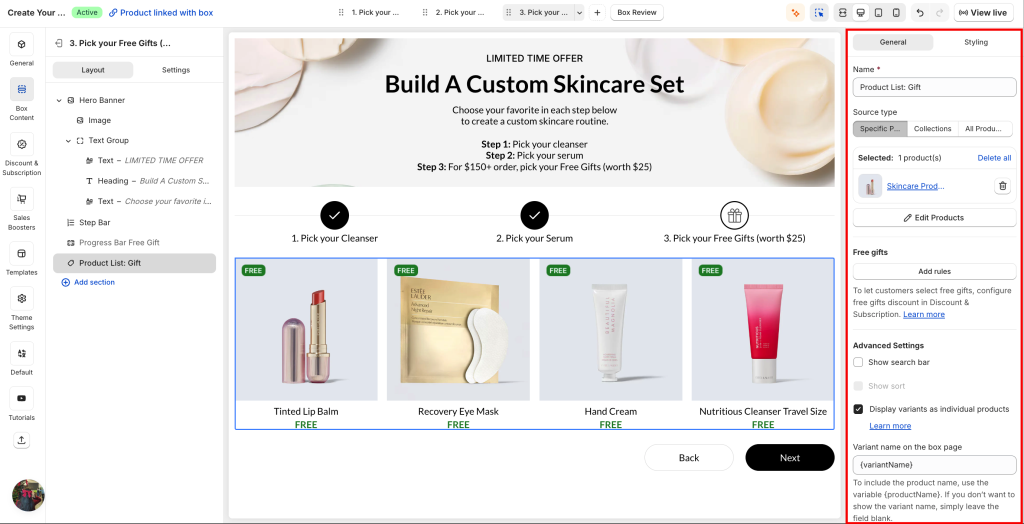
2. Configure gift products #
Set up the Product List: Gift similar to a standard product list:
- Add the products you want to offer as gifts
- Organize and manage them as needed
👉 The key difference: all products in this list are treated as free gifts with 0.00 price.
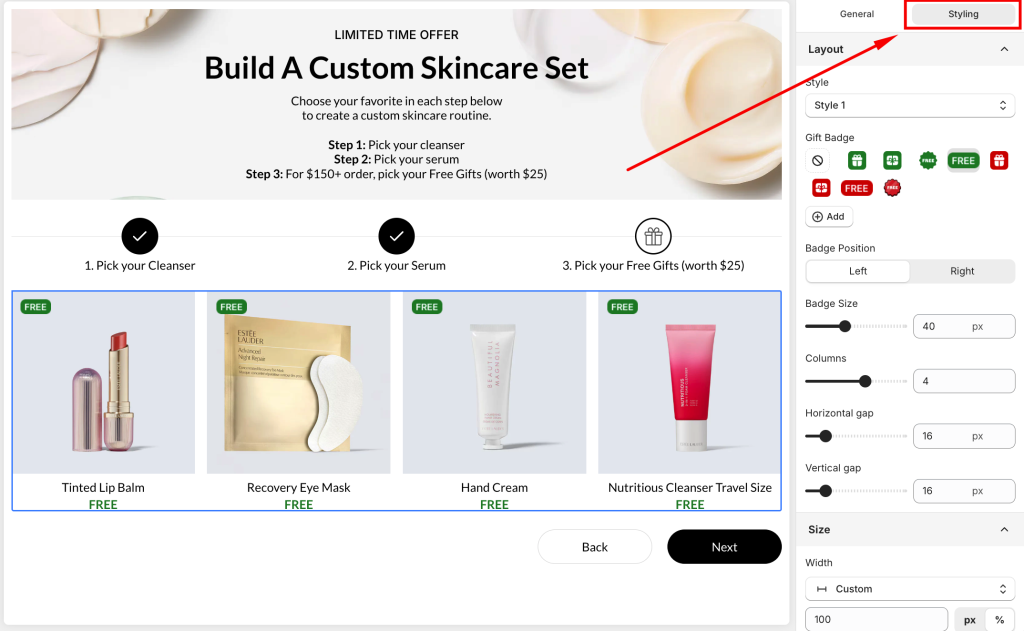
3. Customize display #
Go to the Styling tab to customize how the gift list appears.
You can:
- Choose between 2 display styles
- Customize the gift badge (label, position, size)
This helps make free gifts more visible and appealing to customers.
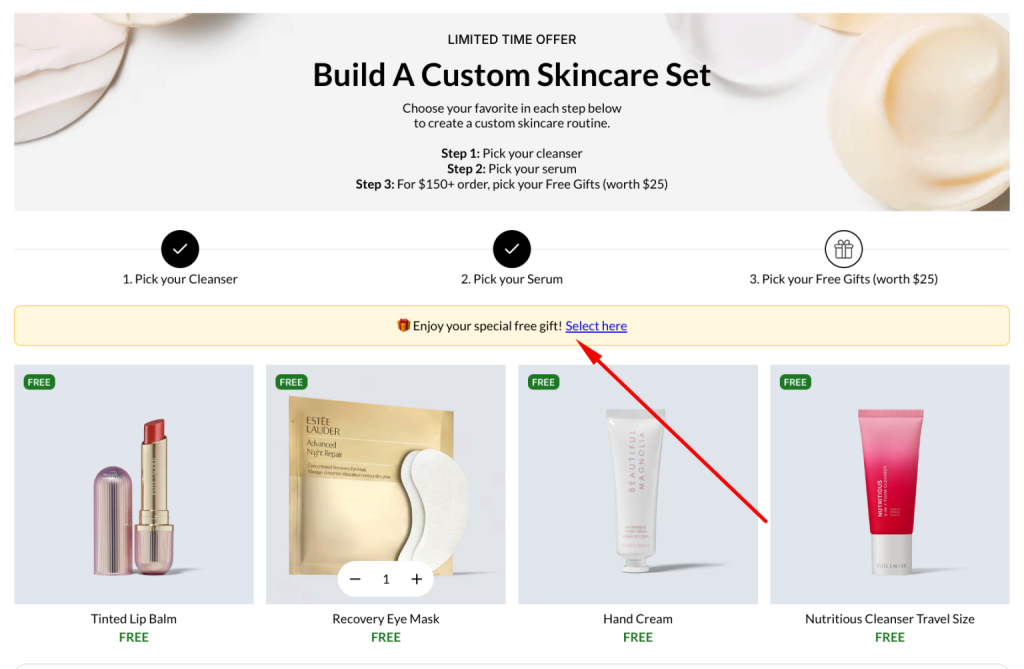
4. Working with Free Gifts Bar #
💡 The Product List: Gift works together with the Free Gifts Bar.
When customers qualify, they can click from the bar to choose their gift in this list.
Once customers qualify:
- A “Select here” button appears in the Free Gifts Bar
- Clicking this button navigates customers to the Product List where they can choose their gift
What’s Next? #
👉 Explore the best practices to Free Gifts setup in the box.
💬 Need Help? #
Questions? Stuck somewhere?
We’re always here to help! Just reach out via our in-app live chat for 24/7 support.