Whether you’re selling gift boxes, meal combos, or curated bundles, the Visual Editor lets you build the layout, flow, design, and discount rules all in one place.
But here’s the secret: you don’t need to start from scratch. Just grab a template, swap what matters, and move on.
🎯 Why this helps you get that first order
Templates save you hours of setup. Instead of staring at a blank screen, you get a working box in minutes — so you can focus on selling, not building. The faster your box is live, the faster customers can start customizing and placing that first order.
Step-by-Step Setup #
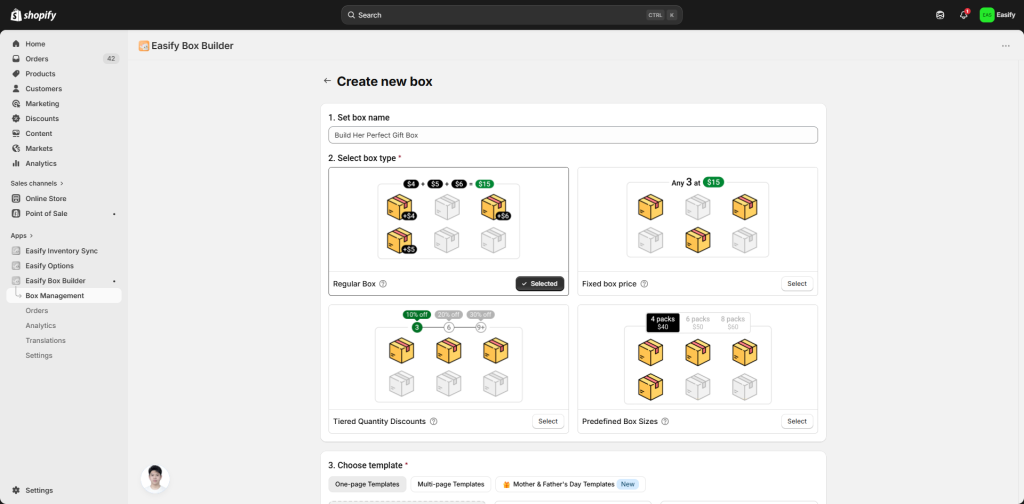
Step 1: Pick your box type #
You’ll see 4 types: Regular Box, Fixed Box Price, Tiered Quantity Discounts, or Predefined Box Sizes. Click the question mark next to each type to see examples before choosing.
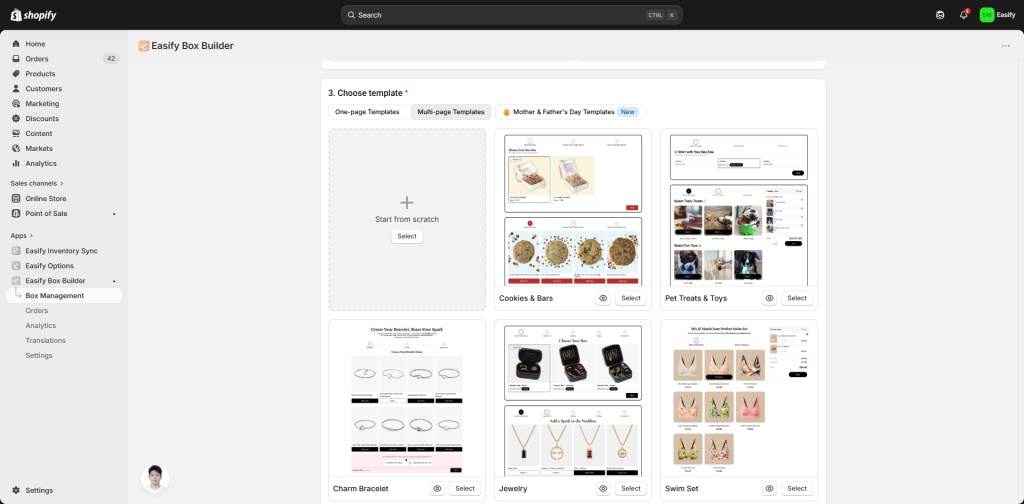
Step 2: Pick a template #
After choosing your box type, browse the available templates. Click the eye icon to preview any template. Use layout filters to choose between One-page layout or Multi-page layout. Then click Start building.
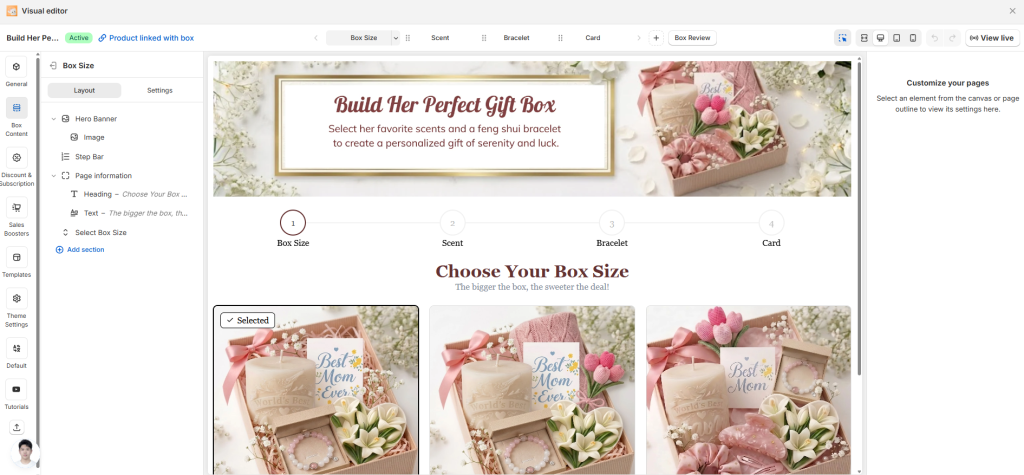
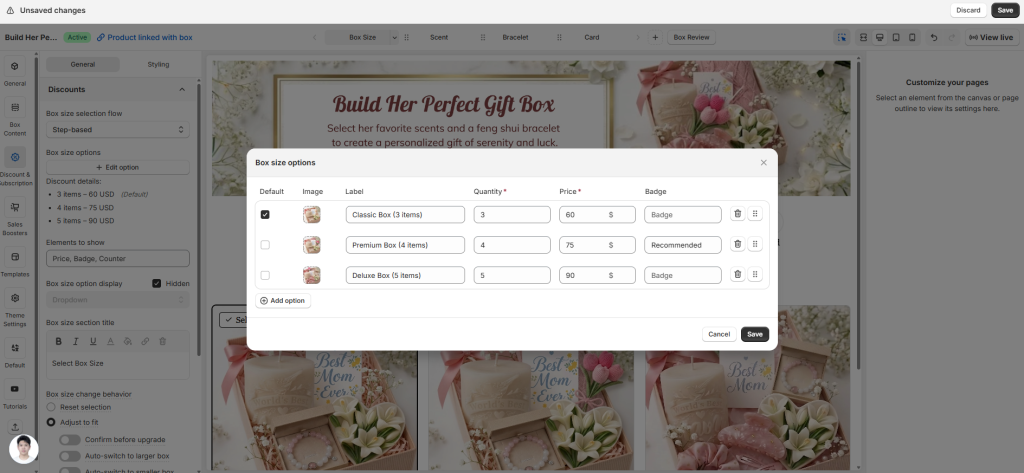
Step 3: Swap the content #
Now the fun part — just replace everything with your own:
- Steps – Remove, duplicate, or reorder steps like “Box > Gifts > Card”
- Headings & text – Click on any text and type your own
- Products – Replace dummy products with your real products (choose from Specific Products, Collections, or All Products)
- Custom fields – Click each field to edit the label, help text, and placeholder
- Box image – Upload a square image
- Box name & URL – Enter a name and a unique handle like “build-your-box”
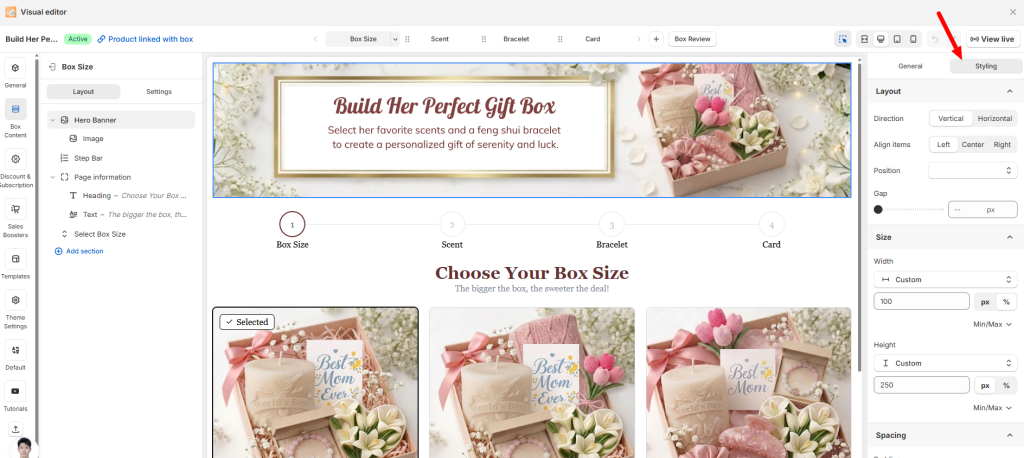
Step 4: Style it #
Use the Styling tab to change colors, padding, and borders. Or leave it as is — the template already looks good. Your choice.
Step 5: Set up discounts (optional) #
Go to the Discounts tab, turn Status to Enabled, and click Edit Rules to set your discount logic. The rules will be different depends on what type of box you choose.
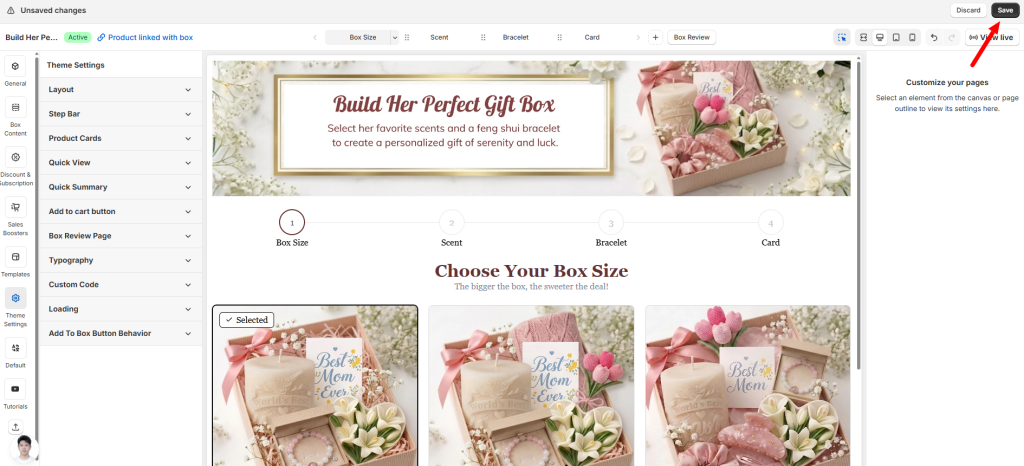
Step 7: Publish #
When you finish customizing your box, click Save. Then click View Live to see your box live on your store
If you want to dive deeper into setup details in visual editor, check out our full documentation.
Once your box is built with a template, don’t forget to make sure it looks good on every device. Customers browse on phones, tablets, and desktops — your box needs to shine on all of them.
Next, let’s check how your box behaves on different screen sizes in “Check Box Responsiveness on Every Device”
Need assistance? #
If you get stuck at any point, just click the live chat in the bottom-left corner of the app. We’re here 24/7 to help you win that first order.