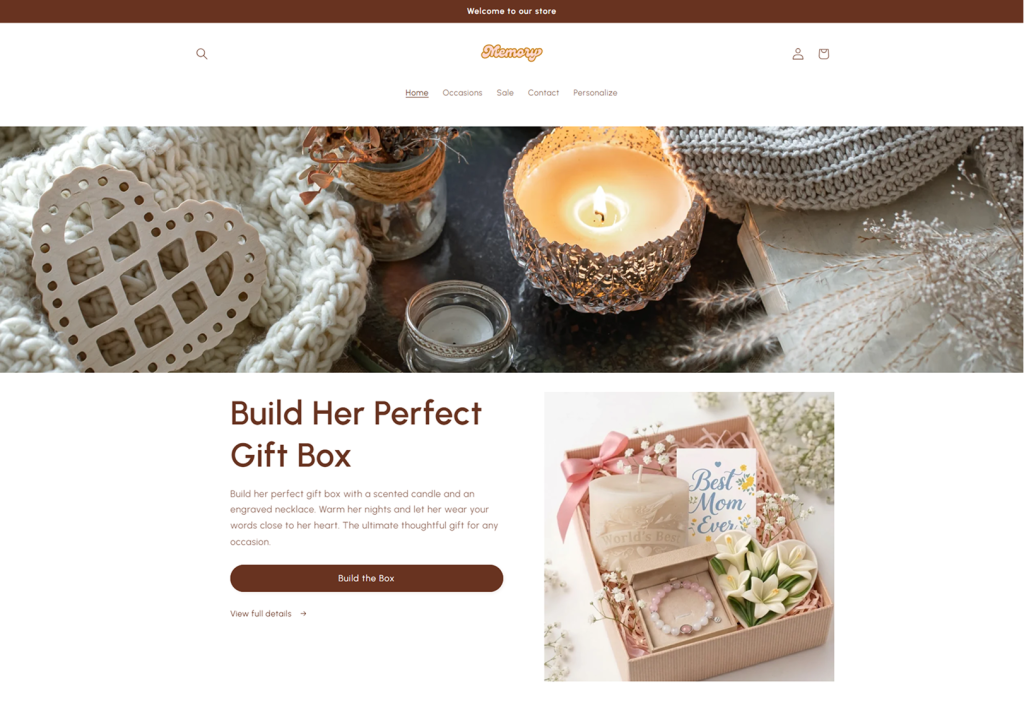
If you’ve just created a beautiful gift box — for example, “Build Her Perfect Gift Box” for Mother’s Day or a birthday — you want it to be the first thing customers see. Adding that box to your homepage as a Featured Product is the best way to grab attention and drive your first order.
No searching. No extra clicks. Just right there, front and center.
Simply write a few sentences introducing the box, what makes it special, who it’s for, and add a clear button like “Build the box”. When customers click that button, they go directly into the box builder. No extra steps. They can immediately start choosing products for their box and complete that first order.
🚀 How this helps you get that first order
First-time visitors don’t know your store yet. They won’t dig through menus or collections unless something grabs them right away.
A featured box on your homepage does exactly that:
- Grabs attention
- Builds trust
- Removes hesitation
When a customer sees a beautiful, gift-ready box — for example, a “Build Her Perfect Gift Box” — they’re more likely to think: “This is perfect. Let me build one.”
And once they click, your Easify Box Builder makes it easy for them to customize and complete that first order.
Step-by-Step Setup #
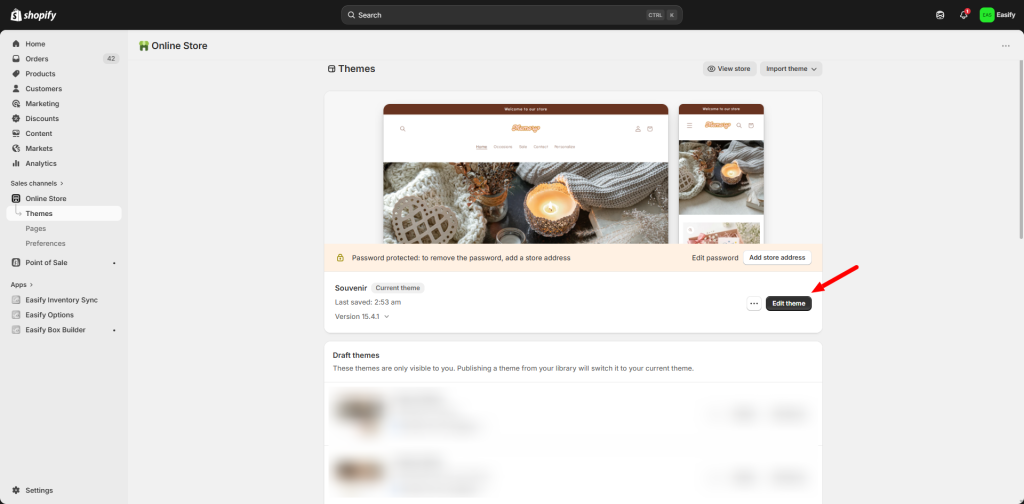
Step 1: Open the Theme Editor #
Log in to your Shopify admin and go to Online Store. Click the Edit theme button next to your active theme to open the editor.
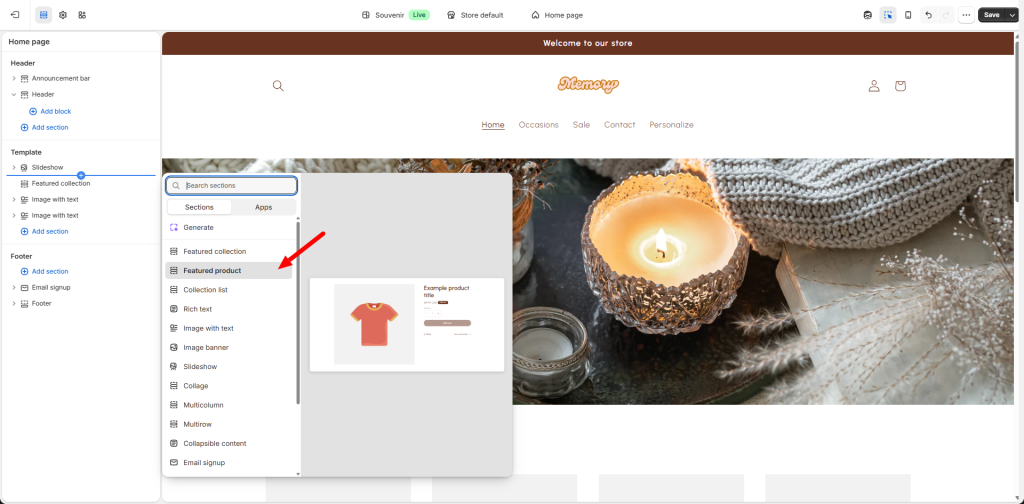
Step 2: Add the Featured Product Section #
- On the left-hand sidebar, make sure you are viewing the Home page.
- Scroll down to the area where you want the product to appear.
- Search for and select Featured product.
Step 3: Select Your Product #
- Click on the new Featured product section you just added.
- In the settings panel, click Select product.
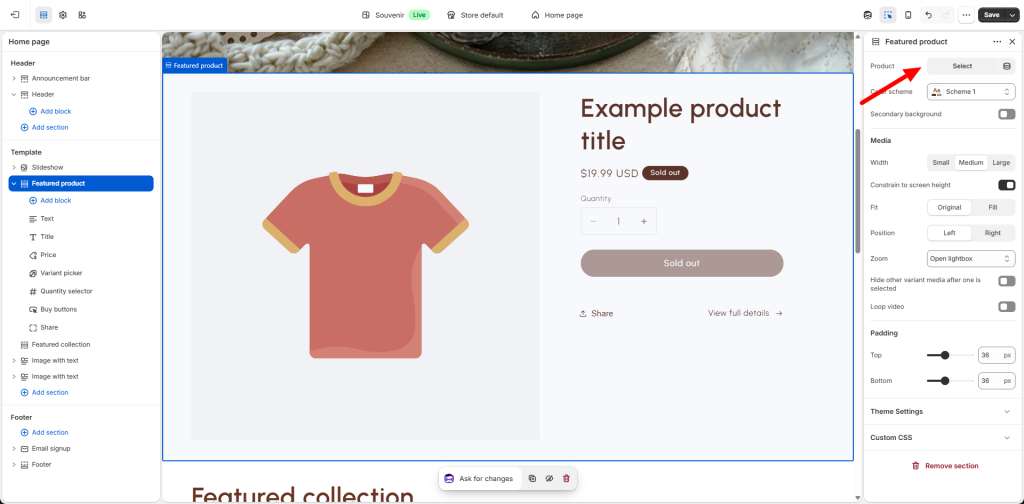
- Choose the box you want to highlight and click Select.

Step 4: Add Custom Text and Details #
You can personalize the section to make it more inviting:
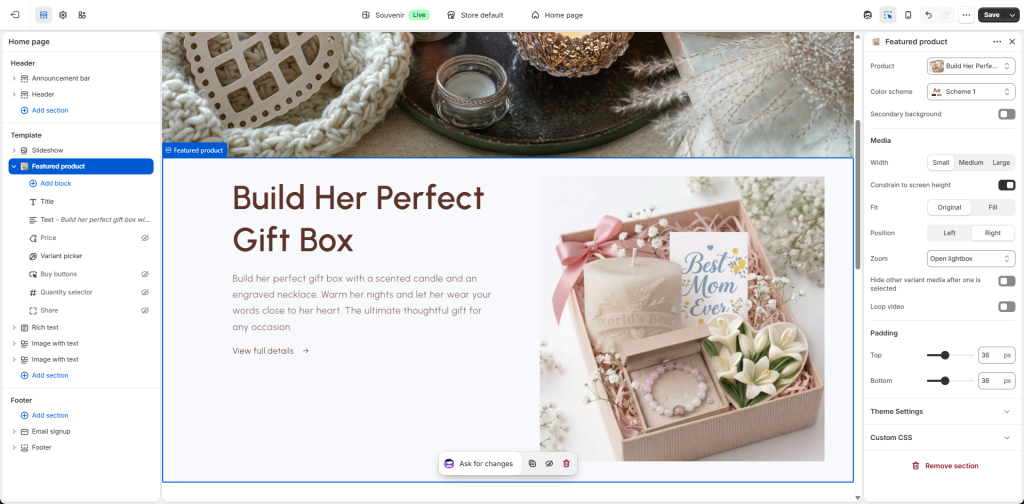
- Description: Add a few lines explaining why this product is special.
- Show details: Choose whether to show or hide the quantity picker, buy button, variant options, social sharing buttons, or view details.
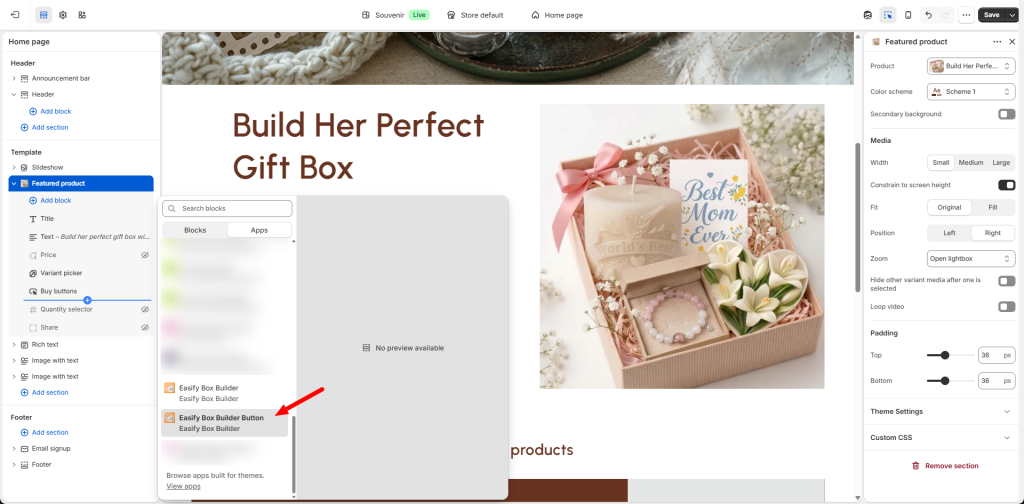
Step 5: Add Easify Box Builder Button #
Click Add block and select Easify Box Builder Button.
Then:
- Drag it to where you want the button to appear
- Click on the block to change the button text
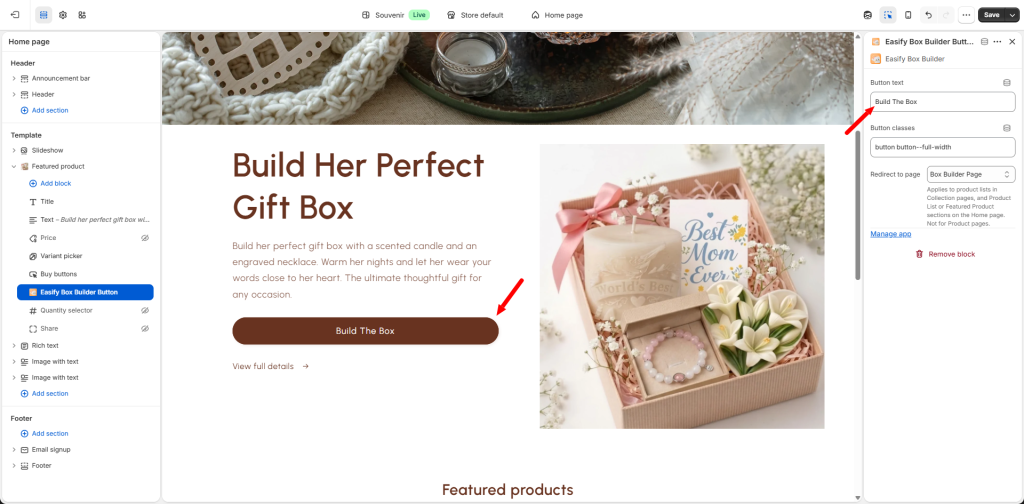
When customers click this button, they go directly into the box builder to start choosing products for their box.
Note: Make sure the default Shopify “Buy buttons” is visible. Do not hide it. The box builder button needs it to work correctly.
Step 6: Save and Publish #
Once you are happy with how it looks, click the Save button at the top right of the screen. Your box is now front and center for everyone to see!
Now that your box is featured on the homepage and has a dedicated button on the product page, the next step is to make it easy to find from anywhere in your store. Add your box to your store’s navigation menu so customers can discover it from the header, footer, or sidebar.
Check out the next guide: “Add Your Box to the Navigation Menu” – so your custom box is always just one click away.
Need assistance? #
If you have any questions or encounter issues while following this guide to set up option value images, don’t hesitate to reach out through our in-app live chat. We’re always here to help!