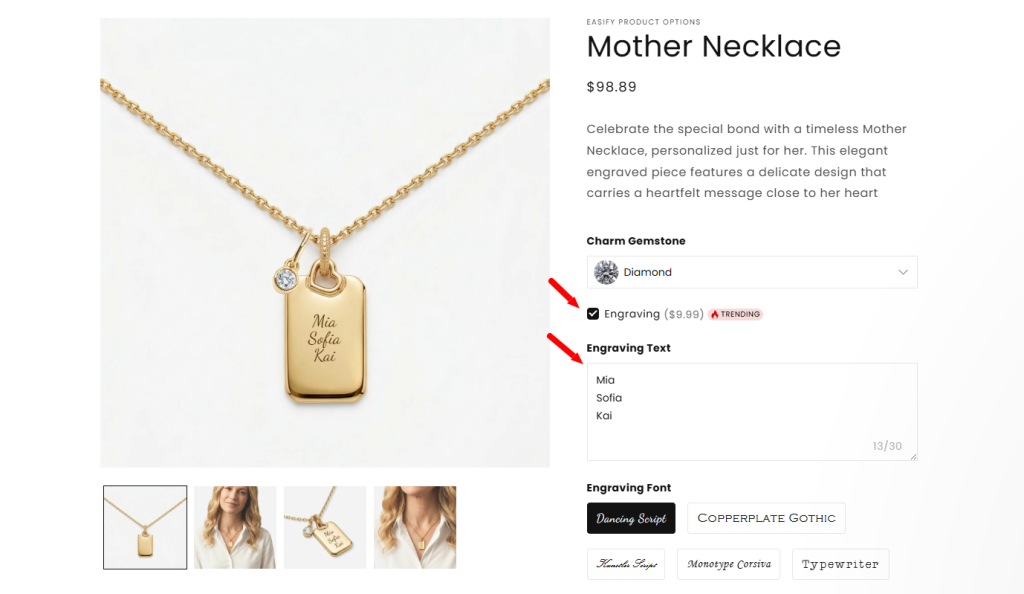
A clean product page helps customers focus on what matters. Conditional Logic allows you to hide options and only show them when they are needed. For example, you can hide the “Text Area” and “Font Picker” for engraving until the customer actually checks the “Add Engraving” box.
Conditional Logic among Easify options is available on the Free Plan and works with all option types.
Why Use Conditional Logic? #
- Cleaner Layout: Your product page looks organized because extra options stay hidden until they are relevant.
- Better Experience: Customers only see the questions that apply to their specific choices.
- Avoid Confusion: By showing only what is necessary, you help customers move faster to the checkout.
Step-by-Step Setup #
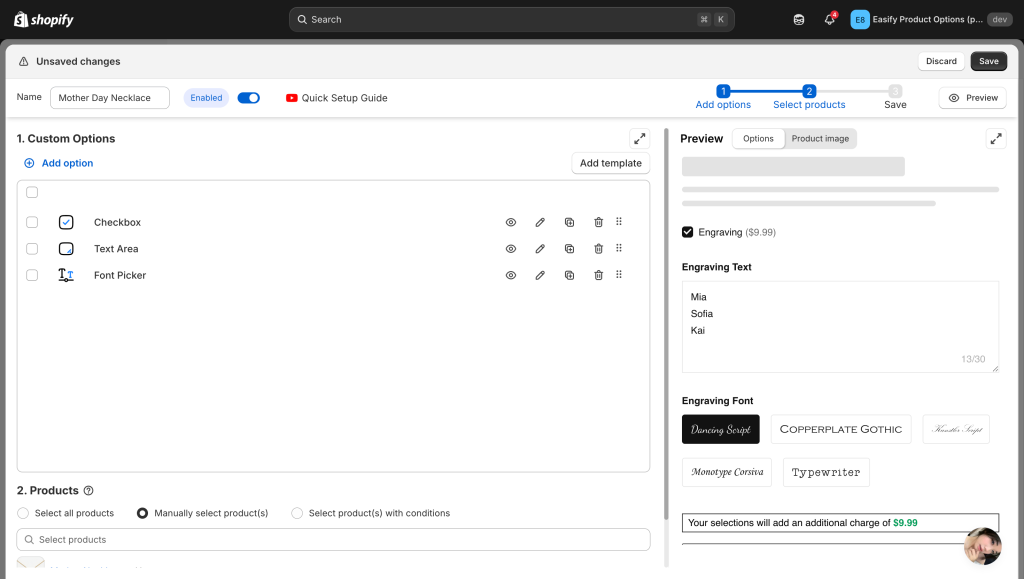
Step 1: Create Your Options #
First, create all the options you need as usual. For example:
- Checkbox named “Engraving”
- Text Area for the engraving message.
- Font Picker for the font style.
Step 2: Open Advanced Settings #
Go to the option that you want to hide or show (for example, the Text Area).
- Click on Advanced Settings.
- Select Conditional Logic.
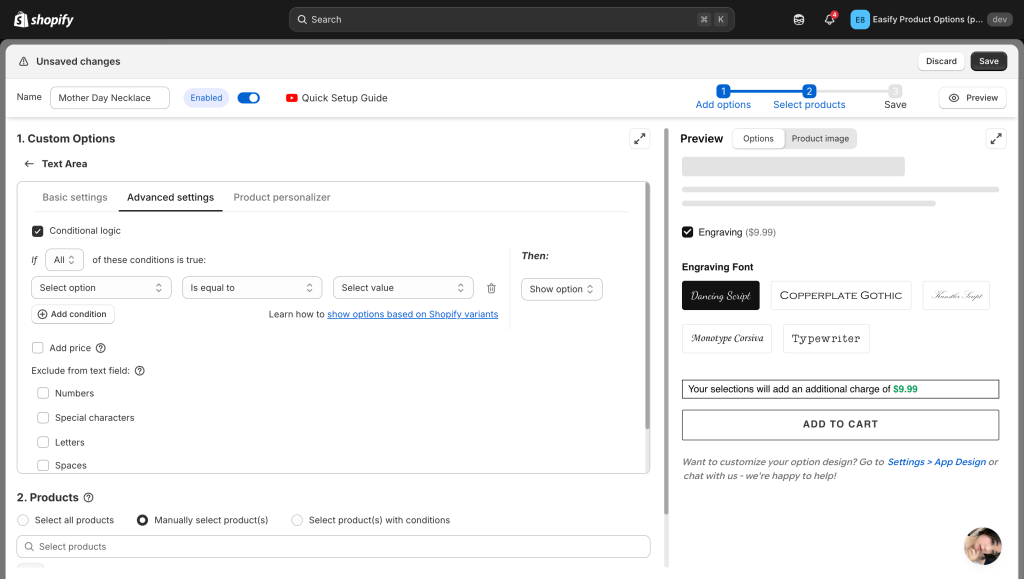
Step 3: Set Your Conditions #
Specify the conditions under which the option will be shown or hidden:
If [All/Any] of these conditions are true:
[Select option] [Select relative] [Add value]
Then: [Select action]
- Choose whether All or Any of the conditions need to be true: This determines if all the specified conditions must be met or if just one of them is enough to trigger the action.
- Select option that the current option depends on: Choose the option that will affect the visibility of the current option.
- Select relative: Choose the relationship between the selected option and the current option:
- Is equal to: The values must be exactly the same.
- Is not equal to: The values must be different.
- Starts with: Checks if the value begins with the same characters.
- Ends with: Checks if the value ends with the same characters.
- Contains: Looks for a partial match.
- Does not contain: Triggers when the value is not found within the other.
- Select/enter value: Select the specific value that triggers the logic.
- Specify the action:
- Show option: Make the option visible when conditions are met.
- Hide option: Keep the option hidden when conditions are met.
Note: If you need to set up multiple conditions for the same option, simply click the Add condition button.
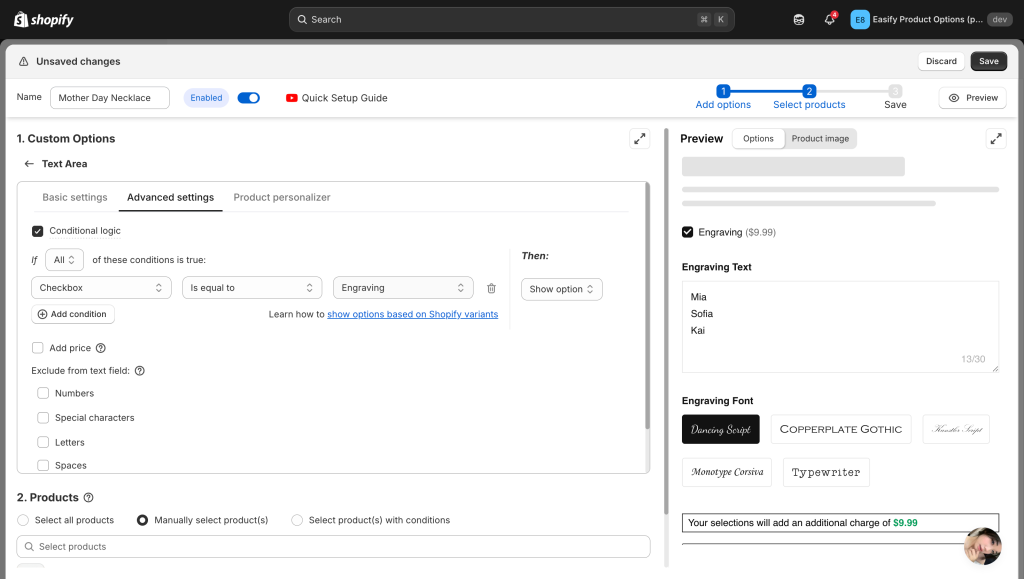
Example: Continuing with the engraving example, for your “Text Area” option, choose:
- Select option: Checkbox
- Select relative: Is equal to
- Select value: Engraving
- Action: Show option
Now, the text field for engraving will show up only when customers select “Yes” for Engraving, and it will remain hidden if Engraving is unchecked.
Step 4: Save and Test #
Click Save. Always check your live product page to make sure the options appear and disappear exactly as you planned!
Need Assistance? #
If you run into any challenges while hiding your products, feel free to reach out to us for assistance through our convenient in-app live chat. We’re here to help!