When customers shop on your store, they need to feel sure about what they are buying. Often, just the name of an option – like “Express Shipping” or “Material” – isn’t enough. If a customer is confused, they might leave without buying anything.
By adding clear descriptions to your options, you answer their questions immediately. This builds trust, makes it easier for them to choose, and helps you sell more.
This guide will show you how to use Help Text for simple notes and Option Value Description for detailed info on each choice.
1. Help Texts #
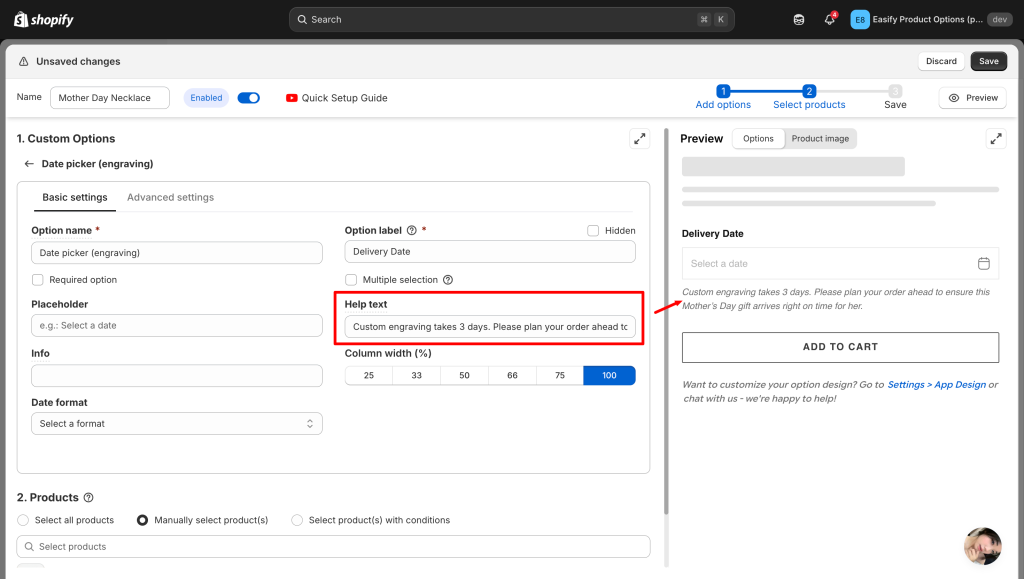
Help Text is a small note that sits at the bottom of an option. It is available for all option types and is free.

Why use it? #
Use Help Text for general rules that apply to the whole option. For example, if you have a “Delivery Date” option, you can add: “Note: Custom items take 3 days to make before we ship them.” This helps customers know what to expect.
Steps to add Help Text #
Step 1: Create your option as you normally do.
Step 2: Go to the Basic Settings part of the menu.
Step 3: Find the Help Text box and type your note.
2. Option Value Descriptions #
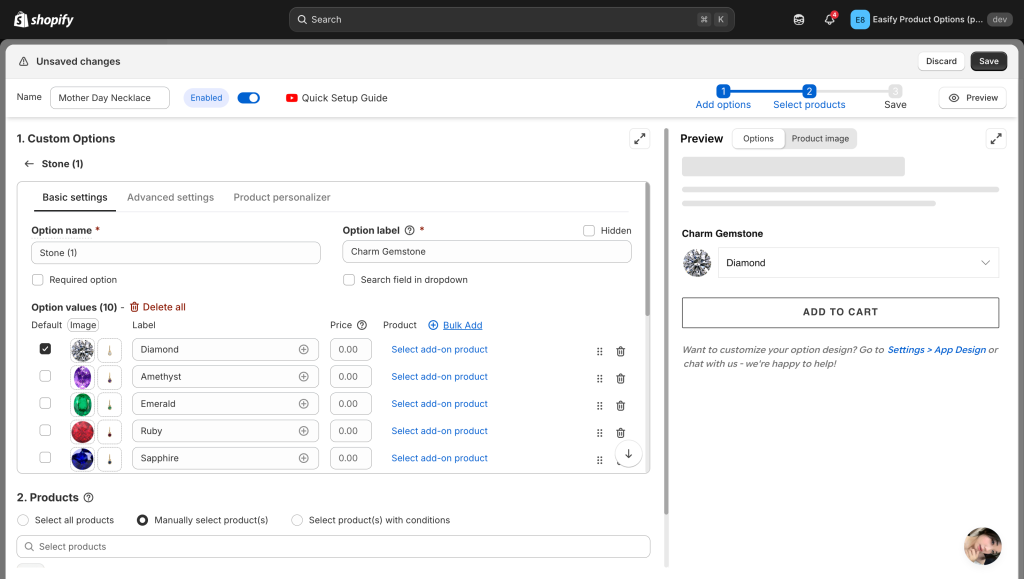
If you want to explain the difference between specific choices (like different fabrics or material), use Option Value Description. This is a Premium feature that lets you add a unique description to every single choice.

Supported Option Types: This works for Dropdown, Color Swatch, Image Swatch, Checkbox, and Radio Button.
Steps to add Value Descriptions: #
Step 1: Pick a supported option type #
Add one of the 5 types listed above to your option set.
Step 2: Add all your choices #
Type in all the choices (values) for your option first. It is faster to have the whole list ready before you start writing descriptions.
Step 3: Write your descriptions #
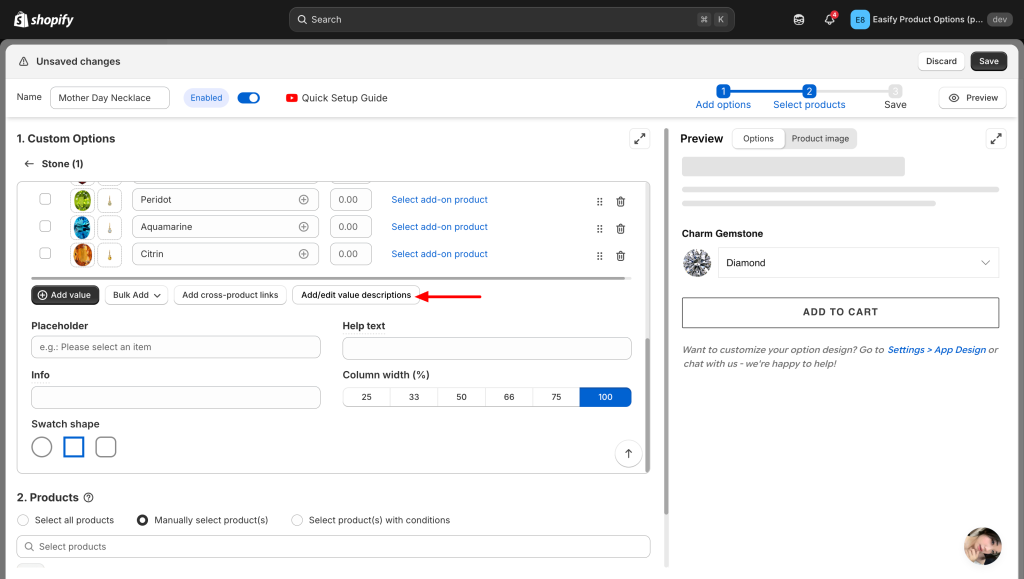
Click the Add value descriptions button under your list of choices.

A window will pop up. Pick the choice you want to describe and type your text.
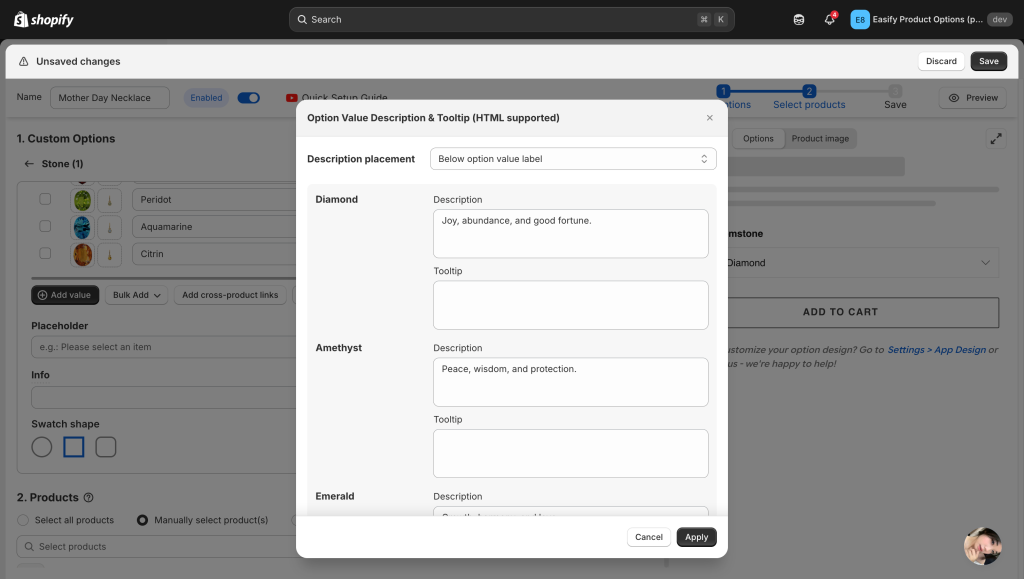
Click Apply. Use the Preview button to see how it looks. You can click Add/edit value descriptions again if you need to change anything.
Step 4: Choose where the text shows up #
You can decide exactly where the description appears so it looks good on your page:
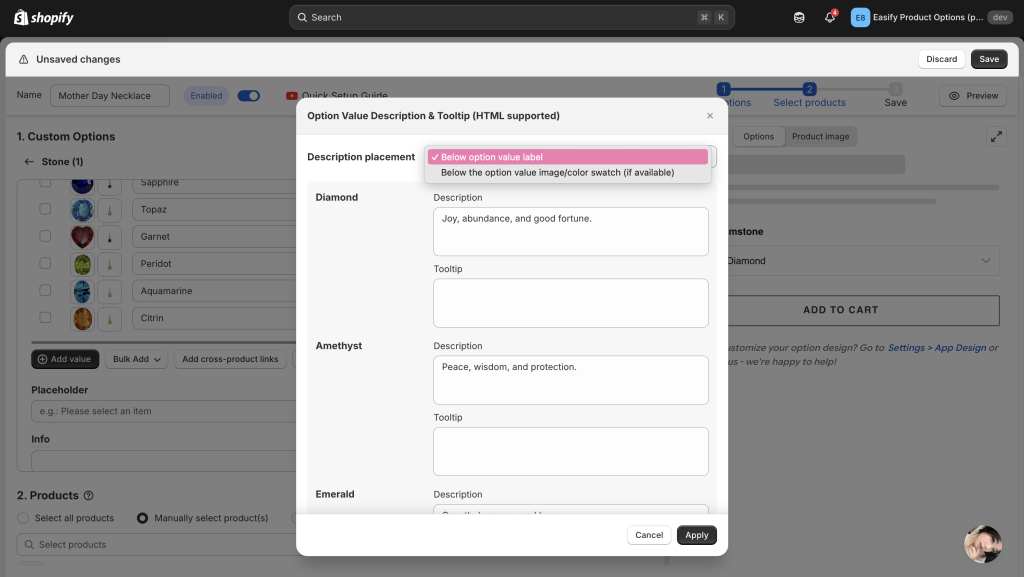
For Dropdown, Radio Button, and Checkbox:
- Below the option value label: Best if your labels are short.
- Below the option value image: Best if your labels are long, so the page stays neat.
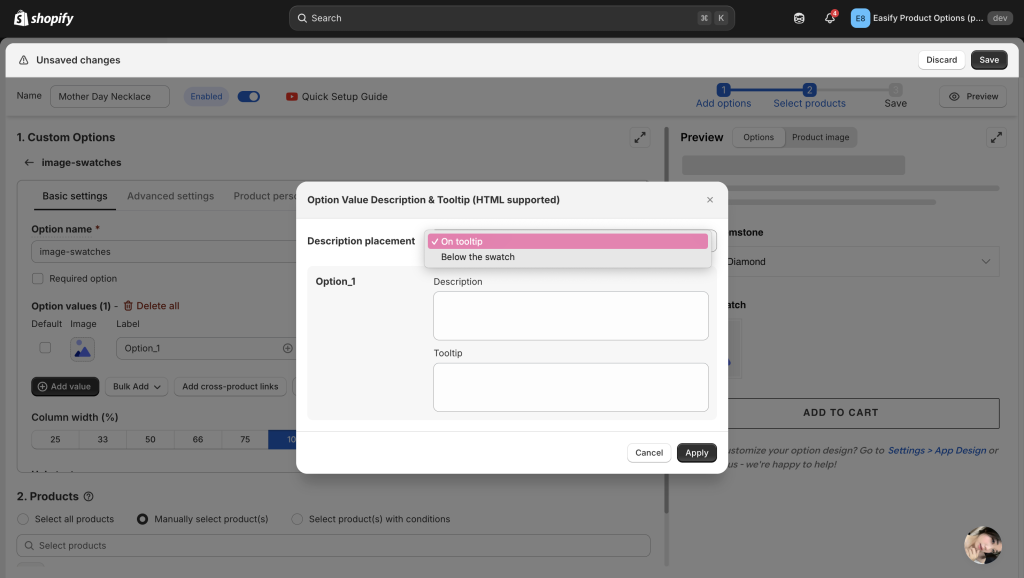
For Color Swatch and Image Swatch:
- On tooltip (Default): The text shows up only when the customer points at the color square.
- Below the swatch: The text stays visible right under the color square.
Step 5: Save and Publish #
Finish any other settings, then click Save and Publish. Check your live website to make sure the descriptions are easy to read and look perfect!
Descriptions help customers understand what they’re choosing. But sometimes, they also need a little nudge — a reason to choose now, not later.
That’s where the next guide comes in: “FOMO Badges for Option Values” — where you’ll learn how to add badges like “Best Seller,” “Limited Edition,” or “Hot Item” to create urgency and encourage that first order faster.
Need Assistance? #
If you run into any challenges while hiding your products, feel free to reach out to us for assistance through our convenient in-app live chat. We’re here to help!