Big news for your storefront! We’ve made the Live Preview even smarter. It now recognizes the Quantity Selector, meaning your customers can see their designs come to life in real-time as they add more items.
What is it? #
This feature ensures your Live Preview stays perfectly in sync with the Quantity Selector. Instead of just showing which option is selected, the preview image now updates to show how many of that option have been added.
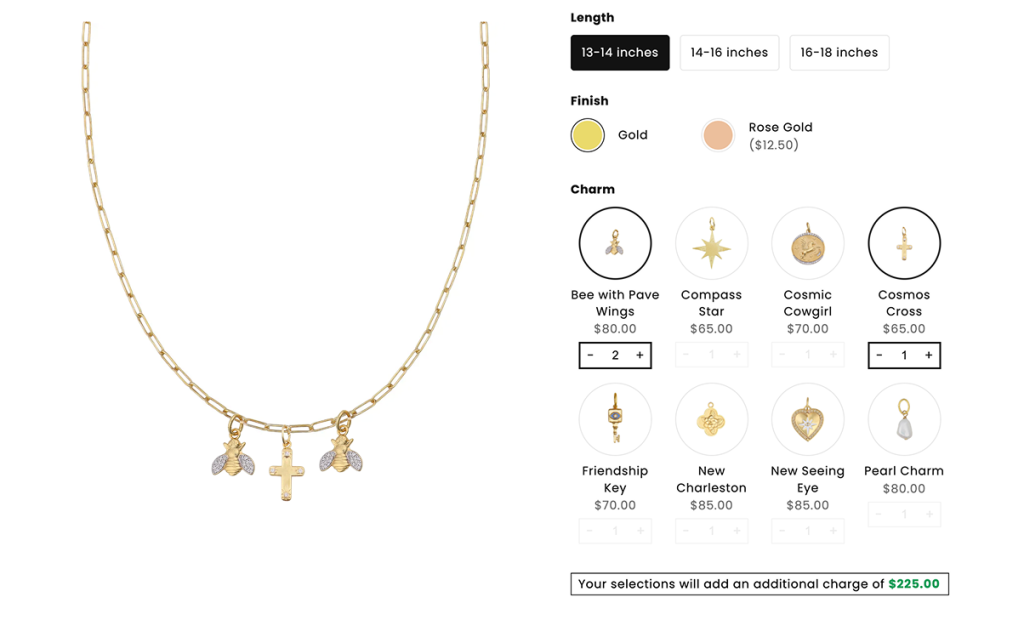
For example, if a customer is designing a custom necklace and uses the quantity selector to add two “Pearl Charms,” the Live Preview will instantly show both charms on the chain. This visual confirmation gives shoppers a clear, real-time look at exactly what they are building.
Note: This update works seamlessly across all your favorite option styles, including Dropdown, Image Swatch, Color Swatch, Button, Radio Button, and Checkbox.
Demo #
How to Set Up #
Follow these simple steps to enable real-time visual updates for your product options.
Step 1: Create your Option Set #
Start by creating your Option Set and adding your product options as you normally would.
Step 2: Enable the Quantity Selector for your options #
Select the specific option you want to use with this feature. Navigate to the Advanced Settings and toggle on Allow quantity selector for option value. This allows customers to choose more than one of the same item.

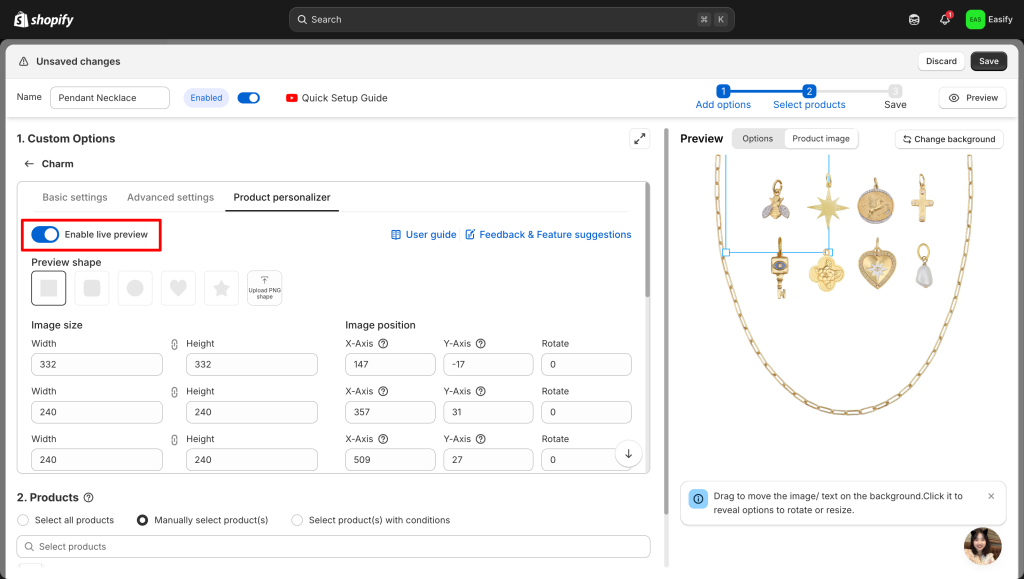
Step 3: Configure the Live Preview #
Go to the Product Personalizer tab and ensure Enable Live Preview is turned on. Set up your layers as you usually do for a standard live preview.
To enable the quantity-based visualization, scroll to the bottom to find the Quantity selector preview section and select Show multiple previews based on quantity.
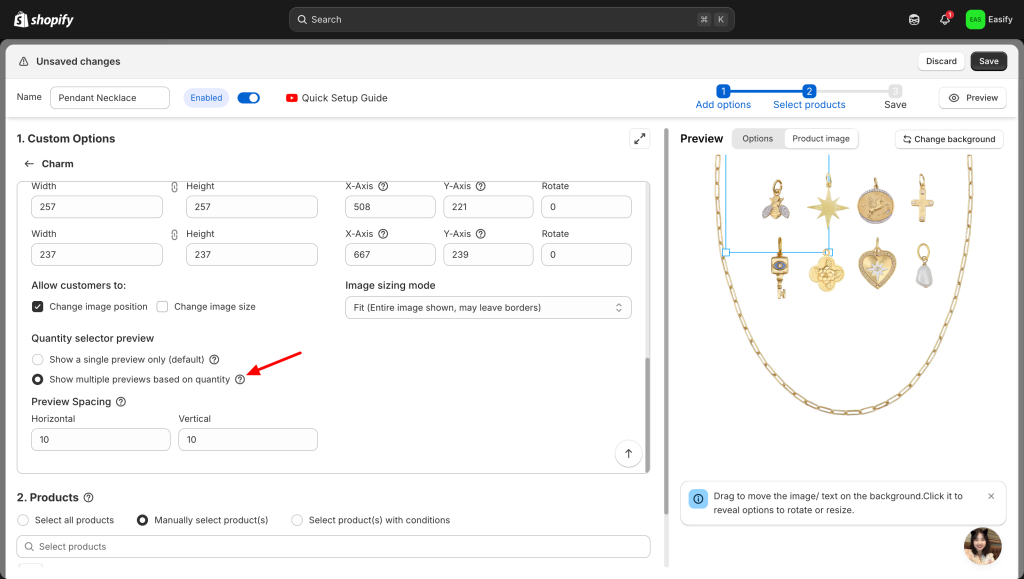
Preview Spacing #
Below the “Show multiple previews” setting, you will see a field for Preview Spacing. This defines the distance (in pixels) between the multiple previews of the same item. If you want your items—like charms on a necklace—to automatically shift and display clearly without overlapping, be sure to set your preferred spacing value here.
Need assistance? #
If you have any questions or encounter issues while following this guide to set up option value images, don’t hesitate to reach out through our in-app live chat. We’re always here to help!