Enhance your product pages by using Option Value Swatches. Instead of relying on text alone, this feature allows you to provide clear visual references for every choice your customers make.
By showing exactly what each option looks like, you eliminate guesswork and help customers feel more confident in their selection. This visual clarity builds trust and reduces decision fatigue, ultimately leading to higher conversion rates for your store.
Make Choices Easier with Option Value Swatch #
Option Value Images serve as a visual bridge between a customer’s choice and their expectations. By attaching an image to a specific option value, you transform a simple text label into a tangible preview. This will help you:
- Eliminate Guesswork: Visuals clarify terms or styles that are difficult to describe with text alone, such as specific artistic techniques or textures.
- Make your Product Page look professional: High-quality images create a more engaging interface, encouraging customers to interact more with your products.
- Build Confidence: When customers see exactly what they are selecting, from material grains to decorative details, they feel more secure in their purchase, which reduces cart abandonment.
While this feature is versatile, it is most effective for options where the visual detail is the deciding factor:
- Material: Perfect for furniture or apparel to display the difference between Dark Walnut, Natural Oak, or Red Wood. These can be very hard to distinguish through text alone.
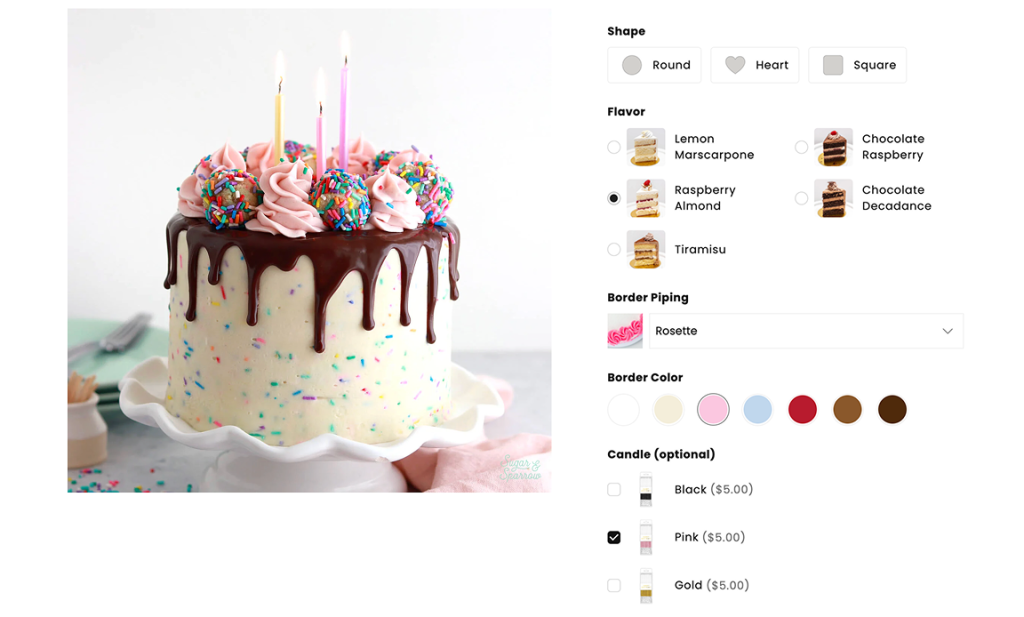
- Complex Techniques: Essential for bakeries to show different frosting techniques like Shell, Star, or Rosette. These are terms that not everyone is familiar with, so a photo helps them “see” the cake’s texture.
- Pattern: Use images for complex patterns like Boho Floral, Geometric, or Herringbone that names can’t fully capture.
Now that you see how Option Value Images can transform your product page, let’s walk through the setup process. It only takes a few clicks to upload your visuals and assign them to your options. Follow our step-by-step guide below to bring your product choices to life.
Supported option types: Dropdown, Checkbox, Button, Radio Button, and Product List. The option value image feature will be extended to more option types in the future.
Availability: This feature is exclusive to the Pro plan.
Demo #
How to Set Up Image for Option Value #
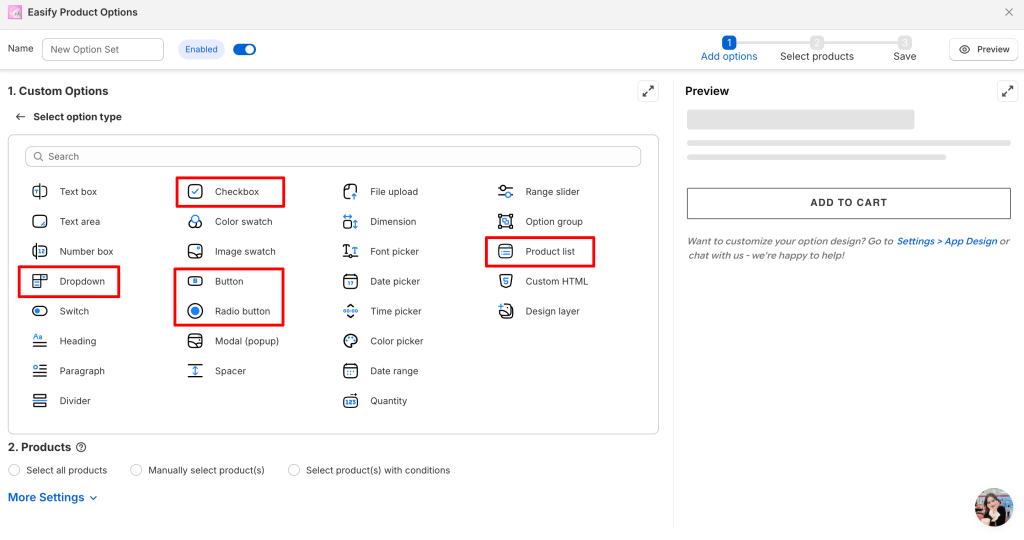
Step 1: Add a supported option type to your option set #
Currently, 5 option types (Dropdown, Checkbox, Button, Radio Button, and Product List) support adding images for individual values.
Choose the one you want and add it to your option set to get started:
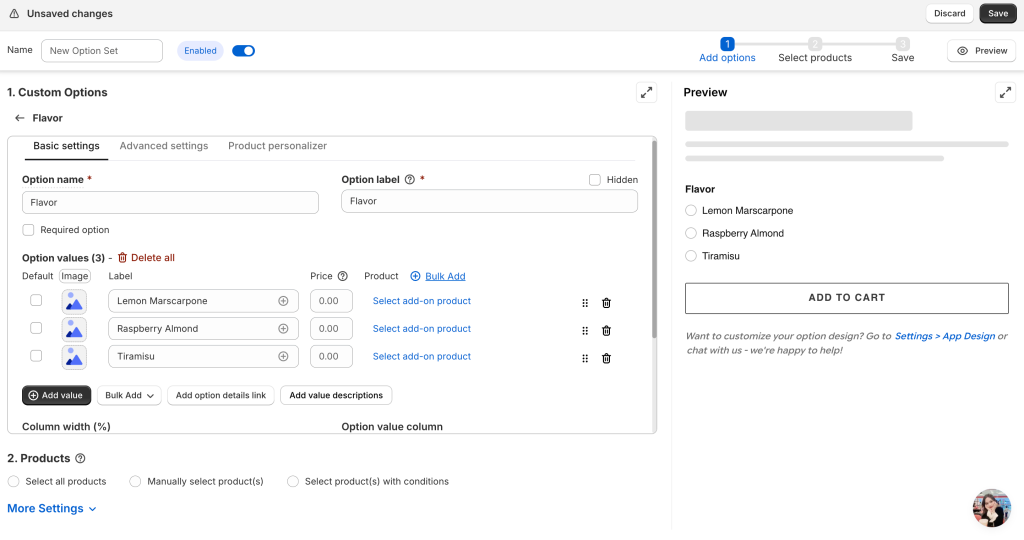
Step 2: Add all option values #
As usual, add all the values for your option before adding images to one, several, or all of them.
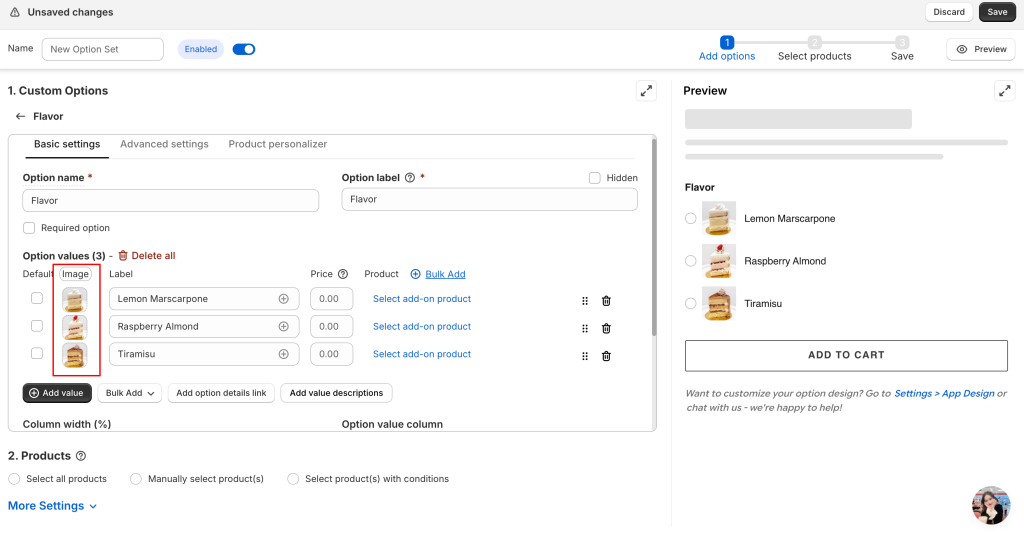
Step 3: Add images #
Upload an image for each of your values to provide a visual reference.
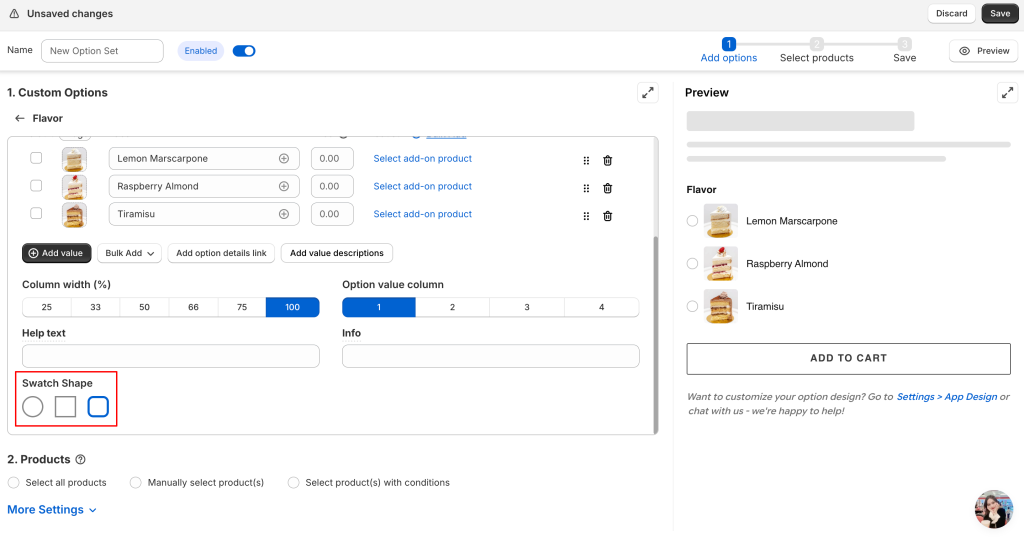
Step 4: Choose swatch shape #
Pick the shape for your value images. You can choose between Circle, Square, or Rounded Square.
Step 5: Finalize and Save #
Complete your Option Set setup and assign it to your products. Click Save to publish your changes and make them live on your store.
How to change from Image to Color #
If you prefer to use solid colors instead of images to illustrate your options, you can easily switch the mode:
1. Click on the Image text located right above your uploaded photo area.
2. Select Color from the list.
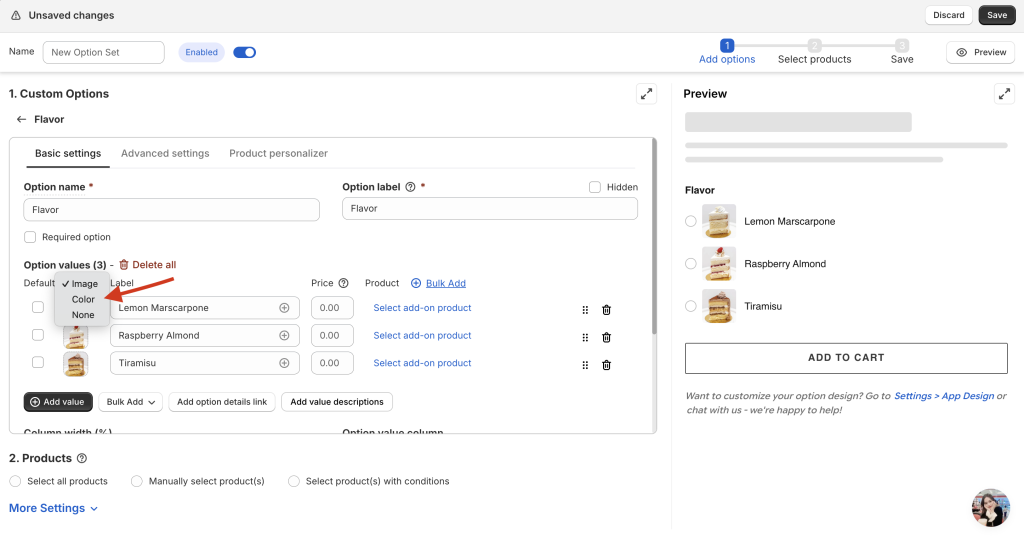
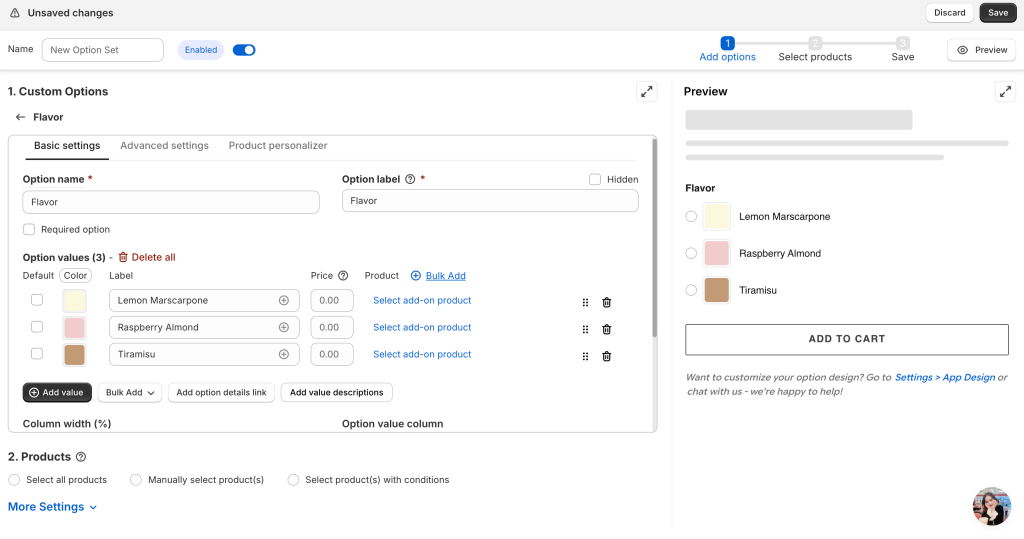
3. Choose the specific color for each option value as usual.
How to Stop Using Images #
If you decide you no longer want to show visuals for your option values, you can easily disable them without losing your progress.
- Click on the Image text located directly above the uploaded photo area.
- Choose None from the list. This will hide the images on your product page and revert the options to a simple text format.
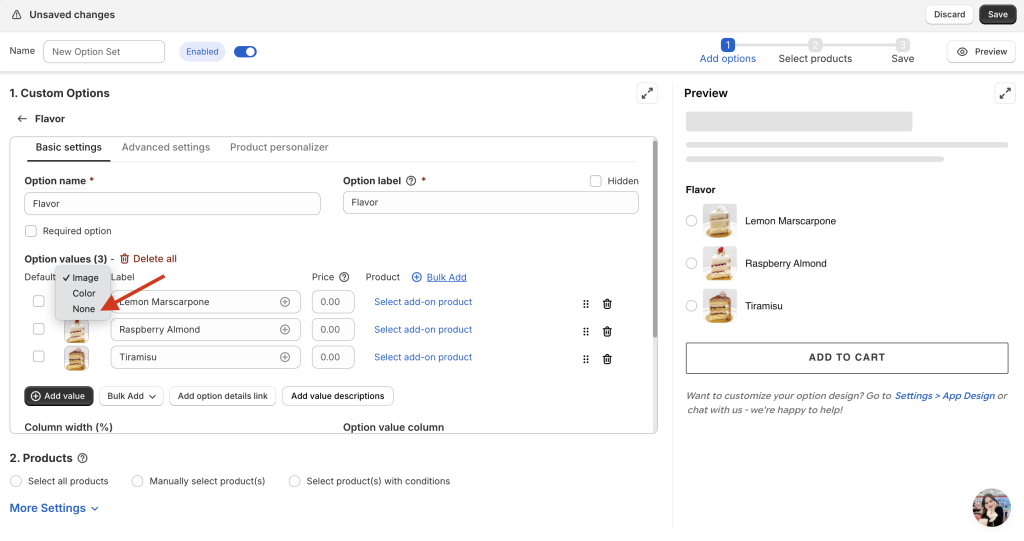
If you decide to switch back to Image mode later, Easify will remember and restore the photos you previously uploaded.
Important Notes
- To replace an existing photo, simply click on the image you want to change and upload a new file.
- If you want to completely remove a specific image from a single value (so that it has no visual at all), you must delete that specific value and recreate it.
Need assistance? #
If you have any questions or encounter issues while following this guide to set up option value images, don’t hesitate to reach out through our in-app live chat. We’re always here to help!