The Easify Product Options App Block gives you full control over exactly where your option set appears on the product page. Instead of being stuck with a single default position, you can add the option set as a block inside Shopify’s own theme editor, then drag it to sit wherever fits your layout — above the price, below the description, right next to the Add to cart button, or anywhere else you choose.
Note: The app embed works best with Online Store 2.0 themes. If your store is on a vintage theme, we recommend you contact our support team for further assistance.
Prefer to read instead? Read the full step-by-step guide below.
How It Works #
The App Block is a block you add through Shopify’s theme editor. Once it’s in place, your option set renders wherever you drag it — using your theme’s own drag-and-drop tools, just like any other section on the page.
📝 Note: Adding the block by itself isn’t enough — both the app block and the app embed need to be active for the option set to display on your store.
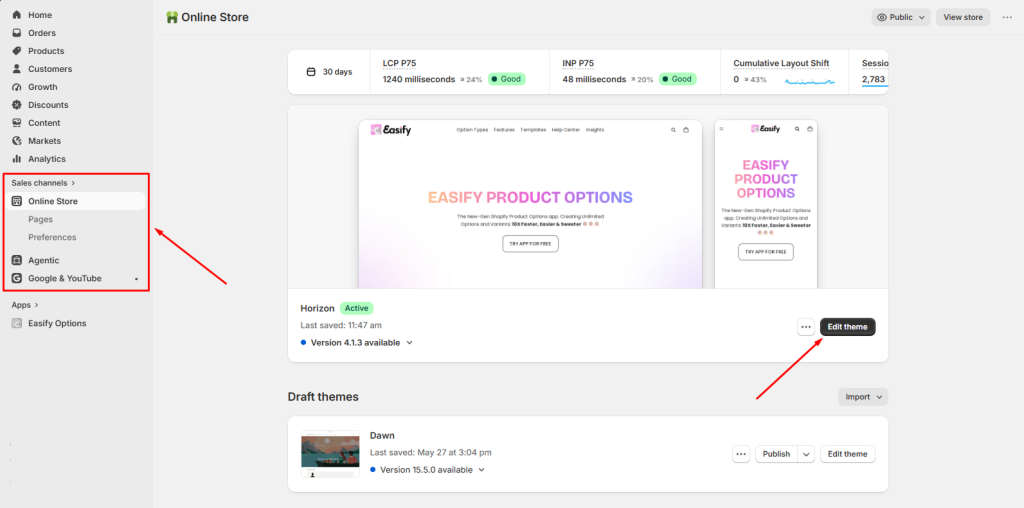
Step 1: Open the Theme Editor #
First, pick the theme you’d like to add the block to, then open the theme editor in your Shopify Admin.
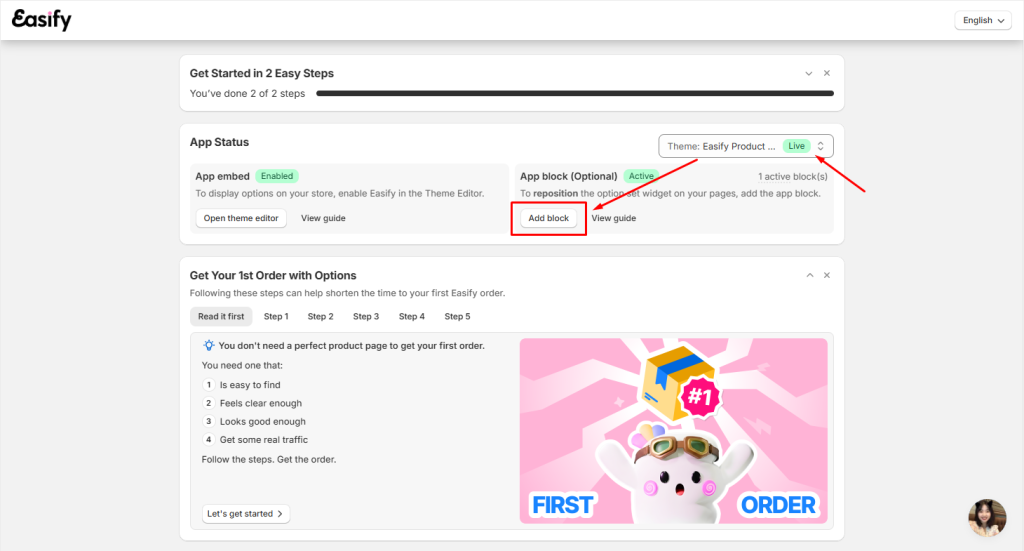
You can also do this straight from your Easify app dashboard — just choose the theme you want to edit and click Add block.
Theme Compatibility for the App Embed #
- Trial themes won’t appear in the theme selector in Easify Dashboard.
- If a theme is still in trial, it hasn’t fully been added to your theme library yet — so it won’t show up as an option when you’re choosing a theme to activate the app embed on.
- Vintage themes aren’t fully supported.
- App embeds are part of Shopify’s Online Store 2.0 theme architecture, so Easify Product Options is built and tested specifically for Online Store 2.0 themes.
- If you’re using a vintage theme (like Shopify 1.0 themes), the app embed setting may not appear the same way, or may not work as expected — we can’t guarantee full compatibility. If you run into this or anything looks off, reach out to our support team via live chat or email, and we’ll help you sort it out.
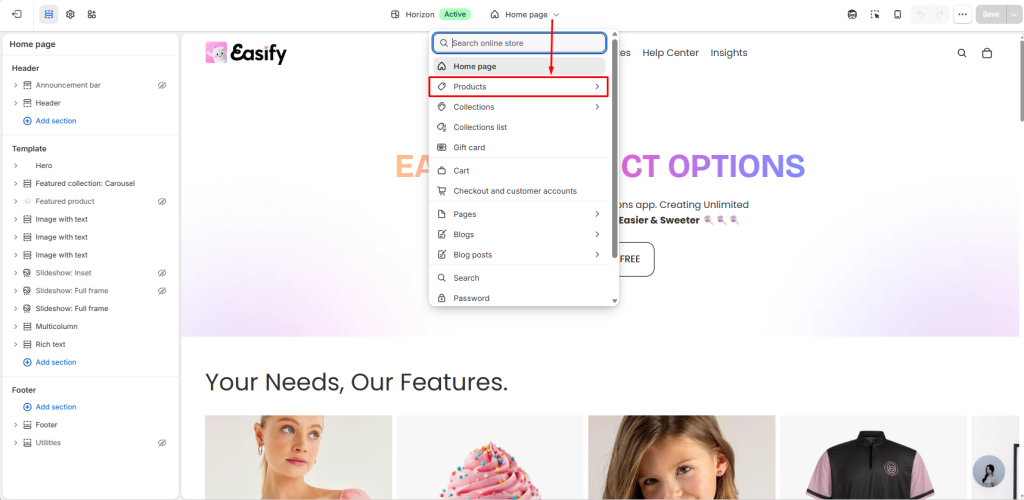
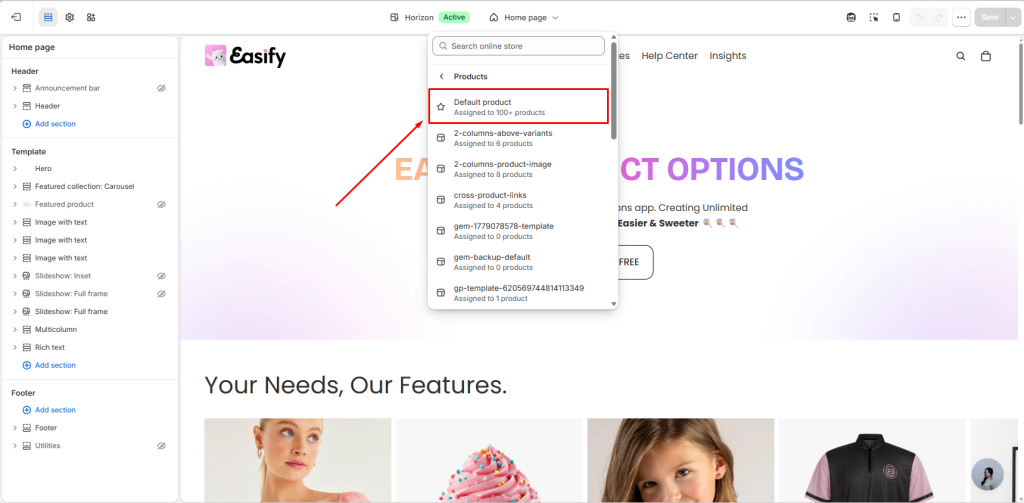
Step 3: Add the Block in the Theme Editor #
Once you’re in the theme editor:
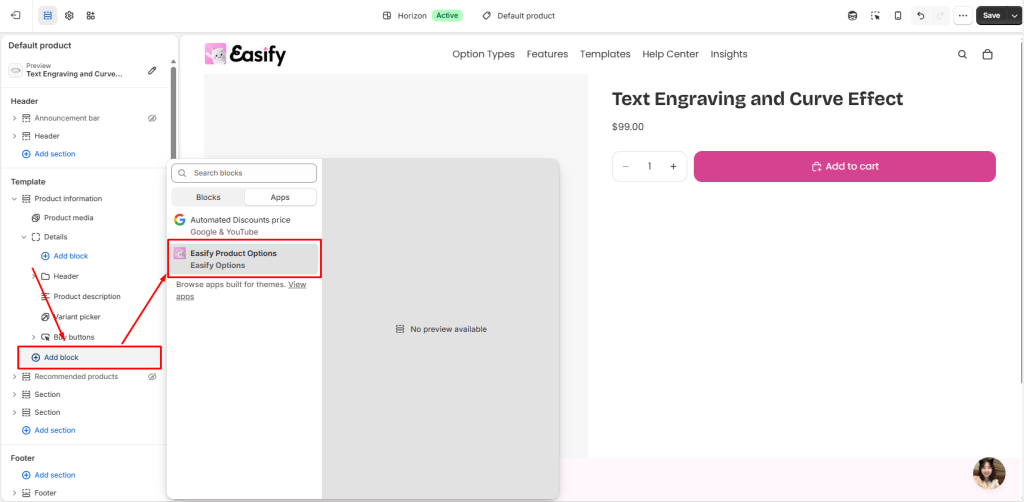
- Make sure you’re viewing the Product template
2. Click Add block → Apps → Add Easify Product Options.
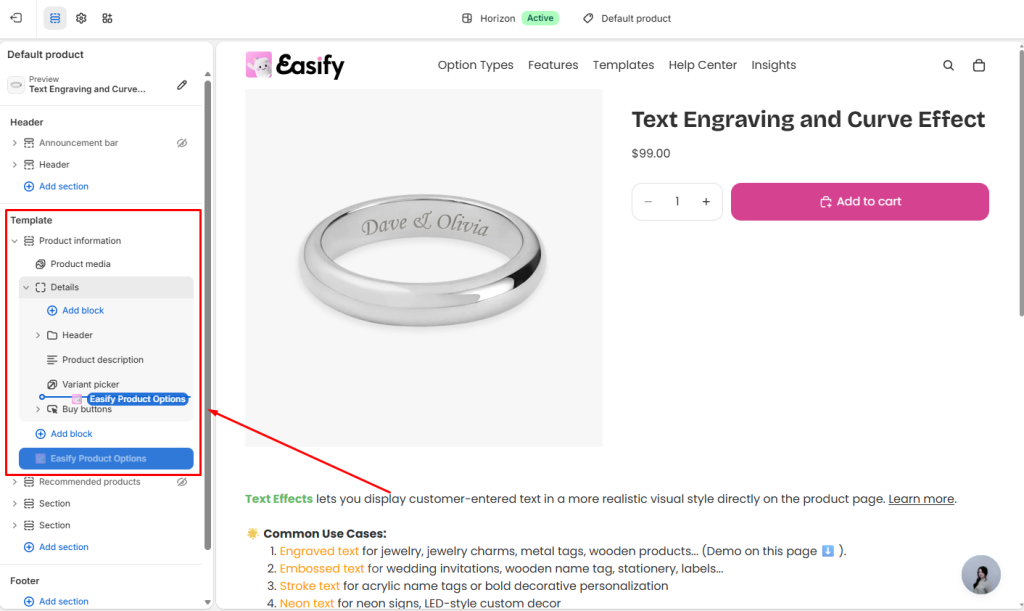
3. To reorder the block, hold to drag and drop it right in your preferred position.
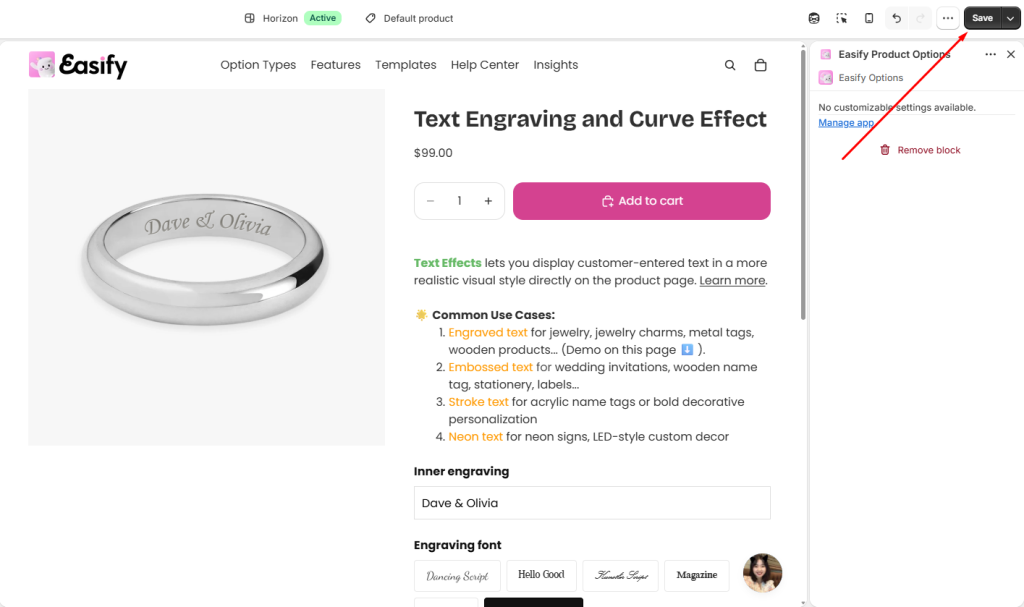
4. Click Save.
Step 4: Make Sure the App Embed Is Also Enabled #
Adding the block is only half the job — the app embed needs to be on too, or the option set won’t show up on your storefront.
Go to: Theme editor → App embeds, and make sure Easify Product Options is switched on.
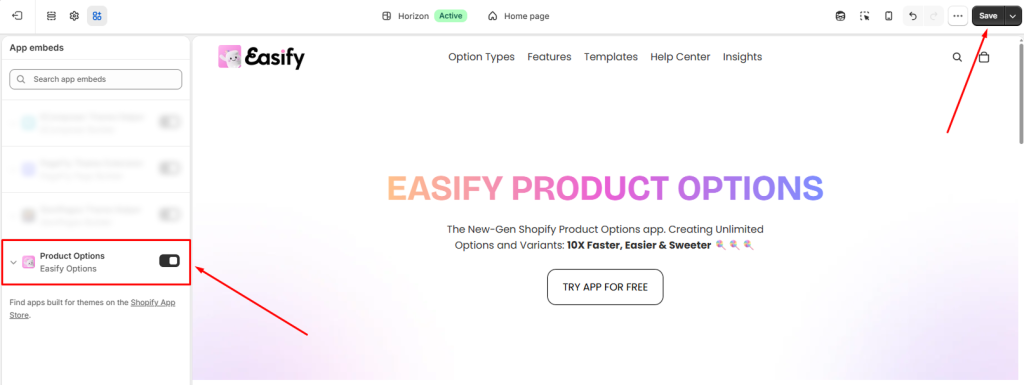
Read a more detailed guide to enabling the App embed in your theme.
Remove the App Block #
If you no longer want the option set to appear on a product template or certain positions on the product page, you can remove the added app block anytime.
To remove the app block:
- Open the theme editor and go to the product template you want to remove the app block from.
- Select the Easify Product Options block on the page.
- Click the Remove icon.
- Click Save to confirm the change.
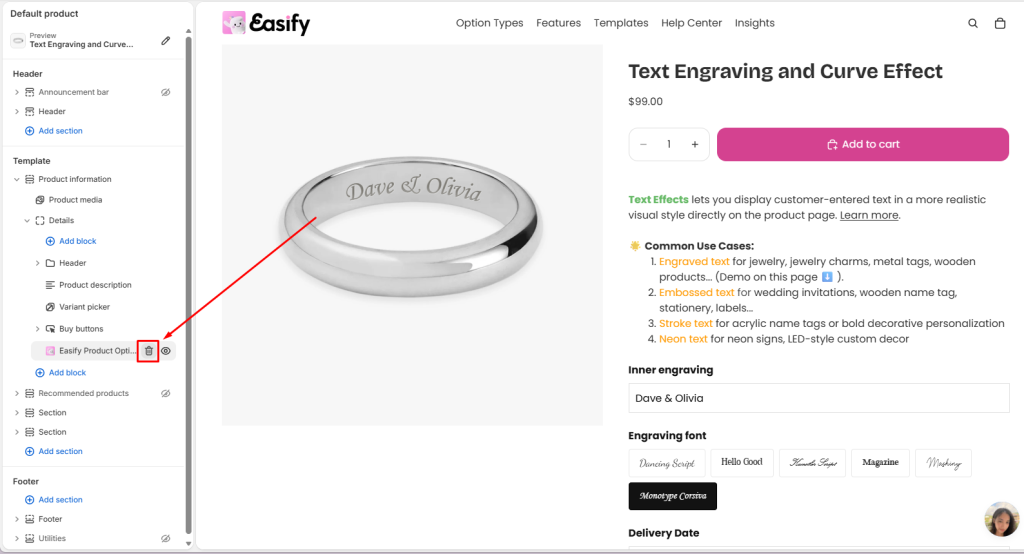
📝 Note: Removing the app block only affects where the option set is displayed — it doesn’t delete or reset the option set itself, or touch any of your other settings. Add the block back anytime and everything picks up right where you left off.
What Happens If You Uninstall the App #
If you uninstall Easify Product Options, we automatically removes the app block from your theme along with it. You don’t need to manually remove it beforehand.
📝 Note: If you reinstall the app later, the block won’t come back automatically. You’ll need to add it again through the theme editor.
Need Assistance? #
If you run into any issues setting up the App Block or the option set isn’t appearing as expected in your store, our support team is ready to help. Reach out anytime via the in-app live chat for prompt assistance!
