Let your customers pick up right where they left off. With this feature, the options a customer fills in are saved automatically during their visit: so when they refresh the page or move between products, everything they configured is still there.
Choices are remembered for the customer’s current browsing session, and clear once they close their browser.
✨ This feature is available on the Premium plan and above.
Why Remembering Choices Matters #
✅ No Lost Work: If a customer refreshes the page or moves to another product and back, their selections and live preview are restored exactly as they left them, nothing to redo.
🛒 Less Friction at Checkout: Customers who don’t have to re-enter their choices are far more likely to follow through. Removing that small annoyance helps protect the sale.
🎨 Live Preview Stays Intact: The customization preview — image position, background, and other adjustments — comes back along with the saved options, so the experience feels continuous.
How It Works #
There are two settings, one nested inside the other:
- Remember customer’s choices: Saves each customer’s selections and preview state during their browsing session, and restores them when they return to the same product within that session.
- Share choices between option sets: Optional add-on settings. Carries a customer’s choices over to other products across your store, so they only need to fill things in once.
Both are configured in your app settings, and everything happens automatically on the storefront, so there’s nothing your customers need to do.
Step 1: Turn On Remember Customer’s Choices #
Go to: Easify Product Options → Settings
In the Saved choices section, switch on Remember customer’s choices.
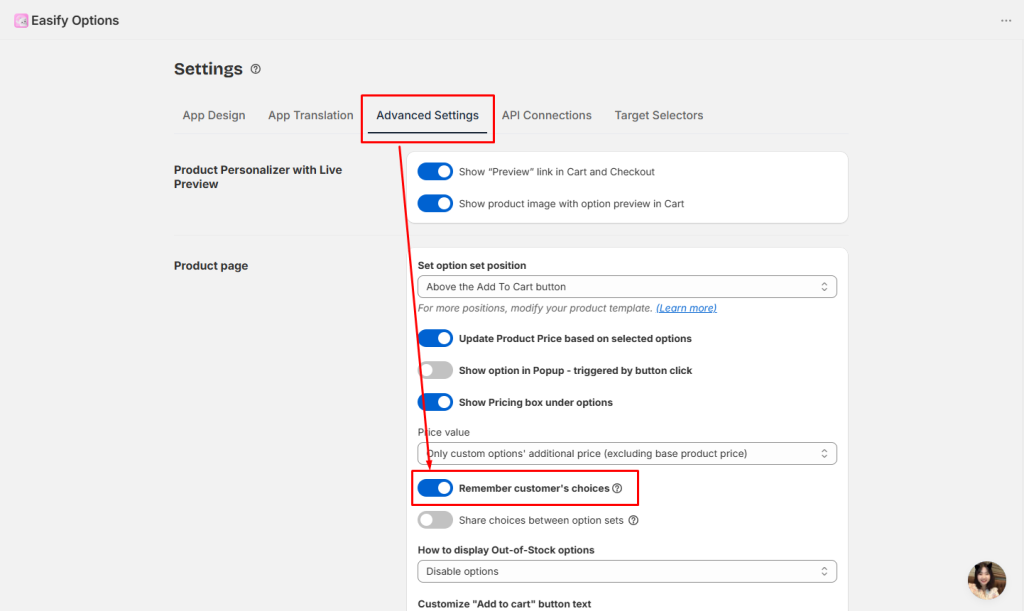
That’s it — from now on, when a customer configures options on a product and then refreshes or returns to that same product, their selections and live preview are restored automatically.
📝 Note:
- Choices are saved in the customer’s own browser, and restored on the same device and browser they used.
- Saved choices last for the customer’s current browsing session. They’re kept while the customer keeps browsing: across page refreshes, when moving between products, and even if they close and reopen a tab. They’re cleared once the customer fully closes their browser and ends the session.
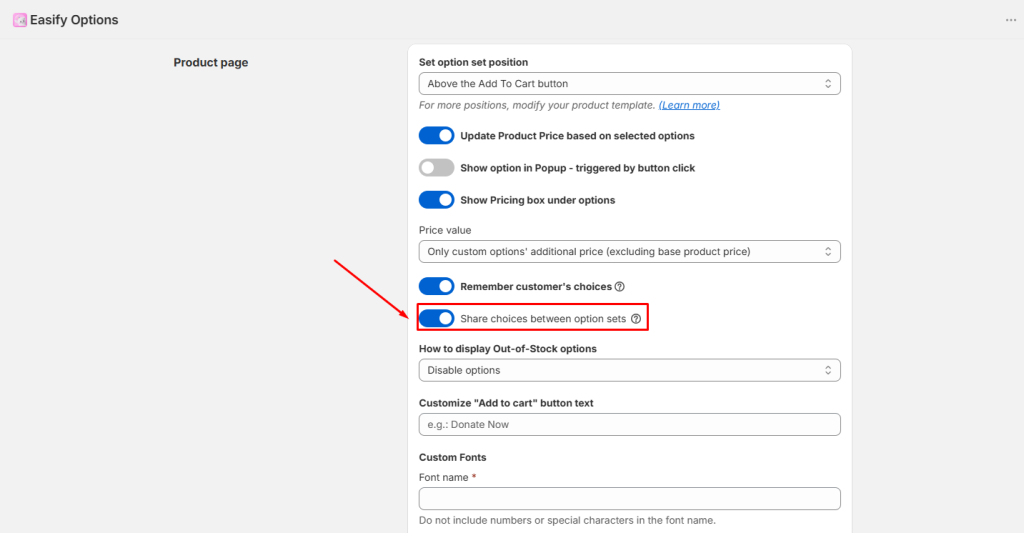
Step 2 (Optional): Turn On Share Choices Between Option Sets #
Once Remember customer’s choices is on, a second switch appears beneath it: Share choices between option sets.
Switch it on if you want a customer’s choices to follow them across products, not just on the same product.
When enabled, a customer’s input carries over to other option sets based on the option name. If two option sets each have an option with the same name and a matching value, the customer’s selection is shared between them.
Example: A customer enters their name on one product, then visits another product that also has a “Engraving Name” field. The name they typed is already filled in, no need to type it again!
| First Product | Second Product |
|---|---|
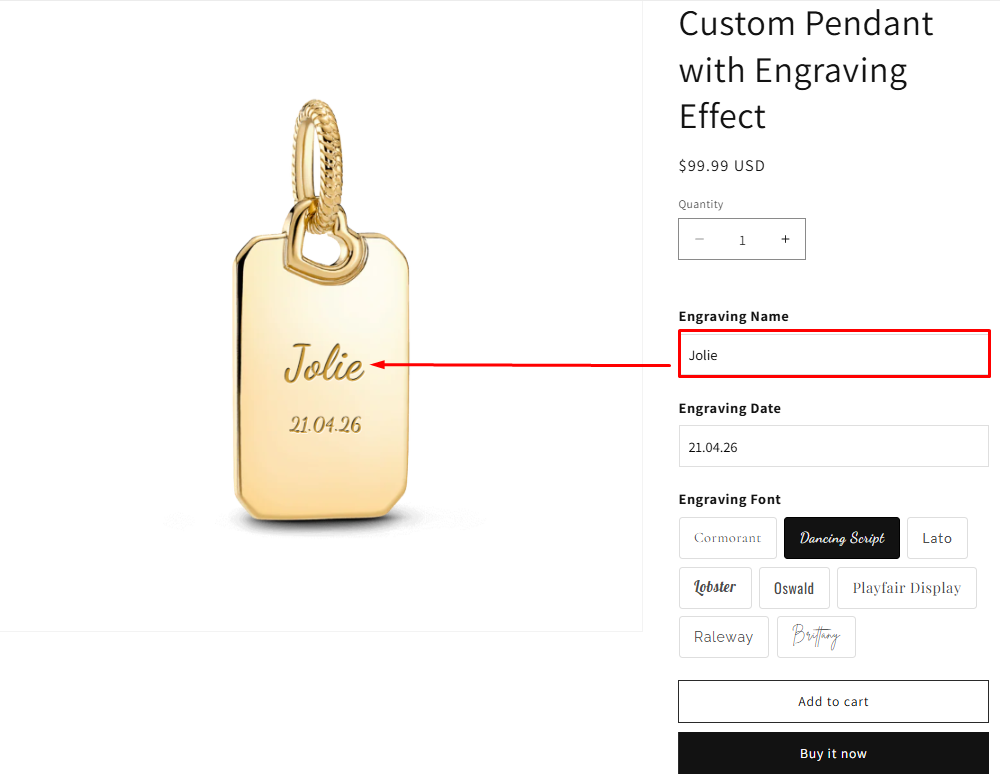 | 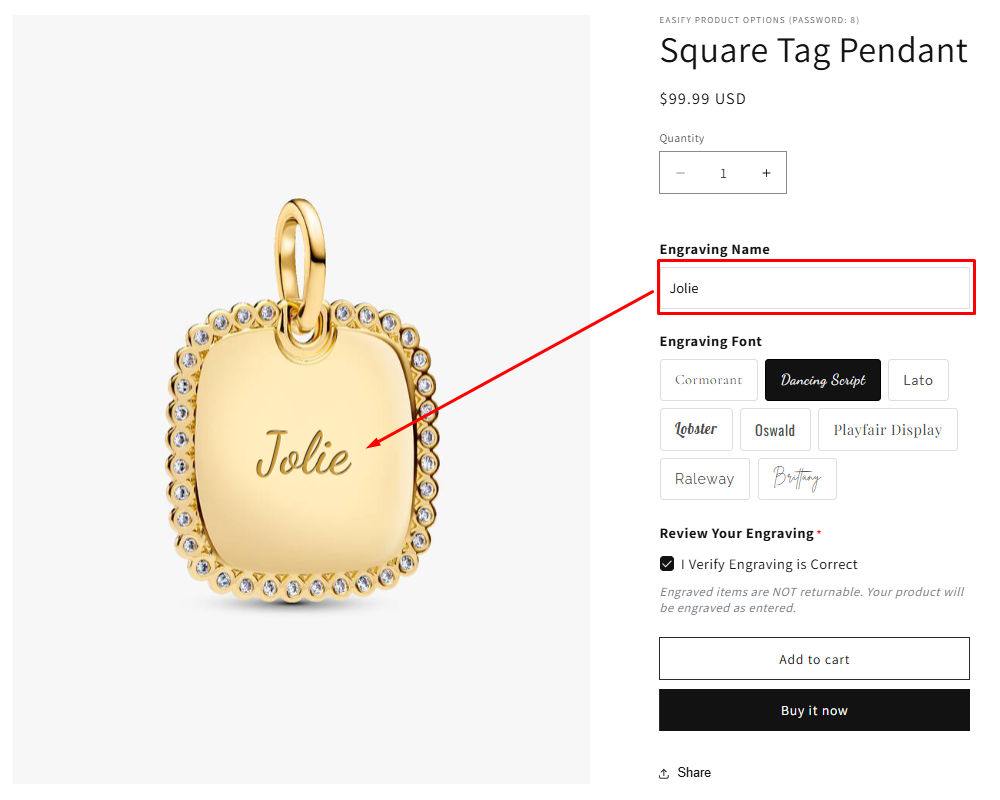 |
🎨 Note:
- This setting applies across your entire store. When it’s on, choices can carry over between any option sets that share an option name.
- If a saved choice isn’t available on the new product — for example, a color the new product doesn’t offer — it’s simply left blank, and the customer can choose as usual.
- Turning this off stops choices from carrying over between products, but it does not erase anything already saved.
What Your Customers See #
The experience is fully automatic:
- A customer configures options and a live preview on a product.
- They refresh the page or move to another product and back → their selections and preview are restored right where they left off, as long as they’re still in the same browsing session.
- With sharing on, when they open another product their matching choices are already filled in.
Good to Know #
- Selections and preview are saved, files are referenced. For file upload options, the link to the uploaded file is remembered rather than the file itself.
- Display-only elements aren’t saved. Headings, paragraphs, spacers, dividers, and similar elements have nothing to remember.
- If a merchant edits an option set, any saved value that no longer matches the updated options is simply skipped on the customer’s next visit.
- Saved data lasts for the browsing session. Choices are kept while the customer keeps browsing your store, but are cleared once they fully close their browser. If a customer switches devices or browsers, their saved choices won’t carry over either — they’ll simply start fresh.
Need Assistance? #
If Remember customer’s choices isn’t working as expected in your store, our support team is ready to help. Reach out anytime via the in-app live chat for prompt assistance!