Log in to your Shopify admin panel and follow these steps:
Step 1: Access New Order Email Template #
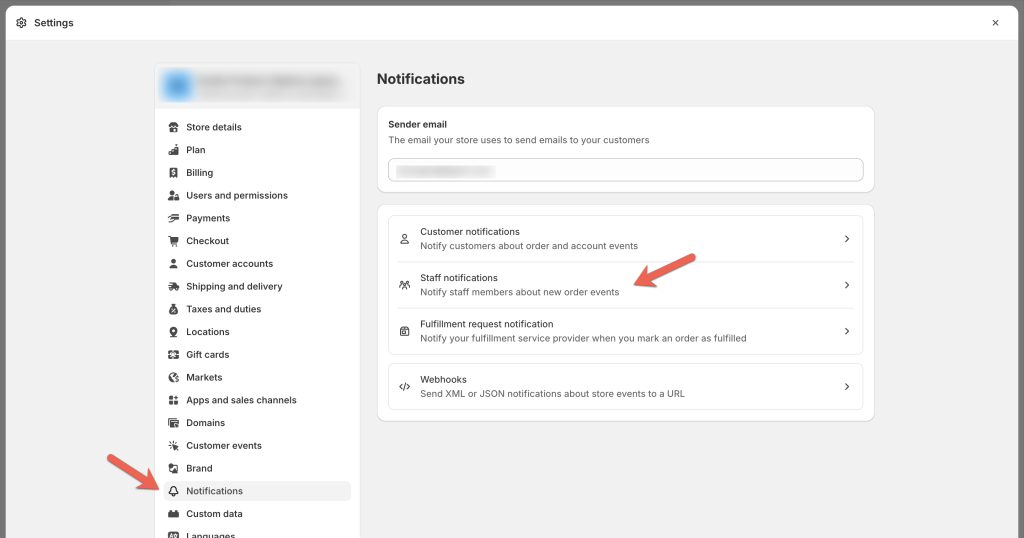
- Navigate to Settings > Notifications > Staff Notifications
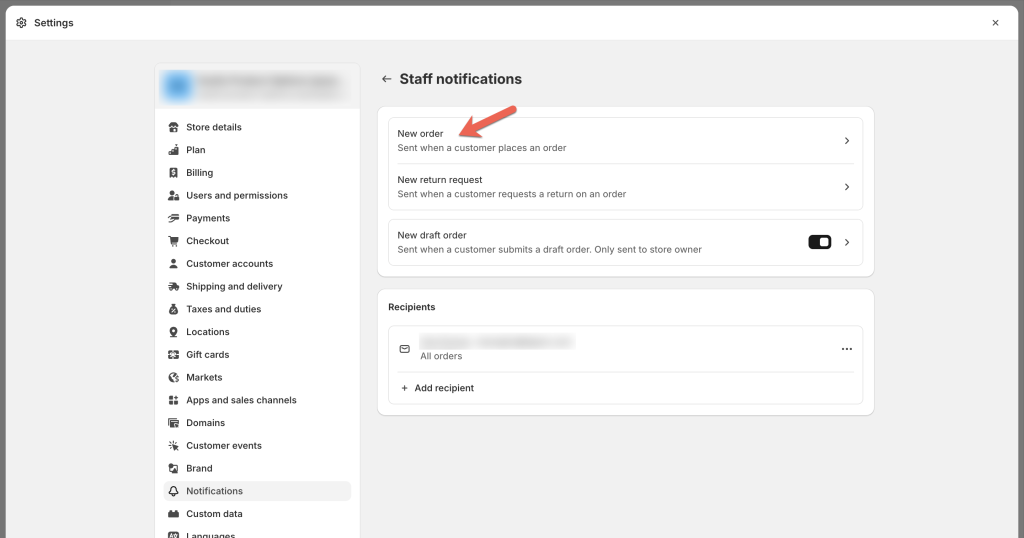
- Locate and select New order
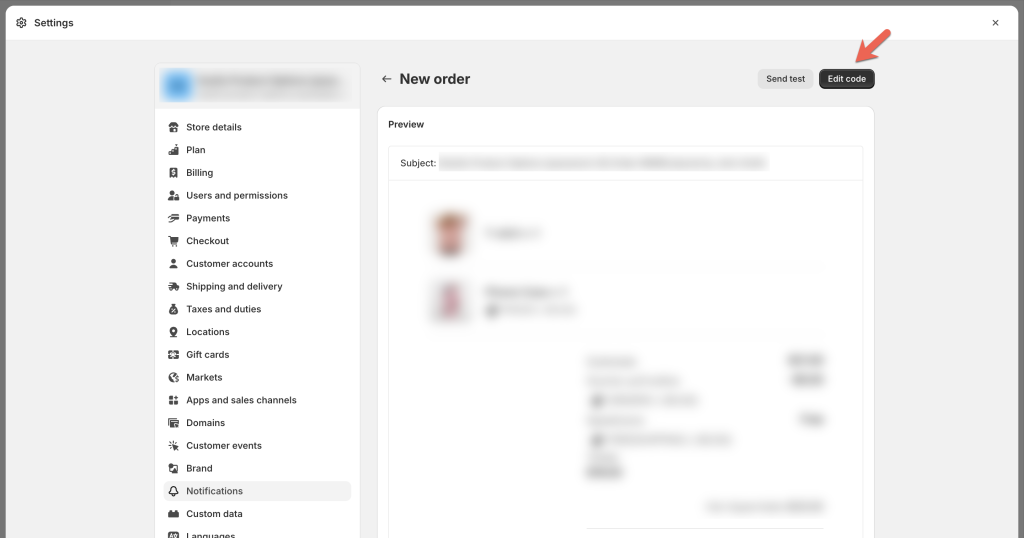
- Click on the Edit code button to access the email template’s HTML code
Step 2: Add custom code to email template #
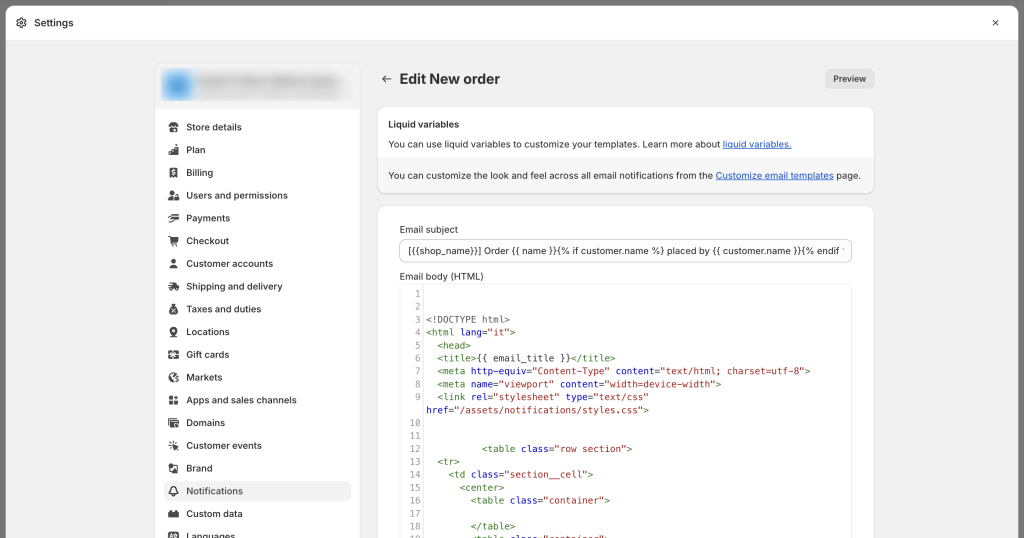
Place your cursor in the Email body (HTML), use the shortcut Ctrl + F (Command + F on Mac) to open the search function.
Search for “{{ component.variant.title }}” in the existing code.
After locating “{% endif %}“, paste the following code snippet:
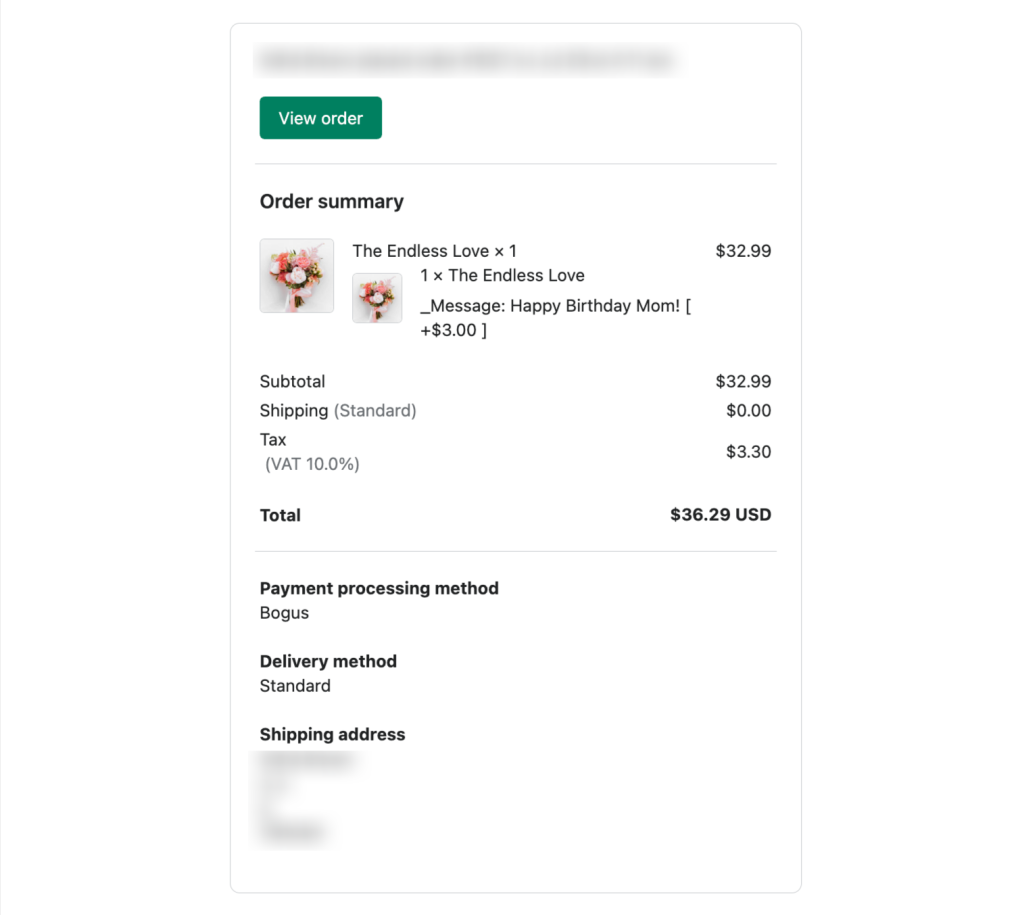
{% for property in component.properties %}
  {% assign property_first_char = property.first | slice: 0, 4 %}

  {% if property.last != blank and property_first_char != '_tpo' %}
    <span class="order-list__item-property">
      {{ property.first }}: {{ property.last }}
    </span>
  {% endif %}
{% endfor %}

<style>
	td.order-list__image-cell {
	    display: flex;
	}

	span.order-list__item-property {
    	    display: block;
    	    height: max-content;
    	    margin-top: 5px;
	}
</style>
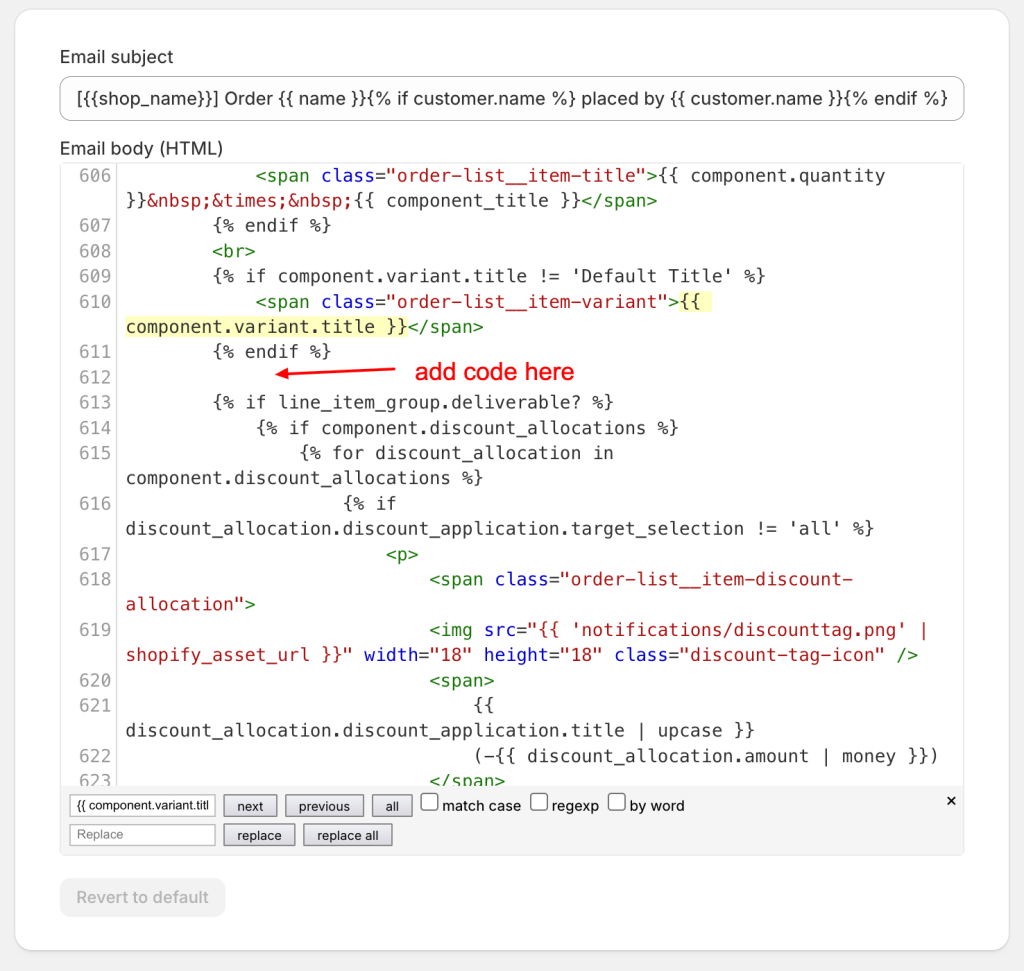
Note: You might find 2–3 matching results. In this case, you can add the code to all the positions you find.
If there are no results for “order-list__item-title component”, it’s likely that your email template is different from Shopify’s default version. In that case, you can reach out to Easify Support for assistance with adding the code.
Step 3 : Save changes #
Click on the “Save” button to apply the changes to the template.
Wait for approximately 30 seconds for the changes to take effect.
Need Assistance? #
If you run into any challenges while adding Easify’s custom options to your New Order Notification Emails, feel free to reach out to us for assistance through our convenient in-app live chat, by submitting your request via our contact form, or by sending an email to support@tigren.com. We’re here to help!