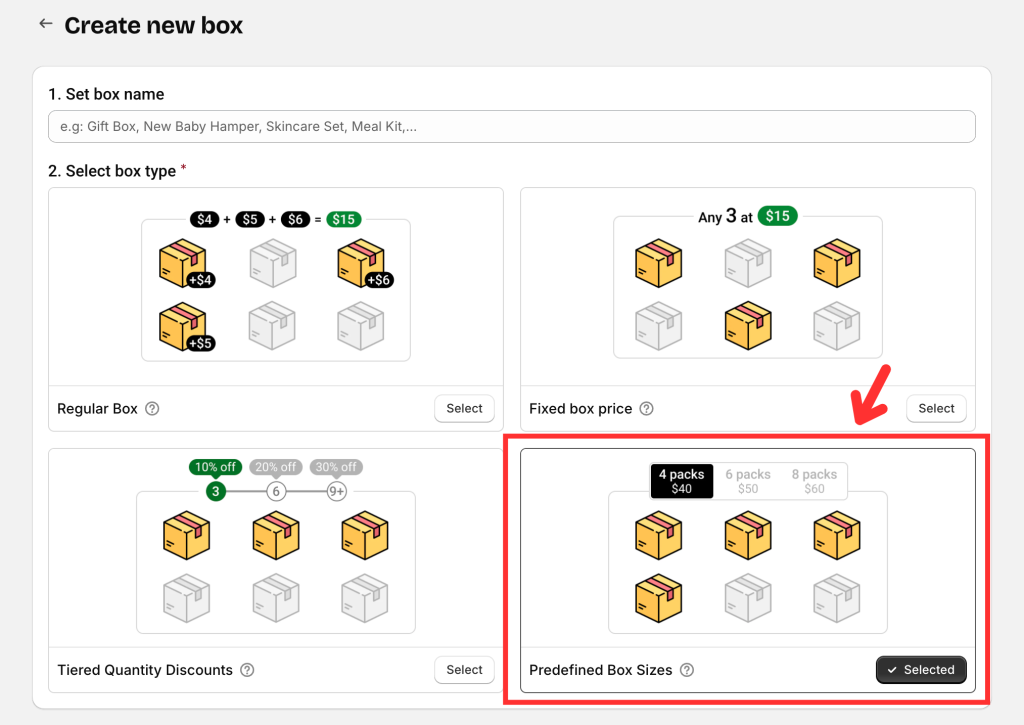
The Predefined Box Sizes type allows you to set up specific box sizes with a fixed number of items and a fixed price.
- Customers choose their box size first (e.g., 4-pack, 6-pack, 8-pack).
- They then fill the box with exactly that many products.
This format creates a shopping experience that’s both clear for customers and profitable for you — because you control price and structure while guiding buyers toward bigger, higher-value orders.
💡 Anywhere customers love mix-and-match variety or buying in sets, this box type will shine.
2 Styles of Predefined Box Sizes #
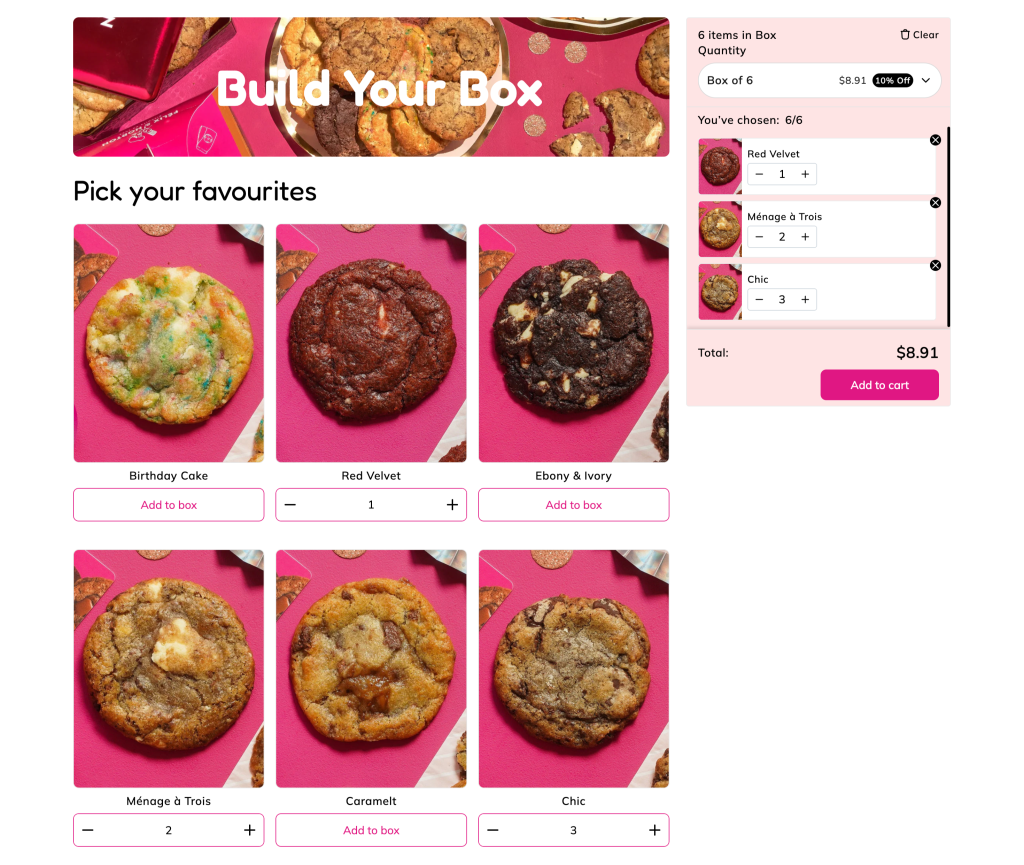
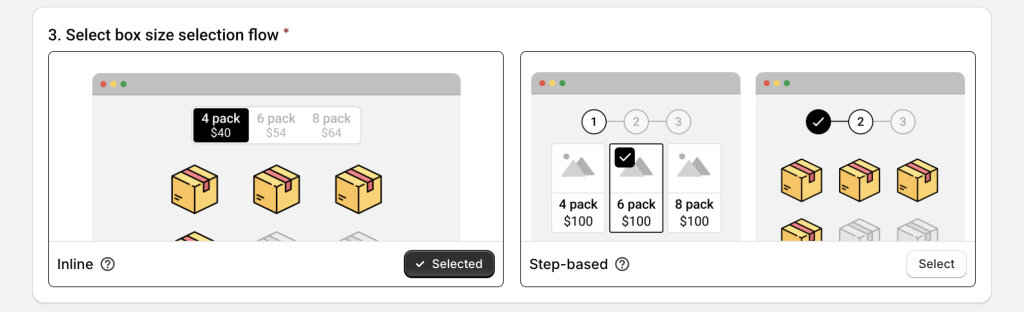
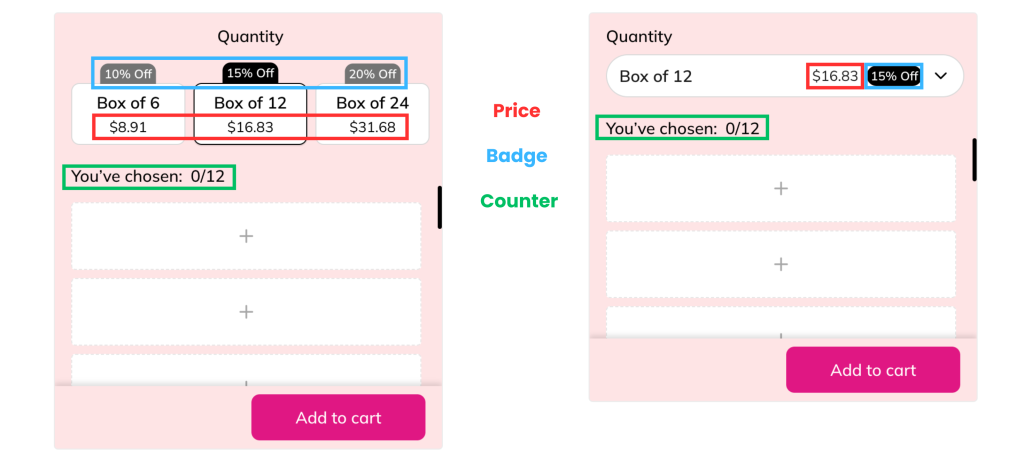
1. Inline (all-in-one page) #
- Box size and product selection happen on a single page.
- Customers can switch between sizes instantly without leaving the page.
Demos:
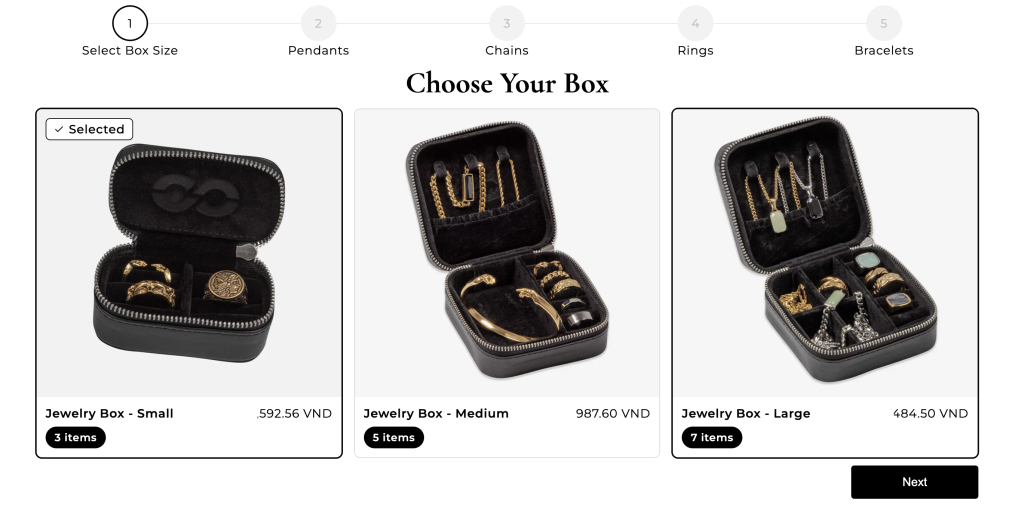
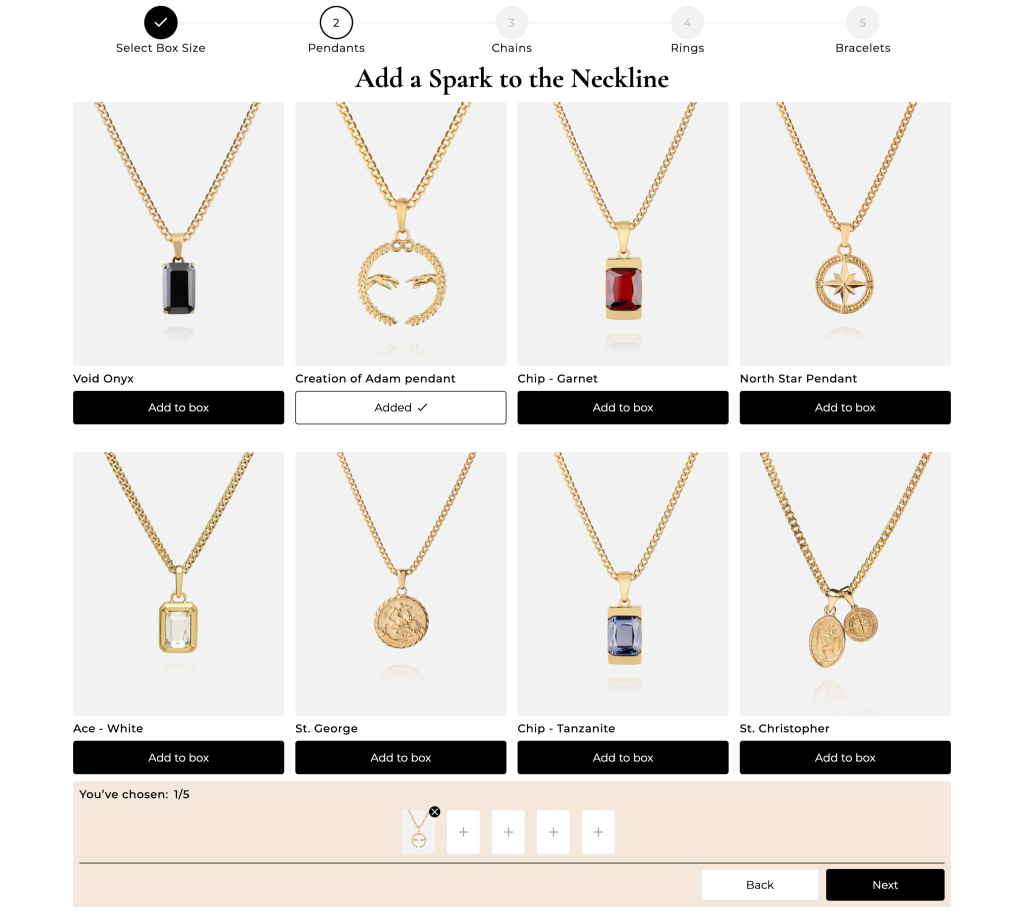
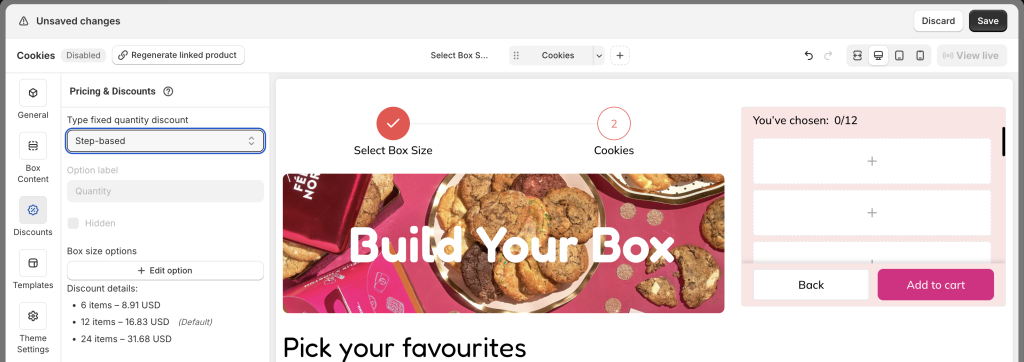
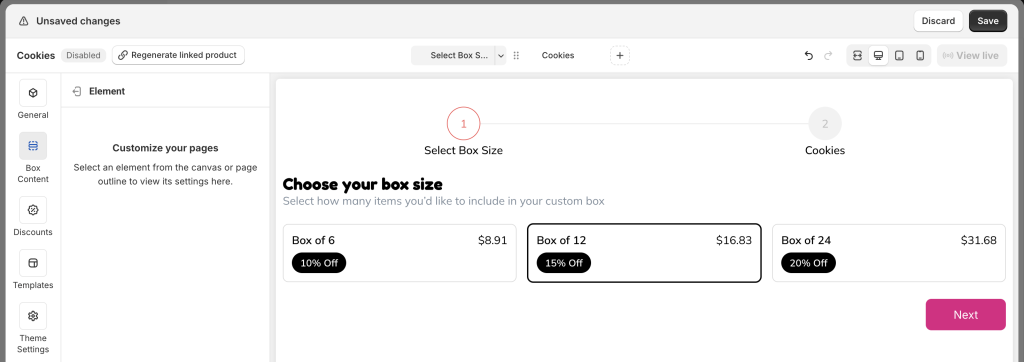
2. Step-based (multi-page flow) #
- Step 1: Choose a box size.
- Step 2: Fill the box.
- Changing sizes requires going back one step.
Demos:
Why this box type is powerful for your store #
- Drives higher average order value (AOV)
Customers often start with the smallest box but are easily nudged toward medium or large sizes when they see the price-per-item advantage.
Example: 4 for $40 ($10 each) → 6 for $54 ($9 each) → 8 for $64 ($8 each).
The bigger the box, the more savings customers feel — and the more revenue you gain.
- Simplifies decision-making
Instead of overwhelming customers with endless combinations, you set clear options. Fewer decisions = faster checkout = more sales.
- Encourages volume sales
By structuring your offer into packs, you naturally push customers to buy more than they initially planned.
- Protects your margins
Since you decide the price per box, you control profitability while still letting customers feel they’re getting a deal.
👉 In short: Predefined Box Sizes help you sell more, protect margins, and delight customers with a simple, rewarding shopping flow.
How to Create a Predefined Box in Easify #
Step 1. Create a new box #
From the app navigation menu, go to Box Management.
Click Create box. Then:
- Enter your box name.
- Select box type: Predefined Box Sizes.
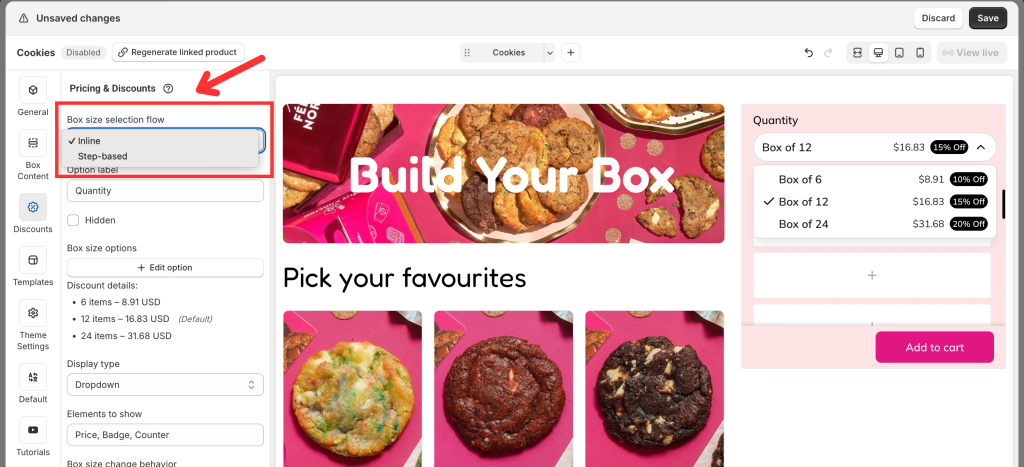
- Choose flow: Inline or Step-based (you can switch later):
- Pick a template (recommended) or start from scratch.
- Easify includes nearly 30 templates, with 6 built for Predefined Boxes (3 Inline + 3 Step-based).
- Templates give you a ready-made structure so you can customize quickly.
After selecting, click Start building to open the Visual Editor.
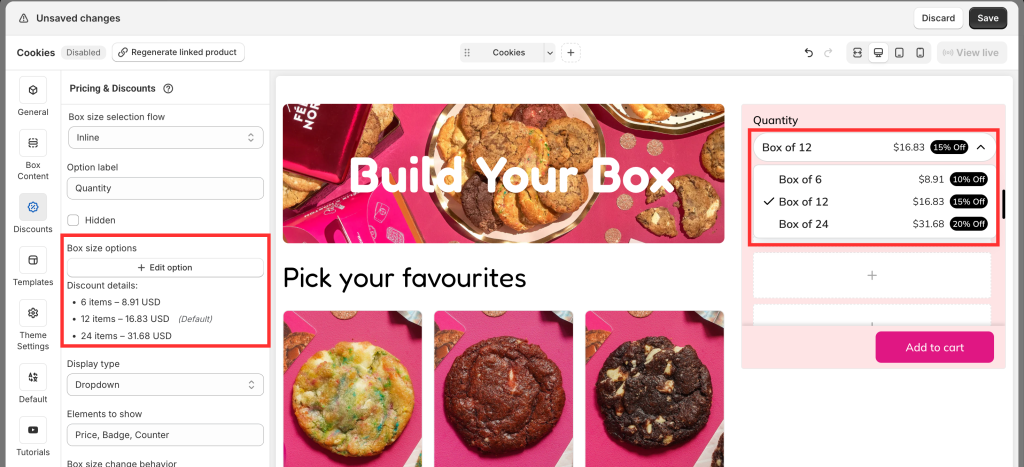
Step 2. Add your box size options #
Unlike other box types, you should configure Discounts (box sizes) before editing page content.
In the Visual Editor, go to Discounts → click Add option.

A popup will let you configure:
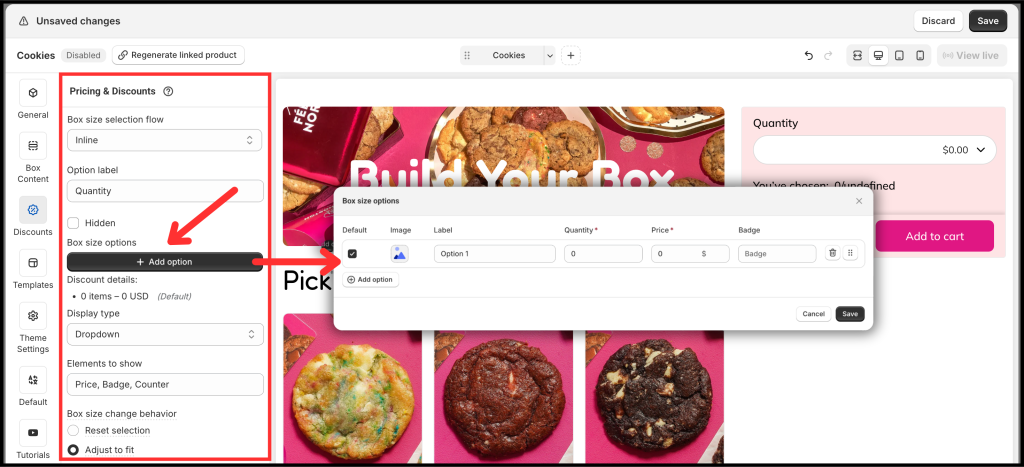
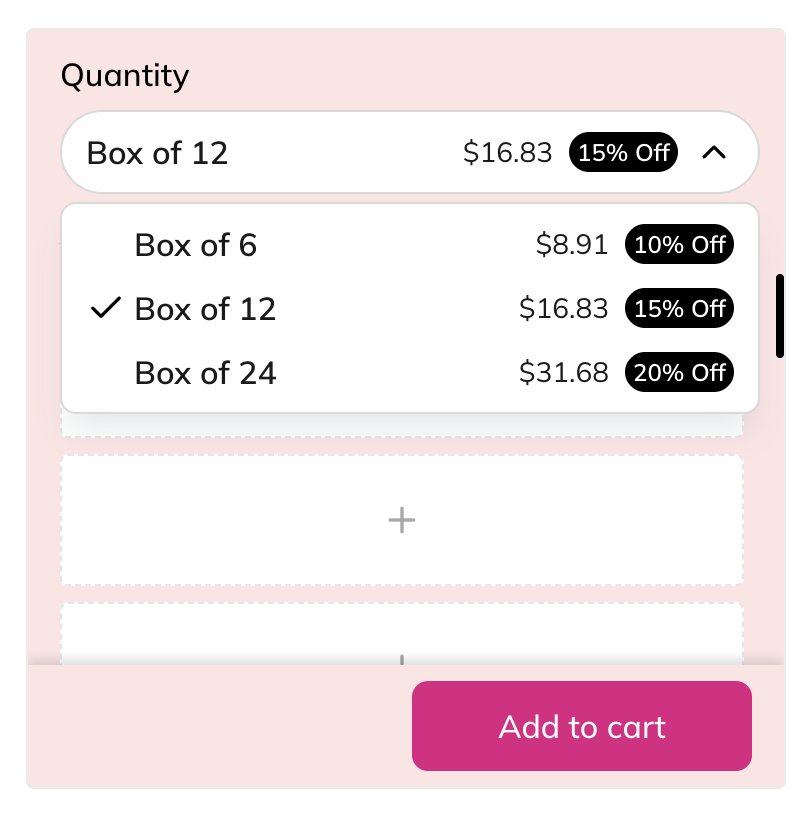
- Label: The label shown on your page (e.g., 4 pack, 8 pack, 12 pack).
- Quantity: The exact number of items customers must select for that box size. (Note: this is the fixed selection quantity, not your product inventory.)
- Price: The fixed price for that box size. This must be the final price customers pay (after any discount). You cannot enter a discount amount or percentage separately.
- Badge: This is a powerful and flexible field. You can use it to:
- Show discount values, e.g., Save $20, 30% off.
- Highlight an option, e.g., Most Popular, Recommended, Best Choice, Best Value.
- Display per-unit pricing, e.g., $4/can, $3.5/can, $3/can. This makes it easy for customers to compare and choose the best deal.
- Image: For Step-based flow, each box size can display an image in Step 1. (Images are not supported in Inline flow yet.)
- Default: One option must be set as the default selection. We recommend selecting the mid-size box and reinforcing it with a badge.
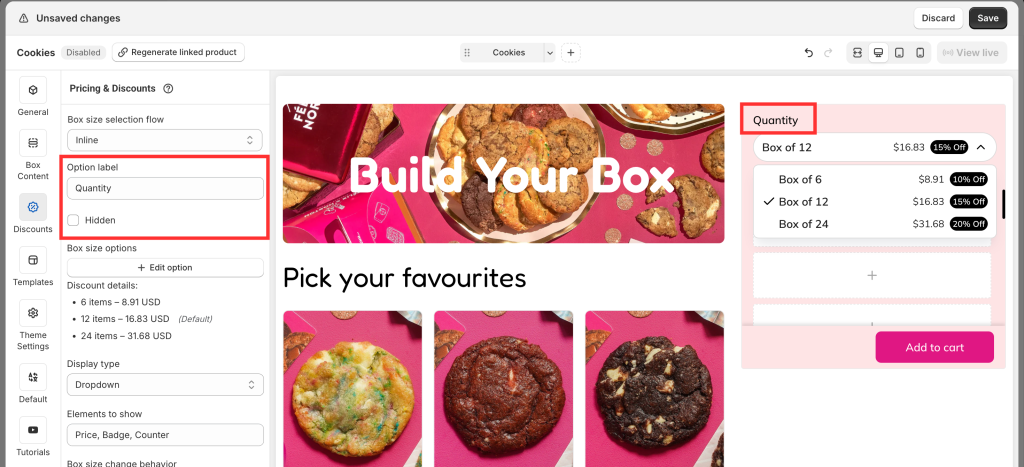
- Display type (Inline only): Choose Dropdown or Buttons. (Buttons are best for three or fewer options; Dropdown works better if you have more.)
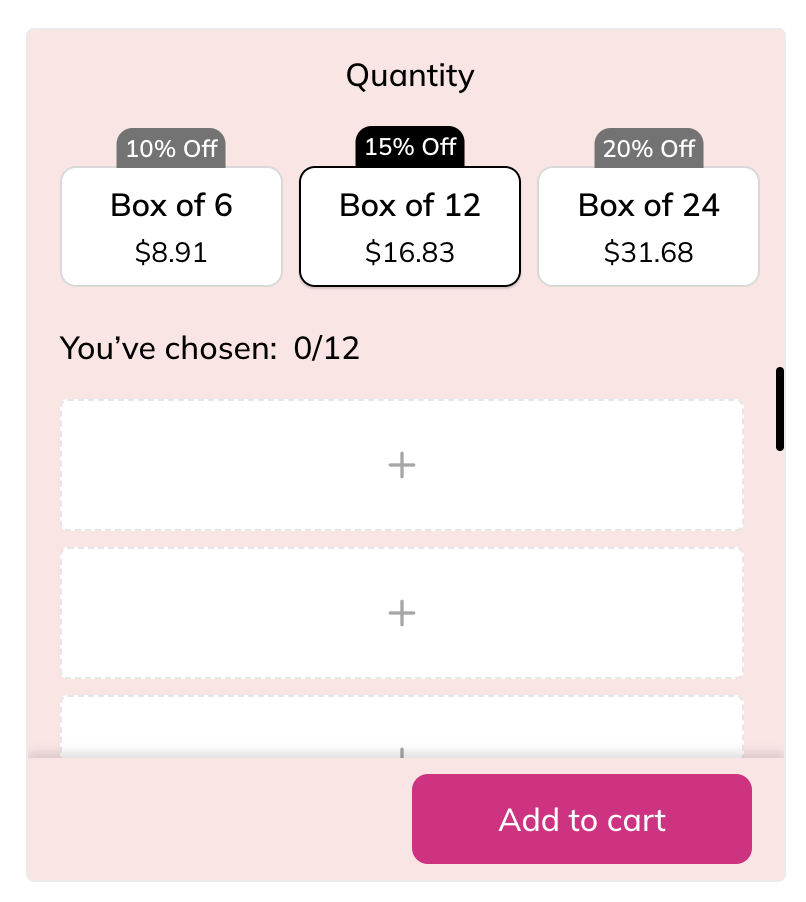
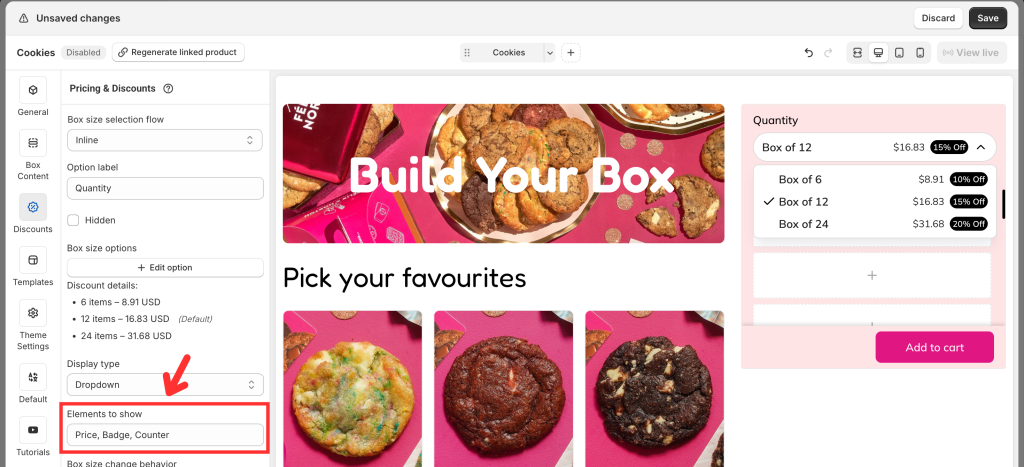
- Elements to show: Choose which elements to display in the box size list (price, badges, counters).
- Box size selection flow: You can change from Inline to Step-based, or vice versa, anytime.
The Visual Editor will update instantly:
Step 3. Decide box size change behavior #
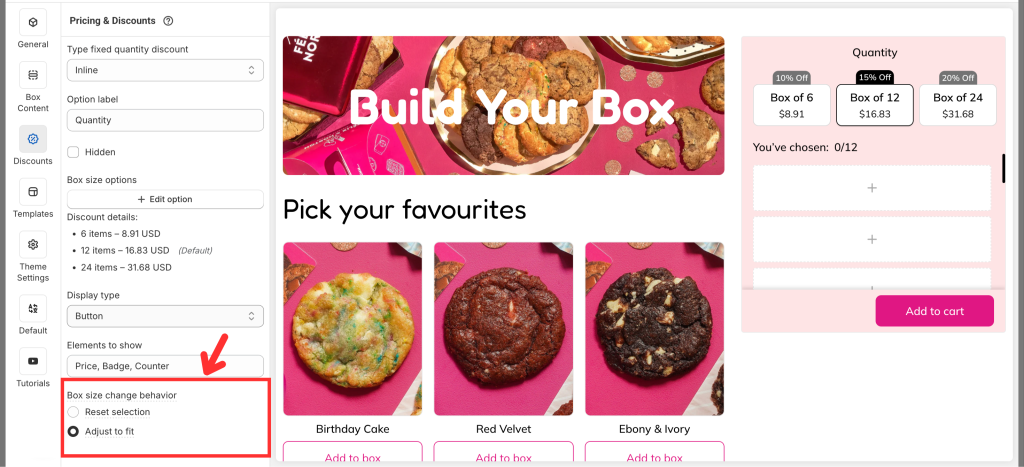
When customers switch from one box size to another (e.g., from Pack of 8 to Pack of 4), you need to decide how their previous selections should be handled.
Easify gives you 2 options:
1. Reset selection #
- What happens: All items are cleared whenever the customer switches box size.
- Example: A customer fills 6 items in an 8-pack. If they switch to a 4-pack or 12-pack, all items are removed and they must start again.
- Best for:
- Premium or curated products (e.g., wine boxes, gift boxes) where the entire selection should feel intentionalfor each size.
- Stores where different box sizes are positioned as separate experiences (e.g., a 4-item “Starter Box” vs. an 8-item “Deluxe Box”).
- Why use it: It ensures customers carefully select products for each size, but it may slow down the process for those who just want to adjust their order.
2. Adjust to fit #
- What happens: Keeps as many items as possible and automatically adapts the selection to the new size.
- If switching to a smaller box: The system trims down the selection to fit the limit (usually removing the last items added).
- Example: Customer selected 6 items in an 8-pack → switches to 4-pack → only the first 4 items remain.
- If switching to a larger box: All items remain, and empty slots open up for the additional items.
- Example: Customer selected 6 items in an 8-pack → switches to 12-pack → the 6 items remain, with 6 new slots available.
- If switching to a smaller box: The system trims down the selection to fit the limit (usually removing the last items added).
- Best for:
- Stores with larger box sizes (e.g., 6, 12, 24) where reselecting everything would be frustrating.
- Products often bought in multiples (cookies, snacks, soaps, pet treats) where customers don’t mind if a couple of items are trimmed automatically.
- Why use it: It creates a smoother, faster shopping experience, helping reduce drop-offs during size changes.
👉 Practical recommendation:
- Use Adjust to fit if your boxes include many items or you want to make size switching effortless — this keeps the process fast and customer-friendly.
- Use Reset selection if each box size is marketed as a different experience (e.g., “Mini Box” vs. “Luxury Box”) and you want customers to consciously curate their items again.
Step 4. Customize content in the Visual Editor #
From the left menu, go to Box Content to edit your page.
Add sections and elements (e.g., banners) and assign products to the box.
You can switch between Desktop, Tablet, and Mobile views and customize what appears in each. (This is not just a responsive preview — you decide the actual layout for each device)
Step 5. Refine the design #
From the left menu, go to Theme Settings to adjust page style.
Customize layout width, typography, product cards, step bar, colors, and more to match your store branding.
Step 6. Finalize and publish #
In the General tab, enable the box page.
- Define the box page URL.
- Add a box image (displayed on the box review page, cart, and checkout).
- Save and publish to your storefront.
Advanced Tips to Maximize Profits with Predefined Box Sizes #
1. Offer 3 sizes (small, medium, large) #
- Why: Behavioral economics shows customers often avoid extremes (“too small” or “too expensive”) and settle on the middle choice — known as the center-stage effect.
- Proven effect: Merchants consistently see 60–70% of sales land in the mid-tier box when it’s positioned as the “sweet spot”.
- Example: A chocolate store offers 6 truffles for $20, 12 for $35, 24 for $60. Most buyers pick 12 — not the cheapest, not the priciest, but best perceived value.
👉 Use Easify badges like “Most Popular” on the mid-tier to reinforce this effect.
2. Price larger boxes with clear savings per item #
Why: Shoppers are very sensitive to “price per unit.” If you make the math obvious, they feel smarter buying more. Large box adoption jumps when savings are 15–25% compared to the smallest box.
Example:
- Pack of 4 cookies → $10 each
- Pack of 6 cookies → $9 each (10% savings)
- Pack of 12 cookies → $7.50 each (25% savings)
The 12-pack becomes irresistible because customers see the deal.
👉 Add “Save 25%” labels directly under the box size for instant impact.
3. Use badges & social proof strategically #
Why: Labels like “Best Value” or “Customer Favorite” guide decisions faster than long descriptions. They tap into decision shortcut psychology. Shopify studies show highlighting one option as “most popular” can increase its selection rate by up to 40%.
Example: A tea shop marked its 20-bag box as “Most Popular”. Despite offering 10 and 40, the 20-bag option dominated sales (70% of orders).
👉 In Easify, apply badges to your mid or large box to push customers where you want them.
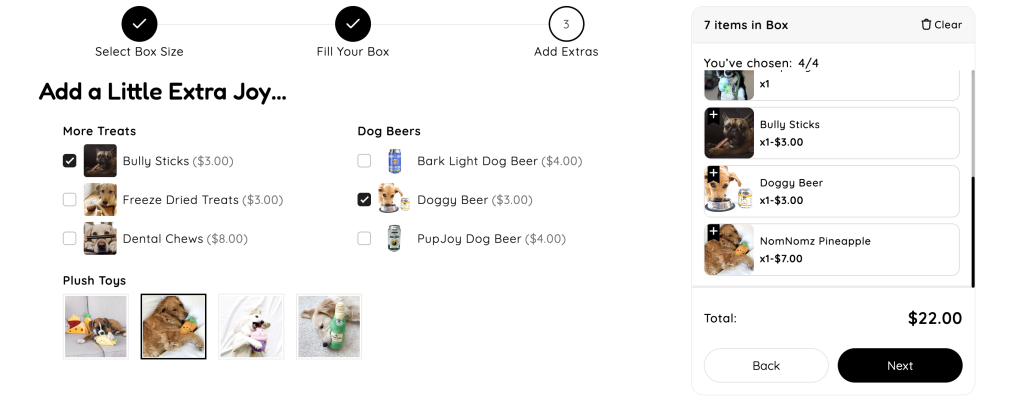
4. Add upsells after box selection #
Why: Once customers commit to a box, they’re in “shopping momentum”. Offering extras feels natural and adds incremental revenue.
Example: A pet shop offered “+1 surprise toy for $7” after customers filled a 6-item treat box. Over 25% of buyers clicked yes — pure profit, no extra acquisition cost.
👉 Use Easify’s Custom fields and add-on product feature to layer revenue on top of your box sizes. Demo:
5. Test & optimize using real data #
Why: The ideal box size and pricing strategy isn’t based on guesswork — it’s uncovered through testing and tracking customer behavior.
Example test ideas:
- Compare 3 vs. 4 size tiers: Does offering an extra option increase sales or cause confusion?
- Experiment with different price gaps: For example, $40 → $54 vs. $40 → $50. Which balance drives more upgrades?
- Rotate the “Most Popular” badge: See how highlighting different options influences customer choices.
👉 For now, you can test these manually by running each setup during a specific time period and measuring the results.
In the future, Easify will include a built-in A/B testing feature to make this process easier and more precise — stay tuned! If you’d like to see this feature released sooner, please share your ideas and requests with us. Your feedback helps us shape Easify to match your real needs.
Final takeaway #
Predefined Box Sizes aren’t just a way to bundle — they’re a profit strategy backed by consumer psychology:
- Customers feel in control (they choose the size).
- You control margins (fixed box pricing).
- Anchoring, badges, and upsells subtly nudge them toward bigger baskets.
✅ When applied well, this box type transforms average orders into high-value, repeatable sales — perfect for any Shopify store that thrives on volume, variety, or gifting.
💬 Need Help? # #
Questions? Stuck somewhere?
We’re always here to help! Just reach out via our in-app live chat for 24/7 support.