After finishing your setup, please go through this checklist to confirm that everything is functioning exactly as intended. This ensures your options and prices are displayed correctly across your store, providing a smooth experience for both you and your customers.
Here are the list that you need to carefully check after setup options with Easify Product Options:
- Option Visibility
- Visual Appearance
- Cart & Checkout Test
- Order Detail
- Notifications
- Packing Slips
Let’s follow the detailed guide below to complete your setup review!
1. Option Visibility #
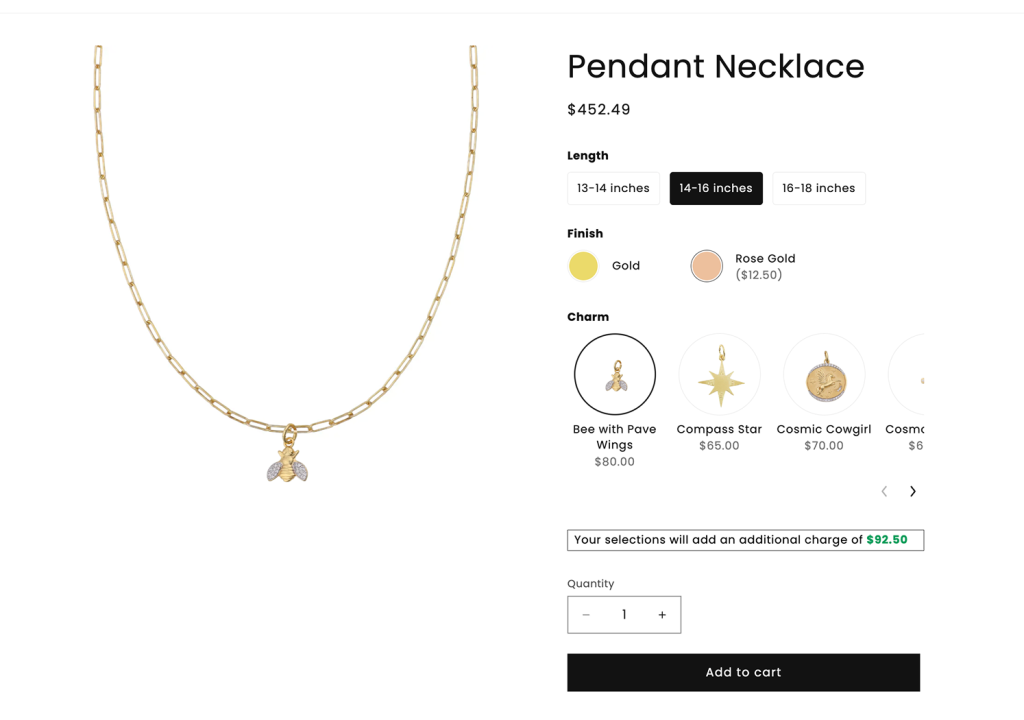
This checklist ensures that your options are correctly displayed on your product pages and visible to your customers.
Go to your online store and open your product pages. Verify that all configured options are appearing as expected and that no options are missing.
Common Issue: Options are not showing up on the product page.
Possible Causes & Solutions:
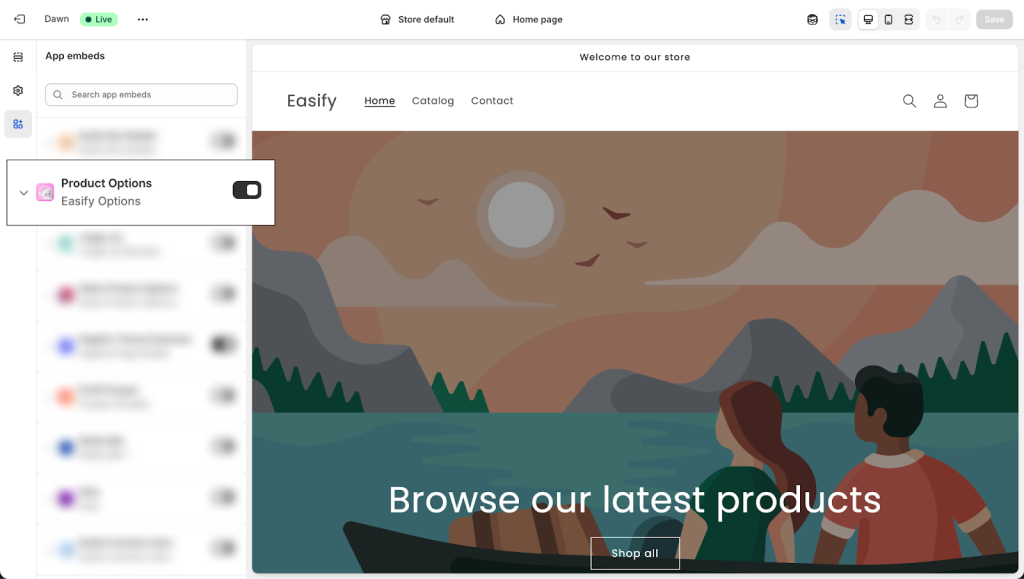
- App not activated in theme: Go to your Theme Editor > App embeds and ensure Easify Product Options is toggled ON.
- Option Set not assigned: Double-check your Option Set settings in the app to confirm it is correctly assigned to the specific product(s) you are testing.

- App or Theme conflicts:
If you have already checked the above solutions and your option set is still not appearing on the product page, it is possible that there might be a conflict between the app and your theme, or you have installed and enabled multiple product options apps simultaneously, or there is a conflict with another existing app in your store.
Please contact our 24/7 Live Chat so we can look into this and fix it for you!
2. Visual Appearance #
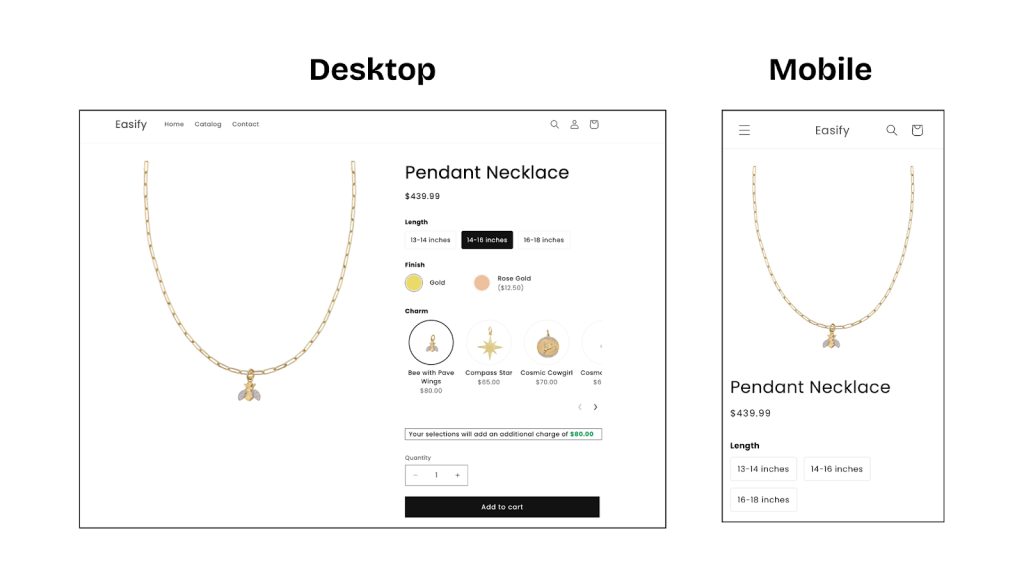
Use this checklist to make sure your options look professional and perfectly match your store’s branding on any device.
How to check: View your product page on both desktop and mobile. Verify that the layout is clean, the text is easy to read, and the design is consistent with your brand.
Common Issues, Causes & Solutions:
- The layout is broken or shows display glitches:
- Cause: Technical conflicts between the app and your theme.
- Solution: Please contact our Live Chat immediately. Our developers will jump in to fix the display issues to ensure the app works perfectly with your theme.
- The options do not match your store’s brand/design:
- Cause: The default styling needs to be customized to fit your specific brand identity.
- Solution: Self-Customize: Go to the app’s Settings > Option Design. Here you can fully customize fonts, colors, sizes for buttons, swatches, radio buttons, and more.
Extra Help: If you need an advanced custom look that isn’t available in the settings, reach out to our Live Chat to see how we can assist you with custom styling.
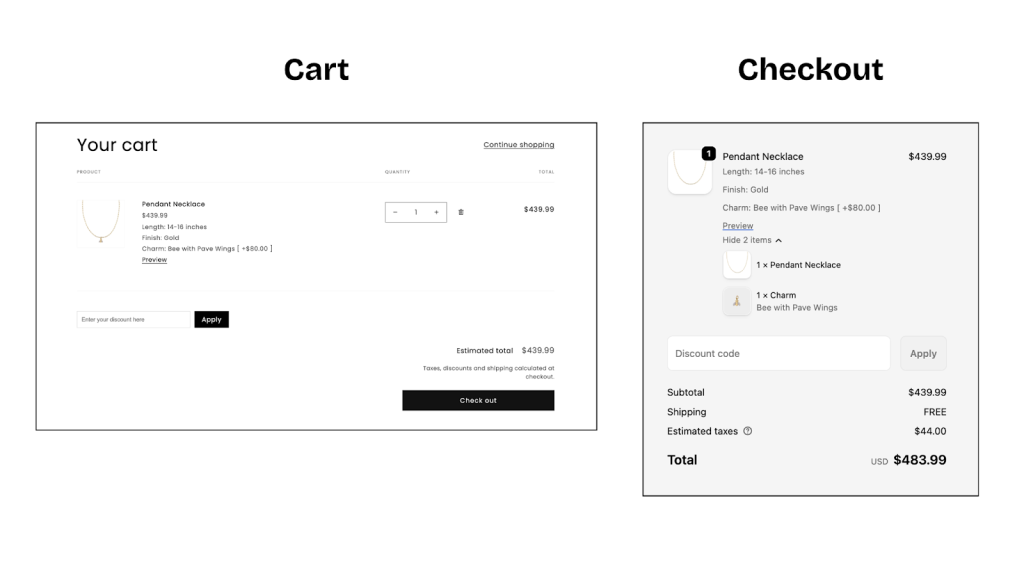
3. Cart & Checkout Test: #
This step is to verify that all selected options and extra costs show up correctly for your customers during checkout.
How to check: Run a test purchase by adding products to your cart. To verify the process without being charged, you can:
- Follow Shopify’s guide on placing a test order.
- Use a 100% OFF discount code.
- Place a real order and refund it later to test the actual payment process.
Proceed to the Cart and Checkout pages to verify that every selected option is clearly listed and that the final total is accurate.
Common Issue: Add-on prices are not calculated or added to the total cost.
Possible Causes & Solutions:
- Inactive Add-on Products: Ensure all associated products used for your Add-on Product feature are set to Active in your Shopify Online Store. If they are in “Draft”, the extra charges will not function.

- App or Theme Conflicts: Other apps (discounts, cart drawers, booking) or your Shopify theme might be blocking the app’s price calculation. Check for overlapping apps, and if the issue persists, contact us via Live Chat for a technical investigation.
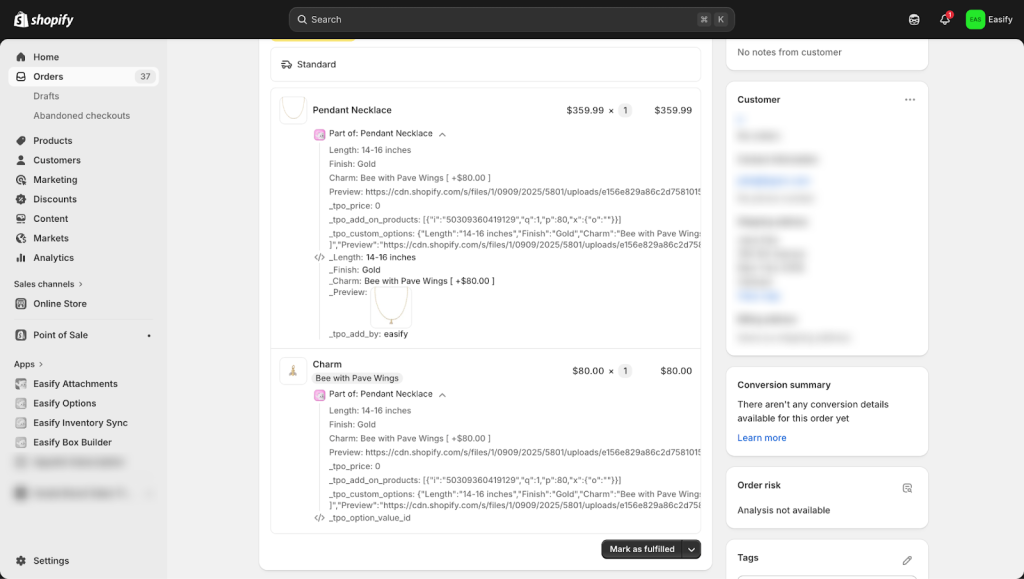
4. Order Details #
Confirm that all customer choices are accurately captured in your Shopify Admin, so you have everything you need to fulfill orders correctly.
How to check: After completing your test checkout, go to Shopify Admin > Orders and open the order you just placed. Check the order information to confirm that every selected option is listed correctly.
Common Issue: Selected options are missing from the order in Shopify Admin.
Cause: A technical conflict with another app might stop your option data from being sent to the Shopify order.
Solution: If your options appear in the Cart and Checkout but disappear once the order is placed, please contact our Live Chat immediately. Our developers will investigate the data flow and ensure your orders record all details accurately.
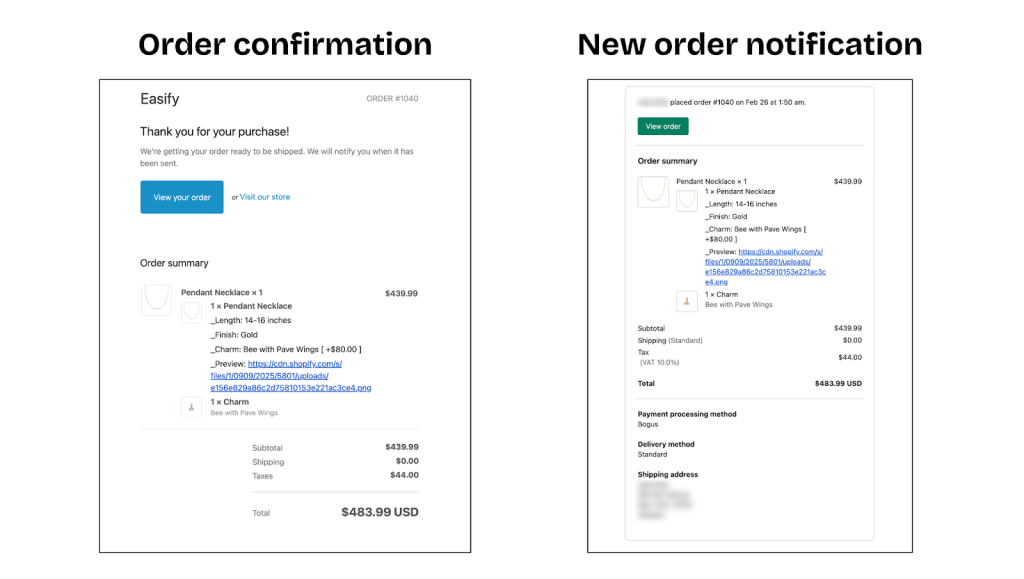
5. Notifications #
Checking this helps confirm that all option details and add-on prices are included in the automated emails for both you and your buyers. Review your Order Confirmation email (sent to customers) and the New Order Notification email (sent to your team) to verify that all option details are visible.
How to set up:
By default, Shopify email templates will NOT show Easify options. You must manually add a code snippet to your templates to make them visible. Please follow these guides:
🚨Important note: If you use custom email templates or 3rd-party email apps, your options and add-on prices might not show up automatically. In this case, please contact our Live Chat so we can assist you with the integration.
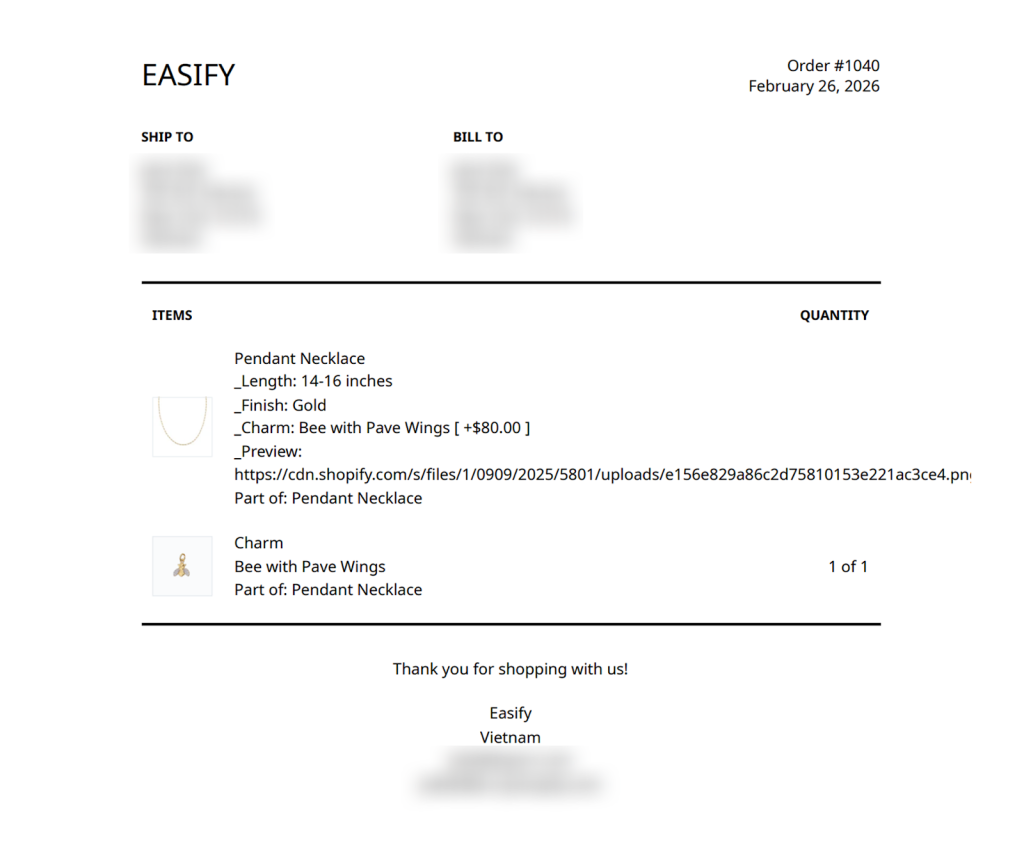
6. Packing Slips #
This part makes sure all custom options appear clearly on your packing slips, helping your team pack orders without any mistakes.
How to check: Go to Shopify Admin > Orders, select your test order, and click Print > Packing slip. Verify that all selected options are listed clearly.
You must manually add a code snippet to your packing slip template to make the options visible. Please follow our detailed guide here: Show Options on Packing Slips.