Easify Inventory Sync always synchronizes inventory one-way, from the Source Store → Destination Store.
The only difference between the sync modes is what happens when the Destination Store receives a new order:
- No order is created in the Source Store
- A Draft order is created in the Source Store
- An Actual order is created in the Source Store
This guide explains each mode and when each is most suitable.
Source Store Setup #
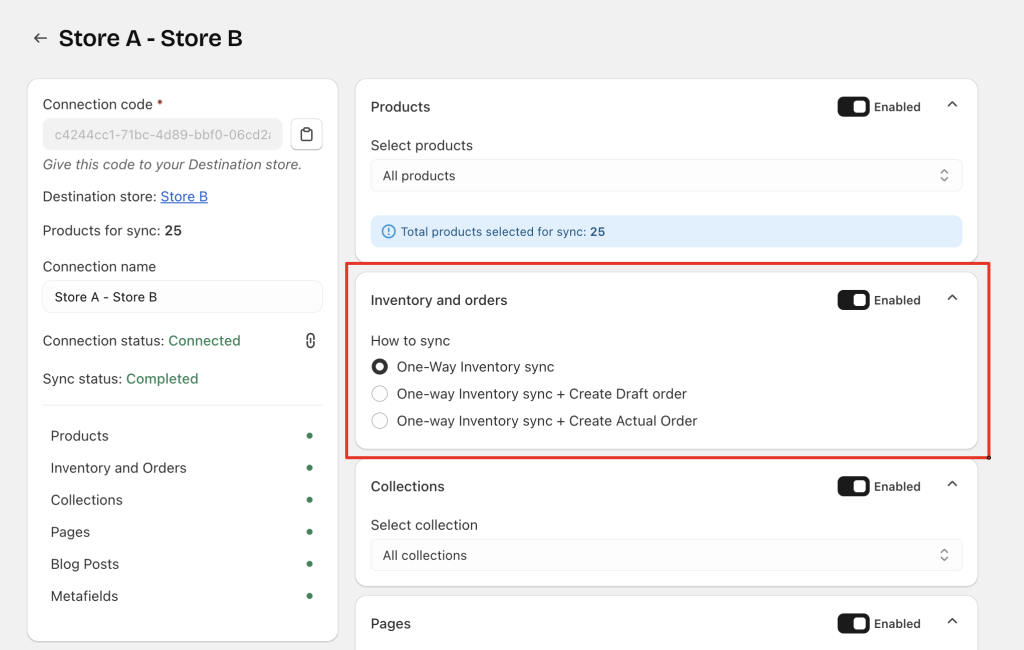
The Source Store controls how inventory and optional order syncing behave.
You can choose between 3 modes:
- One-way Inventory sync
- One-way Inventory sync + Create Draft order
- One-way Inventory sync + Create Actual Order
Each mode is explained below.
1. One-way Inventory sync (Source → Destination) #
What it does
- All inventory updates flow only from the Source Store to the Destination Store.
- Inventory changes in the Destination Store do not sync back and do not affect the Source Store.
- The Source Store remains the single source of truth for all stock levels.
Typical use cases
- A business operating 1 central warehouse and several regional storefronts.
- Brands that manage stock only in one place but sell through multiple online stores.
- Multi-brand companies that want separate stores but unified inventory control.
Example
If the Source Store decreases from 50 → 40 units, the Destination Store updates to 40 automatically.
If inventory is edited manually in the Destination Store, it is not reflected in the Source Store.
2. One-way Inventory sync (Source → Destination) + Create Draft Order (Destination → Source) #
What it does
When a Destination Store receives an order for synced products:
- A Draft Order is created in the Source Store.
- Inventory continues syncing one-way (Source → Destination).
- The Source Store can review and convert the draft order before fulfillment.
Typical use cases
- Multiple storefronts but all fulfillment handled by one central warehouse.
- Businesses needing a simple way to pull orders back into the Source Store without immediately creating final orders.
- Situations where order approval or manual review is required before shipping.
Example
“Store A” (Destination) receives an order for Product X
→ A Draft Order appears in “Main Warehouse Store” (Source).
→ Staff reviews the order and converts it into a real order before fulfillment.
3. One-way Inventory sync (Source → Destination) + Create Actual Order (Destination → Source) #
What it does
When the Destination Store receives an order:
- An Actual Order (not a draft) is automatically created in the Source Store.
- Inventory still flows one-way (Source → Destination).
- Fulfillment can start immediately from the Source Store with no manual steps.
Typical use cases
- Businesses that fulfill all orders from a single warehouse.
- Merchants requiring automated, immediate order creation in the Source Store.
- Stores using fulfillment apps, accounting apps, or automation that rely on full Shopify orders.
Example
An order is placed in “International Store” (Destination)
→ A full Shopify order appears instantly in “Main Warehouse Store” (Source)
→ Fulfillment is processed from the Source Store immediately.
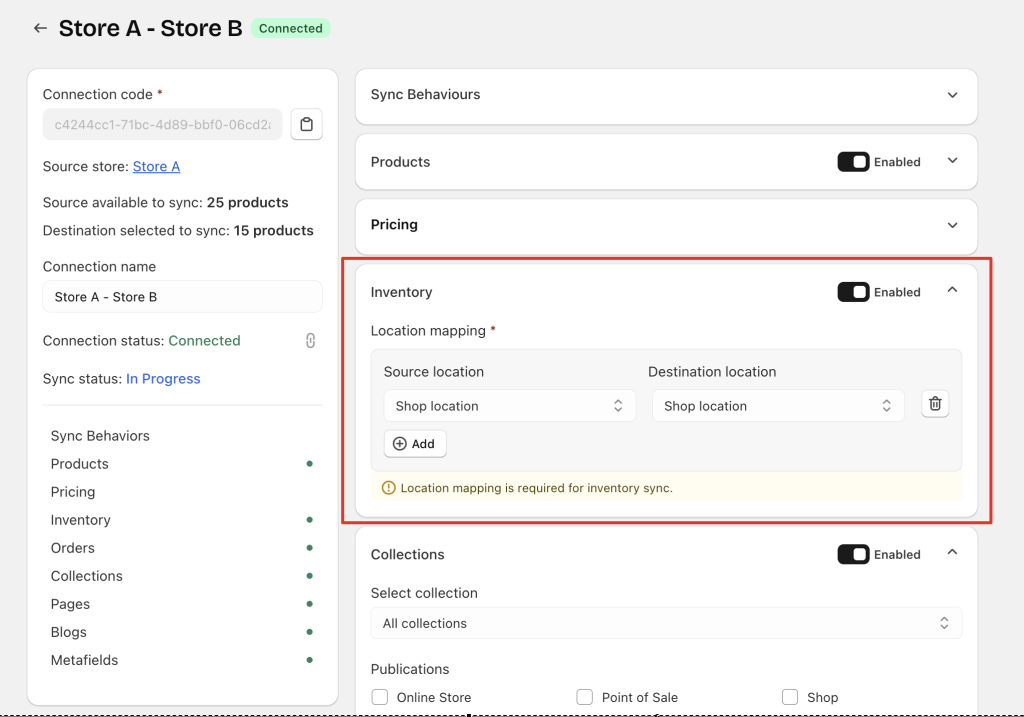
Destination Store Setup #
To ensure accurate inventory syncing, Location mapping must be configured.
Location Mapping Requirements
- 1 Source Store location must be mapped to 1 Destination Store location.
- Currently, each Source Store location can be mapped to only 1 Destination Store location.
- A single Source location cannot map to multiple Destination locations.
This prevents double-counting and ensures correct inventory distribution.
Quick Decision Summary #
Choose “One-way Inventory sync” if: #
- Each store fulfills its own orders
- Only inventory consistency is required
- No central fulfillment is needed
Choose “One-way Inventory sync + Create Draft order” if: #
- Central warehouse fulfillment is used
- Orders must be reviewed or modified before processing
- Teams need visibility but not full automation
Choose “One-way Inventory sync + Create Actual order” if: #
- All orders should be auto-routed to the Source Store for fulfillment
- Fully automated workflows are needed
- The Source Store handles logistics, shipping, and reporting
Important Notes #
1. Order updates do NOT sync back #
If “One-way Inventory Sync + Create Draft/Actual Order” is enabled:
- The app only syncs new orders from the Destination Store
- Updates such as refunds, edits, and fulfillment changes on the Destination Store do not sync back to the Source Store’s Draft or Actual order
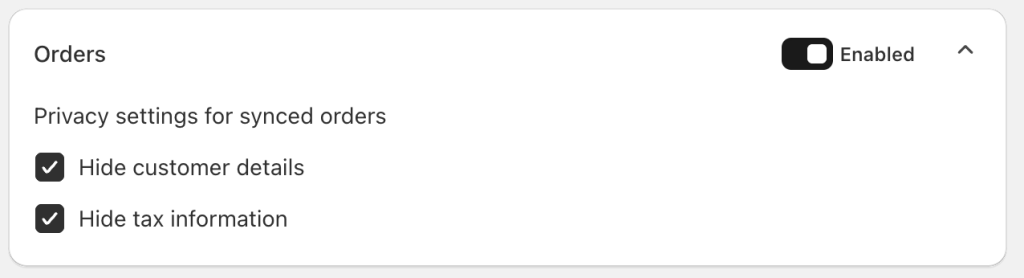
2. Destination can choose what info to include #
If order syncing is enabled, the Destination Store can choose to:
- Hide customer details
- Hide tax information
This affects what appears in the Draft or Actual order on the Source Store.
Need Assistance? #
If you run into any issues while syncing inventory or orders, our support team is always ready to help. Just message us through the 24/7 in-app live chat, we’ll assist you right away.