You’ve built a sophisticated, high-value box builder. Your customers are engaged, but there is a hidden friction point: The “Draft” Trap. Because building a custom box is an emotional and creative investment, shoppers often reach a “thinking point” mid-way through and decide to “come back to it.”
In the fast-paced world of Shopify, a Pause is almost always a Lost sale.
Customers get distracted by notifications, close their tabs, or simply lose the momentum of the creative process.

Unlike standard urgency tools that appear only at the last second, Easify Box Builder’s Countdown Timer is visible from the moment your visitor lands on the page. It acts as a Strategic Anchor, transforming a casual browsing session into a mission-driven purchase by defining the “Value Window” before the first item is even selected.
What is a Countdown Timer? #
It is a dynamic, real-time urgency engine integrated directly into your box-building interface. By appearing the moment the page loads, it establishes the “rules of engagement” for the shopping session. It signals to the customer that the premium experience they are about to curate -and the rewards that come with it – are time-sensitive.
- The Offer Guard: “Your 15% Bundle Discount is reserved for 09:52.”
- The Logistics Lead: “Order in the next 01:45:00 to ship your gift today!”
Instead of leaving the “When” up to the customer’s mood, the timer sets a professional boundary that encourages them to finalize their creation while the inspiration is still fresh.
Why an “Immediate-Start” Timer Scales Revenue #
1. Beat “Creative Procrastination” #
Building a custom box is a creative investment. However, high-effort tasks often lead to “decision fatigue,” causing shoppers to step away to “think about it”. An early-start timer sets a professional tempo from the first click. It tells the customer that their time is valuable and that finishing the task now is the most rewarding path.
2. Mastering “Loss Aversion” #
Behavioral economics teaches us that the fear of losing an existing benefit is twice as powerful as the joy of gaining a new one. By showing the timer immediately, you are essentially “handing” the customer a reward – like a bundle discount – and telling them exactly how long they have to keep it. The drive to protect that “earned” value ensures they follow through to the checkout.
3. Providing Service-Based Logic #
Modern shoppers ignore fake urgency, but they appreciate logistical transparency. A timer tied to a shipping cutoff or a flash sale isn’t a “sales tactic”, it’s helpful information. It shifts the timer from being a pressure tool to a high-end service feature, building trust in your brand’s operational excellence.
How to Set It Up in Easify Box Builder #
Ready to turn “drafts” into “deals”? Here is how to configure your countdown timer:
Step 1: Add A Countdown Banner #
In your Box layout tree, click “Add section”.
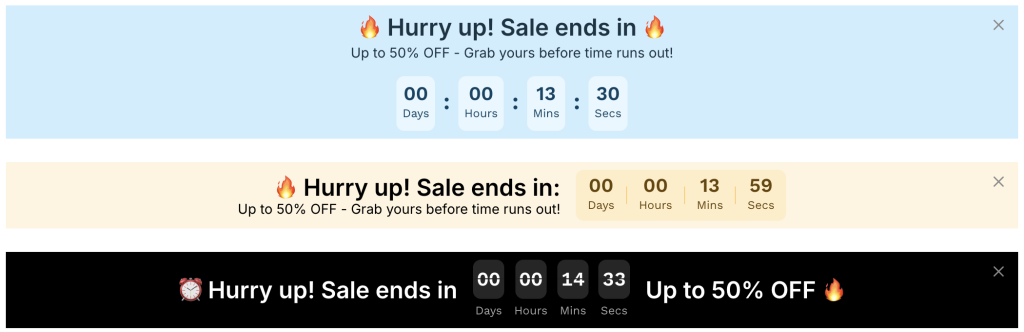
Under the “Countdown banners” category, select one of the 3 available layouts (Stacked/ Side by side/ Bar).
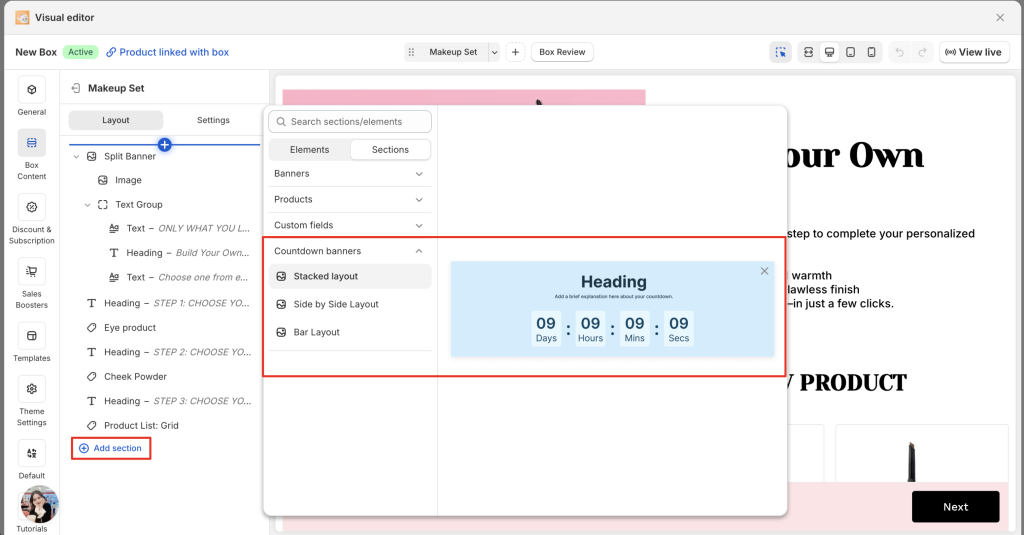
Notes:
- Each banner comes with pre-set text and a timer.
- Once added, you can drag and drop the section to your preferred position (typically at the very top or bottom of the page).
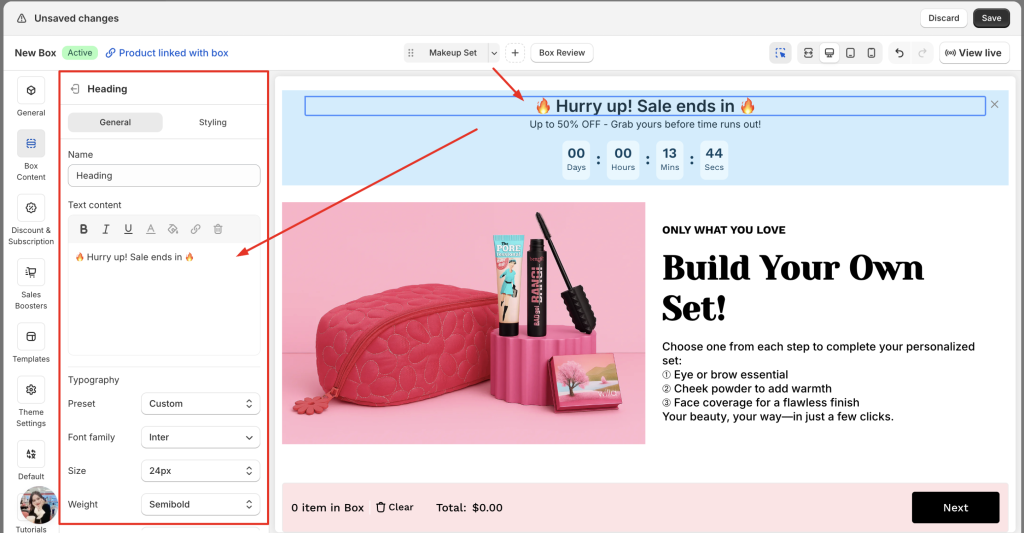
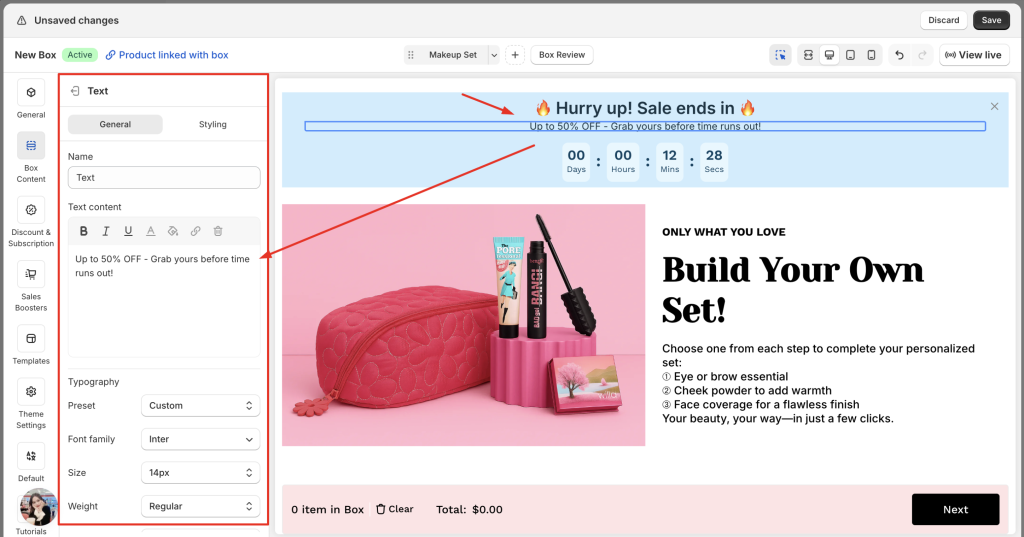
Step 2: Customize Your Messaging #
Click directly on each heading and text elements within the banner to edit the copy. Use this space to explain why the timer is ticking.
Step 3: Configure the Timer Logic #
Click on the Countdown Timer element to open the settings.
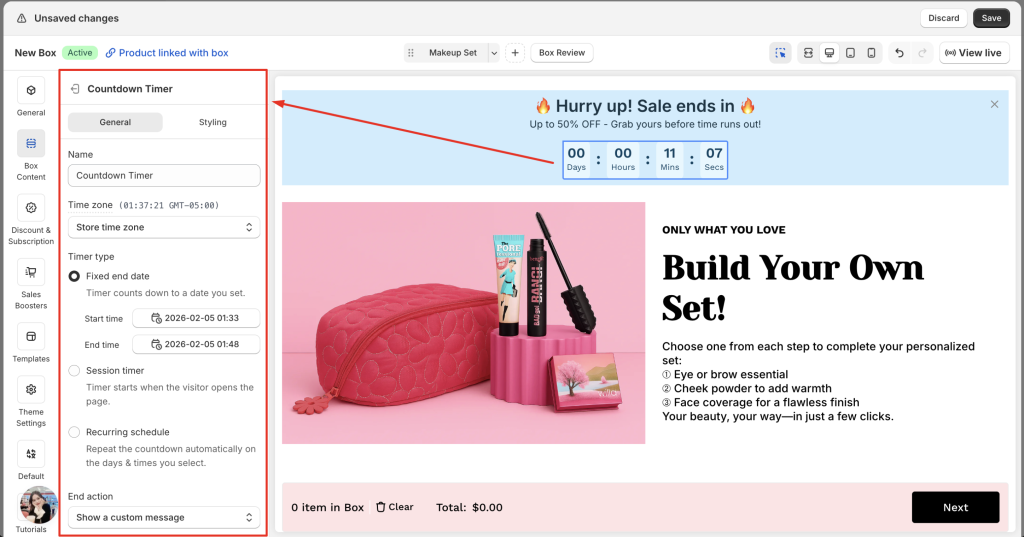
1. The General tab:
- Timezone: Choose between “Store time zone” (best for shipping cutoffs) or “Customer time zone” (best for localized flash sales).
- Timer type:
- Fixed End Date: Counts down to a specific date/time (e.g., Valentine’s Day at Midnight).
- Session Timer: Starts the clock the moment the visitor opens the page.
- Recurring Schedule: Automatically repeats on specific days and times (e.g., every weekday for a 2:00 PM shipping cutoff).
- End action: Decide what happens when time runs out (Hide the timer, show a custom “Expired” message, or do nothing).
- Time labels: Customize the text for Days, Hours, Mins, and Secs to match your language or brand style.
2) The Styling tab:
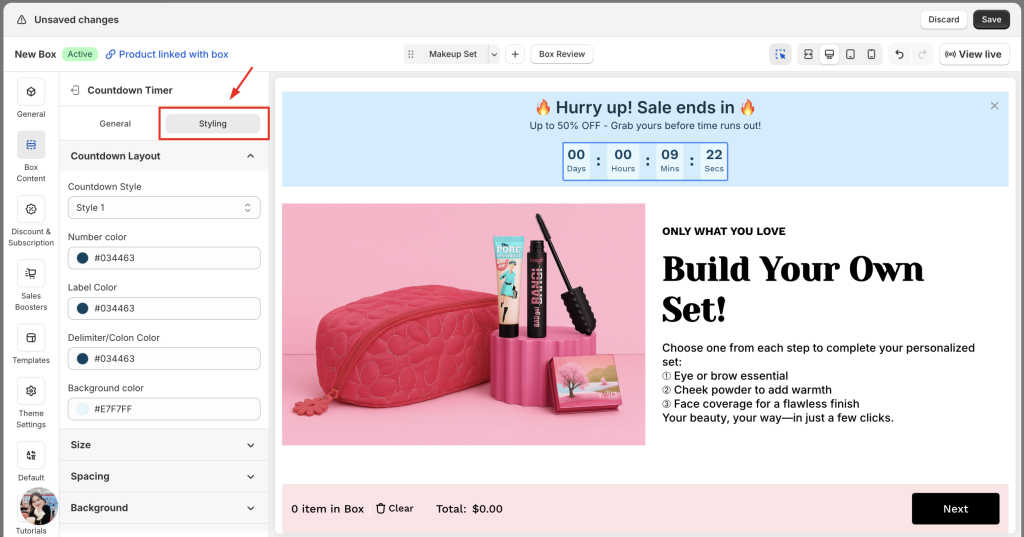
- Countdown style: Choose from 4 unique layouts. You can set specific colors for the numbers, labels, delimiters (the colons), and the background.
- Size & Spacing: Adjust the width, height, padding, and margins to ensure it fits perfectly within your layout.
Step 4: Save & Close the Sale #
Click Save. Your box builder now has a visual heartbeat that reminds every customer that the best time to buy is now.
Pro-Tips: Engineer a High-Conversion Session #
1. Implement “Daily Cut-Off” Logic #
If you handle your own fulfillment, use the timer to highlight your operational speed.
- The Tactic: Set the timer to count down to your daily shipping pickup (e.g., 2:00 PM). Use a message like: “Order in the next {timer} to have your gift shipped out TODAY.”
- Why it works: This is the most “honest” form of urgency. It provides a real-world reason for the customer to stop procrastinating, as waiting literally delays the arrival of their gift.
2. A/B Test Your “Urgency Color” #
The color of your timer shouldn’t just match your brand; it should stand out.
- The Tactic: If your store is primarily blue and white, try a soft coral or a muted gold for the timer digits.
- The Logic: You want the timer to be a “visual interrupt”. It needs to be the one element on the page that looks different, drawing the eye back to the deadline every time the customer gets distracted by a product description.