Conditional Logic allows you to create dynamic product flows that adapt to each shopper’s choices. Instead of displaying the same options to everyone, you can set rules such as: “If the customer chooses X, then show Y.” This ensures that only the most relevant products and options are shown, creating a personalized and streamlined shopping experience for every customer.
👉 In this guide, we’ll walk you through the best practices to keep your Conditional Logic clear, efficient, and customer‑friendly.
If you’d prefer a broader overview and want to explore real‑world use cases, check out our Overview Guide to Conditional Logic.
Or, follow this step‑by‑step guide to learn how to set up Conditional Logic.
Combine with Default Selected Products/Option #
You can set certain products or options to be pre‑selected by default.
This is especially useful when your conditional logic depends on product lists. By adding defaults, you make sure that some steps appear right away — without requiring customers to manually add those products first.
Example:
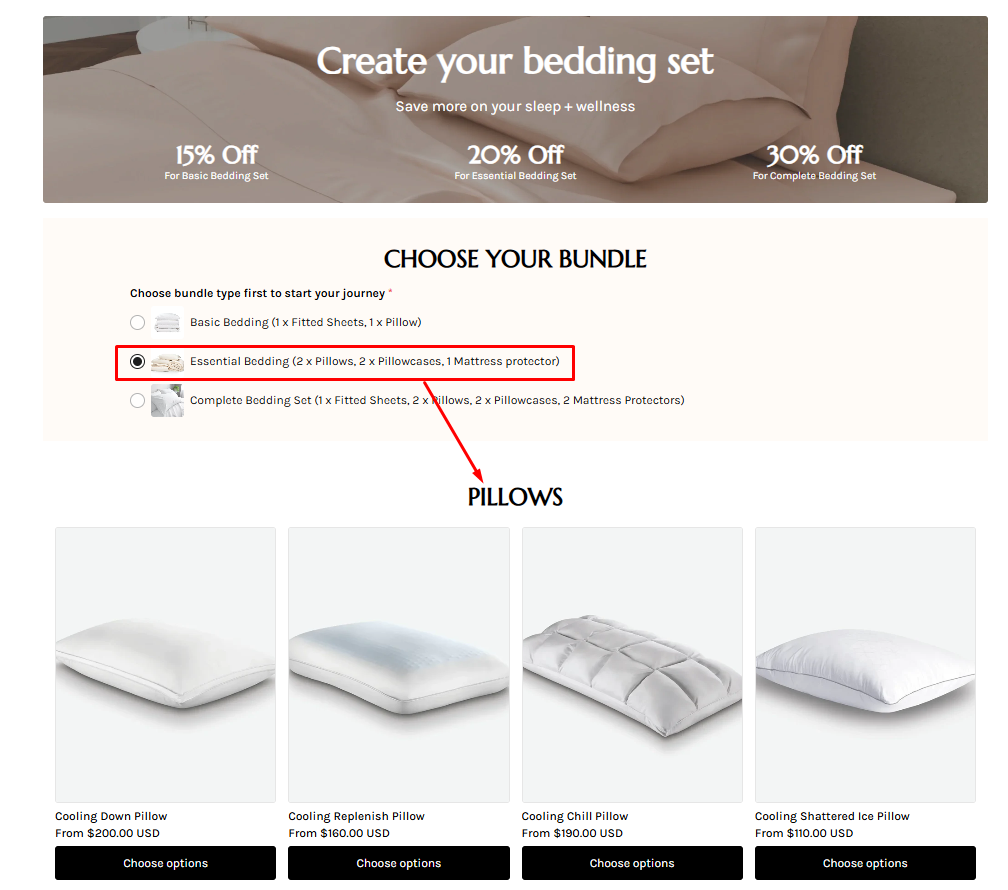
- Suppose you want the step “Choose 2 Pillows” to show only when a customer choose the Essential Bed Sheet Bundle option. If you set the Essential Bed Sheet Bundle as a default selected option, “Choose 2 Pillows” will appear right from the start.
Set up default values #
Default values of custom fields:
- Go to Box Content and open the option you want to configure
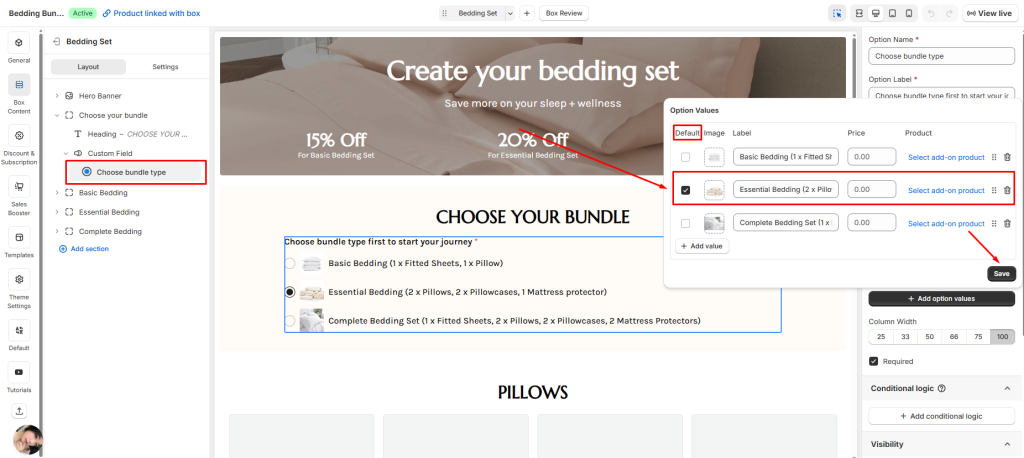
- Click at Add option values to open the list of all values
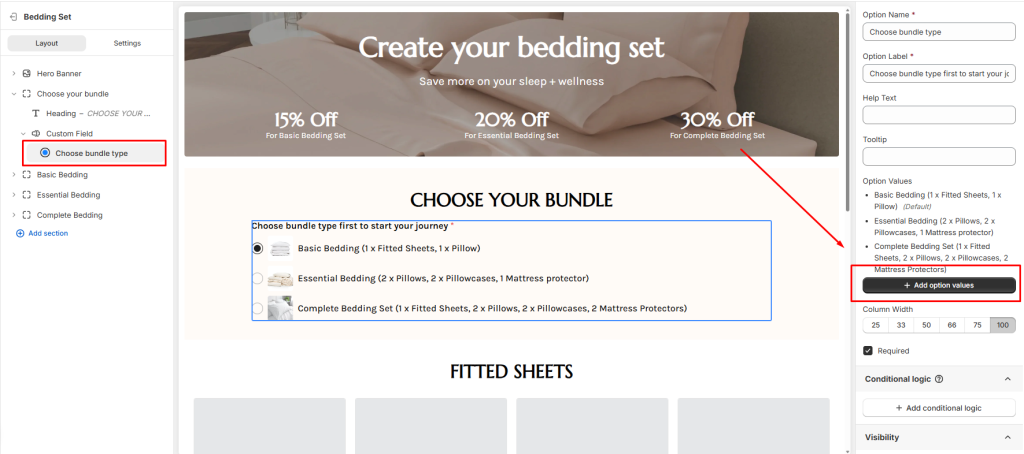
- Find the one you want to make the default
- Select the default option by ticking the box
Default values of product lists
- Go to Box Content and open the product list you want to configure
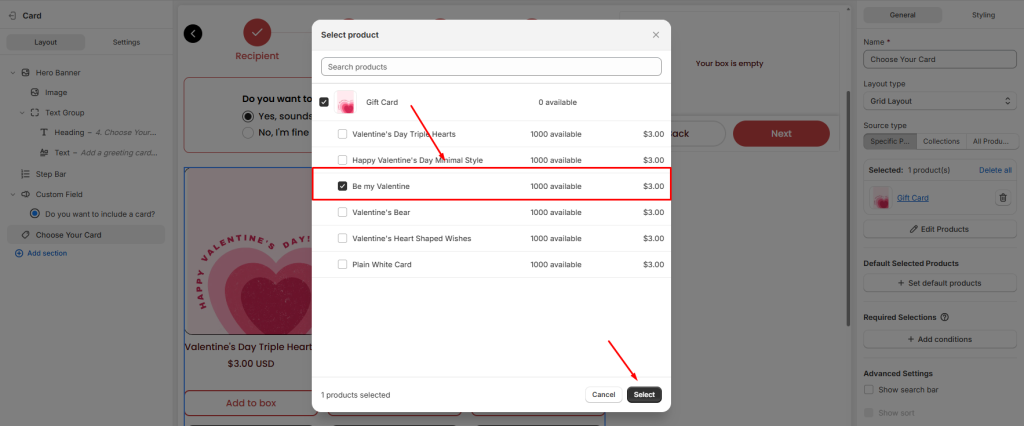
- Scroll down to Default Selected Products section
- Click at Set default products button

- Choose the products you want to automatically add as default and hit the Save button
Check out this step-by-step guide to Default Selected Products to learn more if you want!
Combine with Required Selections #
Conditional Logic works perfectly when combined with Required Selection rules. This allows you to control how many items customers must choose before moving on to another step.
Example:
Imagine you sell snack gift boxes in different sizes:
- Small Box (S) → requires 1 sweet snack + 1 salty snack
- Large Box (L) → requires 2 sweet snacks + 2 salty snacks.
To configure this, create separate product lists of sweet snacks and salty snacks for each box size (Small, Large), and assign unique conditional logic and required selection rules to each one.
From the customer’s perspective, the process feels simple and seamless:
- They only see one product list when building their box.
- When they choose a box size, the system quietly enforces the right rules in the background.
- If they pick a Small Box, the builder will lead them to the sweet snacks product list that requires 1 product, and salty snacks product list that requires 1 product.
- If they pick a Large Box, the builder will lead them to the sweet snacks product list that requires 2 product, and salty snacks product list that requires 2 product.

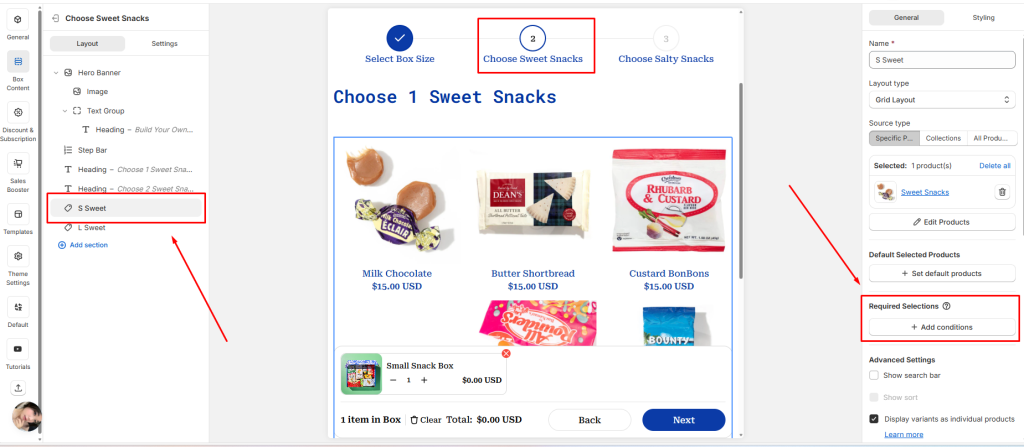
Set up Required Selections #
- From Box Content, go to the product list that need these required selections setup.
- In general, scroll down to Required Selection
- Click at Add conditions button.
- Requirements can be based on either:
- Quantity (number of products)
- Amount (total value of products)
- You can define conditions using:
- is equal to
- is greater than or equal to
- is less than or equal to
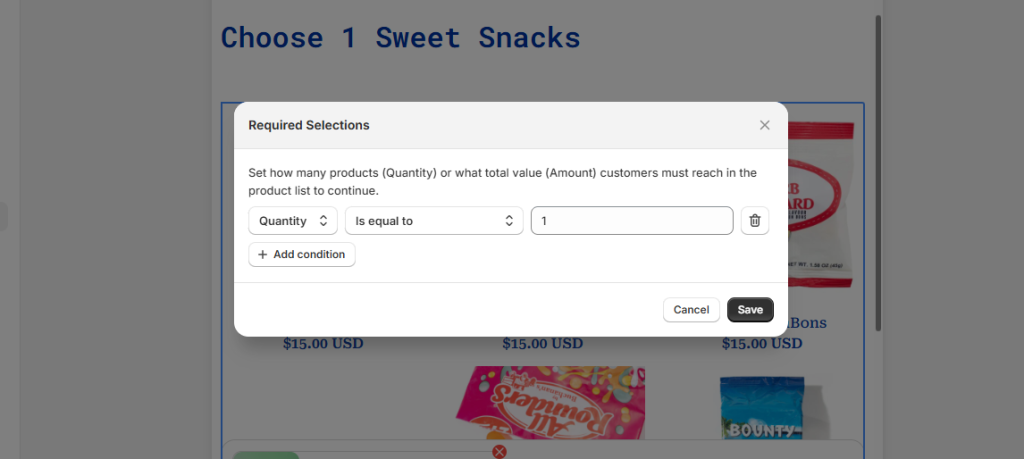
- If customers don’t meet the requirement, they’ll be prompted to add more before continuing.
Plan Before Building #
Before you begin creating your box builder, take time to map out the customer journey. A clear plan ensures that your setup is logical, efficient, and easy to maintain.
- Define the flow: Outline the steps a customer will take from start to finish.
- Identify decision points: Pinpoint where Conditional Logic should apply — for example, box size, personalization options, or product categories.
- Document your setup: Keep a record of your rules and structure so you can easily adjust or expand later.
By planning ahead, you’ll create a smoother experience for customers and save yourself time when updating or scaling your box builder.
Test Thoroughly #
As a final tip for you, remember to test it thoroughly before publishing the box!
- Test your builder on both desktop and mobile devices.
- Check that steps/groups/elements appear and disappear as expected.
- Double‑check that every branch of your conditional logic correctly shows or hides the right options.
Need Assistance? #
If you have questions or need assistance setting up conditional logic, don’t hesitate to reach out! Our support team is available via in-app live chat and ready to help you make the most of Easify Box Builder’s features.