The Easify’s custom option set widget is initially placed under Shopify variants on the product page by default. If you want to adjust its position, you can choose from 2 different approaches.
Approach 1: General Settings #
- Navigate to the app’s menu and select “Settings“.
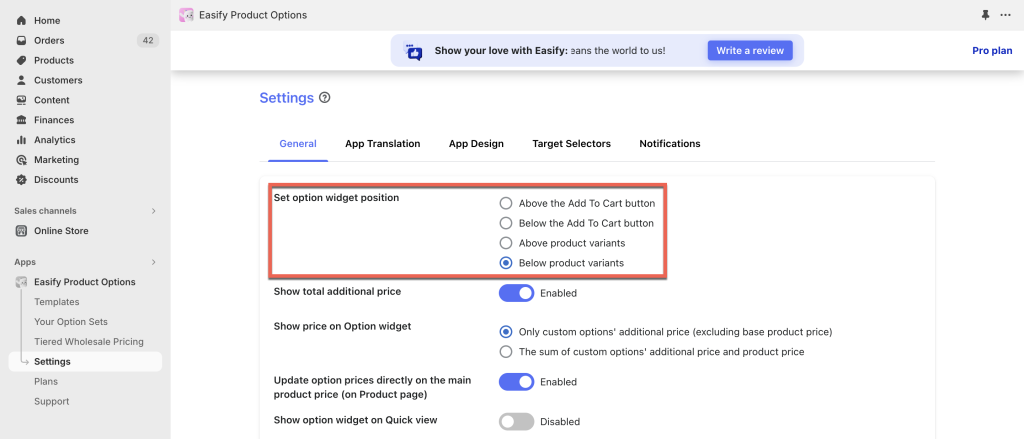
- On the General tab, find the option to set the position of the option set widget.
- Choose from 4 available positions: Above/Below the Add To Cart button, or Above/Below (Shopify) product variants.
- Once you’ve selected your preferred position, save the settings.
Approach 2: Theme Editor #
If the 4 available positions in Settings do not meet your requirements, follow these steps for further customization:
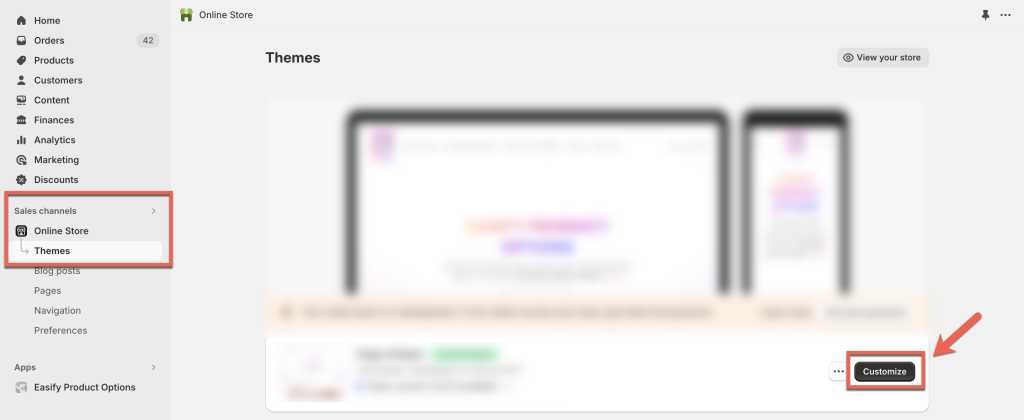
- Access the “Online Store” under “Sales Channels” in the store navigation menu to open the “Themes” page.
- Click the “Customize” button on your published theme to open the theme editor.
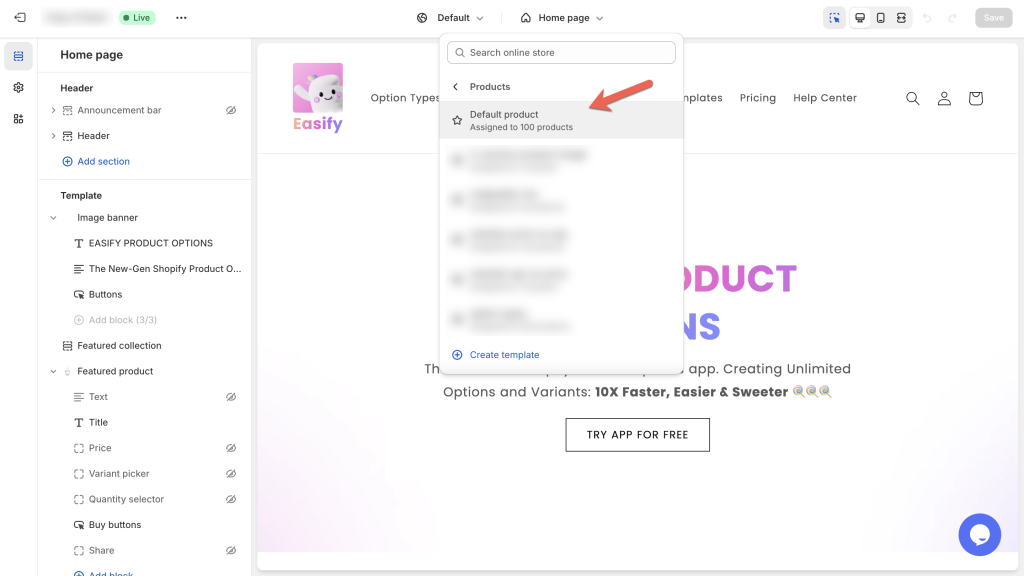
- Select the product template for the products containing the option set.
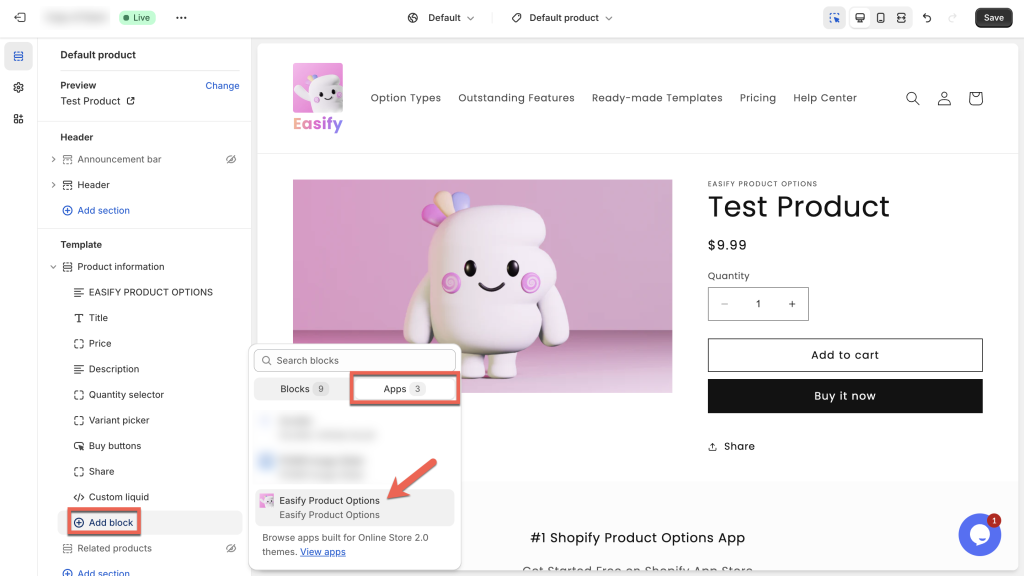
In the “Product Information” section, click “Add block“, choose the “Apps” tab, and select “Easify Product Options“.
Move the “Easify Product Options” block to your desired position within the “Product Information” section, e.g., under the “Quantity selector“.
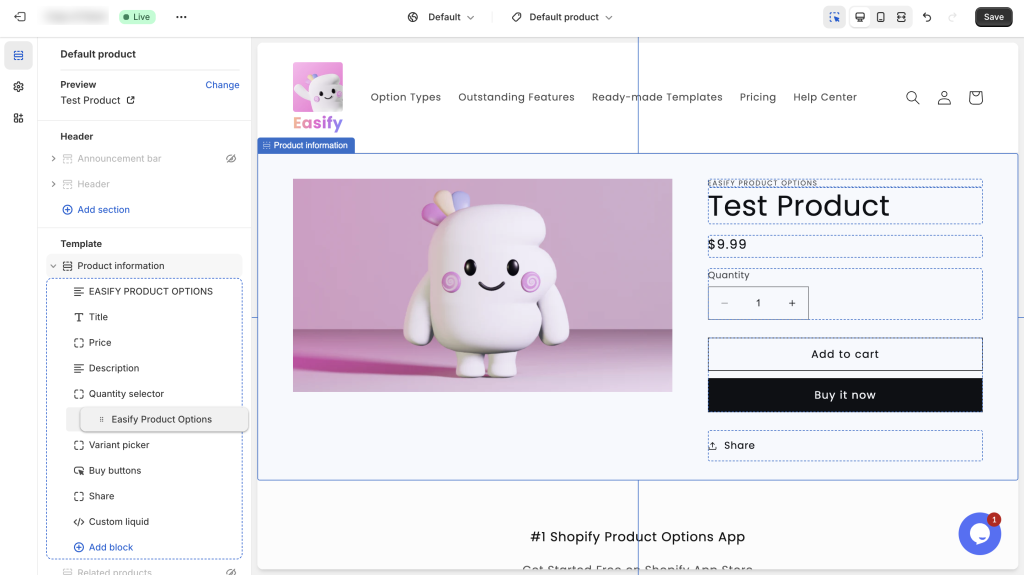
After setting the position, remember to click Save. Double-check the results on your storefront.
Notes: By default, the app adopts the position from the General Settings. If you customize the position in the theme editor, it takes precedence over the General Settings on the storefront.
Need Assistance? #
If you run into any challenges while adjusting Easify’s custom option set position, feel free to reach out to us for assistance through our convenient in-app live chat. We’re here to help!