- Source Store Setup
- Destination Store Setup
- Summary
- Need Assistance?
The Easify Inventory Sync app allows you to automatically sync products from your Source Store to your Destination Store. This includes:
- Updating products that already exist in the Destination Store
- Creating new products in the Destination Store if they don’t exist yet
This guide walks you through how to set up Product Sync for both stores and choose the right options for your setup.
Source Store Setup #
The Source Store decides which products are allowed to sync.
You can choose from 3 options:
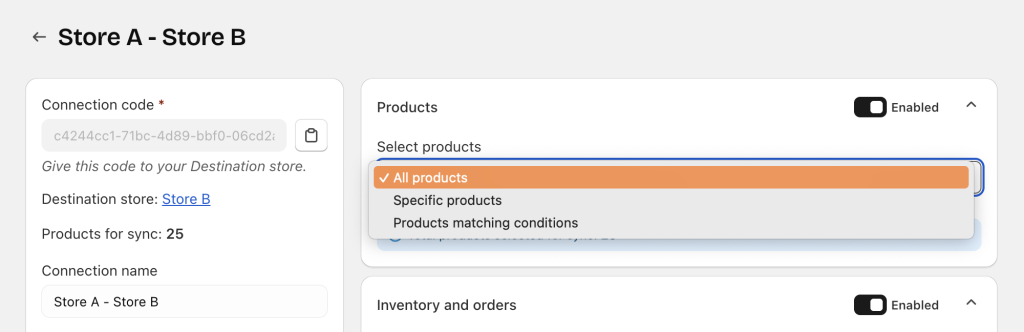
All products #
Every product in the Source Store is allowed to sync.
New products added to the Source Store also become available for sync automatically.
Best for: Stores that want identical catalogs.
Specific products #
You manually pick the products that are allowed to sync.
Only the selected products will be available in the Destination Store.
Best for: Stores that only want to share certain key products.
Products matching conditions #
Products are allowed to sync only if they meet your filter rules.
You can filter by:
- Title
- Price
- Vendor
- Type
- Tag
- Collection
Best for: Syncing only a specific category or product group.
Destination Store Setup #
The Destination store decides:
- Which allowed products to receive
- How to match products across stores
- Which fields to update
- How new products are created or existing ones are updated
- What happens when Source products are removed
1. Choose Sync Behavior (Important) #
This setting decides what happens when the Source product is found or not found in the Destination Store.
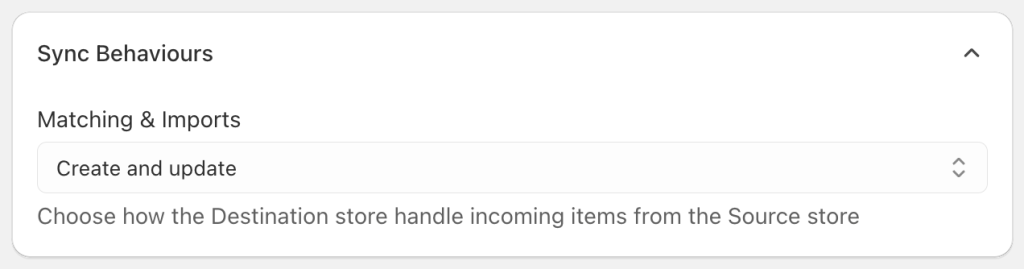
Create and update (recommended) #
- If a matching product exists → update it
- If it does not exist → create it
Best for:
- Fully automated syncing
- Keeping both stores matched
- New stores syncing for the first time
Update only #
- Update products that already exist
- No new products will be created
Best for:
- Stores that created their destination products manually
- Avoiding new items being added automatically
- Only updating fields like description, price, or images
Create only #
- Only create new products
- Does not update existing products
Best for:
- Preventing overwriting of existing product data
- Adding new products while keeping existing ones untouched
2. Choose Which Products to Receive #
Even if the Source store allows many products to sync, the Destination store can choose to sync:
All products #
Receive everything the Source Store allows.

Products matching conditions #
Apply your own filters to receive only certain products.
Example: Only syncing a vendor or collection.

3. Set the Identifier (Very Important) #
The Identifier is what the app uses to recognize that 2 products are the same in both stores.
Choose 1 identifier that is guaranteed to be unique:

- Handle
- SKU
- Barcode
Notes:
- The identifier must be unique per product
- Do not use an identifier that repeats across multiple products
- Duplicate identifiers may cause incorrect matching
4. Choose Sales Channels to Publish Synced Products #
Decide where synced products should appear once created:

- Online Store
- POS
- Other active sales channels
You can select one or multiple channels.
If you want the product synced but not visible yet, simply leave all channels unselected.
5. Choose Which Product & Variant Fields to Sync #
Destination store can control exactly which product information is updated.
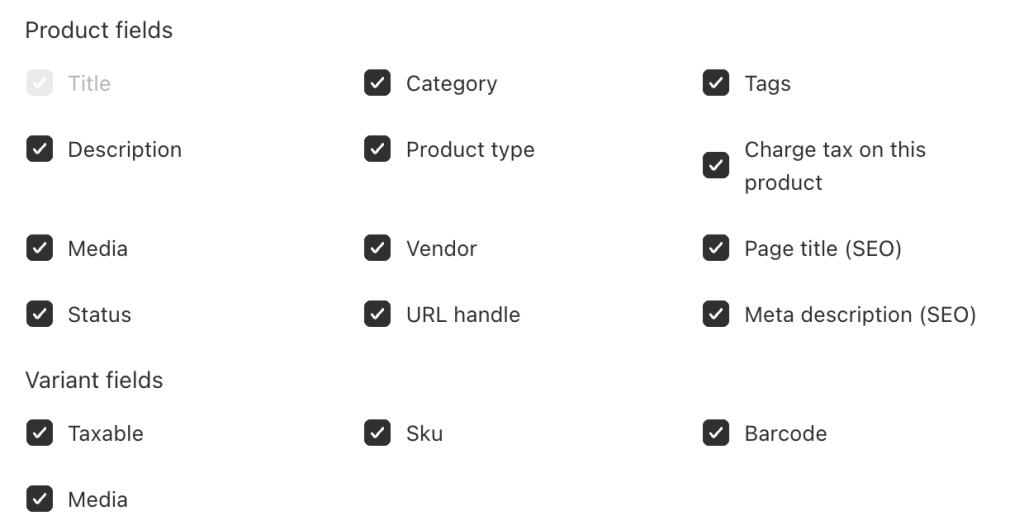
Product fields: #
- Title (required)
- Description
- Media
- Status
- Category
- Product type
- Vendor
- URL handle
- Tags
- Charge tax on this product
- Page title (SEO)
- Meta description (SEO)
Variant fields:
- Taxable
- SKU
- Media
- Barcode
Unselect fields if you prefer to manage them separately in the Destination Store.
6/ Choose Unlink behavior #
If a product is removed from the Source store or from Source store’s sync scope, decide what should happen to that product in the Destination Store:

No action (default) #
The product stays as-is in the Destination Store.
Best for:
- Keeping products even when removed from the Source
- Manually cleaning up old items
Unpublish #
The product is hidden from customers but remains in Shopify admin.
Best for:
- Stopping sales without deleting the product
- Keeping product data for records or future use
Delete #
The product is completely removed from the Destination Store.
Best for:
- Stores that must mirror the Source Store exactly
- Preventing outdated or unsynced products from remaining in the Destination Store
7/ Map Product Pricing from Source to Destination Store #
You can choose how product pricing is synced from the Source store to the Destination store.
This includes mapping Price, Compare at price, and Cost.
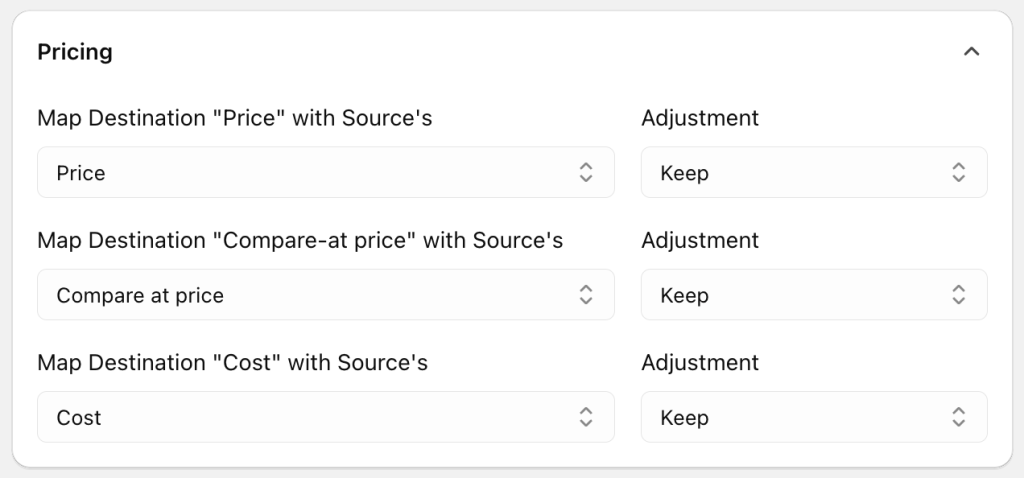
In addition to copying the price values, you can also adjust the price in the Destination store after syncing.
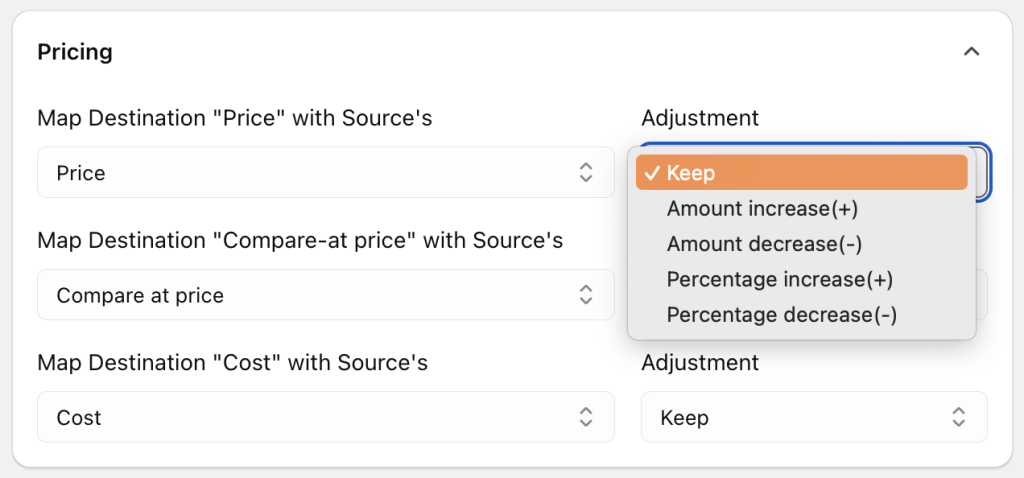
You can increase or decrease the synced price using one of 4 methods:
- Amount increase (+, $)
- Amount decrease (-, $)
- Percentage increase (+,%)
- Percentage decrease (-. %)
Example
If Product A in the Source store costs $10, and you set an adjustment of + $5, then the synced product in the Destination store will be $15.
This feature is useful when you need different pricing between stores, such as adding a markup for regional markets or reseller stores.
Summary #
- The Source Store decides which products are allowed to sync.
- The Destination Store decides which products to receive, how they match, which fields to sync, and what happens when products change or are removed.
With these options, you can support:
- Simple setups where both stores share the same catalog
- Advanced setups where each Destination Store receives only the products that match its purpose
Need Assistance? #
If you run into any challenges while syncing products, feel free to reach out to us for assistance through our convenient in-app 24/7 live chat. We’re here to help!