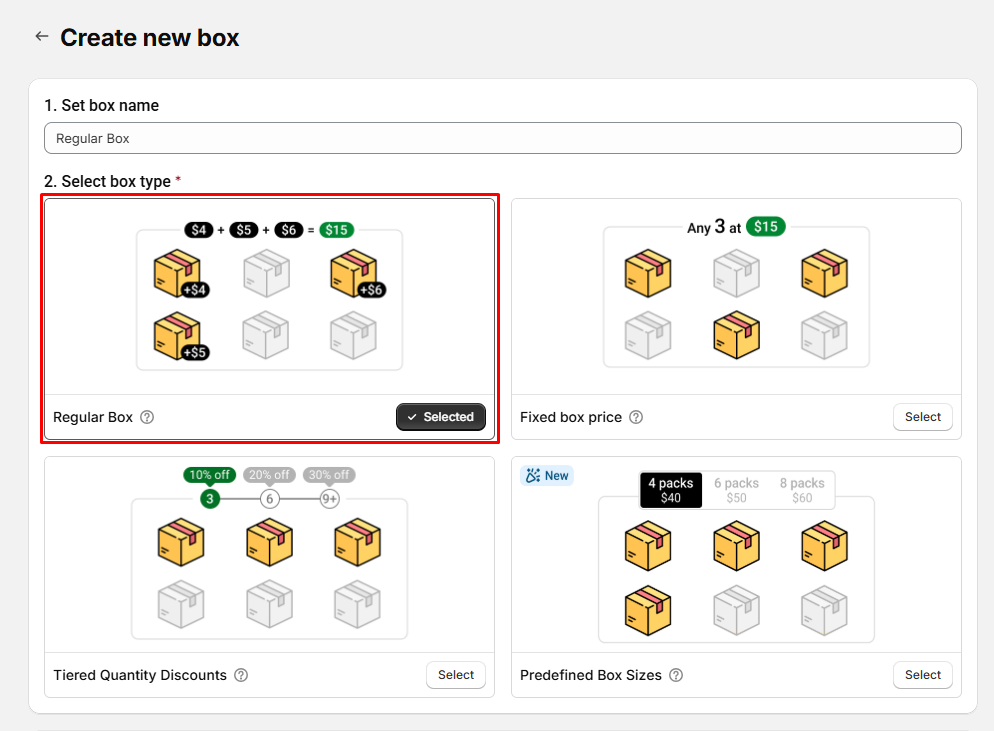
Give your shoppers the freedom to build their own bundle exactly the way they want. With a Regular Box, customers can mix and match any products from your store, and the total price is simply the sum of the individual product prices.
👉 To drive bigger Average Order Value, you can also set up optional discounts that reward customers for adding more items.
Example: Pick 3 items at $4, $5, and $6 → total = $15
Common Use Cases #
There are two main styles of Regular Box:
One-page box: Customers build their box on a single page — quick and straightforward.
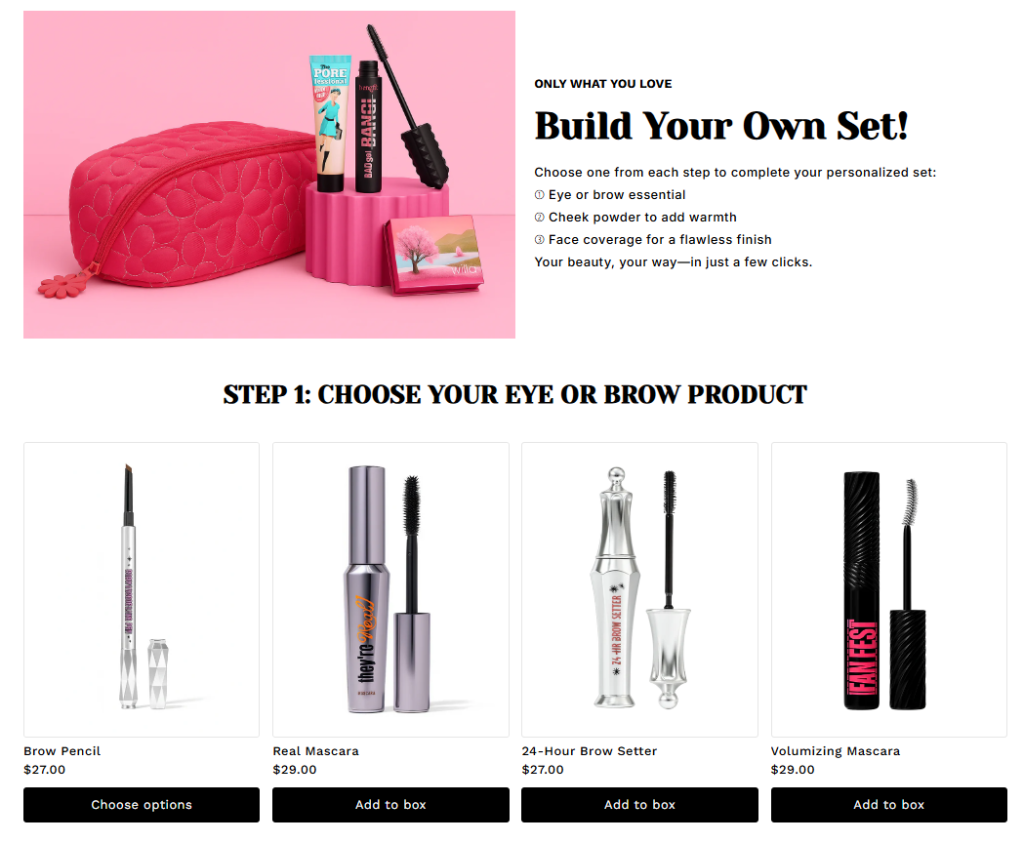
Example: Makeup Set
Choose one from each step to complete your personalized set:
➀ Eye or brow essential
➁ Cheek powder to add warmth
➂ Face coverage for a flawless finish
Multi‑page box: Customers move through multiple steps — perfect for larger or more complex bundles.
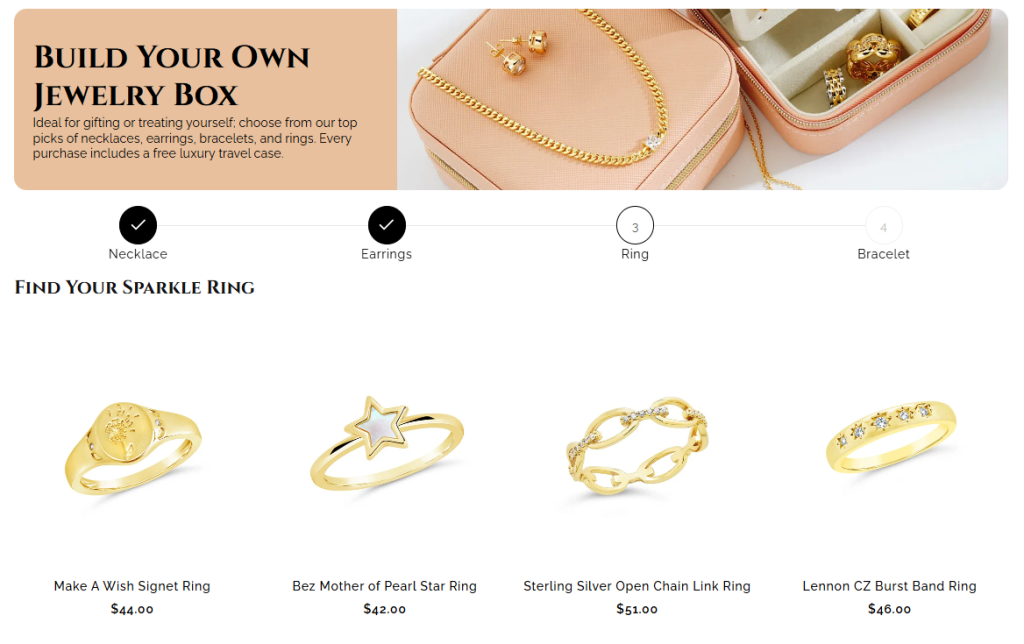
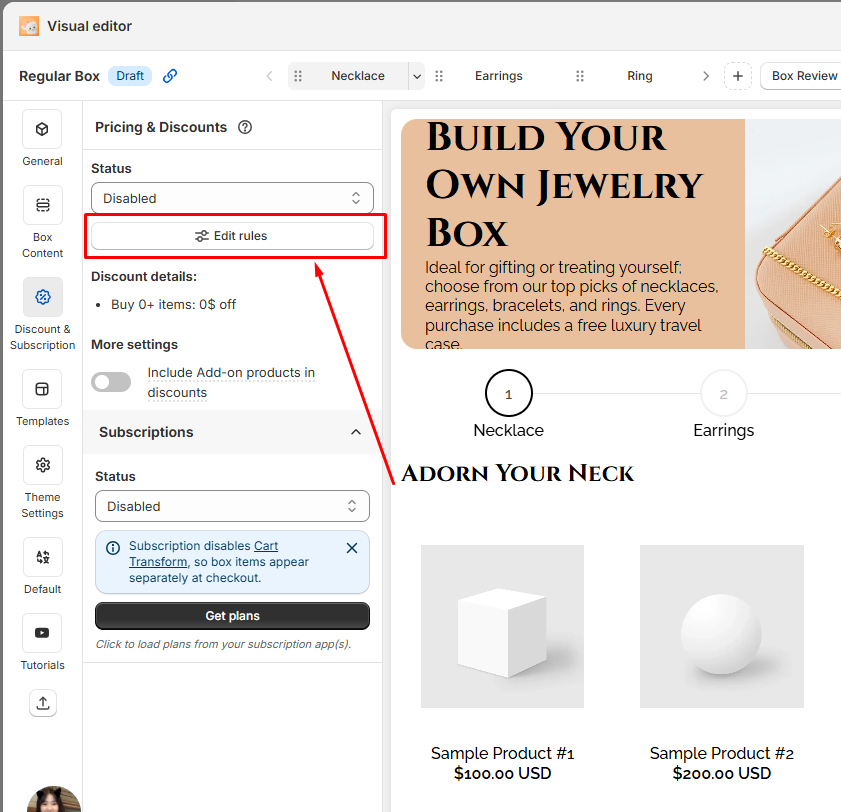
Example: Jewelry Set
- Ideal for gifting or treating yourself; choose from our top picks of necklaces, earrings, bracelets, and rings.
Here are some other demo templates you can explore for inspiration:
One-page Templates
Multi-page Templates
How to Create a Regular Box #
Step 1. Create a New Regular Box #
From the Easify Box Builder app admin, go to Box Management → Click the Create box button. Then:
- Enter your box name.
- Select box type: Regular Box
Step 2. Customize content in the Visual Editor #
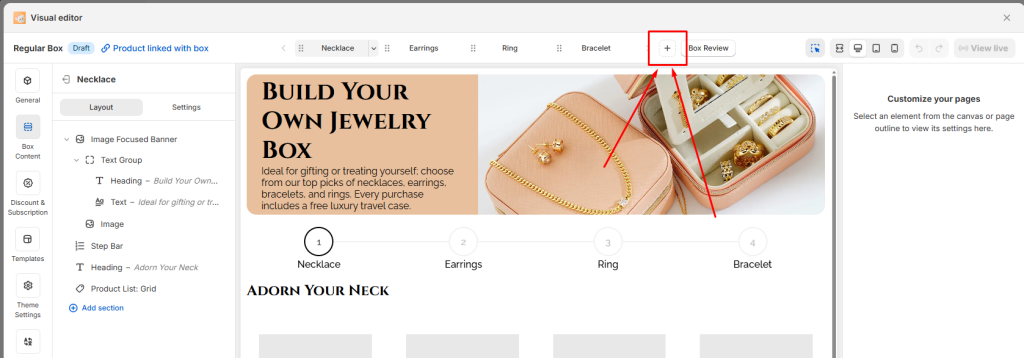
From the left menu, go to Box Content to edit your page.
- Click Add Sections to insert sections and elements (e.g., banners) and assign products to the box.
📝 Note: Customization in the Visual Editor is similar across all 4 box types. The difference lies in how discounts are applied.
- Regular Box
- Fixed Box Price
- Tiered Quantity Discounts
- Predefined Box Size
Below are the types of elements and section you can add in the Box Content.
| Group | Element/Section types |
| Basic | Heading Text Image |
| Layout | Group Divider Tabs Accordion Carousel |
| Banners | Hero Banner Split Banner Image Focused Banner Dual Image Banner |
| Products | Product List: Grid Product List: Tabs Product List: Accordion Product List: Carousel |
| Custom fields | Text Box Text Area Number Box Dropdown Radio Button Button File Upload Date Picker Time Picker Switch Checkbox Image Swatch |
👉 You can switch between Desktop, Tablet, and Mobile views and customize what appears in each. (This is not just a responsive preview — you decide the actual layout for each device)
You can also add new steps or multiple steps and configure the content for each step by clicking the Plus (+) button.
Step 3. Configure Discounts #
Even though a Regular Box calculates the total price purely as the sum of individual product prices, you still have the flexibility to add discounts. This is a powerful way to encourage customers to buy more items and increase your average order value.
👉 For example, you can set up tiered discounts such as:
- Buy 2 items → Get 10% off
- Buy 3 items → Get 15% off
- Buy 5 items → Get 20% off
How to Set up Discounts #
Step 1: In the Visual Editor, open the Discounts tab.
Step 2: Click at the Edit rules button
Step 3: Choose the discount type (percentage off or amount off).
Step 4: Define the rules — for example, “Buy X items → Get Y% off.”
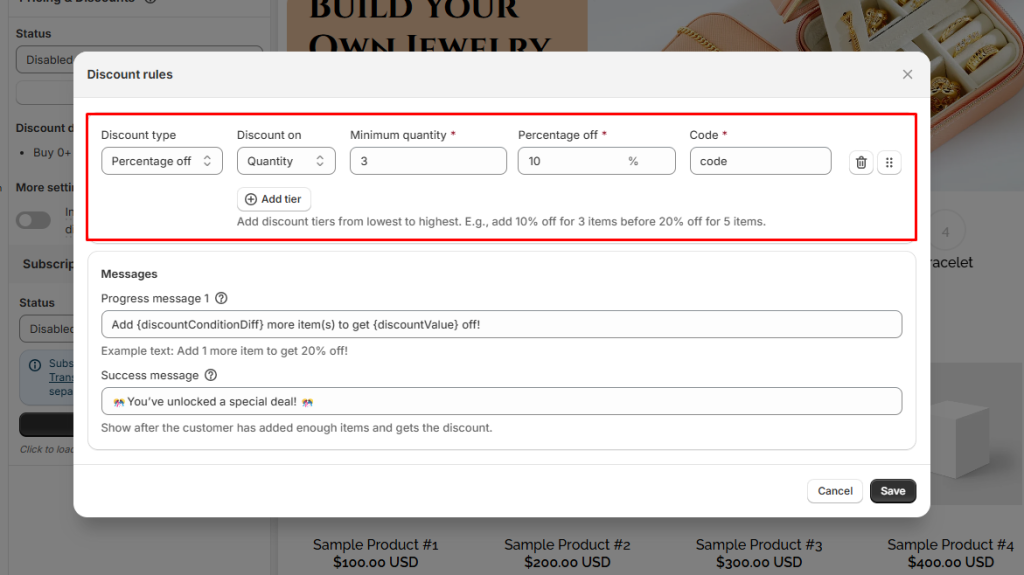
Step 5: Save your changes
👉 For a deeper dive into strategies and setup, check out our guide on Tiered Quantity Discounts.
Step 4. Refine the design #
From the left menu, go to Theme Settings to adjust page style.
Customize layout width, typography, product cards, step bar, colors, and more to match your store branding.
Step 5. Finalize and publish #
In the General tab, enable the box page.
- Save and publish to your storefront.
- Define the box page URL.
- Add a box image (displayed on the box review page, cart, and checkout).
Advanced Tips to Maximize Profits with Regular Box #
Bundle Complementary Products #
Why: Pairing complementary products and structuring the box experience thoughtfully creates a sense of completeness. Customers are more likely to add extra items when they see natural combinations or when the flow of the box feels easy to navigate.
Example:
- Coffee + Mug
- Skincare + Tote Bag
- Pet Food + Chew Toy
Use Tiered Discounts Strategically #
Why: Tiered discounts motivate customers to add more items to their box by rewarding larger purchases. Shoppers often aim for the next discount threshold because it feels like they’re getting more value for their money.
Example: A beauty store sets up tiered discounts:
- Buy 2 items → 10% off
- Buy 3 items → 15% off
- Buy 5 items → 20% off
👉 Most customers will add that extra item to reach the 3‑item tier, because it feels like the best balance of savings and product variety.
Optimize for Mobile Shoppers #
Why: A large portion of ecommerce traffic comes from mobile devices. If the box builder isn’t optimized for smaller screens, customers may abandon their purchase due to frustration.
Example: A snack subscription store configures its Regular Box with:
- Carousel layout for product lists (easy swiping on mobile)
- Simplified step navigation with clear buttons
- Mobile‑specific banners that fit smaller screens
👉 Customers browsing on their phones can quickly swipe through products and complete their box without endless scrolling, leading to higher conversion rates.
💬 Need Help? #
Questions? Stuck somewhere?
We’re always here to help! Just reach out via our in-app live chat for 24/7 support.