In this guide, we’ll walk you through the two available options for how items are displayed in checkout: grouped together or listed separately. Understanding these settings will help you decide which approach works best for your store and your customers.
What These Settings Mean #
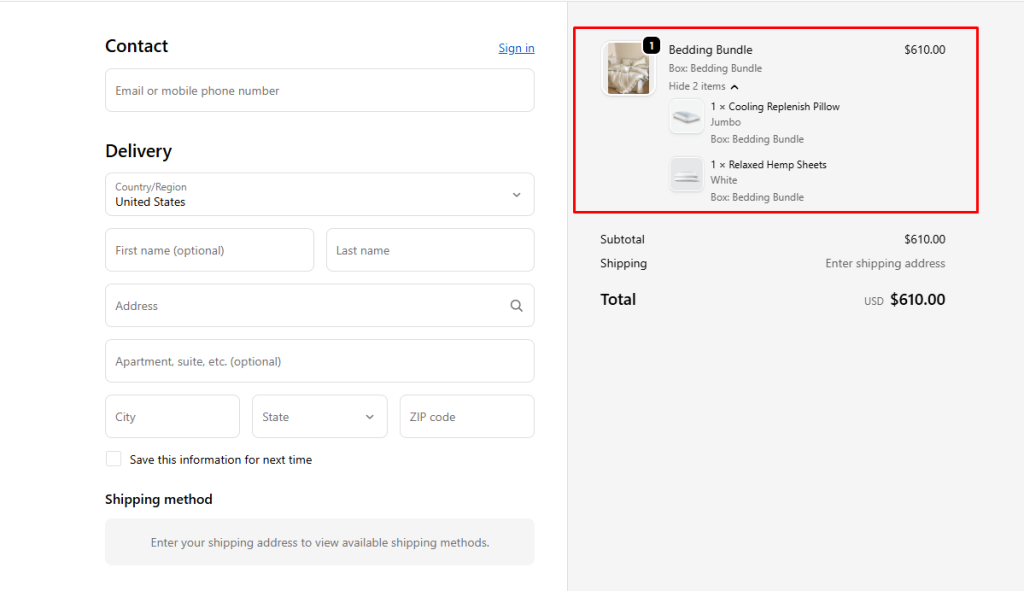
Cart Transform #
With Cart Transform, all bundled products are grouped into one main product at checkout. This makes it easy for customers to see the box as a single item, clearly distinguished from any other products they’ve added individually.
List Items Separately at Checkout #
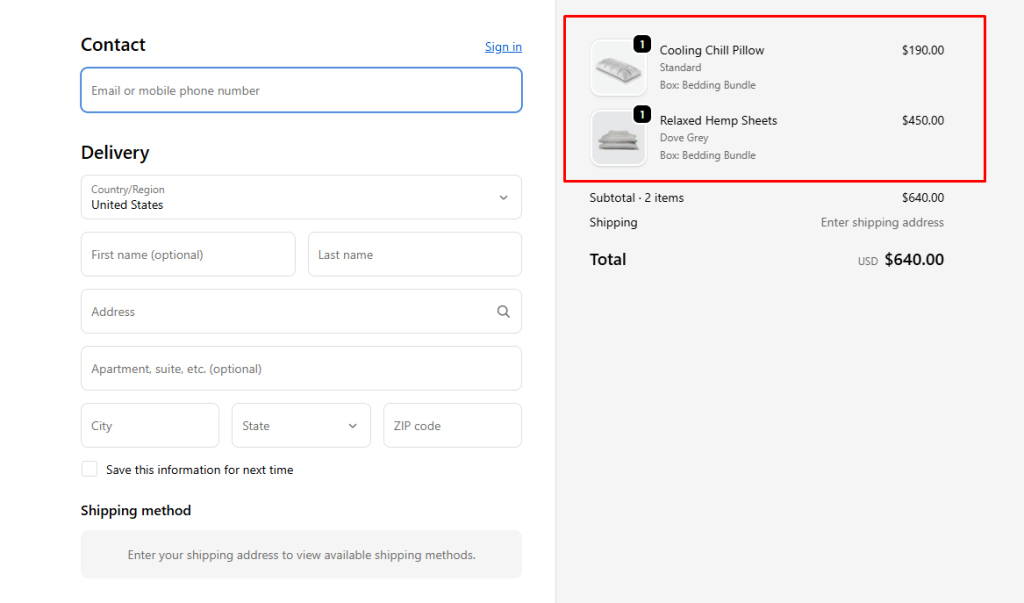
With List Items Separately, every item inside the box is shown individually at checkout — just like a normal product checkout flow. This option is useful if you want customers (or your store setup) to treat each item as a separate product.
Where to Enable #
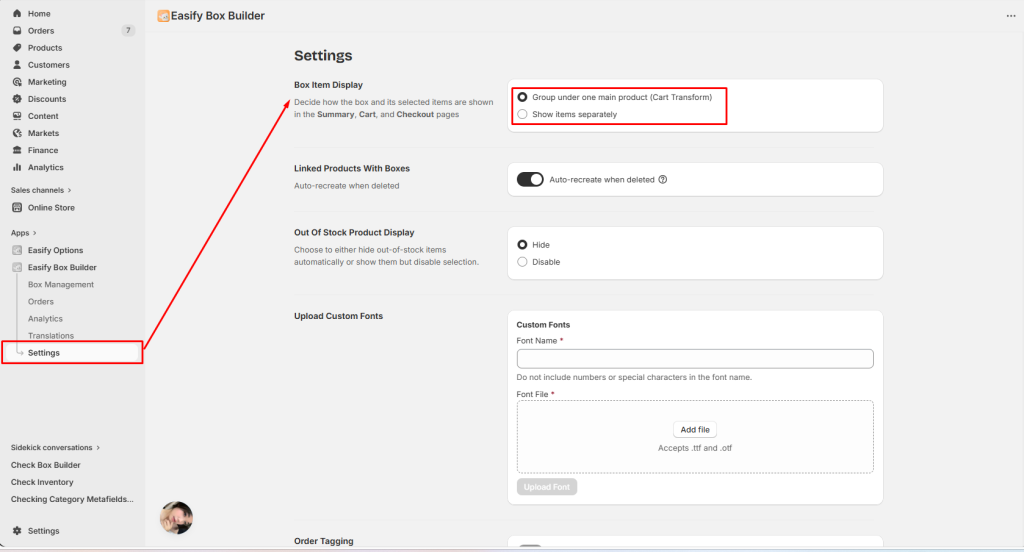
You can switch between these two display options directly:
- In your Easify Box Builder app admin, go to Settings.
- Under Box Item Display, choose one of the following:
- Group under one main product (Cart Transform) → Default for all users
- Show items separately
Cart Transform #
Cart Transform is the most common way to display boxes. By default, Easify Box Builder uses this method.
When to Use #
Cart Transform is the go‑to option in most situations. It works best when:
- You want the box to appear as one main product that neatly groups all bundled items at checkout.
- You don’t need to apply separate discounts or subscriptions to individual products inside the box.
- You’re using Shopify Checkout and not any other third‑party payment systems.
In short: Cart Transform is the simplest and most common setup — it covers the majority of use cases.
Behavior in Your Store Admin #
When Cart Transform is enabled:
- A Linked Product is automatically created in your product admin.
- This Linked Product acts as the “big product” that groups all bundled items together in checkout.
You can find the Linked Product by:
- Opening the bundle visual editor and clicking Product linked with box.

- Searching for the bundle name in your Product Admin.
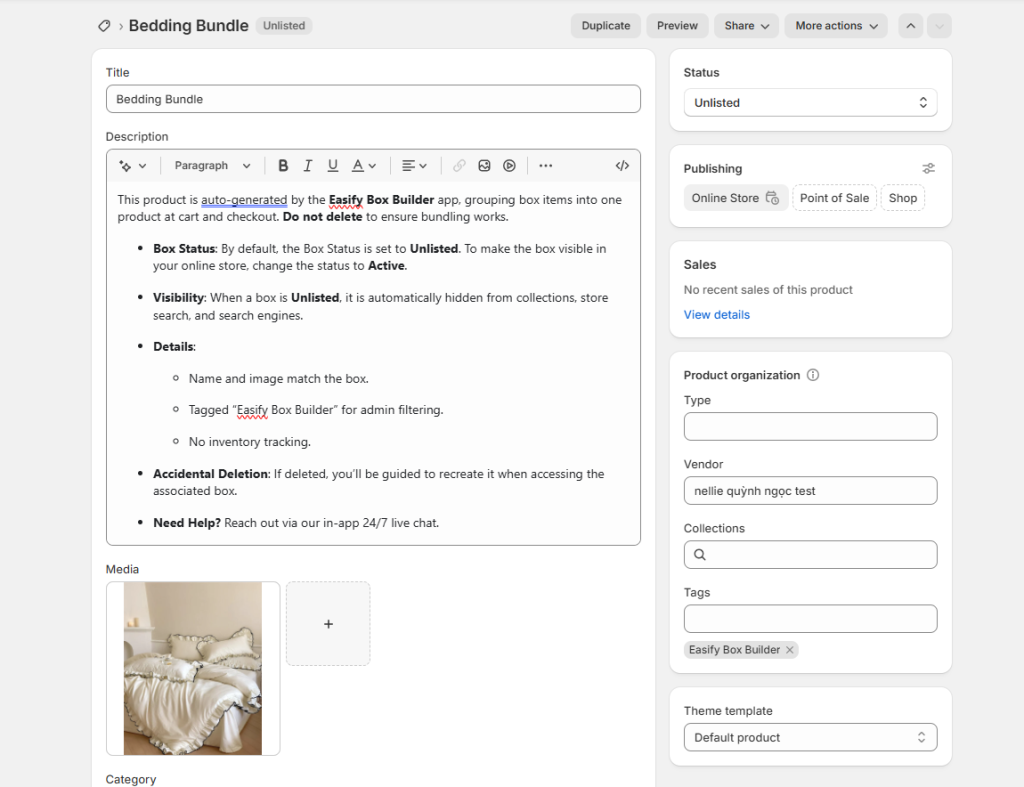
Linked Product Details:
- Box Status: By default, the Box Status is set to Unlisted. To make the box visible in your online store, change the status to Active.
- Visibility: Unlisted boxes are hidden from collections, store search, and search engines.
- Details:
- Name and image match the box.
- Tagged “Easify Box Builder” for admin filtering.
- No inventory tracking.
Behavior in Your Storefront #
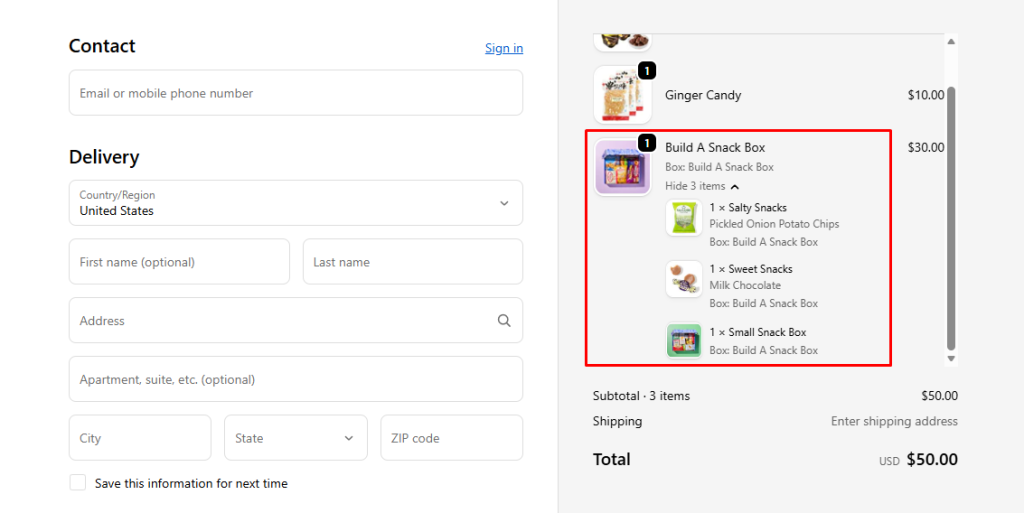
In Checkout: One main product groups all bundled items.
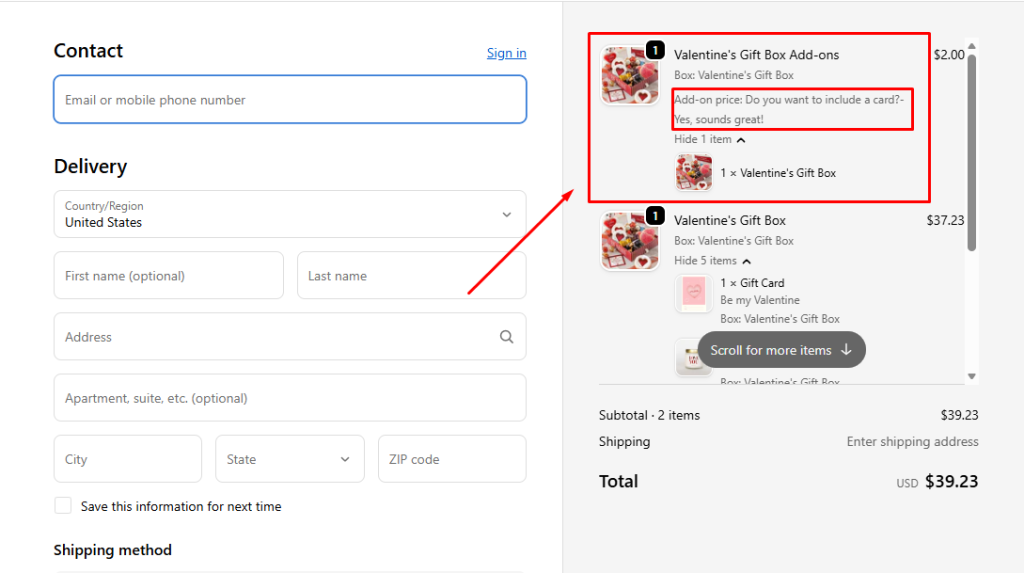
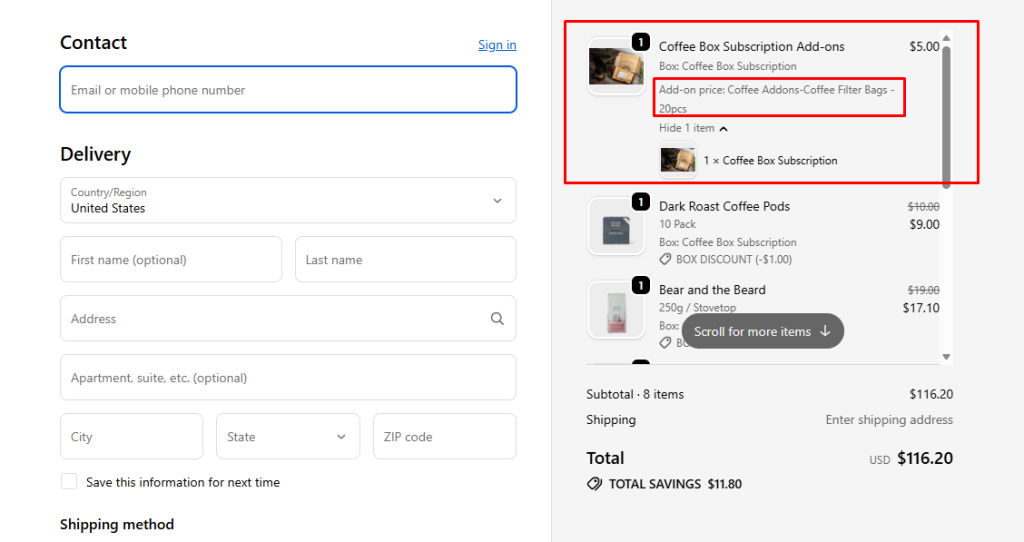
- If there’s an addon price, a new box product will be created to include this extra cost.
- Example: For a Valentine’s Gift Box, if customers choose to add a gift card (with an additional fee), a new product called Valentine’s Gift Box with the addon price will appear in checkout.
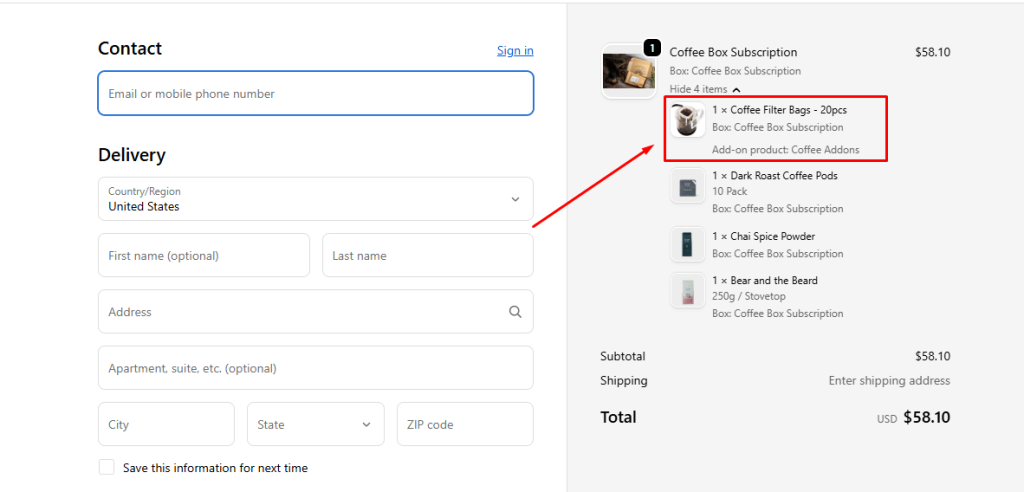
- If there’s an addon product, it will be added into the bundle with a note: Add‑on product: [Product name].
- Example: For a Coffee Box Bundle, if customers select coffee filter bags as an addon, they will be displayed right under the main product in checkout.
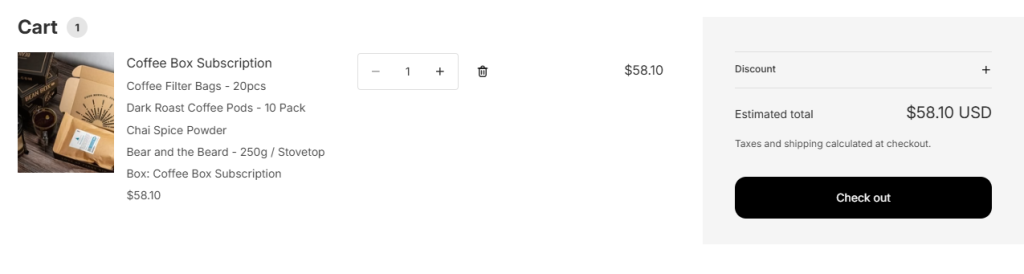
In Cart: Currently, the cart shows only the main product, with bundled items listed individually in the product description.
- If you’d prefer the cart to show all grouped items (so the cart view matches what customers see at checkout), just reach out to us — we will take a look and assist you with customization.
List Items Separately at Checkout #
This option isn’t the default, but it’s perfect for certain situations where you need more flexibility.
When to Use #
- Subscriptions: If you’re offering subscription boxes, you’ll need to use List Items Separately. Cart Transform isn’t supported here.
- Discounts for specific products: If you want to apply discounts to specific products inside the bundle (for example, a product that’s part of the box but also needs its own discount), this setup is required.
- 3rd-party Checkout/Payment Gateway: If your store relies on third‑party checkout flows or external payment gateways, you’ll need to use List Items Separately. Kindly contact us for further assistance in setting up.
Behavior in Your Store Admin #
When you choose List Items Separately:
- A Linked Product is still created in your admin. Its role is to handle addon prices, just like in Cart Transform.
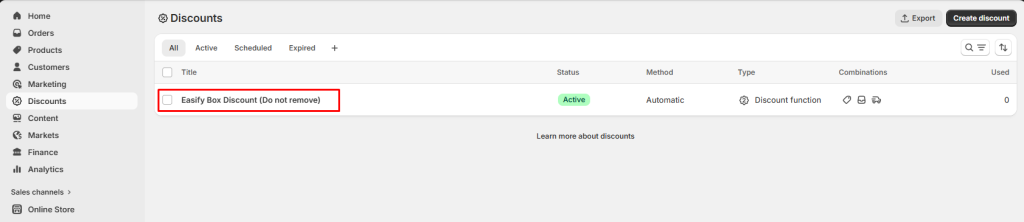
- An Easify Box Discount is also automatically created in your Shopify Discount Admin.
- This discount is titled Easify Box Discount and is used across all boxes in your app.
- Important: Don’t delete this discount. Removing it may cause errors. If it’s accidentally deleted, contact us and we’ll help restore it.
Behavior in Your Storefront #
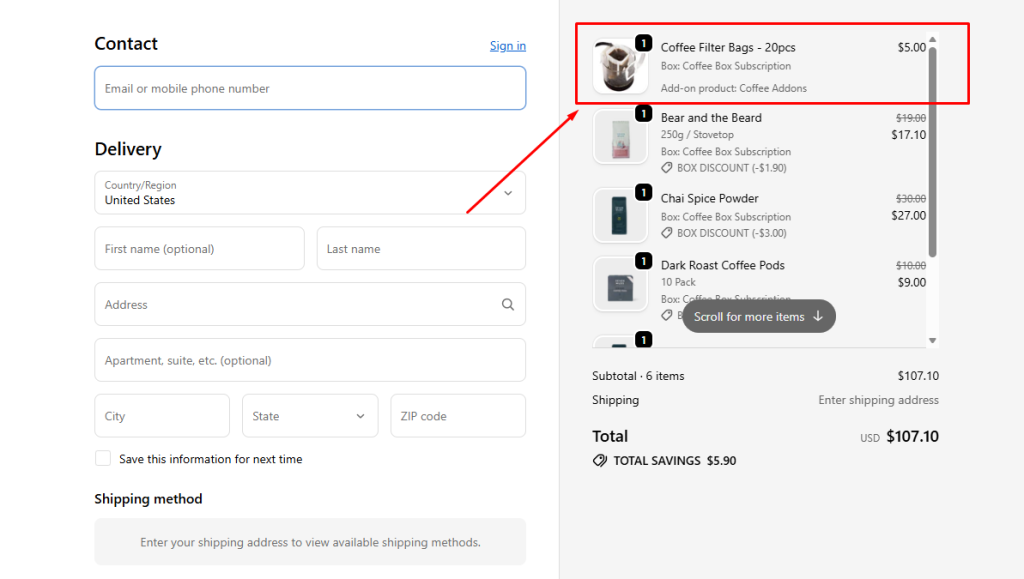
In Checkout: Each product in the box is listed individually.
- If there’s an addon price, the Linked Product will appear with the extra cost included.
- If there’s an addon product, it will show up as a new product in checkout, just like any other item.
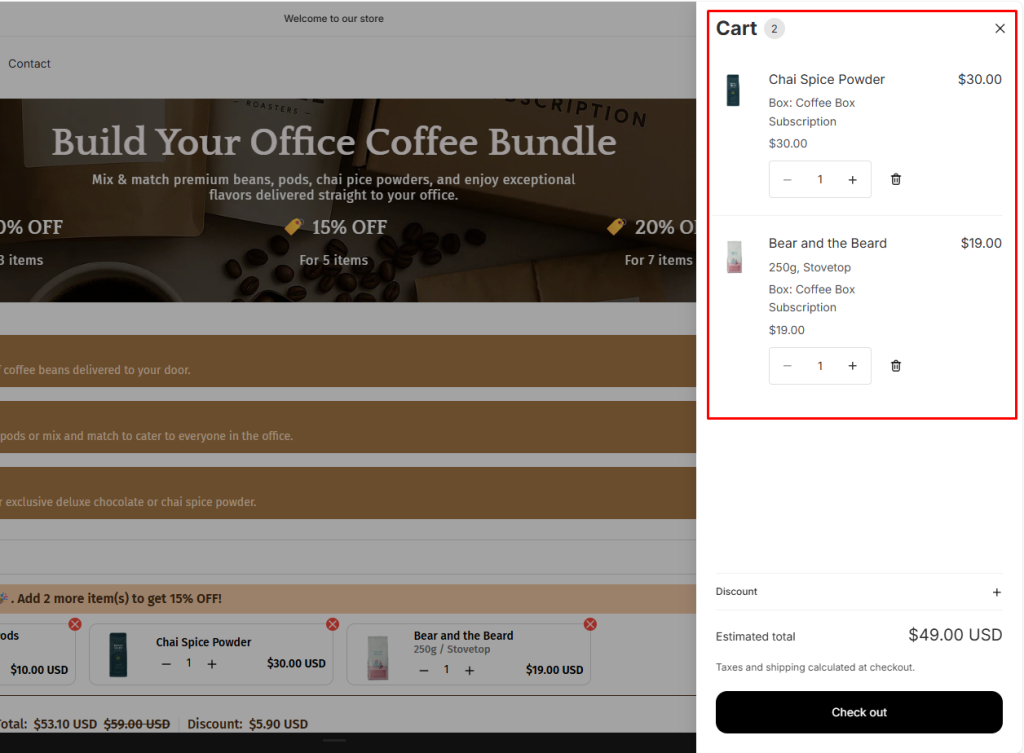
In Cart: Items are displayed separately, following the standard flow.
Summary #
When configuring how bundled products appear at checkout in Easify Box Builder, merchants have two display options: Cart Transform and List Items Separately. The following summary highlights the key differences to help you choose the most suitable setup for your store.
| Aspect | Cart Transform | List Items Separately |
| Checkout Display | Bundled items grouped under one main product in Checkout | Each item in the bundle listed individually in Checkout |
| Admin Setup | Automatically creates a Linked Product in your Product Admin | – Automatically creates a Linked Product in your Product Admin – Auto generates Easify Box Discount in Shopify Discounts |
| Best Use Cases | – Simple and most common setup – Cart Transform covers the majority of use cases. | Works with Subscription boxes, discounts to specific items and third-party checkout compatibility |
| Limitations | Not supported for subscriptions or third-party checkout. | In checkout, shoppers may find it harder to understand that items belong to one bundle |
💬 Need Help? #
Questions? Stuck somewhere?
We’re always here to help! Just reach out via our in-app live chat for 24/7 support.