EasifyApps EasifyApps
  • About
  • Apps
    Easify Product Options
    Easify Product Attachments
  • Resources
    Help Center
    Easify Product Options
    Easify Product Attachments
    Video Tutorials
    Easify Product Options
    Easify Product Attachments
  • Partners
  • Blog
  • Contact
All Easify Apps
EasifyApps EasifyApps
  • About
  • Apps
    Easify Product Options
    Easify Product Attachments
  • Resources
    Help Center
    Easify Product Options
    Easify Product Attachments
    Video Tutorials
    Easify Product Options
    Easify Product Attachments
  • Partners
  • Blog
  • Contact

Easify Product Options App

Getting Started
    Key Terminology Simplified
    • Custom options & variants
    • Option set
    • Option set templates
    • Option type (Option input)
    • Your option sets
    • Option label
    • Option name
    • Option value
    • Option group
    • Price Add-ons
    • Conditional logic
    • Live preview
    • Help text
    • Placeholder
    • Information (Tooltip)
    • Option widget
    Option Input Types
    • Design Layer
    • Text Box
    • Text Area
    • Number Text Box
    • Color Swatches
    • Image Swatches
    • Radio Buttons
    • Dropdown
    • Checkbox
    • Button(s)
    • Switch/ Toggle
    • Modal (Popup)
    • File Upload
    • Option Group
    • Product List
    • Date Range
    • Date Picker
    • Time Picker
    • Font Picker
    • Color Picker
    • Dimension
    • Quantity
    • Custom HTML
    • Heading
    • Paragraph
    • Spacer
    • Divider
    App Activation
    • Activate the app on your theme
    • Video Tutorial
User Guide (PO)
    Set Up Option Sets
    • Create A New Option Set From Scratch
    • Use Ready-made Templates To Create Your Option Set
    Conditional Logic
    • What is Conditional Logic (CL)?
    • Standard Conditional Logic – Among Easify Options
    • Advanced Conditional Logic – Show Easify Options Based On Shopify Variants
    Extra Pricing (Add Charges)
    • Set Up Extra Fees (New Version – From July 18, 2024)
    • Add-on Prices vs. Add-on Products (Old Version – Before July 18, 2024)
    • Set Up Add-on Prices (Old Version – Before July 18, 2024)
    • Set Up Add-on Products (Old Version – Before July 18, 2024)
    • Convert Add-on Prices To Add-on Products (Old Version – Before July 18, 2024)
    • Hide Specific Products from Shopify Storefront while Keeping Them Buyable
    Option URL
    • What is Option URL?
    • Establish Cross-Product Links Using Option URL
    • Include Detail Links For Add-on Products/Custom Options
    Option Design
    • Customize Option Styles
    • Distinct Option Styles for Light & Dark Themes
    • Modern and Classic Option Styles
    App Settings
    • General Settings
    • App Translation
    Tiered Wholesale Pricing
    • What is Tiered Wholesale Pricing?
    • Set Up Tiered Wholesale Pricing
    • Customize Tiered Wholesale Pricing Table
    Option Import/Export
      Option Export
      • Export All Option Sets
      • Export Specific Option Sets
    • Option Import
  • Add Option Value Descriptions & Tooltips
  • Show Image/ Color Swatch Slider
  • Track Real-time Analytics
  • View & Export Orders With Easify Options
  • Enable Image Editor for File Upload
  • Hide Main Product Price & Shopify Quantity Selector
  • Set Up Product Bundles
  • Set Up One-time Charge
  • Set Up Quantity Selector Per Option Value
  • Display Option Set In Popup Triggered By Button Click
  • Switch Product Images Upon Option Selection
  • Set Up Option/ Option Set Templates
  • Translate Option Set Into Multiple Languages
  • Separate or Combine Add-ons with Main Product in Cart
  • Reposition Option Set On Product Page
  • Show Custom Options On Order Confirmation Emails (To Customers)
  • Show Custom Options On New Order Notification Emails (To Staff)
  • Show Custom Options On Packing Slips
Product Personalizer (Live Preview)
  • What Is Product Personalizer – Live Preview?
  • How It Works
  • Ready-to-use Templates with Product Personalizer
  • Upcoming Features
Subscription & Billing
  • Pricing Plans
  • How to upgrade
  • How to cancel subscription
Customization & Support
  • App Maintenance Notification
  • Get support
  • Request a new feature
Frequently Asked Questions
  • Why does the app remain “Inactive” even after activation?
  • What to do if custom options aren’t visible on product pages?
  • Why weren’t custom option prices included in my customer orders?
  • How many custom options can I create per product?
  • Does the app work with Shopify Online Store 2.0?
  • Will the app slow down my website?
  • How can I stay informed about updates for the app?
  • What happens if I uninstall the app, and how does it affect my store?
Integrations
  • Easify Product Options x GemPages Landing Page Builder

Easify Box Builder App

Getting Started
  • Activate the app
  • Create New Box
  • Frequently Asked Questions
  • Get Support

Easify Inventory Sync App

Getting Started
  • Quick Start Guide
  • Frequently Asked Questions
  • Get Support
Inventory Groups
  • Create Inventory Groups Automatically by SKUs
  • Create Inventory Groups Manually
  • Events Triggering Syncs among Products in Inventory Groups
  • When do Inventory groups Fail to sync?
  • How to Set Up Common Cases
Bundle Groups
  • Create A New Bundle Group
  • How Master product inventory is Calculated from Component product inventory (Modified Quantity)
  • Events Triggering Syncs among Products in Bundle Groups
  • When do Bundle groups Fail to sync?
  • How to Set Up Common Cases
Inventory Thresholds
  • What is Inventory Threshold?
  • Set Up Universal Inventory Threshold
  • Create A New Inventory Threshold
Advanced Features
  • Bulk Edit Inventory Groups
  • Import/ Export Inventory Groups
  • Import/ Export Bundle Groups
  • Export Product Variant & Location IDs
  • Bulk Duplicate Products
Subscription & Billing
  • Pricing Plans (& FAQs)
  • How to Change Plans
Common Scenarios & Setup Guides
  • Roast Coffee
  • Loose Leaf Tea
  • Stationery Set
  • Retail & Wholesale Items
  • Blank & Personalized Tees
  • Unisex Tees
  • Baby Gift Hamper
  • Flowers
  • Chocolate Cookies
  • 3-Pack T-Shirts (mixed sizes & colors)
  • Batteries
  • Beverage (Inventory by Cans)
  • Beverage (Inventory by Packs)
  • Multivitamins (from Single Pack)
  • Multivitamins (from Double Pack)
  • Incense Sticks (Inventory by Packs)
  • Incense Sticks (Inventory by Sticks)
  • Candle Trio Set
  • Perfume Set
  • Pick n Mix Sweets
  • Top & Skirt Set (Same Size)
  • Top & Skirt Set (Mixed Sizes)
  • 2-Pack Tops (1 Color)
  • 2-Pack Tops (1 Color) – Only in Packs
  • 2-Pack Tops (Multicolor – Fixed)
  • 2-Pack Tops (Multicolor – Optional)
  • Custom Print Shirts
  • Shoes & Free Socks

Easify Product Attachments App

App Activation
  • Activate the app on your theme
  • Video Tutorial
User Guide
  • Upload Product Attachments
  • Upload Attachment Icons
  • Add Attachments To Templates
  • Import Bulk Product Attachments
  • Export Product Attachments
  • Add Attachments To Collapsible Rows On Product Pages
Customization & Support
  • Get support
  • Request a new feature

Recommended Shopify Apps

  • Page builder
  • Affiliate programs
  • Marketing
  • Invoices and receipts

Announcements

  • Limited Support During Lunar New Year (Jan 25th- Feb 3rd, 2025) – Your Patience Is Our Greatest Gift!
  • Go Beyond Options: Easify Product Options Premium Is Here!

Upload Attachment Icons

Table of Contents
  • Case 1: Use Unique Icons
  • Case 2: Use Shared Icons
    • General Information
    • File
    • File Extension
  • Video Tutorial

Attachment icons enhance your customers’ experience and improve your store’s visual appeal. Icons serve three key purposes:

  1. Highlight Attachments: Icons catch customers’ eyes, directing them to your product attachments on the product page.
  2. Visual Clarification: Icons visually represent the content of your attachment files, making it easier for customers to understand their purpose.
  3. Consistent Design: Icons contribute to the overall design harmony of your attachment files, aligning them with your store’s aesthetics.

Notes: There are two methods for adding icons:

  • Custom Icons: Upload an icon while creating an attachment for a unique visual representation.
  • Shared Icons: Upload an icon on the Icons page for files with similar extensions (e.g.: .pdf). It will automatically be assigned to relevant attachments.

Below is the guide to upload icons for your attachments:

Case 1: Use Unique Icons #

  • Go to the Attachments page and select the attachment you want to add an icon to.
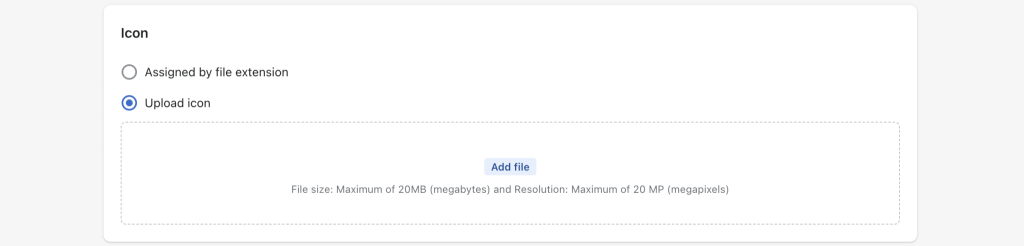
  • Access the attachment editing page and locate the Icon section.
  • Click on “Upload icon” and then click “Add file” to upload the icon corresponding to the attachment you’re editing.
  • If you have multiple attachments with unique icons, repeat this process for each attachment.

Pro Tip: For efficient management of multiple icons, consider using the Bulk Attachment Import function. Upload all icons to your Shopify Files folder and obtain their links. Insert these links into a CSV file for easy import to your site.

Case 2: Use Shared Icons #

Visit the Attachments page and select the attachment you want to add an icon to.

Access the attachment editing page and navigate to the Icon section.

Choose Assigned by file extension and repeat this process for attachments with the same extension that you want to have the same icon.

To add shared icons, go to the Icons tab in the app menu.

Dashboard > Icons > Add icon

General Information #

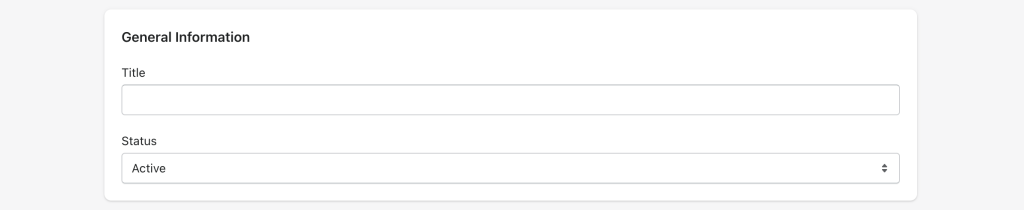
  • Title: Give your icon a descriptive name.
  • Status: Select “Active” to display the icon on your storefront, or “Inactive” to hide it.

File #

Upload your icon in PNG, JPG, JPEG, or other compatible formats. File size should not exceed 20MB, and resolution should stay within 20MP.

File Extension #

Define the associated attachment file extension (e.g., pdf, doc, docx, etc.). This ensures the icon is correctly applied to relevant attachments.

Notes: Specify the attachment file extension, not the icon image extension.

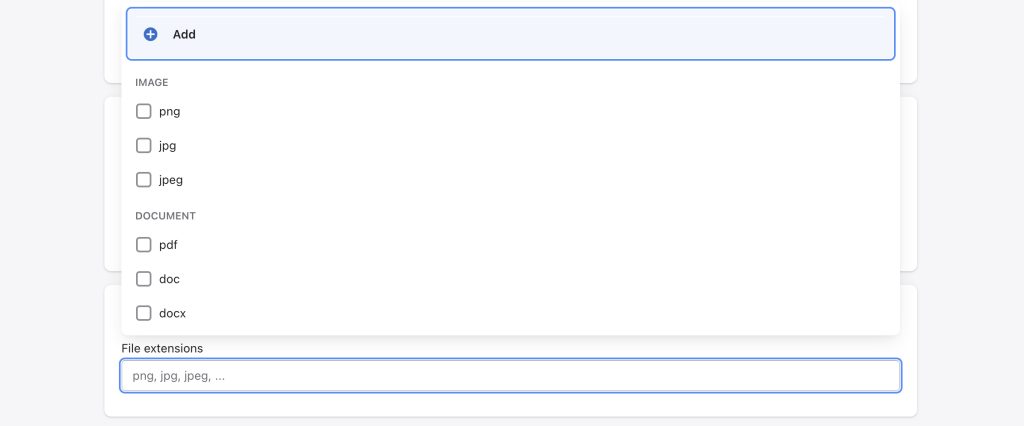
If your attachment files utilize extensions beyond the suggested list, you can easily expand the options. Enter the new extension (e.g., “webp”) and click + Add (+ your entered extension) to include it in the list.

Click “Save” to complete the icon setup.

By following these steps, you can seamlessly enhance your product attachments with icons, adding visual appeal and clarity to your store. If you have any questions or need further assistance, don’t hesitate to reach out to our support team.

Video Tutorial #

Table of Contents
  • Case 1: Use Unique Icons
  • Case 2: Use Shared Icons
    • General Information
    • File
    • File Extension
  • Video Tutorial
Essentials Logo

Make the Complex Simple for Shopify Stores

Our AppsHelp CenterPartner ProgramAffiliate ProgramBlogContact Us

Copyright © 2023 Easify. All rights reserved.

Close
Search

Hit enter to search or ESC to close

cookie By using this website, you agree to our cookie policy. Close