With the File Upload option type, your customers can bring their unique ideas to life by easily uploading single or multiple files – whether it’s images, documents, or any other creative content. This feature empowers users to personalize their products like never before, adding a personal touch that sets their purchases apart.
Available in our Pro and Premium plans, the File Upload feature offers tailored experiences to suit different needs:
- Pro Plan: Customers can upload up to 10 files per upload, with a maximum file size of 10MB each. Perfect for standard customizations!
- Premium Plan: For those looking for more flexibility, this plan allows uploads of up to 20 files per session, with a generous 50MB file size limit. Plus, enjoy our advanced Image Editor, enabling customers to refine and enhance their images right after uploading!
Notes: Files are kept for 90 days after upload and will be automatically deleted afterward. Be sure to download any files you want to keep before then.
Common Use Cases #
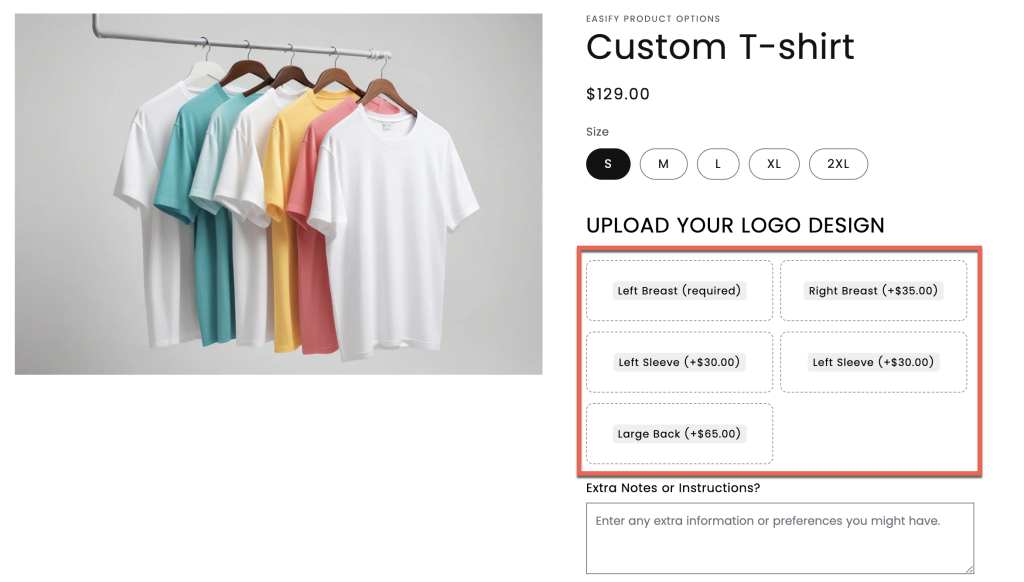
- Custom T-shirt: Customers upload an image for print.
- Custom Drinkware: Customers upload logos or images for engraving or printing on mugs, bottles, or tumblers.
- Custom Trophy/Award: Customers upload text or images for engraving.
- Custom Poster Print: Customers upload artwork or photos for printing.
- Personalized Phone Case: Customers upload images or designs for printing on the case.
- Custom Tote Bag: Customers upload artwork for printing on the bag.
- Personalized Notebook: Customers upload a design or text for the cover.
- Custom Stickers: Customers upload designs or logos for sticker production.
- Custom Pillows: Customers upload images or designs for printing on pillow covers.
- Custom Keychain: Customers upload a design for engraving on the keychain.
- Personalized Calendars: Customers upload photos and events in text files for creating custom calendars.
- Custom Packaging: Customers upload logos for branded packaging materials like boxes or labels.
Demos #
Option Settings #
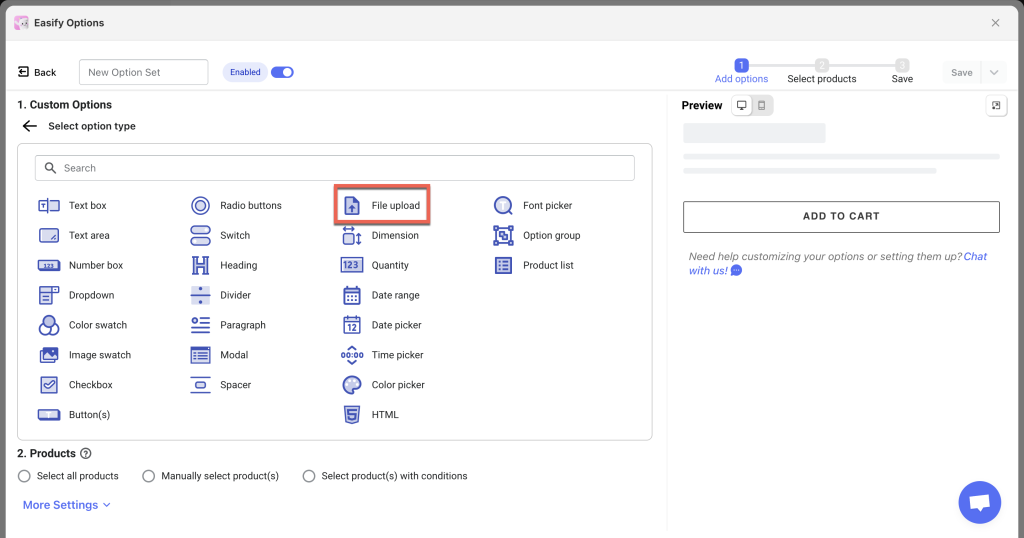
Basic settings #
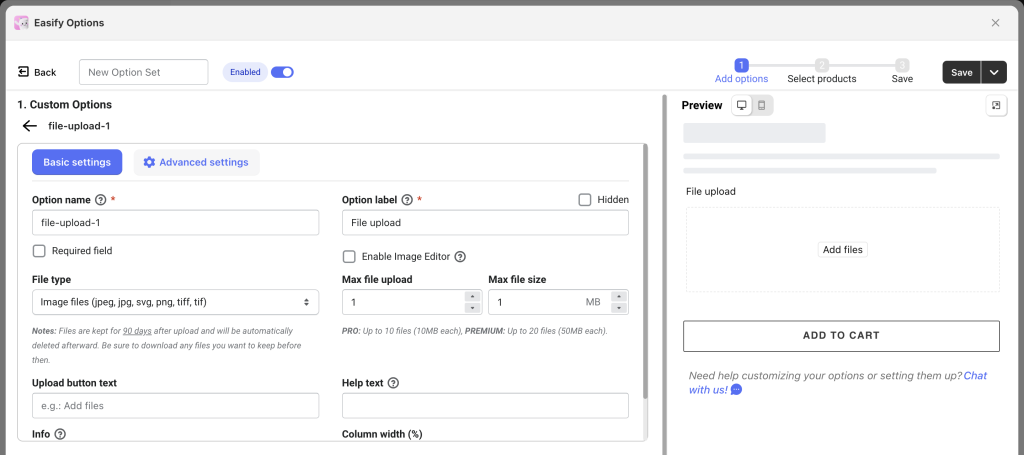
- Option name: Give your File Upload option a unique name that will be visible to your customers on the Cart, Checkout, and Order pages. Ensure that each option within the option set has distinct names.
- Option label: Add a label that will be visible to your customers on the Product page. Option labels can be the same or different for various options in the option set.
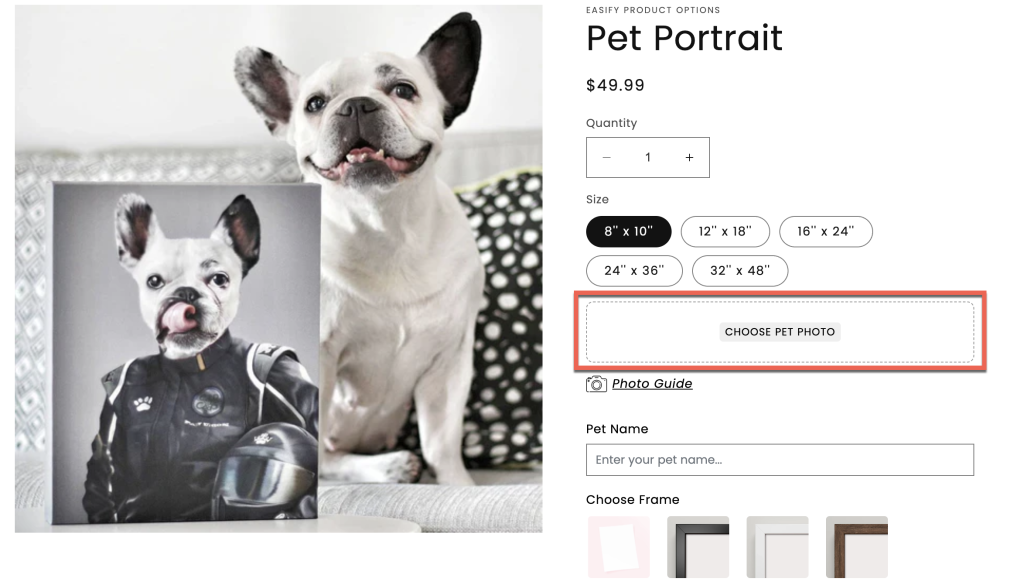
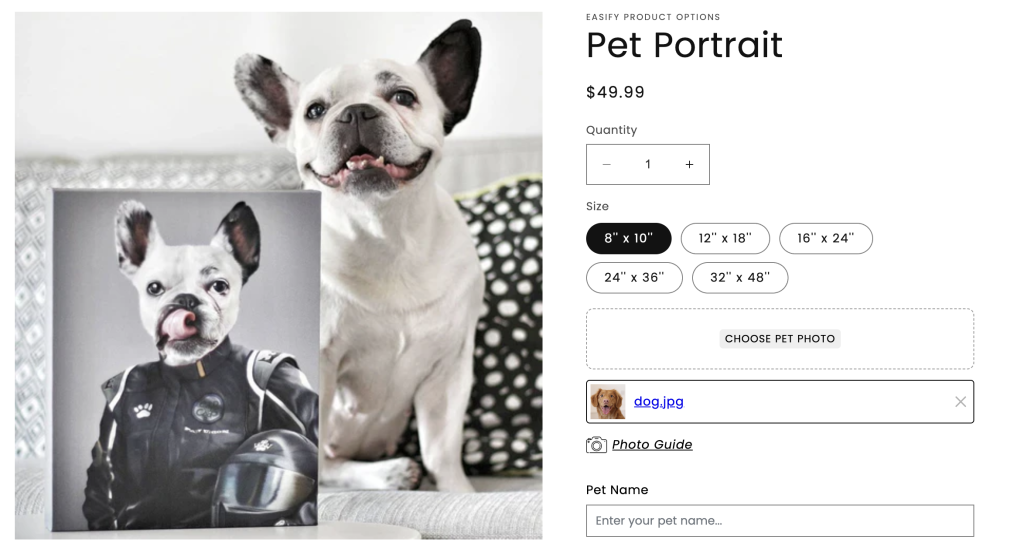
- Required field: Make the File Upload a mandatory field if you want, ensuring customers upload the file(s) before adding the product to cart.
- Enable Image Editor (Premium): When enabled, customers will have access to an intuitive image editing tool right after uploading their files. This feature allows them to refine their images using a comprehensive set of tools, including basic adjustments like Crop, Rotate, Flip, and Resize, as well as advanced options such as Filters, Fine-tuning, Annotations, Decorations, Frames, and Redactions. This enhances the customer experience, giving them the ability to create personalized products that stand out. Note: The Image Editor can only be activated if “Image files” is selected in the File Type configuration.
- Hidden: Optionally hide the option label for a cleaner interface. This is especially useful when presenting multiple file upload options on your page without repeating option names (e.g., displaying various file upload options for different print positions on custom T-shirts).
- File type: Select the file types you want to allow customers to upload. Options include Image files, Document files, Custom files (with your defined extensions), or simply All files.
- Max file upload: Set the maximum number of files that customers can upload at once. For example, if you set this to 5, customers can upload up to 5 different files simultaneously. Our app supports a maximum of 10 files for the Pro plan and 20 files for the Premium plan. Contact us to discuss extending this limit if needed.
- Max file size: Determine the maximum file size customers can upload. The app currently supports a maximum file size of 10MB for the Pro plan and 50MB for the Premium plan. Reach out if you require a higher limit.
- Upload button text: Customize the text displayed on the upload button if desired. The default text is “Add files”.
- Help text: Provide additional instructions or information for your customers, such as allowed file types and the maximum file size.
- Info: Create an informative tooltip that appears when users hover over a small icon, providing more context or assistance.
- Column width (%): Adjust the width of the entire File Upload option area to suit your layout preferences. You can choose from widths of 25%, 33%, 50%, 66%, 75%, or 100%. For instance, if you’re adding multiple file upload options for different print positions on custom T-shirts, consider setting the width of each file upload option to 50%. This allows 2 file upload options to be displayed side by side, optimizing space on your page.
Advanced settings #
- Use Conditional Logic: Control when the File Upload option is visible based on the customer’s selection of custom Easify options or Shopify variants. For example, you can set it so that the file upload option only appears when customers choose “Custom Print” option. If they select a standard print or a blank product, the upload option will be hidden. To learn how to set up conditional logic for your File Upload, check out this guide.
- Add Price: Set an additional charge for custom file uploads if this is part of your service. This lets you collect a fee whenever customers upload their files. For detailed instructions on how to add this charge to your option, please refer to this guide.
- Apply One-time Charge: Use this feature if you want to charge customers a fee for file uploads that is not based on the number of main products purchased. With this feature, customers will only pay the fee once, regardless of how many items they order. For instance, if you charge $15 for a custom logo on a hat, customers will only pay that $15 once, even if they order 50 hats. To learn more about how this feature works and how to set it up, check this guide.
- Save as Option Template: If you’d like to reuse the File Upload option across different Option Sets, you can save it as an Option Template. For more information on how to use this feature, refer to this guide.
Need Assistance? #
If you run into any challenges while configuring your File Upload options, feel free to reach out to us for assistance through our convenient in-app live chat. We’re here to help!