There are two ways to create a new option set: building from scratch or using a template. This guide shows you how to create a new option set from scratch. If you prefer to use a template, check this guide instead.
After installing the app and completing the quick Onboarding guide, you can select Build from scratch to go directly to the New Option Set page.
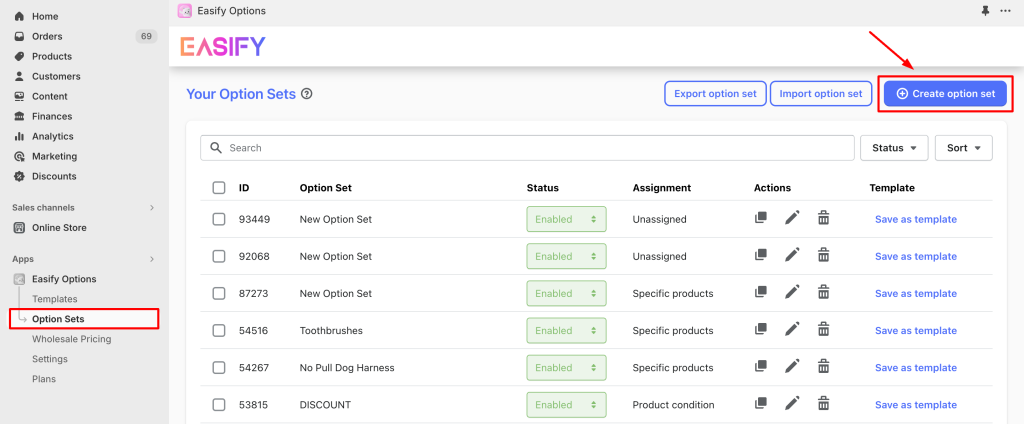
Since the onboarding guide is available only once after installation, there are 2 ways to access the New Option Set page later:
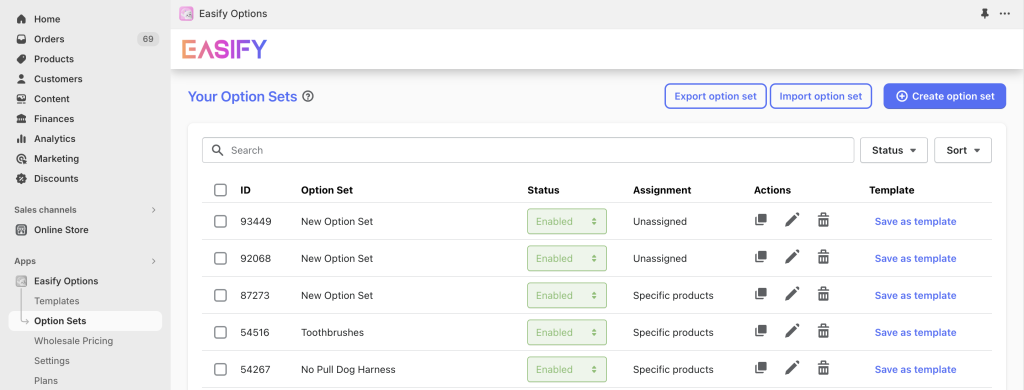
From the app’s navigation menu, select the Option Sets tab. This will take you to the Option Sets listing page, where you can click the Create option set button.
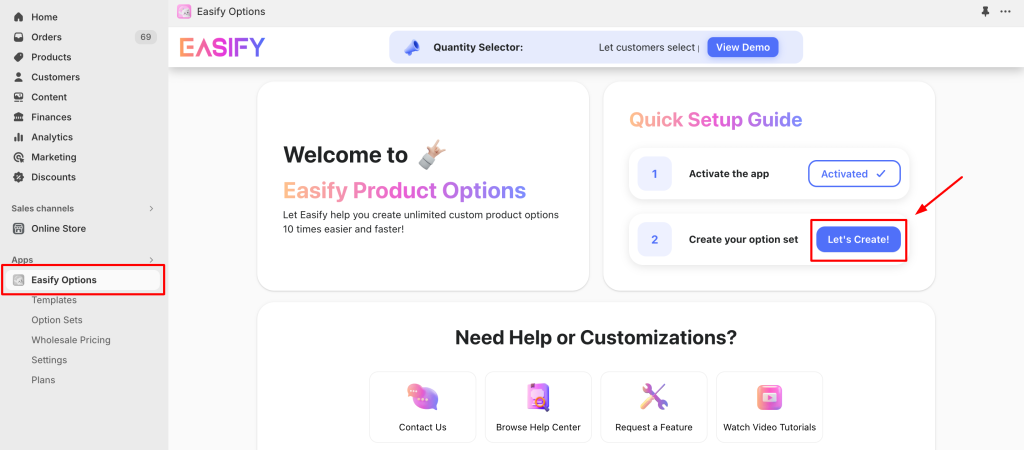
From the app’s navigation menu, select the Easify Options tab. This will take you to the app’s Dashboard page. Here, click the “Let’s Create!” button in the Quick Setup Guide section.
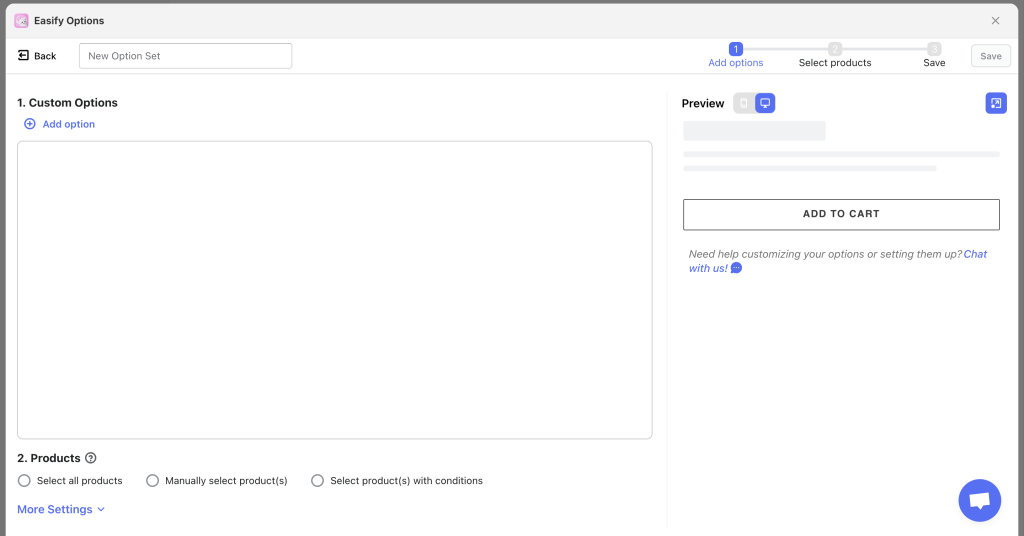
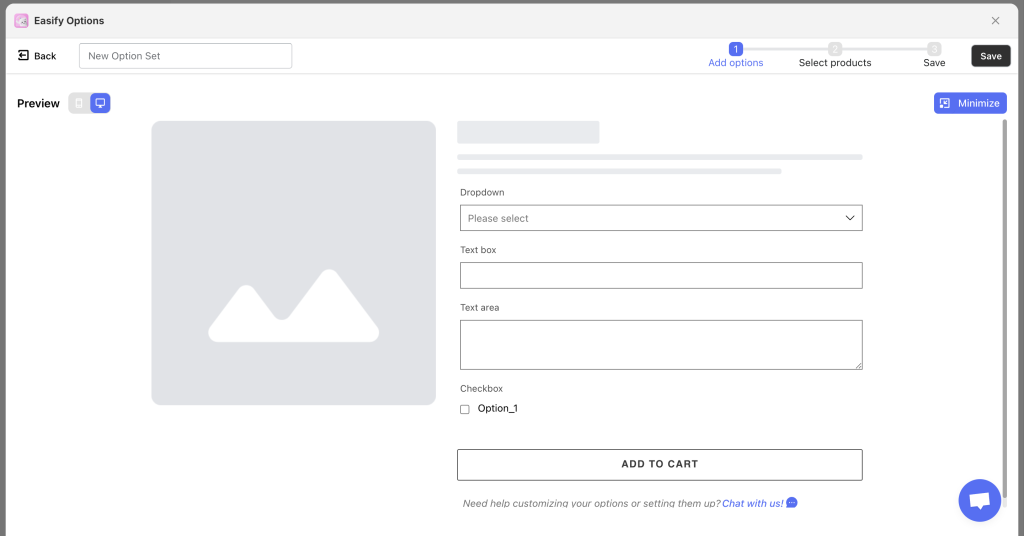
Once you’re on the New Option Set page with the live preview, follow the next steps to configure your option set.
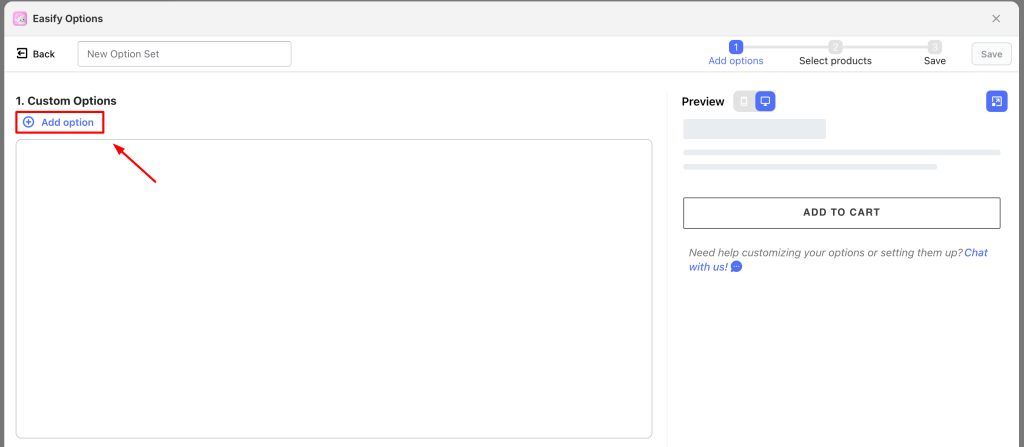
Step 2: Select and configure each option in the option set #
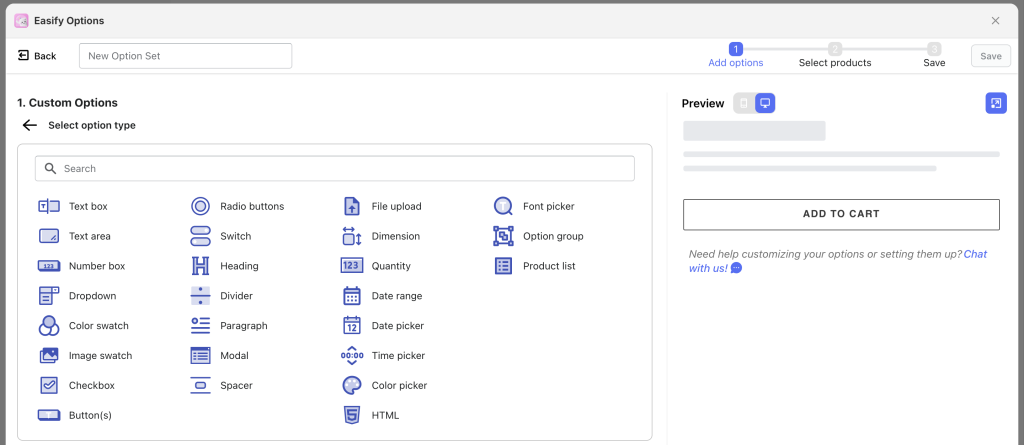
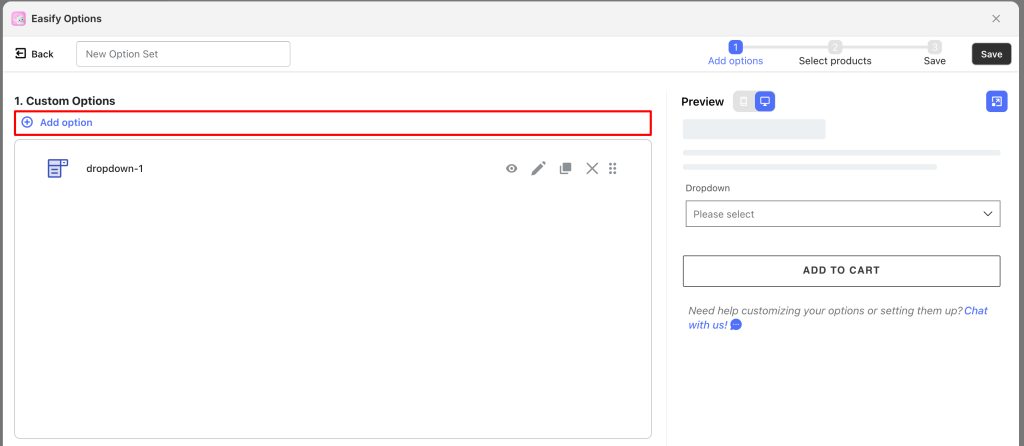
Start by adding the first option to your option set. Click the Add Option button and choose an option type.
Explore all the available options to find the best way to present your custom choices. With Easify options, you can not only show custom options for customers to select but also enhance the visual appeal of these options. This can make your store’s offerings more attractive and valuable to customers.
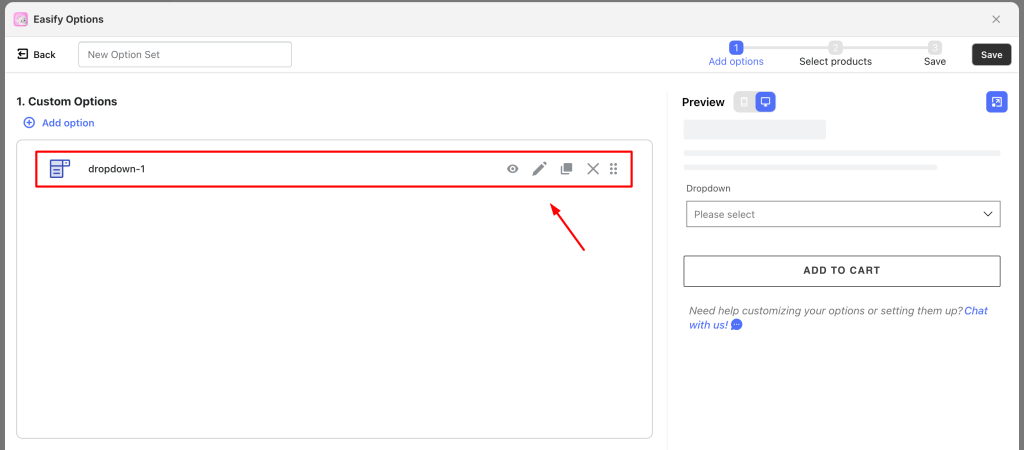
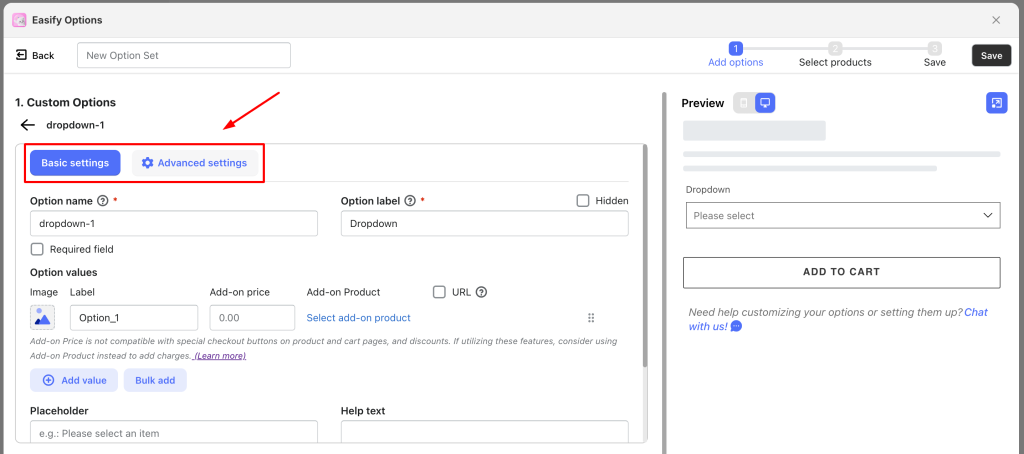
After selecting an appropriate option type for your first option, click on it to edit its details:
Each option type has its own set of settings, typically divided into 2 tabs: Basicsettings and Advanced settings.
Make sure to navigate through and explore the features in each tab so you don’t miss any exciting functionalities.
To learn how to configure each type of option, you can find detailed guidance here.
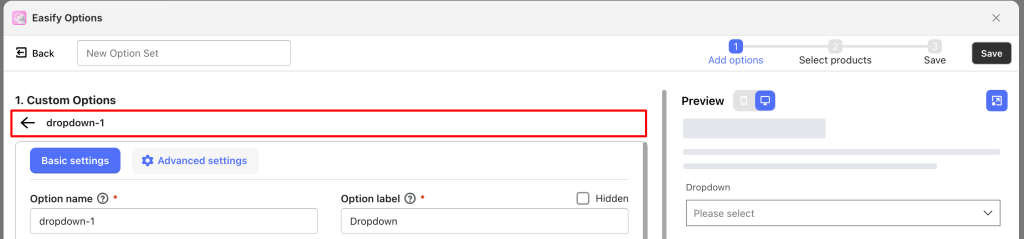
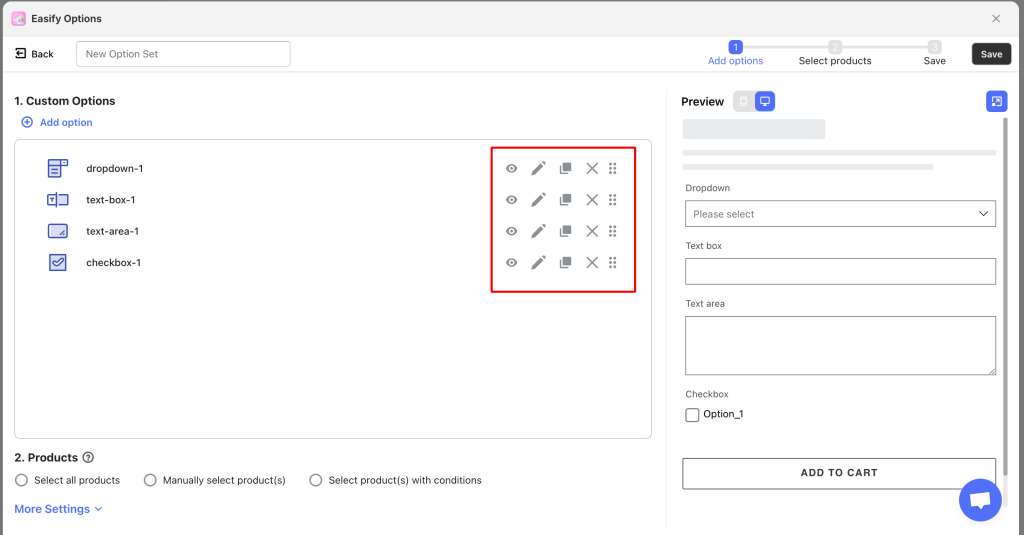
After configuring the option details, you can click the arrow button located on the left side of the option name to return to the option set list and add more options if needed:
Notes: To return to the option list of this new option set, use the arrow button. Do not click on the Back button for this purpose, as it will take you to the Your Option Sets page showing all option sets instead.
On the option list you’ve created, you can easily hide/ show, edit, duplicate, delete, or change the order of each option. Take advantage of these features to streamline the creation of your option set and make the process faster and more efficient:
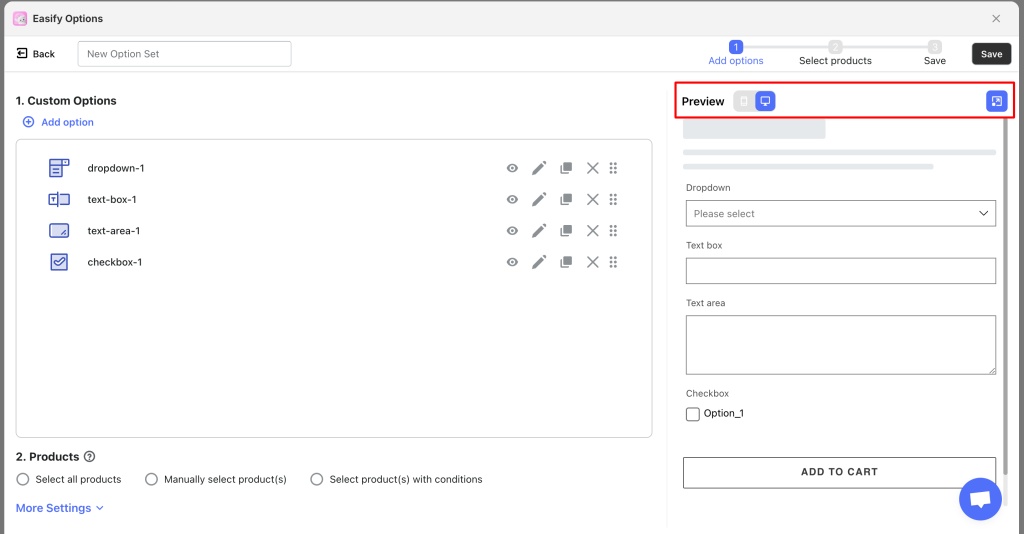
Utilize the Live Preview feature to see how the option set will be displayed on the storefront before officially publishing it.
You can switch between Desktop and Mobile views, and expand the Live Preview to view all the options more clearly.
Click the Minimize button to exit fullscreen mode and continue editing your option set.
Step 4: Assign your option set to relevant products #
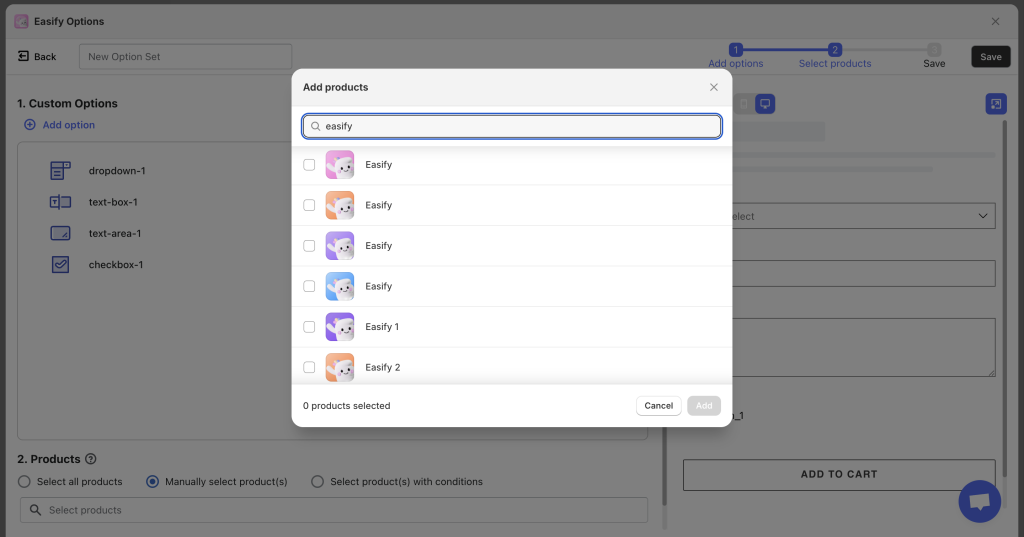
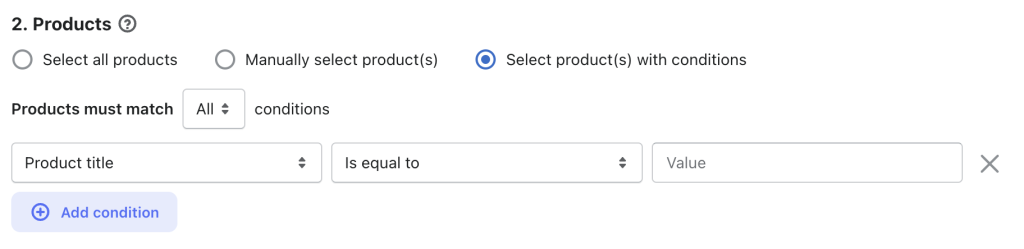
After making all the necessary changes and updates to the template, scroll down to the second section of 2. Product(s) to assign your option set to the desired products.
You have 3 options:
All products: Apply the option set to all products.
Manually select product(s): Choose specific products from the list and apply the option set to them.
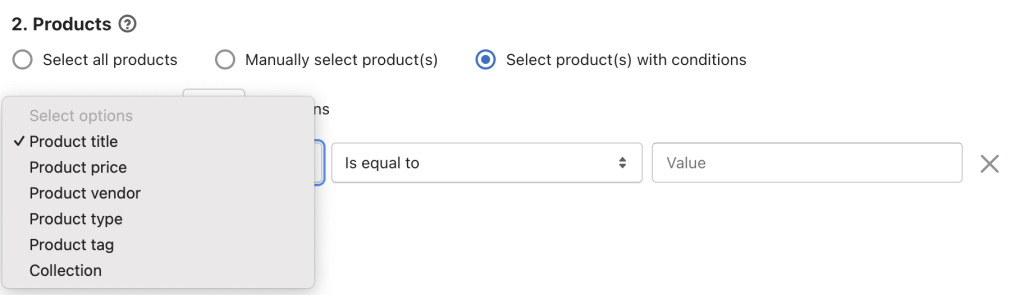
Select product(s) with conditions: Set conditions based on product title, price, vendor, type, tag, or collection to automatically apply the option set to matching products.
Notes:
You can assign multiple products to each option set. However, each product can only be associated with 1 option set at a time.
If you create multiple option sets for a product, only the latest option set that you create will be applied to that product.
Step 5: Assign your option set to a specific customer group (Optional) #
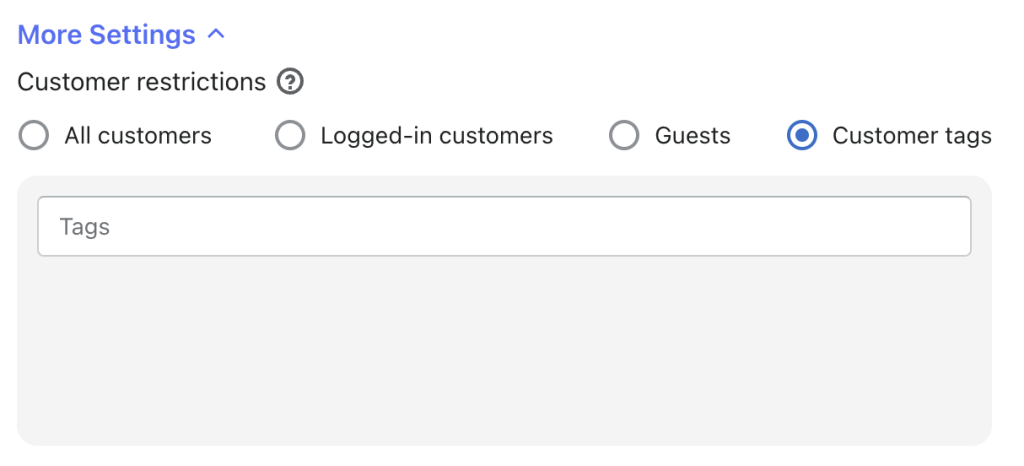
In this step, you can choose which customers can see your option set on the storefront. Click More Settings under the 2. Products section to explore all options.
There are 4 customer groups you can select from:
All Customers: This option is selected by default, which means the option set is visible to all of your customers, regardless of whether they are logged in or not.
Logged-in Customers: With this option, the option set will only be visible to customers who are logged into their accounts on your store.
Guests: By selecting this option, the option set will only be visible to customers who have not logged into their accounts.
Customer Tags: If you choose this option, the option set will only be visible to customers who have been assigned specific tag(s).
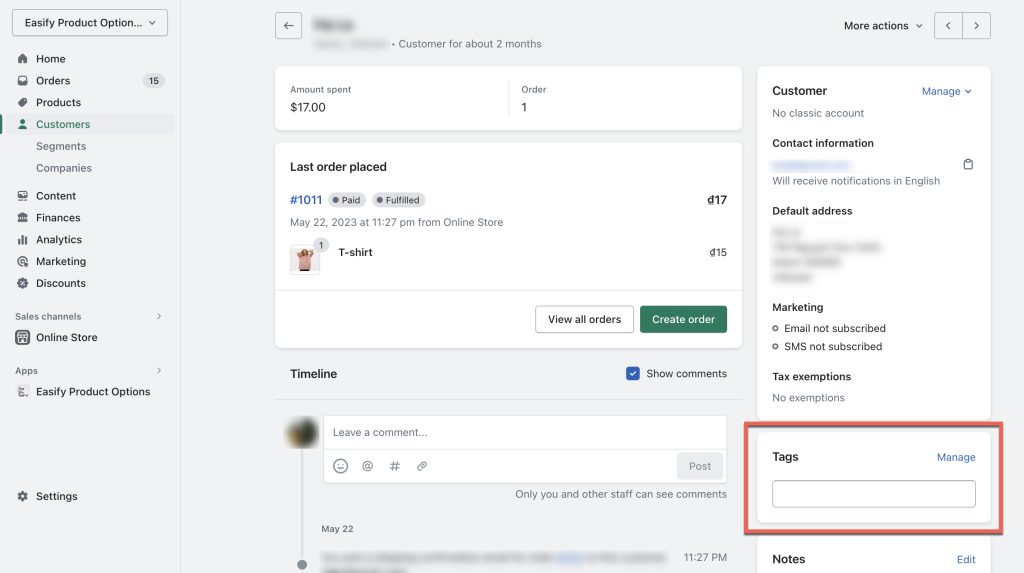
To add a tag for a customer, follow these steps:
Go to the Shopify Admin menu and select Customers
Choose the customer you want to add a tag to
Enter the new tag(s) you want to assign to the customer (or select from existing tags if any)
Set the name of your option set to make it more descriptive or relevant. The default name is “New Option Set”. You can save the option set without editing the name initially and update it later if needed.
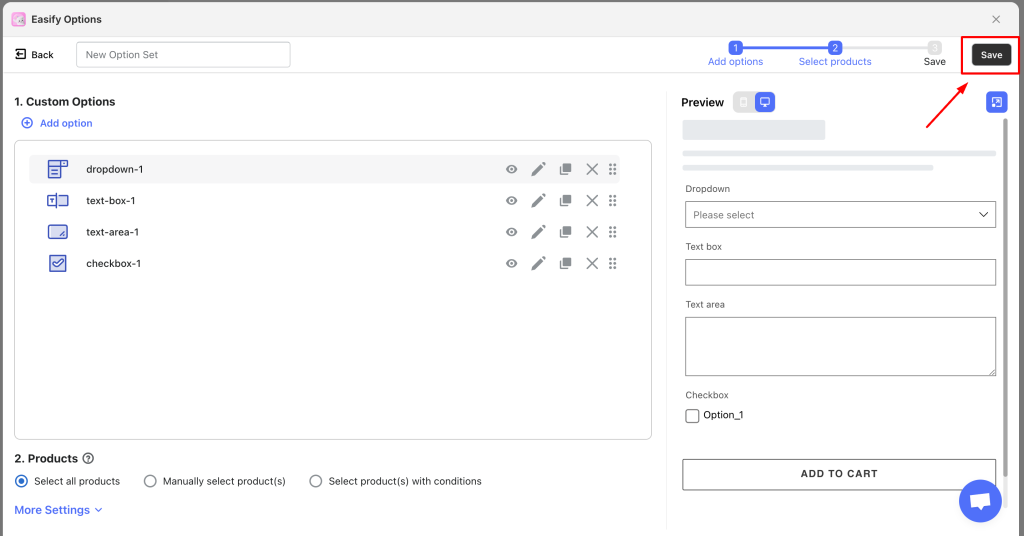
Step 7: Save all of your settings and publish your new option set #
Once you have finished customizing the option set and assigning it to the desired products, click Save to save all the settings.
Step 8: Check how your option set is displayed on the storefront #
Select one of the products to which your option set is applied.
Visit the product page and ensure that the option set is shown properly.
If you need to make any further changes, go back to the option set editor page.
Notes: If you encounter any issues where the option set is not appearing on your storefront, please follow these steps:
Verify option set assignment: Confirm that your option set is correctly assigned to your test product(s). Double-check the product assignment settings to ensure that the option set is applied.
If you have already checked the above solutions and your option set is still not appearing, it is possible that there might be a conflict between the app and your theme. In such cases, please reach out to us for assistance.
You can send your request to support@tigren.com or message us through our In-appLive Chat. Our support team will be happy to assist you in resolving any conflicts or issues.