Once you’ve crafted your attachment files complete with eye-catching icons, it’s time to seamlessly incorporate them into your templates. The Easify Product Attachments app offers a versatile solution, enabling you to not only enrich product pages but also enhance any other page on your website, from collections to articles and CMS pages.
Here’s a simple guide on how to effortlessly integrate attachments into your product page template. Rest assured, you can apply a similar approach to augment other pages throughout your website.
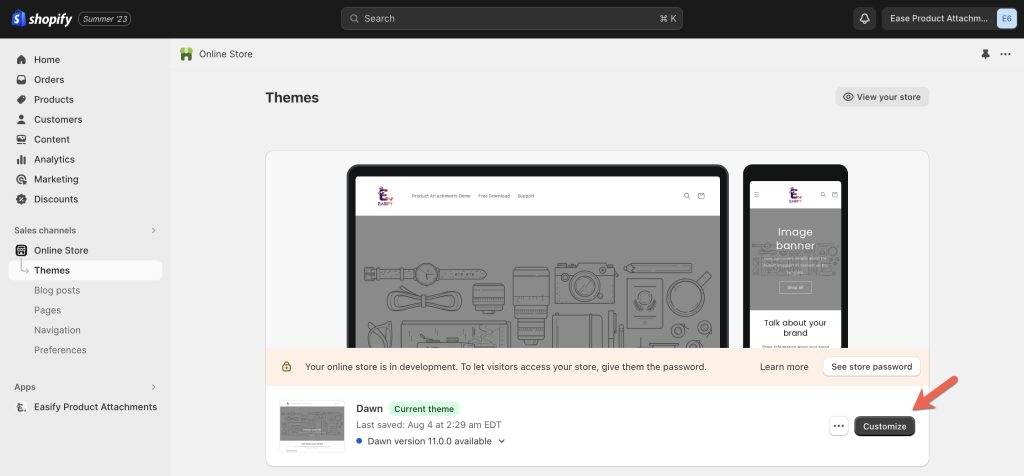
Go to Sales channels > Online Store > Themes, and click the Customize button on your current theme section.
Sales channels > Online Store > Themes > Customize
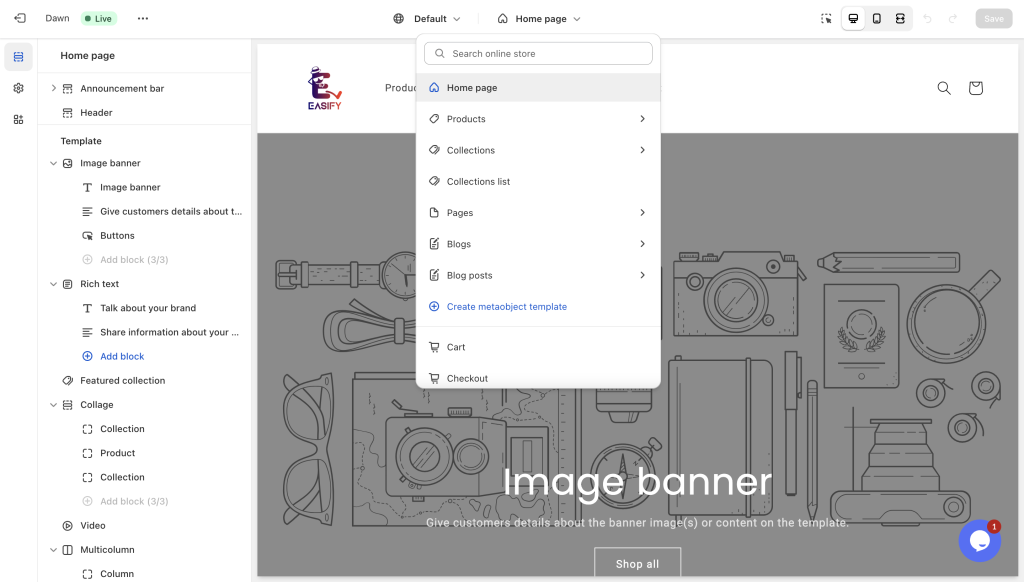
From the page listing menu at the top-middle of the page, choose the desired page type (e.g., Home, Products, Collections).
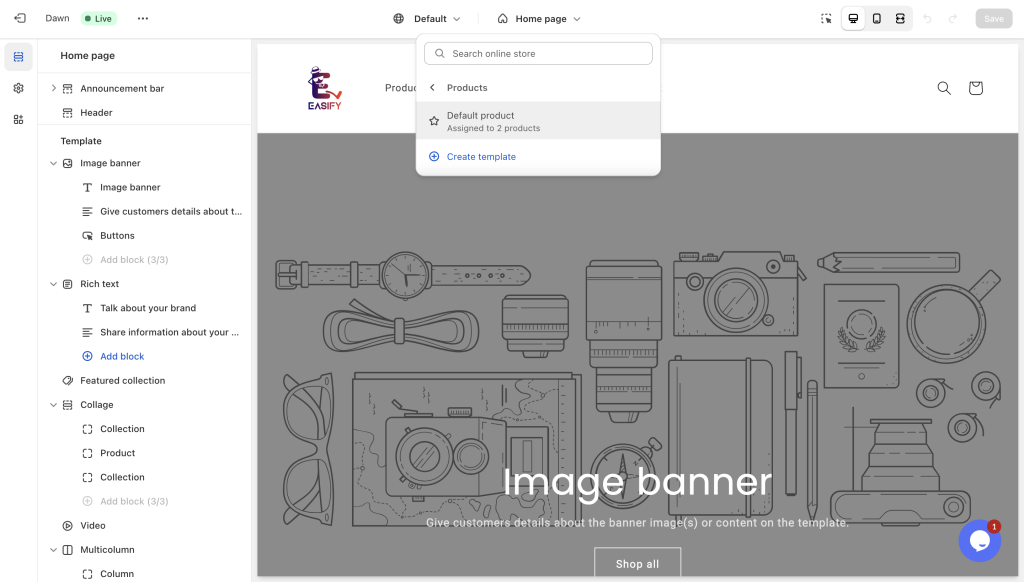
Select the appropriate template for that page type (e.g., Default product).
Next, we will add product attachments to the selected page template.
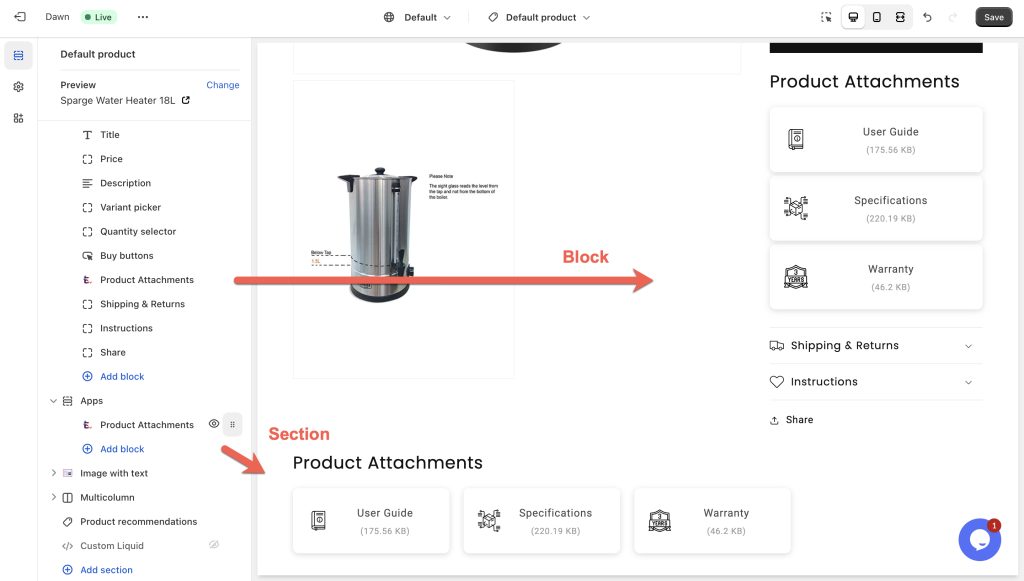
Notes: The attachments can be added as a block or section in the page.
How to add The Product Attachments Block #
Navigate to the desired section in the left menu (e.g., Product Information).
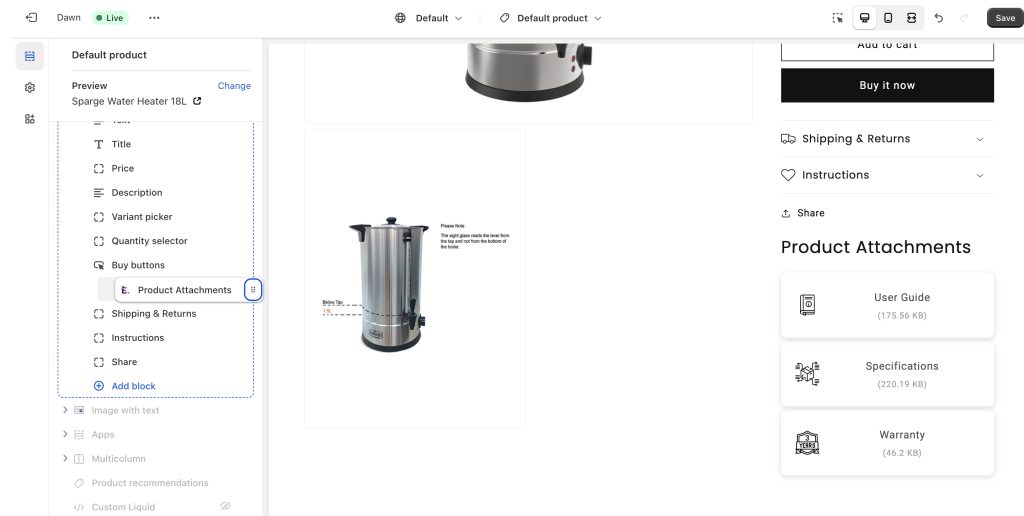
Click Add block and opt for the Product Attachments option at the bottom of the list.
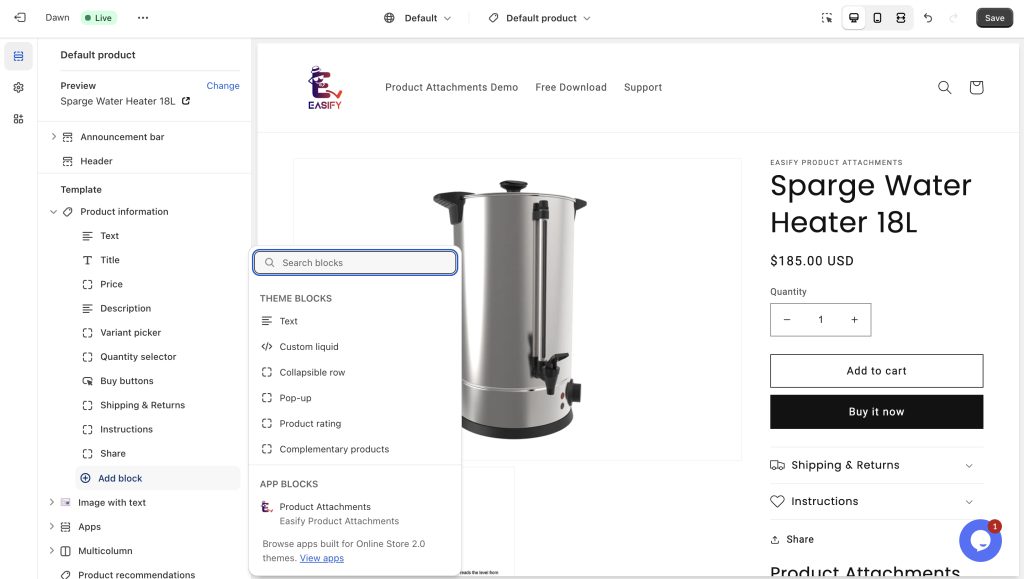
Witness the product attachment block seamlessly appear in the right preview.
Achieve precise placement within the section by effortlessly dragging it up or down within the left selected section list.
How to add The Product Attachments Section #
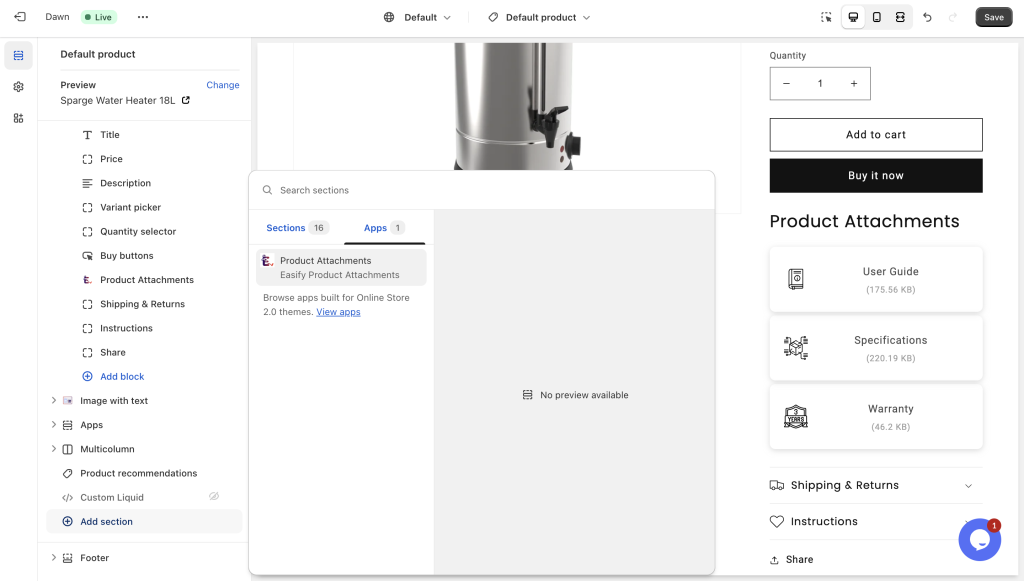
Navigate to the bottom of the left block and section list.
Click Add section, head to the Apps tab, and select Product Attachments.
Take full control of positioning the attachment section by effortlessly dragging it above or below other sections on the page.
How to change the Attachment block/section name #
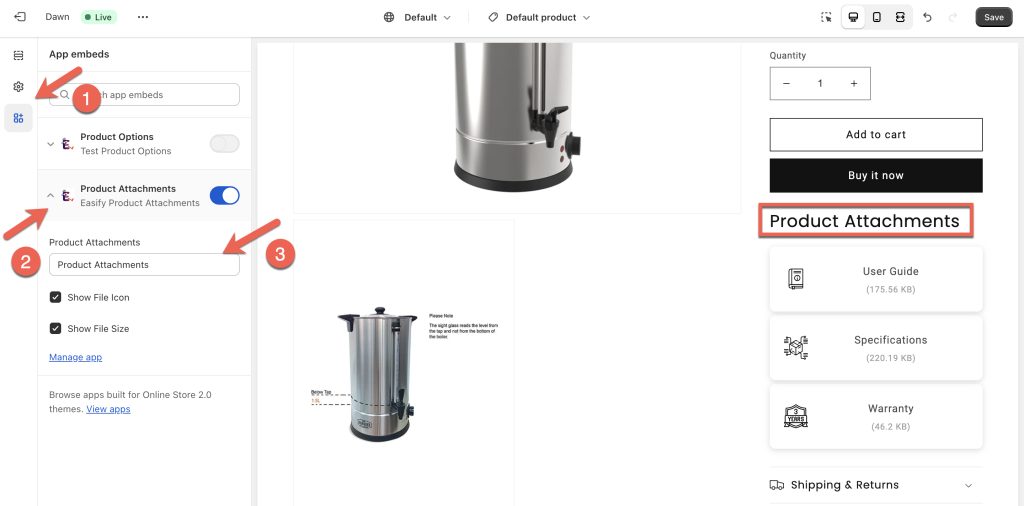
Head to the top left navigation and find the App embeds tab.
Expand the Product Attachments section.
Modify the name of the attachment block to your preference.
Optionally, you can choose whether to display the attachment file icon and size by selecting or deselecting the two options located beneath the attachments name field.
After configuring your attachment block or section with your personalized settings, be sure to save your progress.
Conclude the process by visiting your storefront to review and confirm the achieved results.