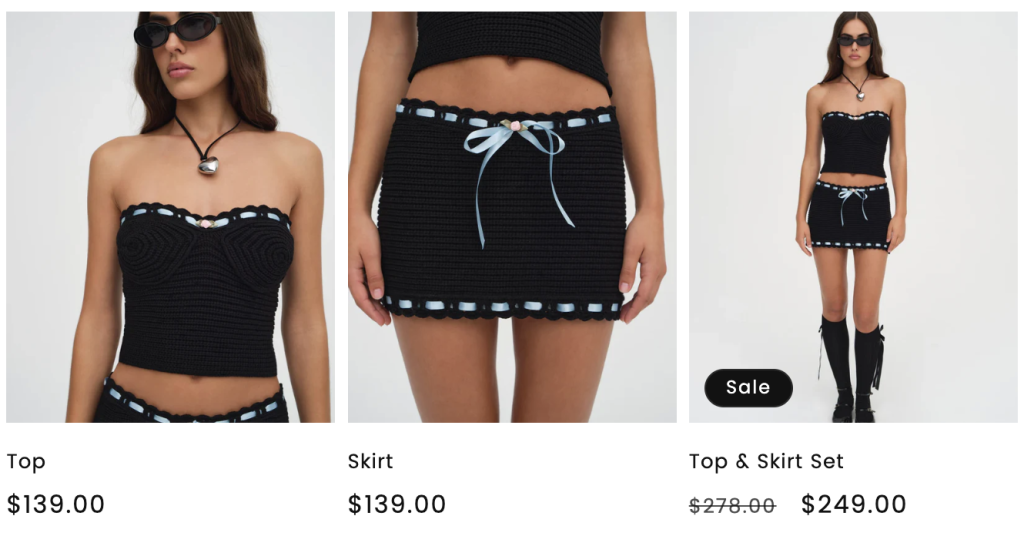
You sell Top & Skirt available both as individual items and in bundled sets – Top & Skirt Set, often offered at a discounted rate compared to buying single items separately.
Notes:
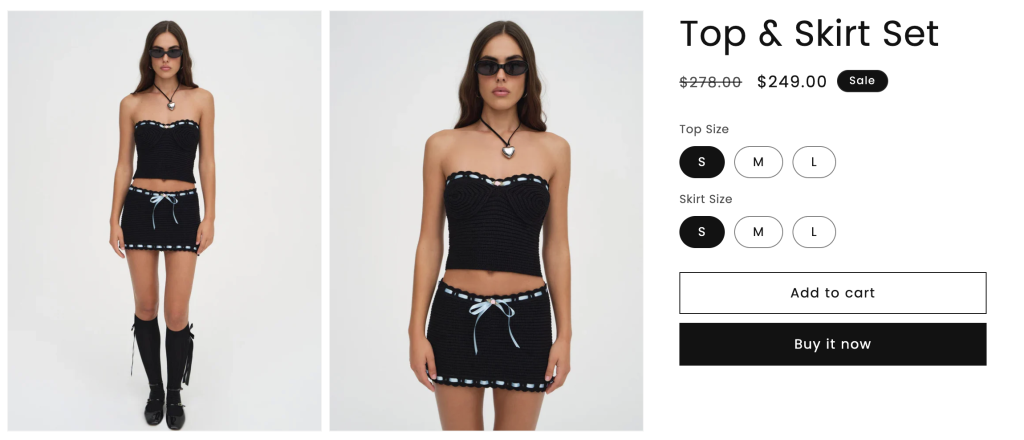
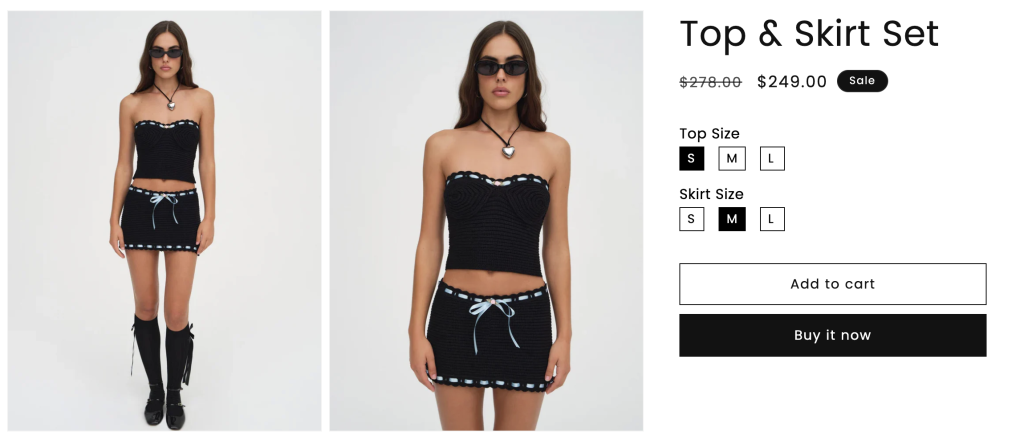
This guide will walk you through setting up bundle groups for Top, Skirt, and Top & Skirt Set when customers can choose either the same or different sizes for the top and skirt within the set (e.g., Top – S and Skirt – M).
However, if you prefer to let customers select a single size for the entire set (e.g., choosing size S for the Top & Skirt Set means receiving a Top – S and a Skirt – S), then please follow the other guide to manage your inventory.
The problem is that when you create and list the Top, Skirt, and Top & Skirt Set as separate products in Shopify, you need to manage separate inventories for each item, which means there’s no direct link between them. However, the inventory for the individual Top and the Top in the Top & Skirt Set is essentially the same. The same goes for the Skirt.
This means that if one inventory changes (whether for the Top, Skirt, or Set), it should impact the others as well. For example, when a Top & Skirt Set is purchased, the quantities of the individual Top and Skirt should also decrease. Conversely, if a Top is bought individually, the inventory for the Set must also reflect that change.
In short, using Shopify’s default functions to set up your products does not accurately reflect their inventory.
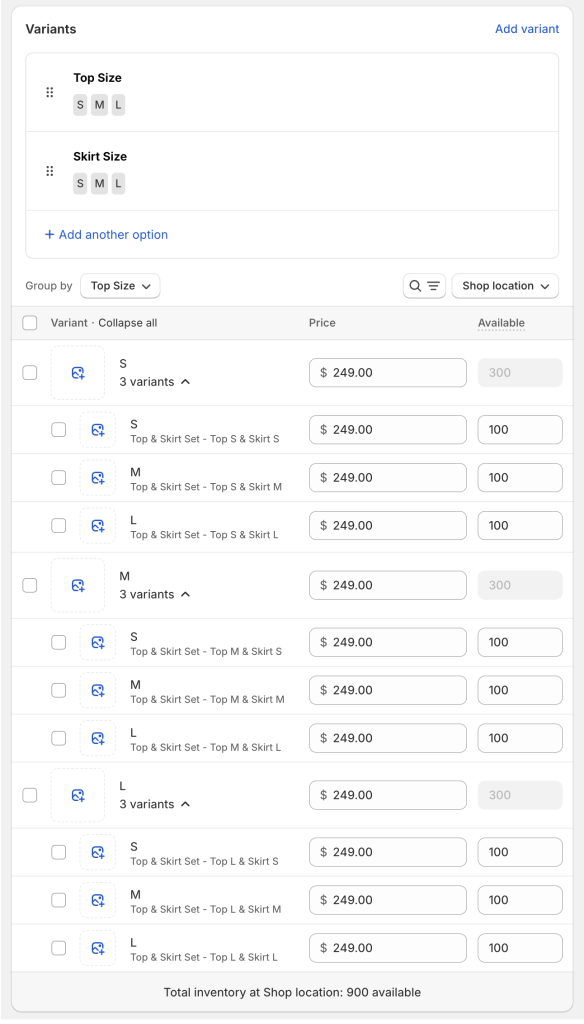
Additionally, there’s a complication when it comes to the Top & Skirt Set inventory. For instance, if both the Top and Skirt come in 3 sizes (S, M, L), creating the set in Shopify generates 9 different combinations (e.g., Top S – Skirt S, Top S – Skirt M, etc.). This requires you to set specific quantities for each Top – Skirt size combination, which can be complicated. Instead, it would be much easier to manage inventory for each Top and Skirt size individually (e.g., Top S: 100, Top M: 100, Top L: 100; Skirt S: 100, Skirt M: 100, Skirt L: 100).
These challenges emphasize the need for a solution that effectively manages inventory across all products, both individual items and the bundle sets.
Here are 2 solutions to consider for managing your Top, Skirt, and Top & Skirt Set inventories effectively:
Solution 1: Using Easify Inventory Sync app to set up Bundle Groups#
Overview:
You will create bundle groups to connect the inventory of each Top & Skirt Set product variant with the individual Top and Skirt products.
This way, the initial inventories of the Set will be automatically adjusted based on the existing inventories of the individual Top and Skirt products.
When the Set or individual Top/Skirt products are purchased, their inventories will be updated together.
Pros:
You only need to use the Easify Inventory Sync app.
Cons:
If your Top & Skirt Set product has 9 variants (3 sizes each for Top and Skirt), you will need to create 9 bundle groups manually. This can be time-consuming, especially if your products have more options and variants.
Steps to Set up:
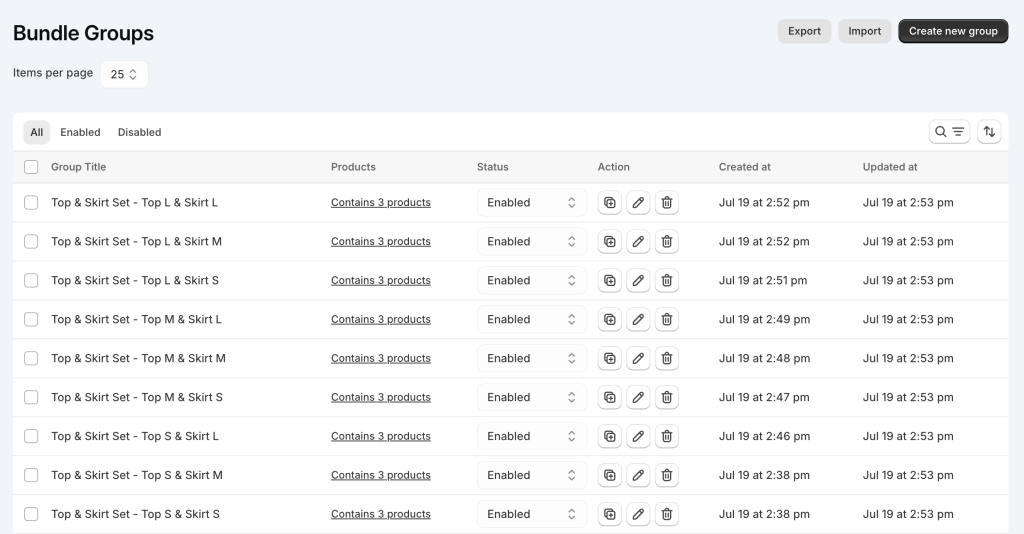
You’ll need to create separate bundle groups for each variant of the Top & Skirt Set product.
Each bundle group links specific variants of the Top & Skirt Set to their corresponding Top and Skirt variants. For example, the bundle group “Top & Skirt Set – Top S & Skirt M” connects the inventory of the Top & Skirt Set (with Top – S and Skirt – M) with the individual Top (size S) and Skirt (size M) variants.
After creating the first bundle group, e.g.,Top & Skirt Set – Top S & Skirt S, you can duplicate that group to quickly create groups for the other variant of Top & Skirt Set.
If you have multiple set products requiring similar Bundle Group setups, consider using the app’s Import function to create all bundle groups in a CSV file and import them into the app.
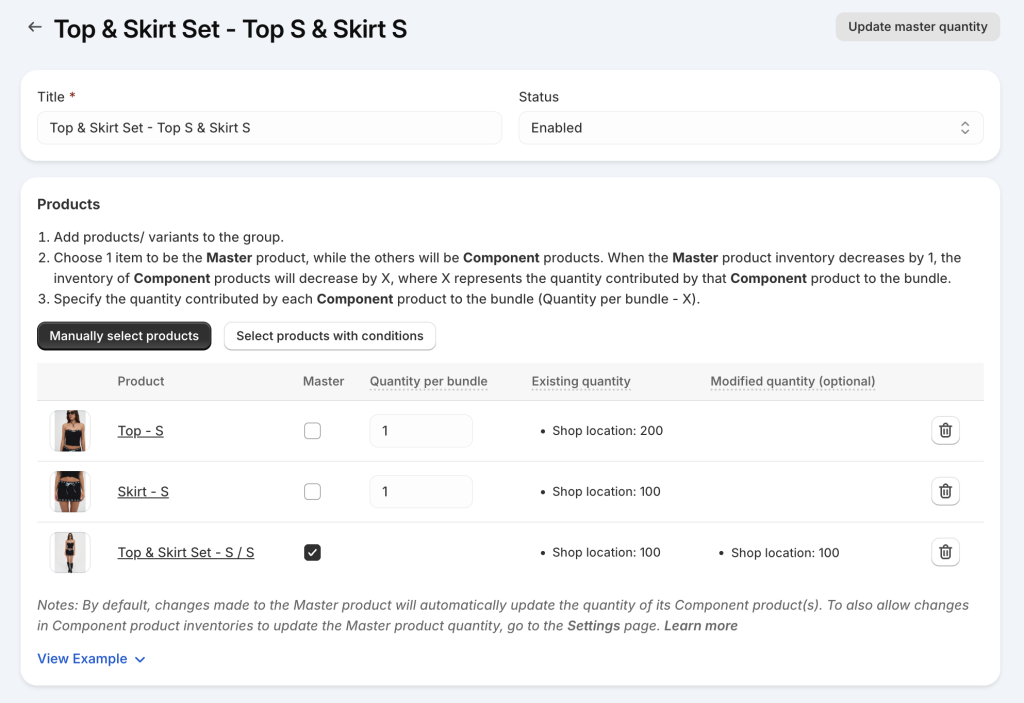
Below is the setup guide for creating the bundle group for the Top & Skirt Set – Top S & Skirt Svariant:
1. Navigate to the app’s menu and select Bundle Groups.
2. Click on the Add new group button to create a new bundle group.
3. Set a Title for the bundle group, which should include the Size variant name to distinguish among bundle groups. For example: “Top & Skirt Set – Top S and Skirt S”.
4. Add 3 product variants to the group, including:
The S / S variant of the Top & Skirt Set product
The S variant of the Top product
The S variant of the Skirt product
5. Define the Master and Component products:
Master product: Top & Skirt Set – S / S
Component product: Top – S and Skirt – S
6. Specify the Quantity per bundle for the Component product:
When a Top & Skirt Set – S / S is purchased, the quantities of both the Top (size S) and Skirt (size S) will each be reduced by 1.
Therefore, the quantity per bundle for the 2 base component products (Top – S and Skirt – S) is 1.
Once your bundle groups are set up, inventory synchronizations will begin.
For example, when a Top & Skirt Set (Top S and Skirt M) product is purchased, its quantity will be reduced by 1, and the quantities of the Top (size S) and Skirt (size M) will automatically adjust based on the predefined quantity per bundle (1).
Notes:
Automatic Master Quantity Adjustment:
To automatically adjust the available quantity of Top & Skirt Set product based on the actual quantities of the Top and Skirt products, follow these steps:
Enable the “Update Master based on changes in Component inventory” feature on the Settings page.
The adjustment will occur immediately after you create the bundle group or enable this setting.
Manual Quantity Update Process:
If you update the Component product quantity on Shopify’s Product editing pages, consider the following:
The Master product inventory will not update automatically, even if the “Update Master based on changes in Component inventory” feature is enabled.
To update the Master quantity after changing Component inventory on Shopify’s Product editing pages: Navigate to the Bundle Groups listing page, select the group containing those products, and click on the “Update Master quantity” button.
Solution 2: Setting up mutual Inventory Groups with the Easify Inventory Sync app and Size options with the Easify Product Options app#
Overview:
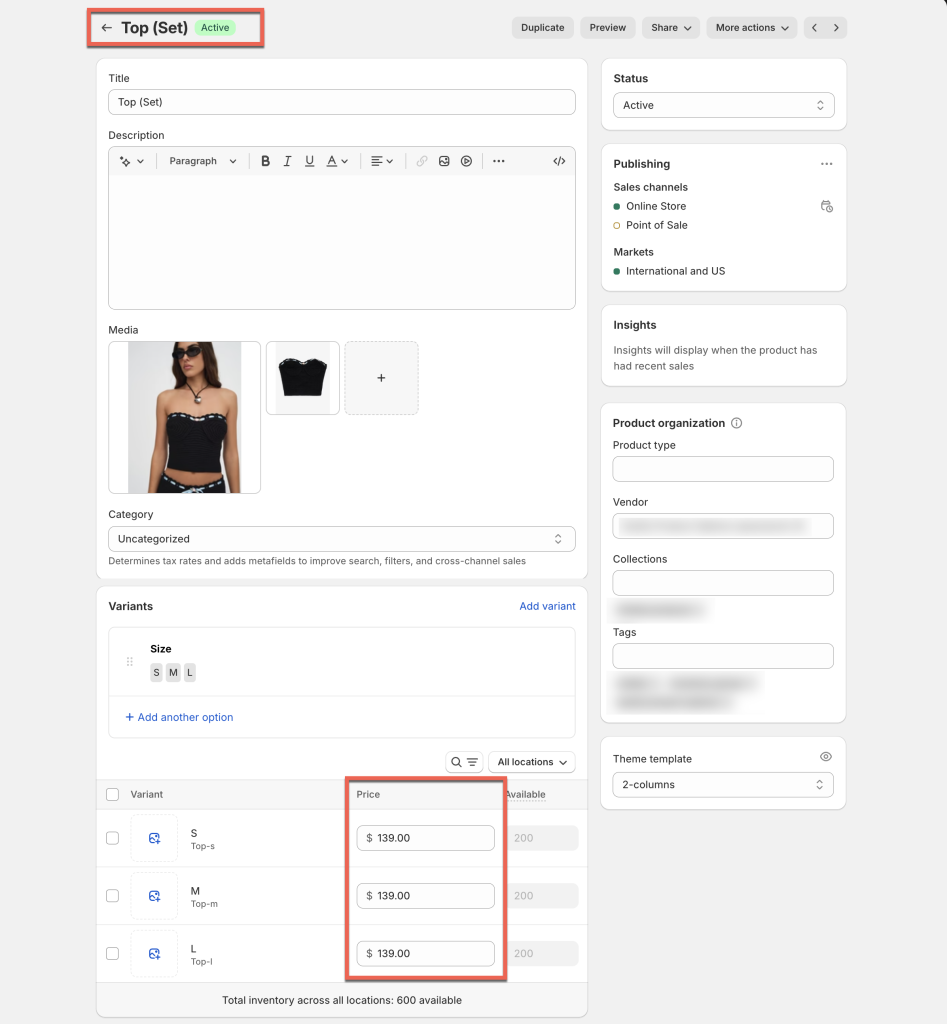
Duplicate the Products: Duplicate the individual Top and Skirt products. Set the duplicates – Top (Set) and Skirt (Set) to $0.00, set them as Active, and hide them from the storefront (Learn more). These duplicates will be used as Add-on Products for the Top & Skirt Set later on, allowing customers to select specific sizes for each item in the set.
Create Size Options: Use the Easify Product Options app to create Top Size and Skirt Size options, linking each size option to the duplicate products.
Sync Inventories: Create Inventory Groups in the Easify Inventory Sync app to sync the inventories of the duplicates with the original Top and Skirt products.
As a result, when customers buy the Top & Skirt Set and the duplicates are added to the cart, the inventory of the duplicates will sync with the original Top and Skirt products, and vice versa, ensuring accurate inventory management.
Pros:
This setup can be less time-consuming and easier to understand than the first solution. You’ll also have the opportunity to explore features of both Easify apps. Additionally, using both apps may qualify you for a discount – just contact us to learn about your benefits.
Cons:
Duplicating the products may seem complex at first, but don’t worry! You can follow the specific guides in the next sections or contact the Easify team via in-app live chat for quick assistance.
Steps to Set up:
1. Create Duplicates for the Original Top and Skirt Products:
You can use the Bulk Product Duplication feature in the Easify Inventory Sync app to quickly duplicate multiple products at once. Alternatively, you can manually duplicate your desired products by following the steps in the following guide.
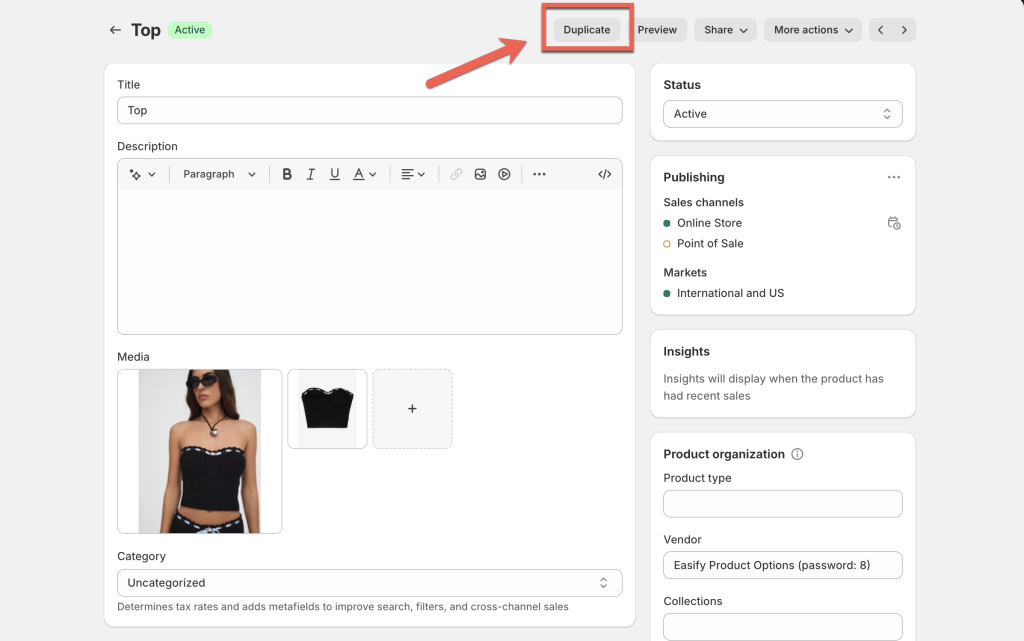
Open the product editing page for the Top, and click the “Duplicate” button.
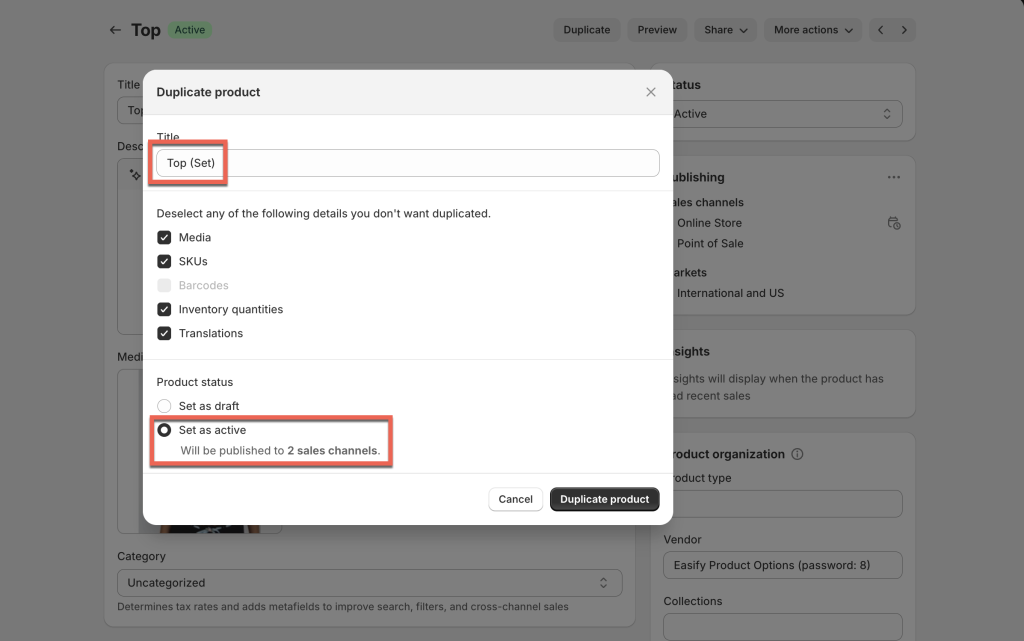
Rename the duplicate product (e.g., Top (Set)) to easily distinguish it from the original.
Ensure the duplicate product’s status is set to active in your Online Store so it can be purchased.
Keep the duplicate product’s SKU the same as the original to utilize the Smart scan feature for faster Inventory Group setup.
On the Duplicate product’s editing page, set all variant prices to $0.00. This ensures that when customers select sizes for top and skirt in the Top & Skirt Set (i.e., selecting these Duplicate/Add-on products), their prices do not add to the Top & Skirt Set price.
2. Set up Top and Skirt’s Size options in Easify Product Options app:
Install and activate the Easify Product Options app in your theme.
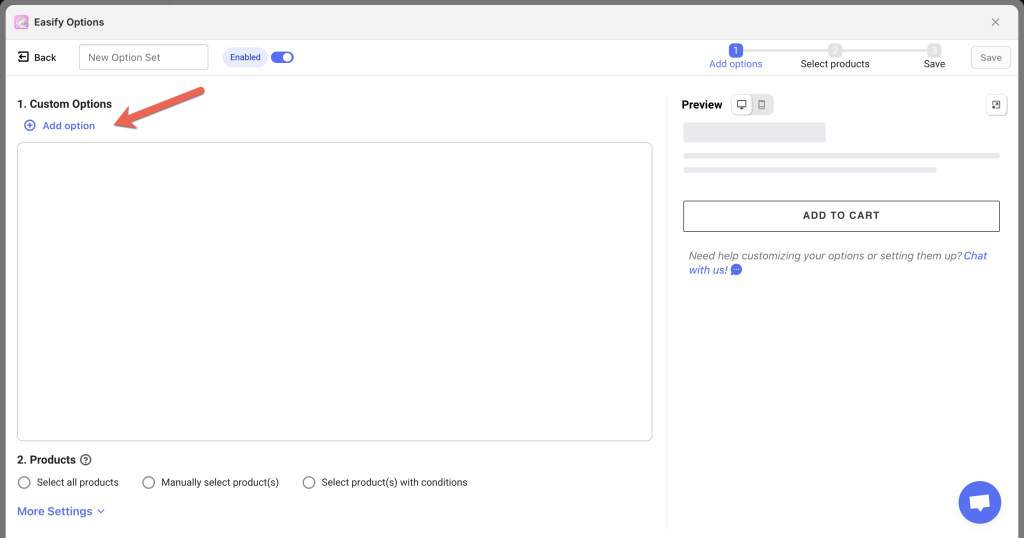
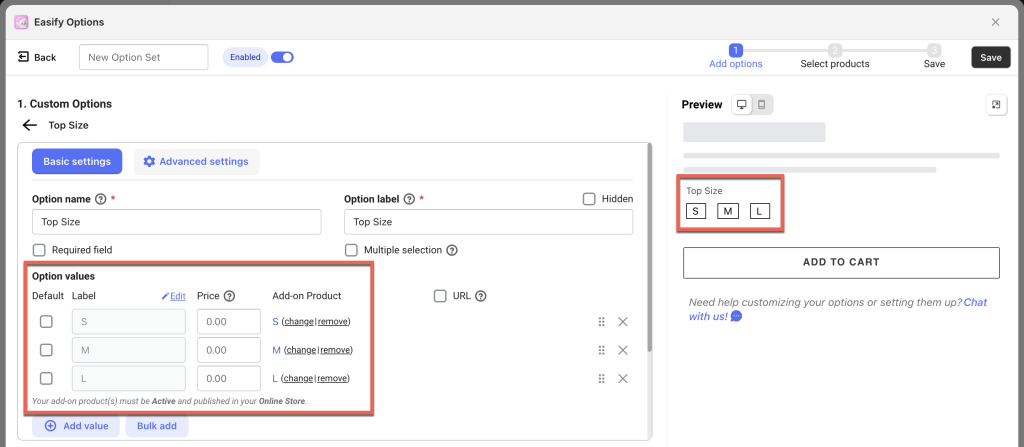
Create a new option set. Start by creating Top Size options first. Click “Add option”:
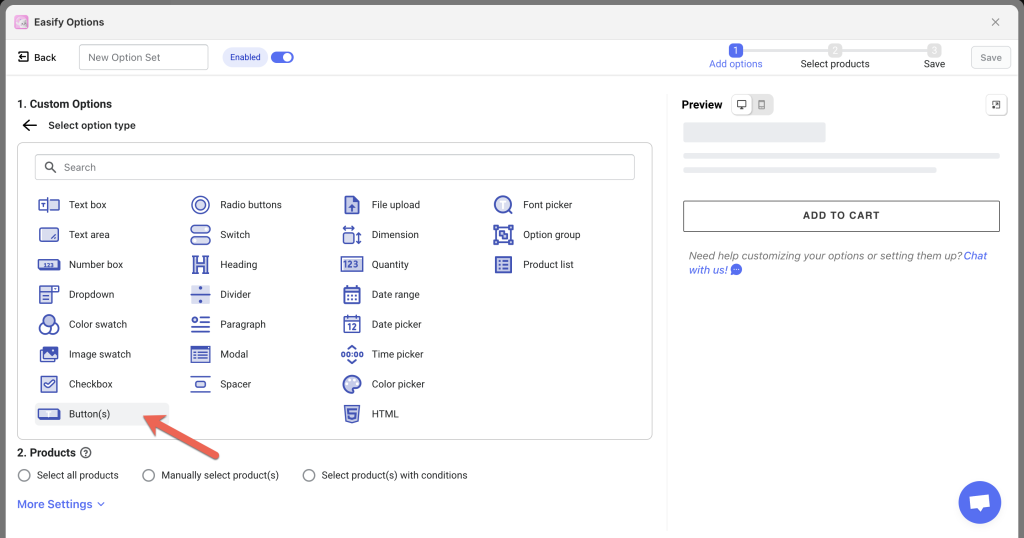
Choose your preferred option type for size options, such as Buttons.
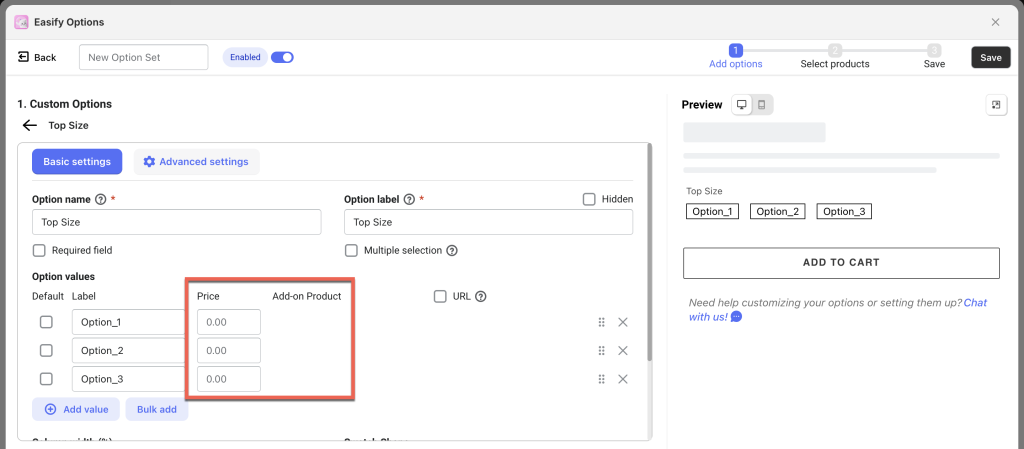
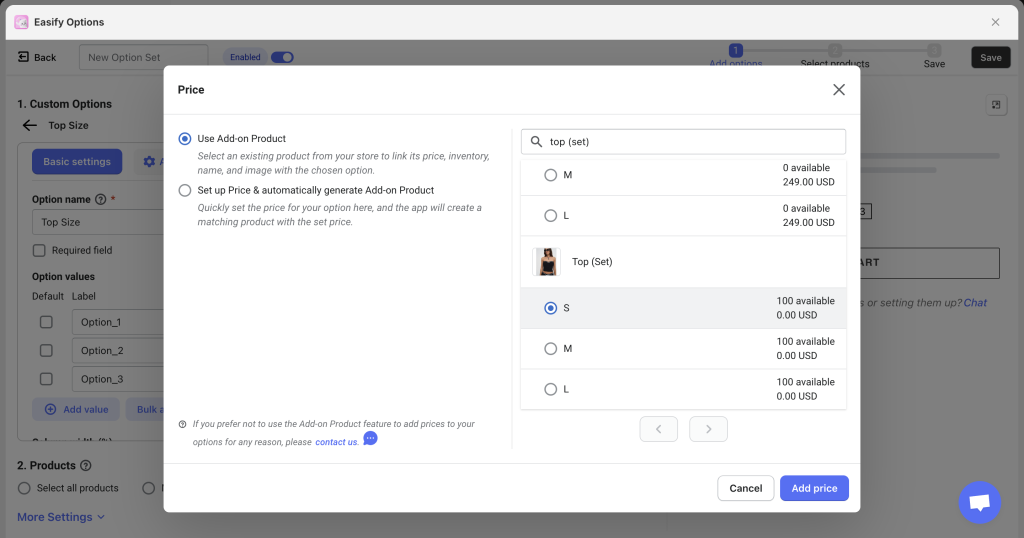
Add the option name and label, then click on the Price field to link each option value with size variants of the duplicate top product – Top (Set).
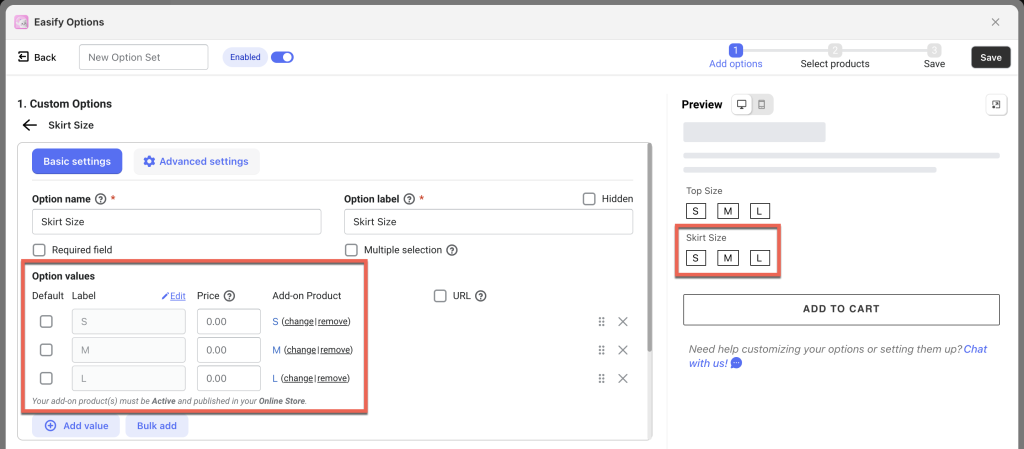
Similarly, add Skirt Size options:
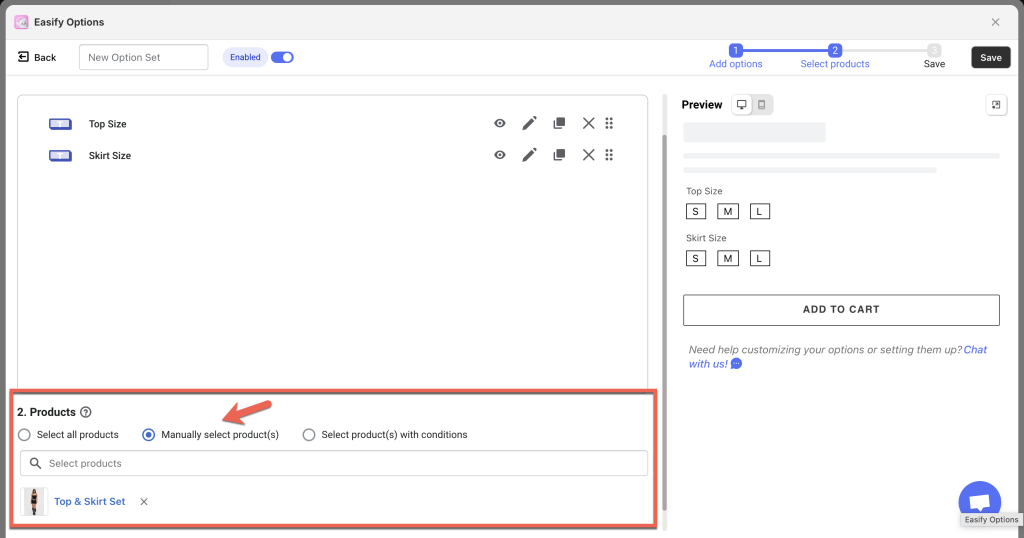
Assign the option set (including the Top Size and Skirt Size options) to your Top & Skirt Set product.
3. Create Inventory Groups in Easify Inventory Sync App:
To sync the inventory of the original Top and Skirt products with their duplicates (Top (Set) and Skirt (Set)), you’ll need to create Inventory Groups.
There are 2 ways to do this:
Smart Scan
If you’ve maintained the same SKU for your duplicate products, you can use the Smart Scan feature.
The Smart Scan automatically detects products with matching SKUs in your store and suggests groups for them.
Here’s how to use it:
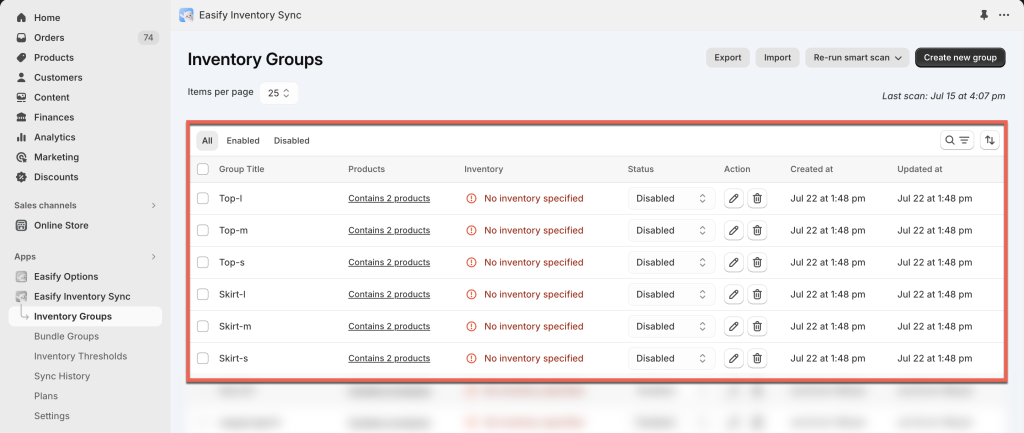
Choose “Inventory Groups” from the app navigation menu.
Click the “Run smart scan” button to start the scan.
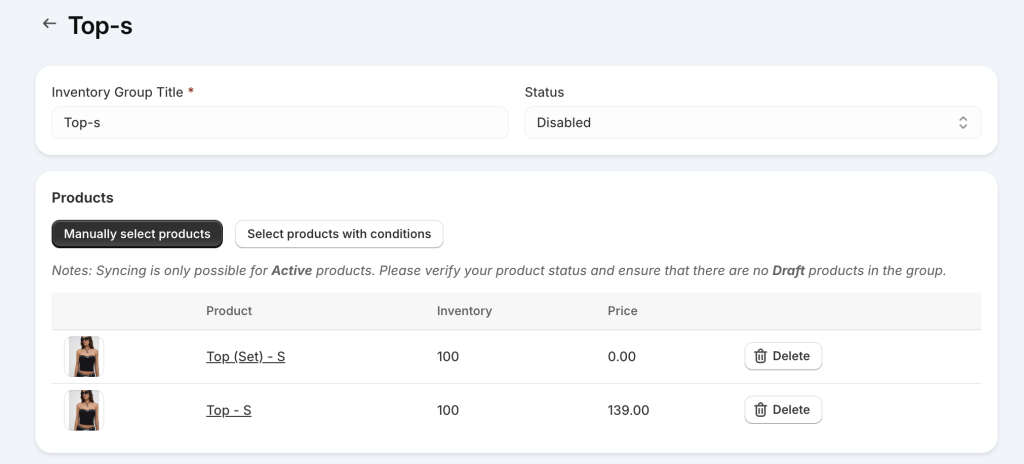
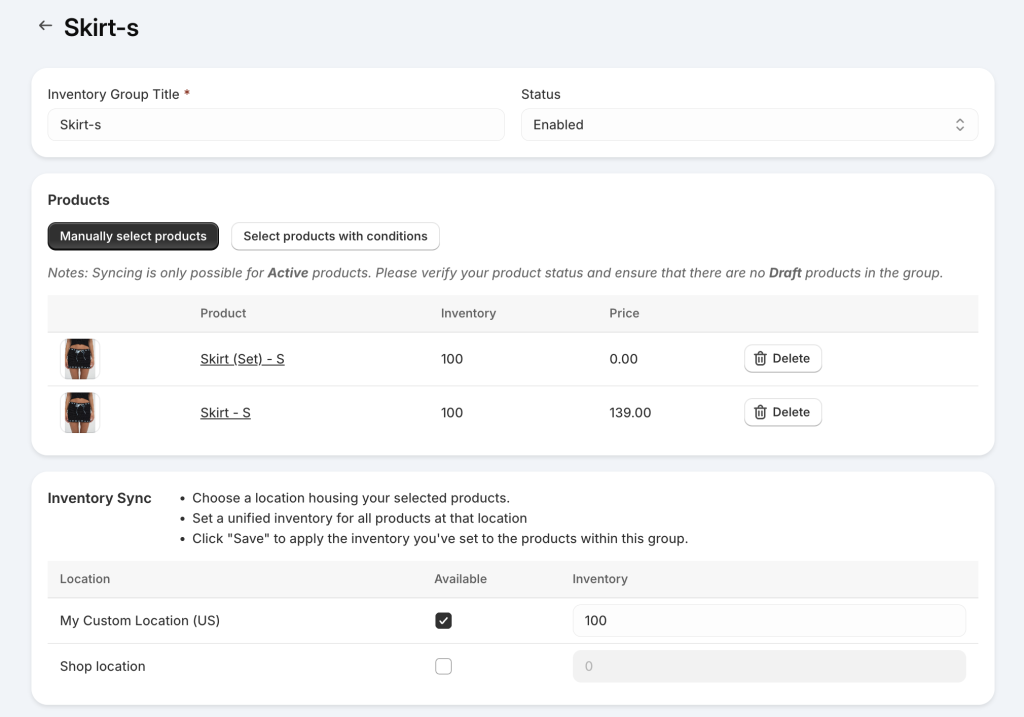
The app will suggest groups based on matching SKUs. Since both the Top and Skirt have 3 sizes each, you’ll see 6 suggested groups. Each group pairs a variant of the original product with the same size variant of the duplicate product. For example, the “Top-s” group will include theSvariant of the original Top and the S variant of the duplicate Top (Set).
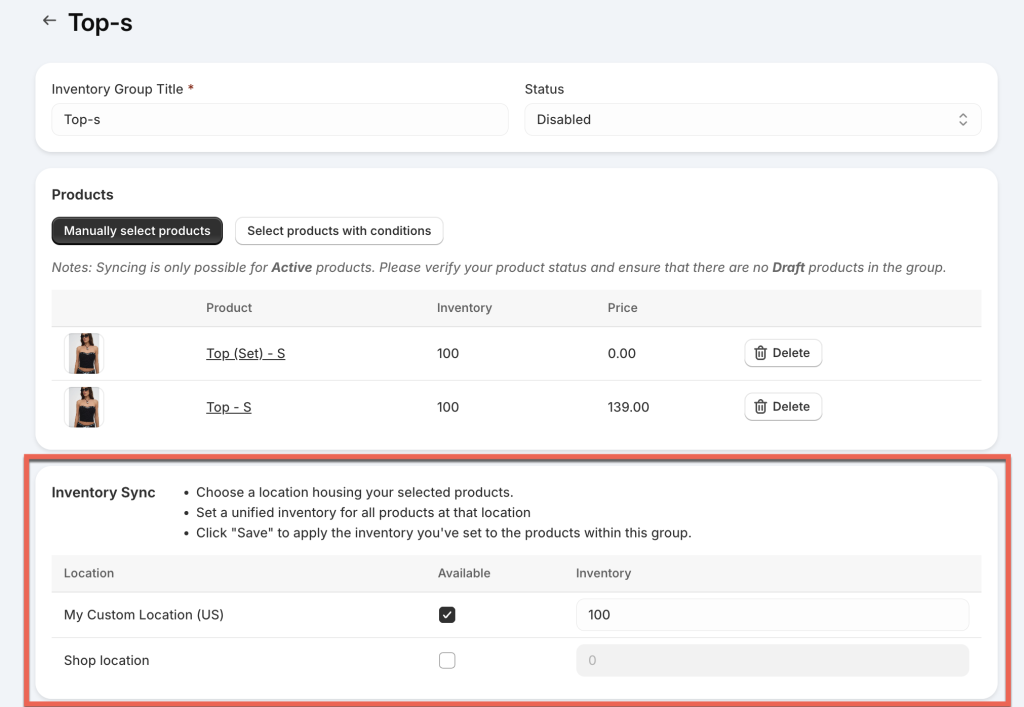
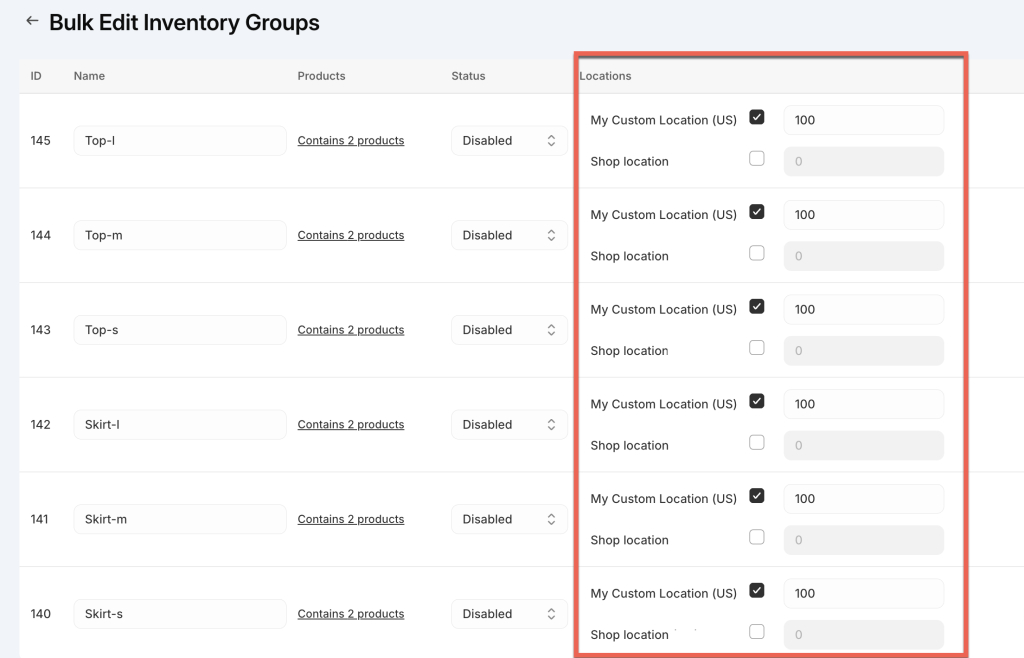
Next, edit each inventory group to set mutual inventory for all products in each group.
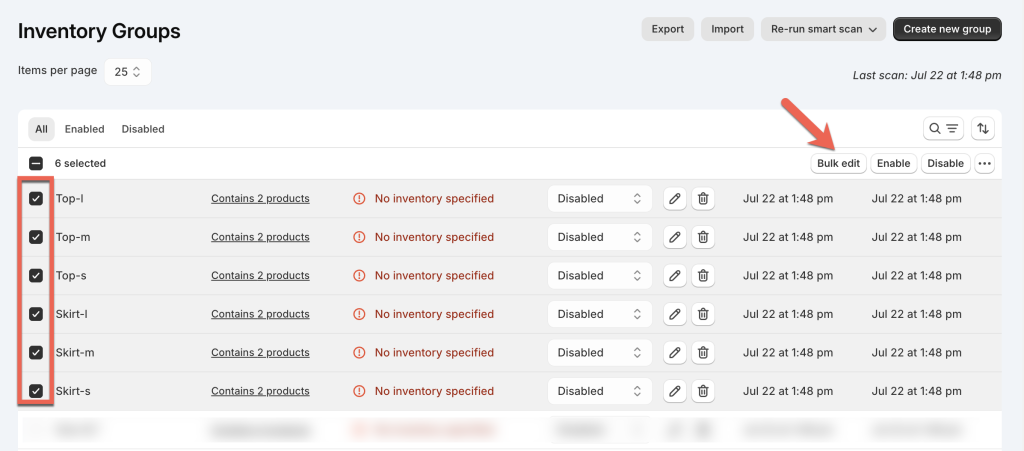
You can also use the Bulk edit feature to update inventories for all groups simultaneously.
Once you save the groups, the app will apply mutual inventories and sync the stock of all products in the groups according to your settings.
If your duplicates have different SKUs, you’ll need to set up 6 inventory groups manually:
Go to “Inventory Groups” in the app navigation menu.
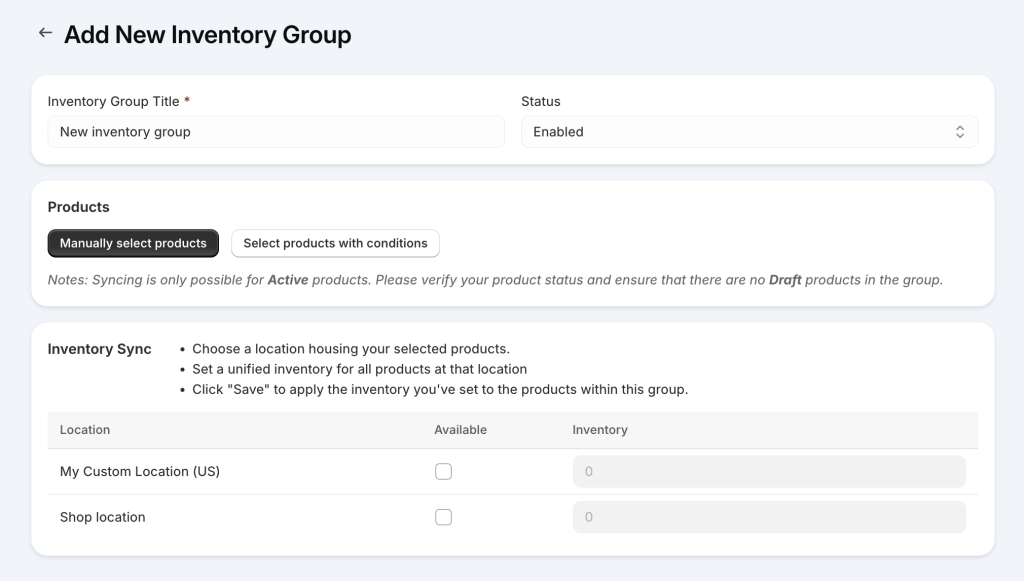
Click the “Add new group” button.
Enter the required information for the new group, manually select the Original and Duplicate products’ variants (same size) to add, set mutual inventory for both, and save the group.
If you run into any challenges while setting up your inventory syncs, feel free to reach out to us for assistance through our convenient in-app live chat. We’re here to help!