Standard Conditional Logic lets you easily create relationships between Easify custom product options. Simply put, you can set options to appear or disappear based on other choices your customers make.
For showing/hiding Easify options based on selected Shopify variants, check out this guide for that setup.
You can apply Standard Conditional Logic to any option within your set, except the first one.
Unlike many other Shopify product options apps, this feature is provided in all Easify plans – even the Free one!
Common Use Cases #
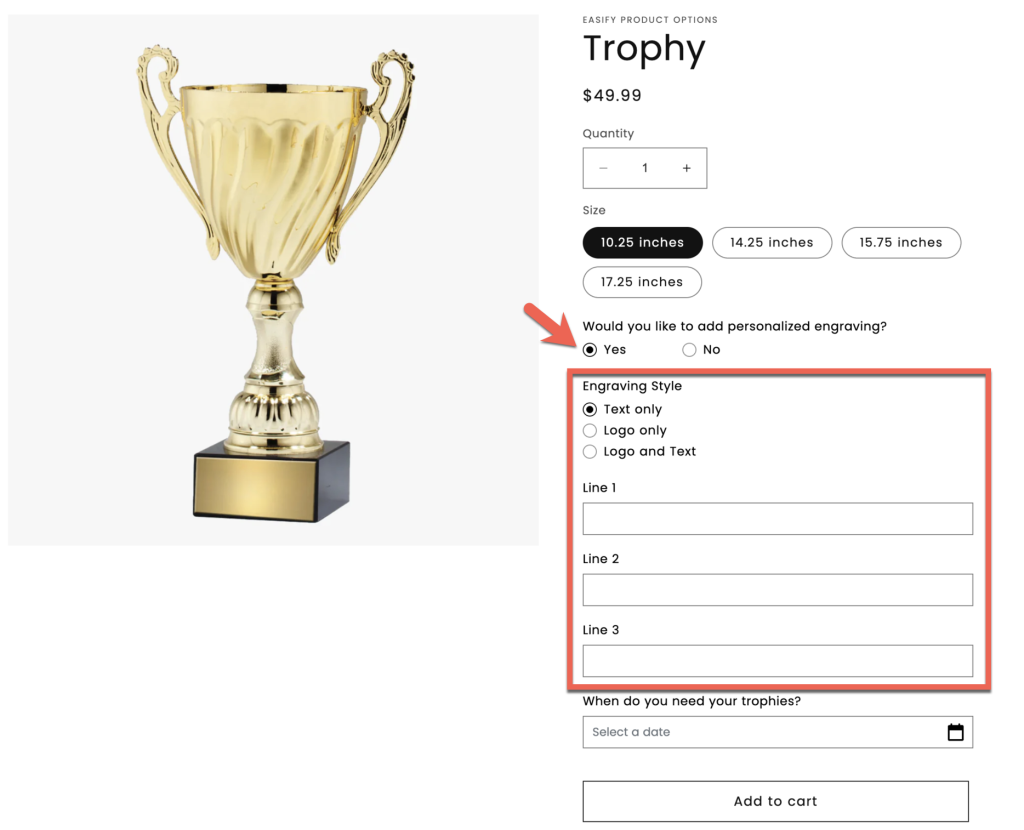
- Engraving: If a customer selects the Engraving checkbox, a Text Box will appear for them to enter engraving text, along with a Font Picker.
- Gift Wrapping: Choosing “Yes” for “Is this a gift?” will reveal options for gift wrapping and choosing a card.
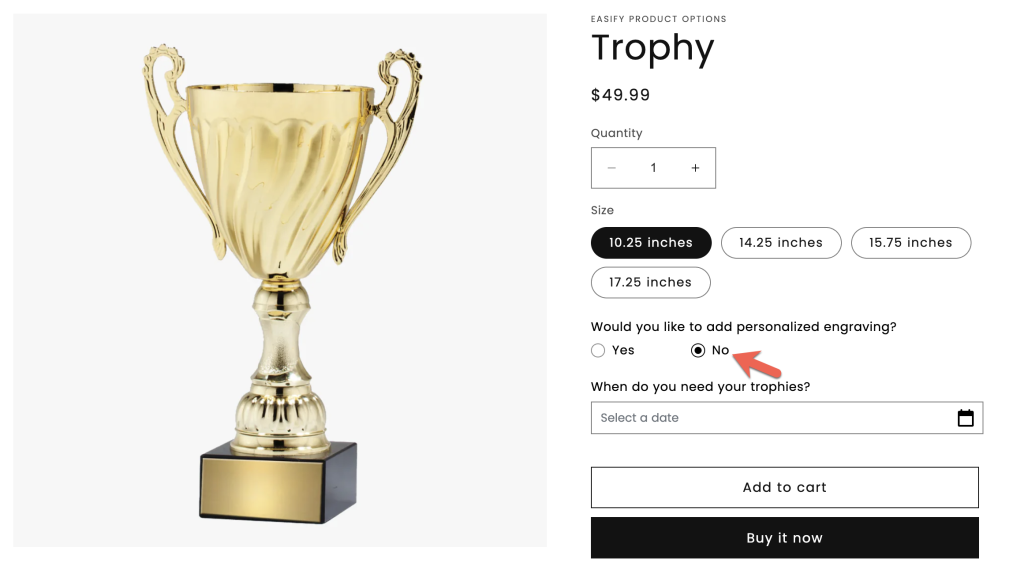
- Personalized Mug: Selecting “Text only” will show a text field for printing text on the mug. If they choose “Text and Logo,” both a text field and file upload will appear.
- Custom Color: Selecting a custom color option will display a Color Picker so they can choose from a palette.
Demo #
How To Set Up Standard Conditional Logic #
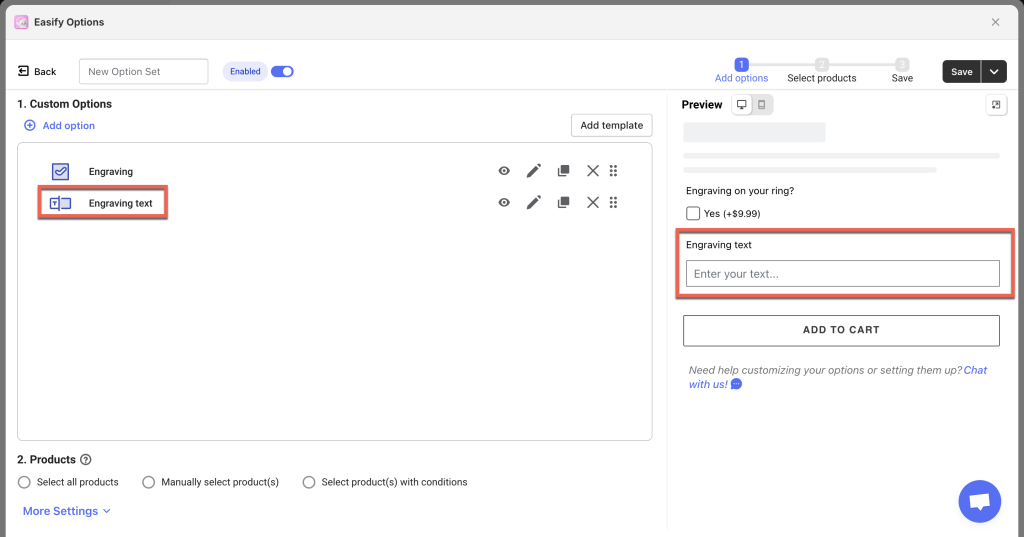
1. Select your target option #
Choose the option you want to make dependent on another.
Example:
If you’ve added an “Engraving” checkbox and a text box for engraving text, you’d select the text field to set conditional logic so it only shows up if Engraving is checked.
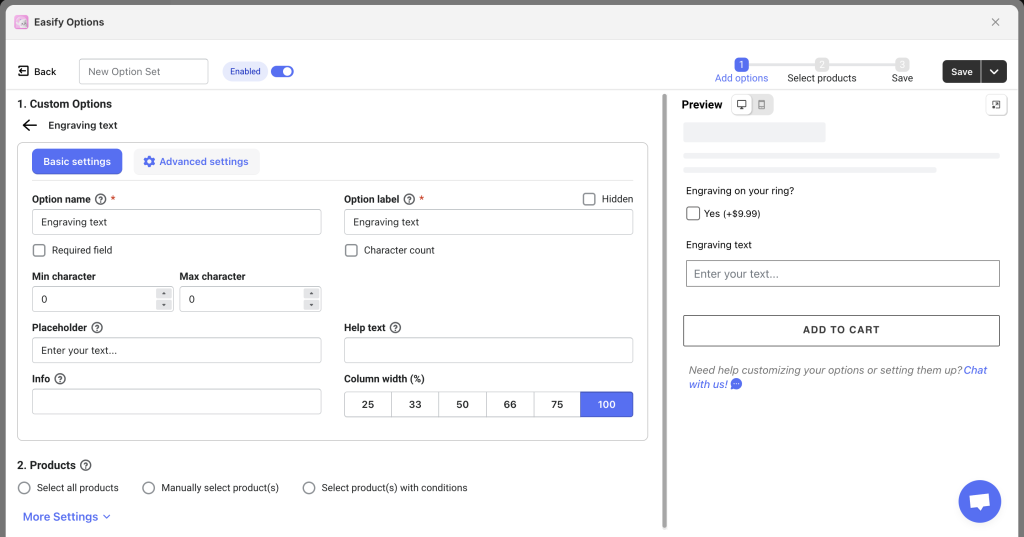
2. Enable conditional logic #
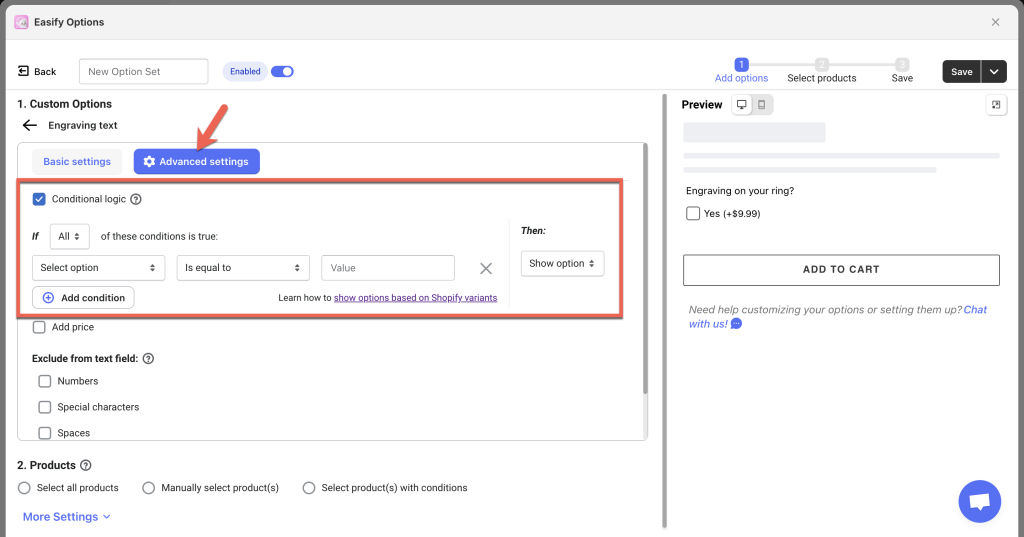
Head to the Advanced settings tab, and check the box for Use Conditional Logic to reveal configuration options.
3. Set your conditions #
Specify the conditions under which the option will be shown or hidden:
If [All/Any] of these conditions are true:
[Select option] [Select relative] [Add value]
Then:
[Select action]
- Choose whether All or Any of the conditions need to be true: This determines if all the specified conditions must be met or if just one of them is enough to trigger the conditional action.
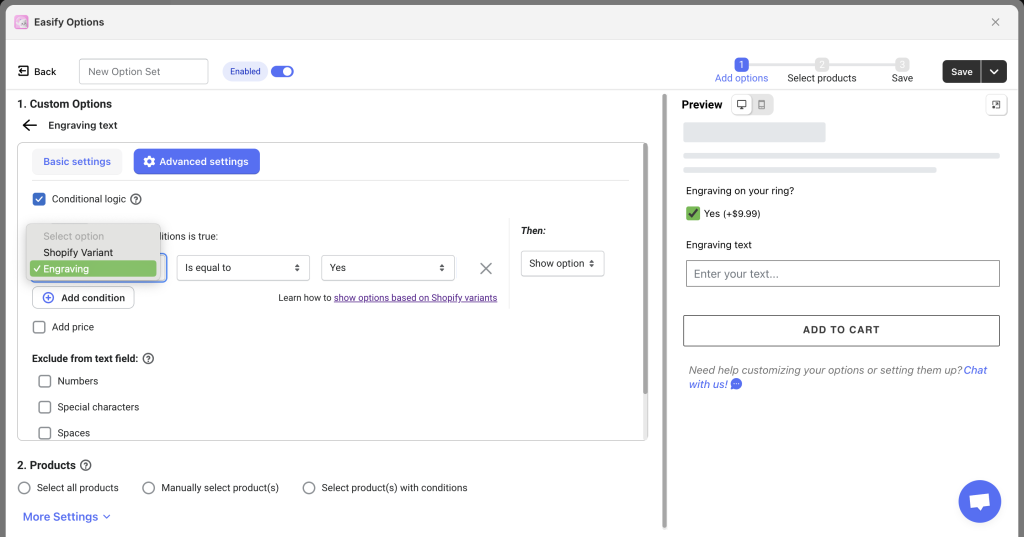
- Select option that the current option depends on: Choose the option that will affect the visibility of the current option.
- Select relative: Choose the relationship between the selected option and the current option among “Is equal to”, “Is not equal to”, “Starts with”, “Ends with”, “Contains”, or “Does not contain”. These conditions define how the values of the options should match or differ.
- Is equal to: This condition requires the values of the selected option and the current option to be exactly the same.
- Is not equal to: This condition means the values of the selected option and the current option must be different. The conditional action will be triggered when the values don’t match.
- Starts with: This condition checks if the value of the current option begins with the same characters as the value of the selected option. It’s useful when you have values that share a common starting pattern.
- Ends with: This condition checks if the value of the current option ends with the same characters as the value of the selected option. It’s helpful when values have a common ending pattern.
- Contains: This condition checks if the value of the current option contains the value of the selected option. It looks for a partial match.
- Does not contain: This condition checks if the value of the current option does not include the value of the selected option. It triggers the conditional action when the selected option’s value is not found within the current option’s value.
- Select/enter value: Select or enter the value that the selected option needs to have for the conditional action to take effect.
- Specify whether the option should be shown or hidden when the conditions are met:
- Show option: Select this action if you want the option to be visible when the conditions are satisfied.
- Hide option: Choose this action if you want the option to be hidden when the conditions are satisfied.
- If you need to set up multiple conditions for the same option, you can click the Add condition button.
Example:
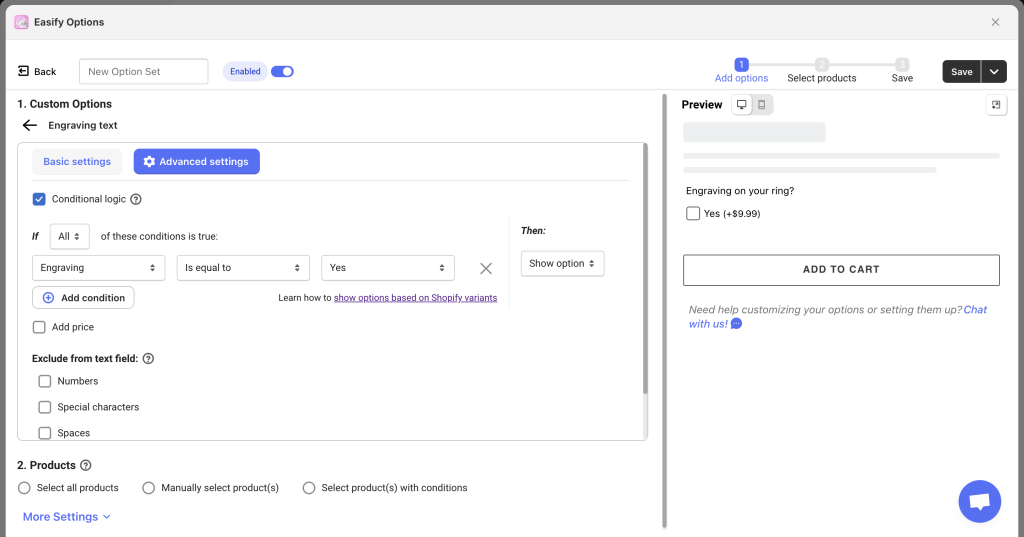
Continuing with the engraving example, choose:
- Select option: Engraving
- Select relative: Is equal to
- Select value: Yes
Now, the text field for engraving will show up only when customers select “Yes” for Engraving on the ring, and it will remain hidden if Engraving is unchecked.
Need Assistance? #
If you have questions or need assistance setting up conditional logic, don’t hesitate to reach out! Our support team is available via in-app live chat and ready to help you make the most of Easify’s features.