This guide provides step-by-step instructions on configuring the Advanced Conditional Logic to dynamically show or hide Easify’s custom options based on the Shopify variants selected by your customers.
If you’re looking to set up Standard Conditional Logic between Easify options, check out this guide on that instead.
This feature is available on our Pro and Premium plans.
Currently, Advanced Conditional Logic is available only on Product Pages. We’re working to extend this to other pages soon, so stay tuned for updates!
Common Use Cases #
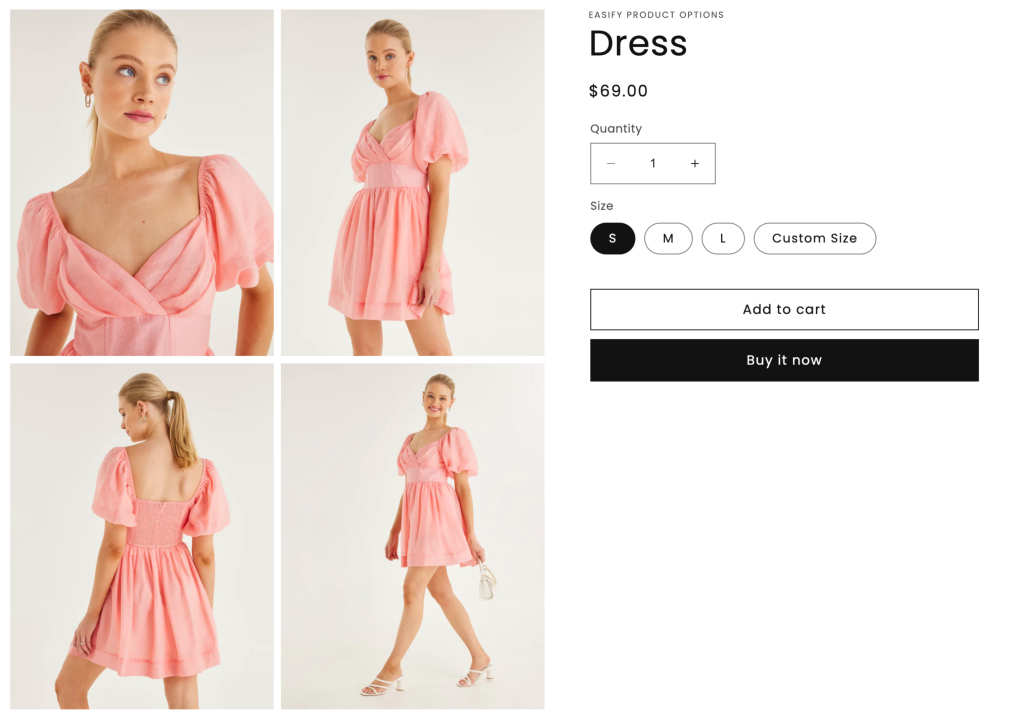
- Custom Size: When customers choose the “Custom size” variant, Easify custom options, like text fields or dimension fields, appear so they can enter their specific measurements.
- Bed & Mattress Combos: When a customer selects a specific bed size (Shopify variant), the matching mattress size appears (linked through Easify options to add-on mattress products).
- Art & Frame Pairings: Selecting a specific art print size automatically reveals matching frame options (linked to add-on frame products).
How To Set Up Advanced Conditional Logic #
Example 1: The main product has only 1 Shopify option #
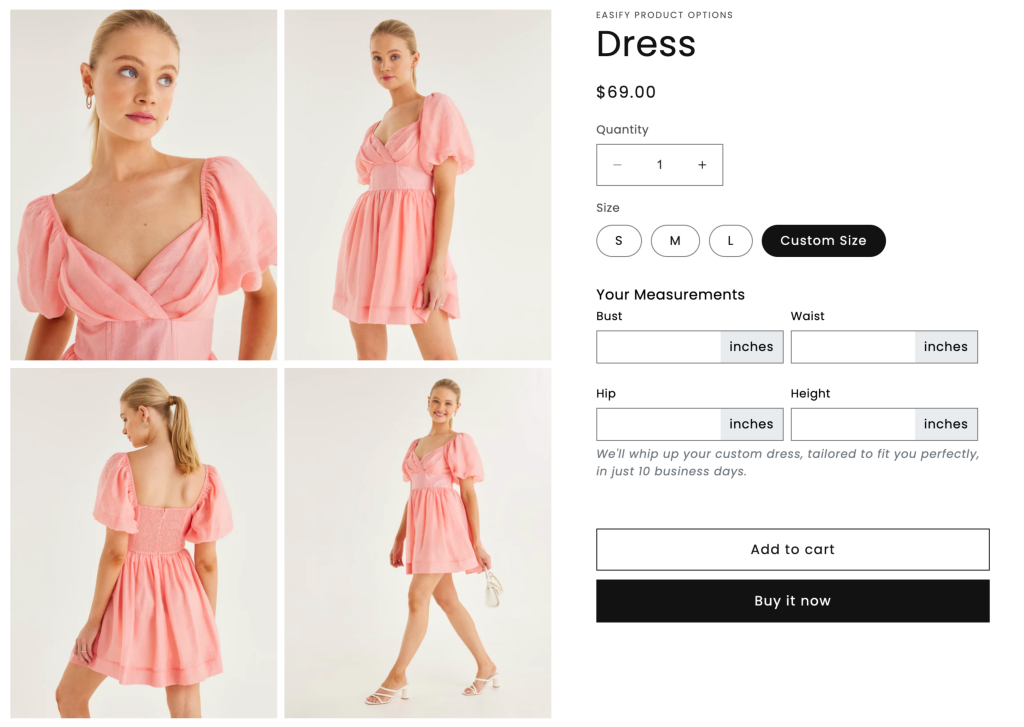
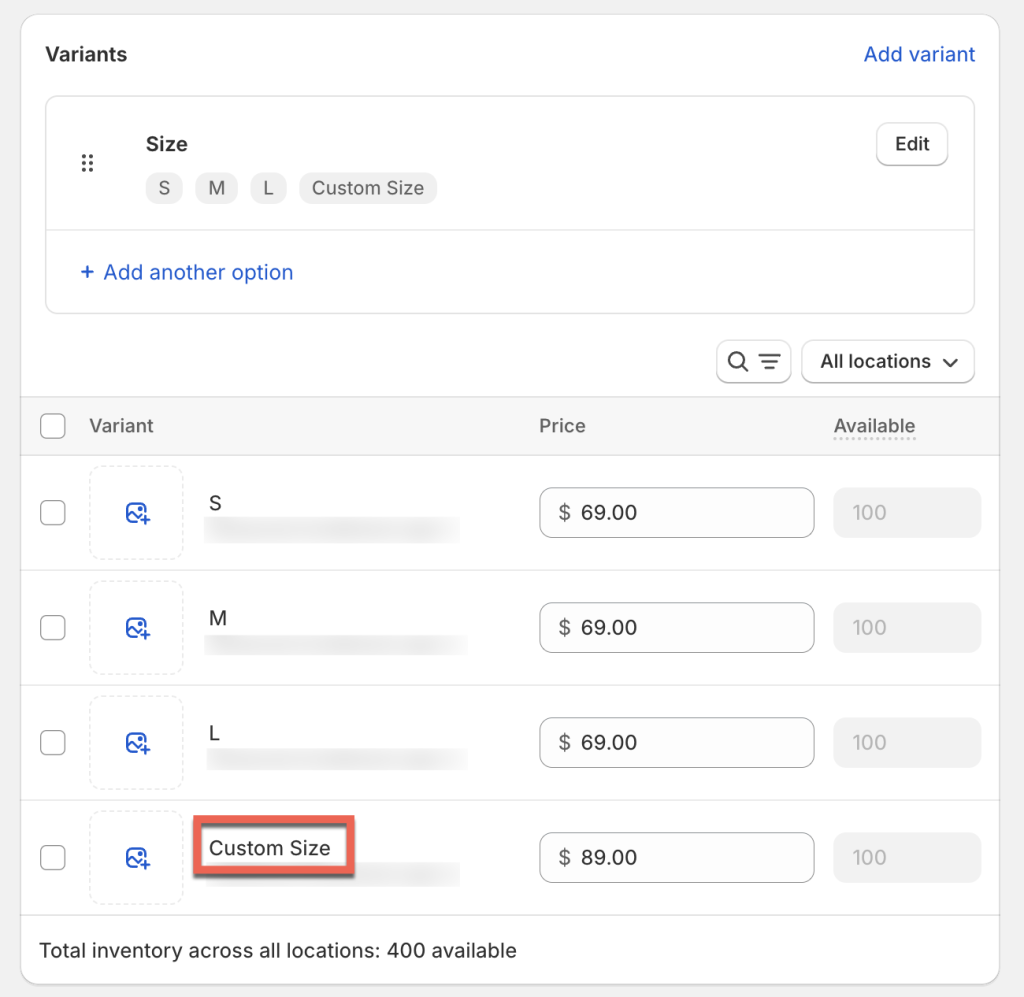
Custom Size – Reveal Easifty’s custom Dimension fields when customers choose the “Custom Size” (Shopify variant) in the Size option.
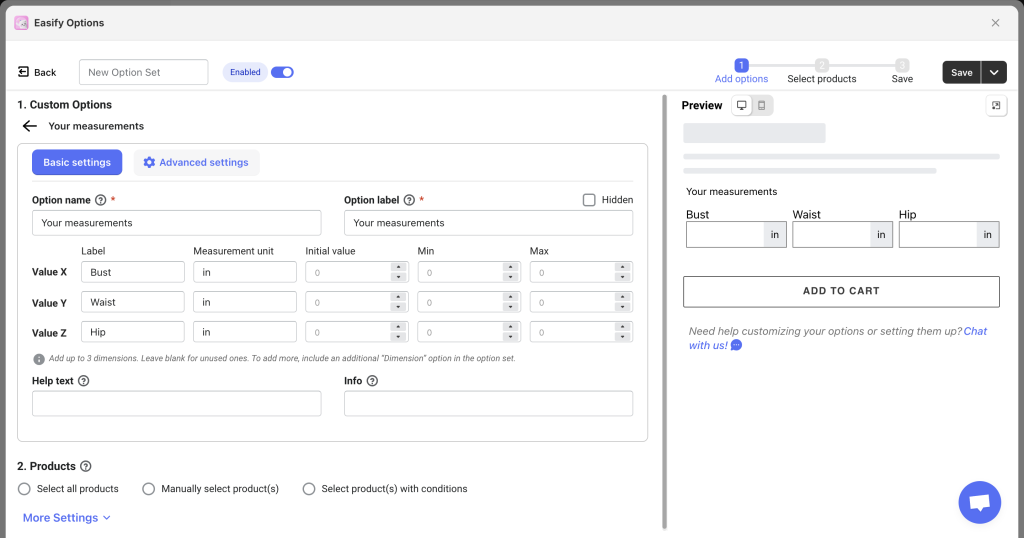
Step 1: Create a New Option Set with Your Custom Option(s) #
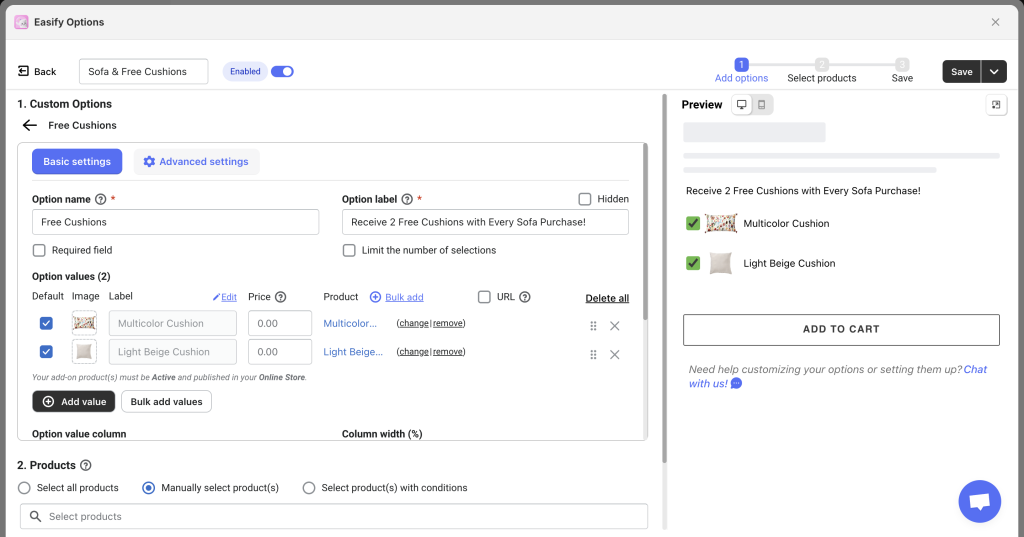
Begin by creating a new option set and adding any custom options you need, like dimensions for entering custom sizes/measurements.
Step 2: Enable Conditional Logic on the Option #
Head to the Advanced settings tab, and check the box for Use Conditional Logic to reveal configuration options.
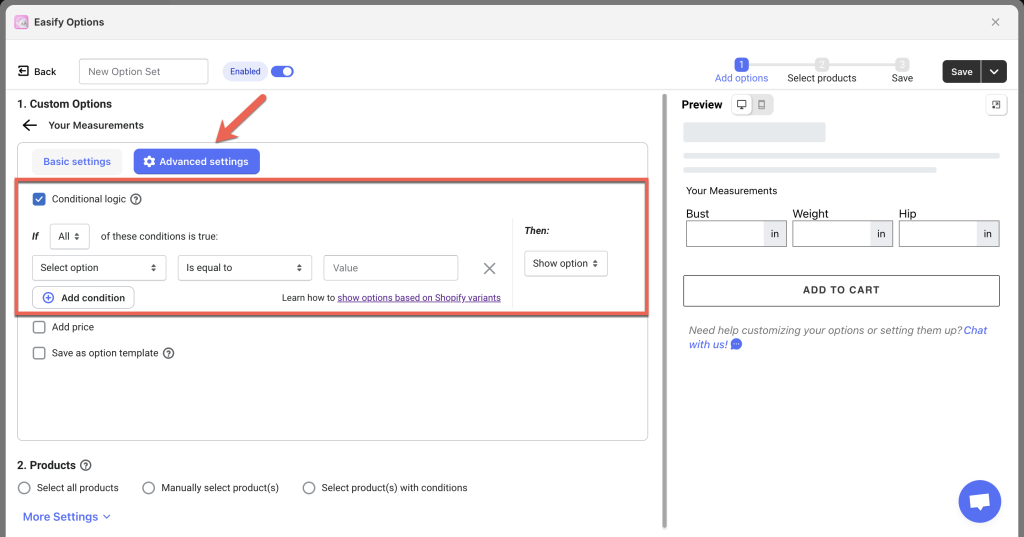
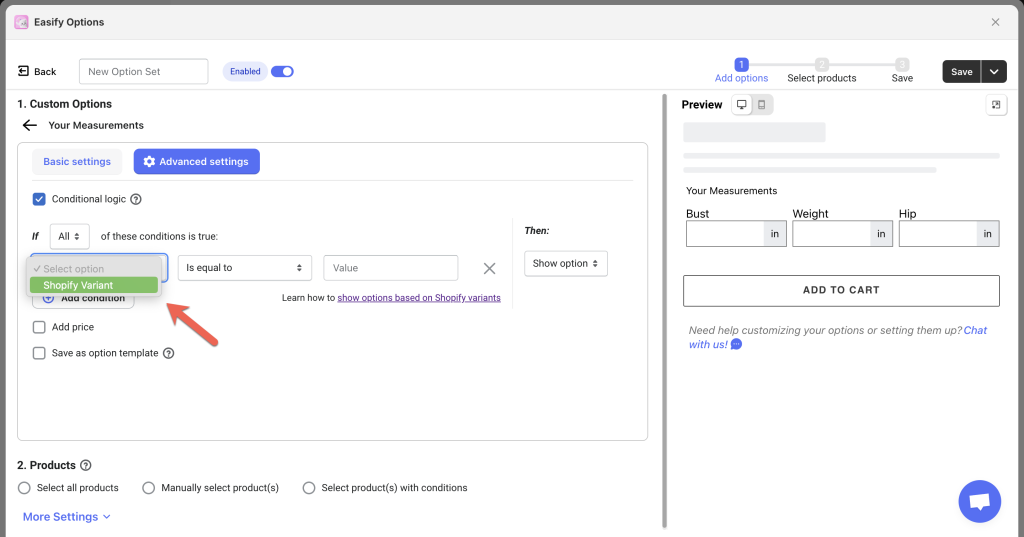
Step 3: Configure Condition Logic with Shopify Variants #
- Select Shopify Variant from the “Select option” dropdown.
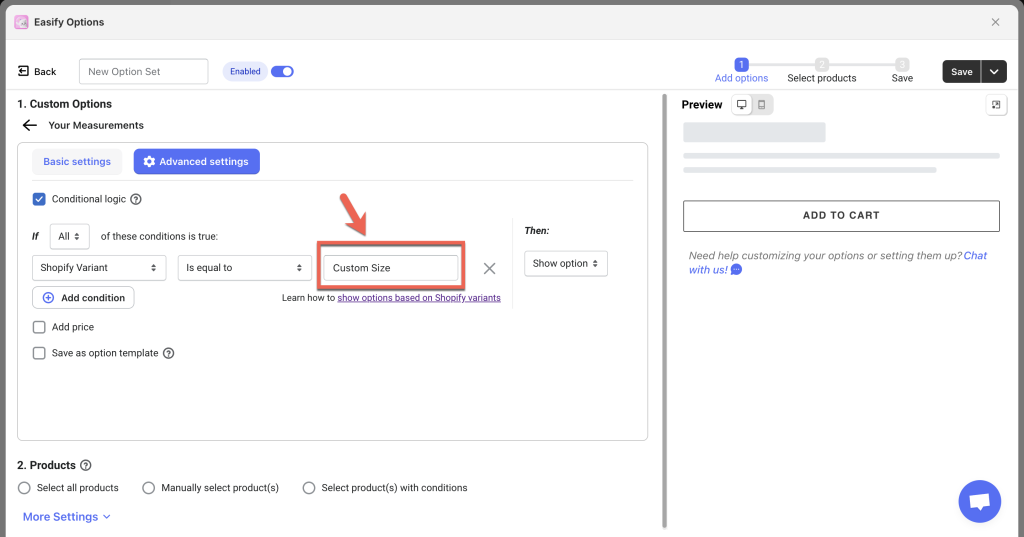
- Enter the exact name of the Shopify variant that will trigger Easify’s custom options. For this example, input “Custom Size” to reveal the custom dimension fields.
Important Notes:
- Be sure the value entered in the condition matches exactly Shopify variant name – what’s set up in Shopify product editing page. Any differences in capitalization or spacing will prevent the logic from working.
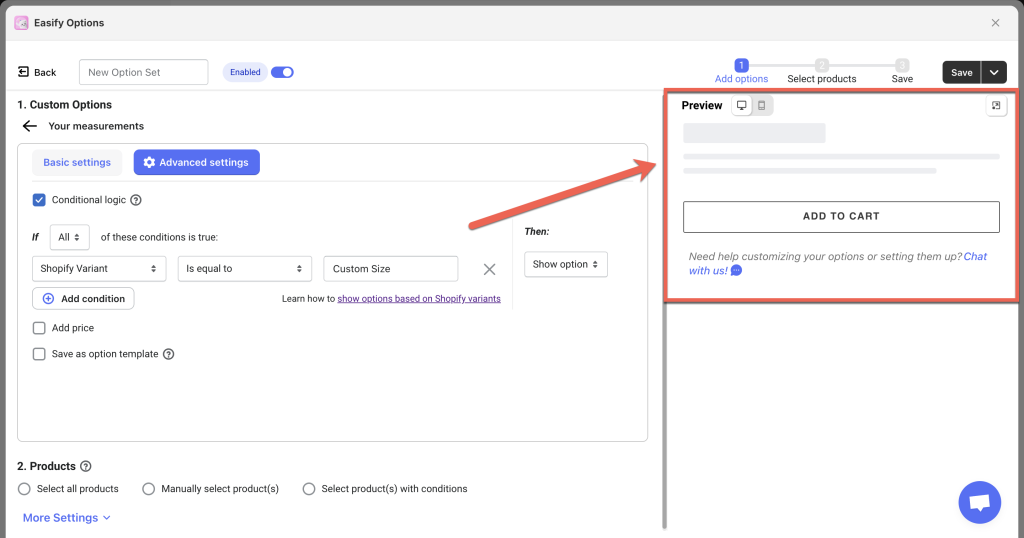
- After setting the conditional logic with Shopify variants, the Preview panel might appear empty (it won’t display the options you created with the applied logic). Don’t be concerned! This happens because the options will only be visible when a specific Shopify variant is selected. Since no variant is selected in the preview, the options remain hidden. You can temporarily disable the logic to view the created options for further adjustments, then re-enable it when you’re ready to finalize your setup.
- While this example focuses on a single condition (showing custom options if the Shopify variant is “Custom Size”), feel free to add more conditions as needed (click Add condition). However, remember that you can only combine multiple conditional logics with Shopify variants; you cannot mix logic between Shopify variants and Easify options for the same option. In other words, Standard and Advanced Conditional Logic cannot be used simultaneously for one option. If you need to use both, some adjustments may be required in the setup – just reach out to our support team via in-app live chat for quick advice and suggestions.
- Only the name or label of the Shopify variant is used for setting up conditional logic; you cannot use variant ID or SKU.
Step 4: Assign the Option Set to the Relevant Product(s) #
You can apply both the option set and advanced conditional logic to all products or specific product(s) based on your requirements.
After configuring the option set and conditional logic, save your settings. Finally, check the outcome on your storefront to ensure that the configured conditions are reflecting as intended.
Example 2: The main product has more than 1 Shopify option #
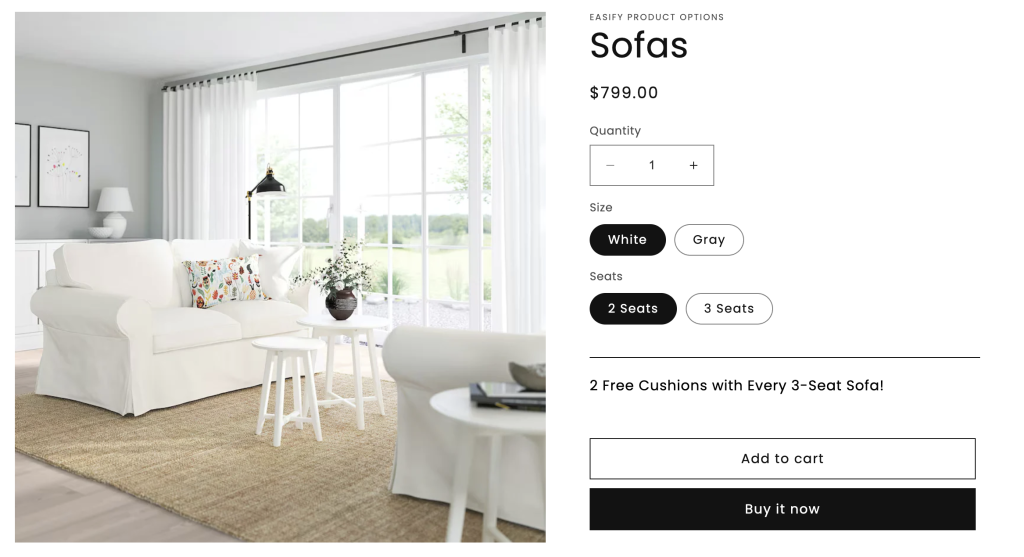
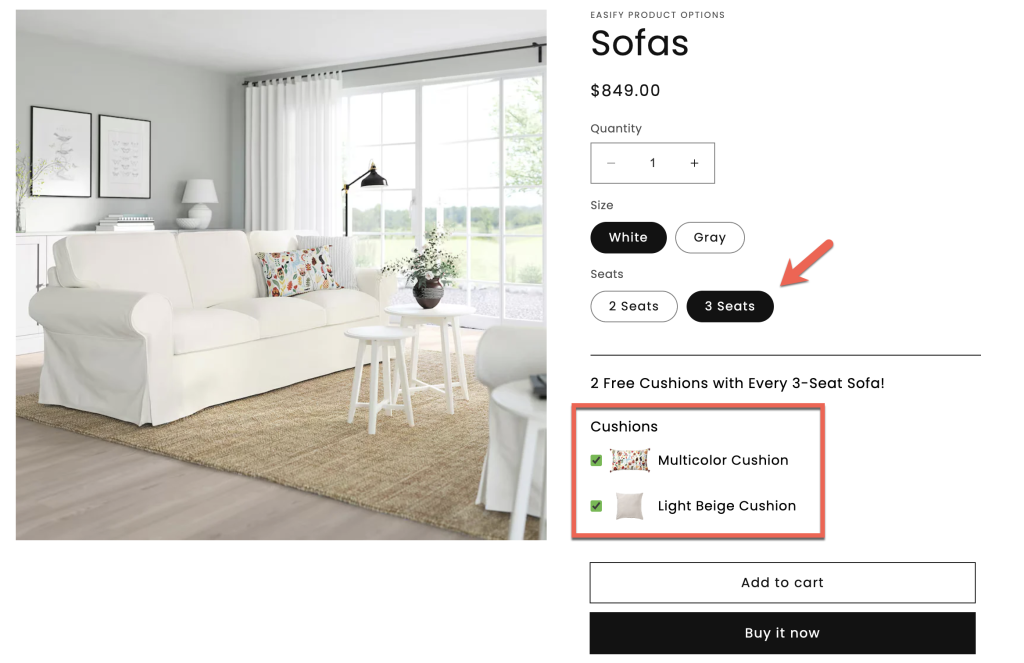
Free Cushions for Bigger Sofas – Show Easifty’s custom options (Free cushions) when customers choose 3-seat Sofa (Shopify variants).
It’s worth noting that the sofas have 2 options: Color (White and Gray), and Seats (2 Seats and 3 Seats). That’s why there are some things different in the setup compared to the first example.
Step 1: Create a New Option Set with Your Custom Option(s) #
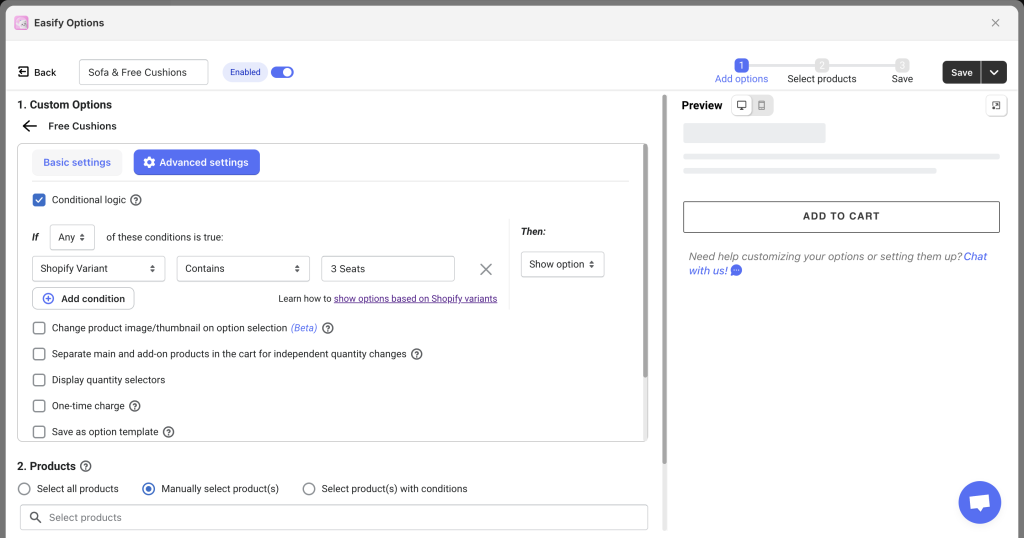
Step 2: Enable & Configure Conditional Logic with Shopify Variants #
Head to the Advanced settings tab, and check the box for Use Conditional Logic to reveal configuration options.
In Example 1, since the main product only has 1 option (Size), the variant name is simply “Custom Size”. However, in Example 2, since the main product has 2 options (Color & Size), the variant names will include:
- “White / 3 Seats“
- “Gray / 3 Seats“
- “White / 2 Seats“
- “Gray / 2 Seats“
This means the setup for conditional logic will be different:
Incorrect Setup: Setting the Shopify variant to equal “3 Seats”. “Is equal to” requires an exact match, so the variant name must be exactly “3 Seats”, but here it’s just part of the variant name.
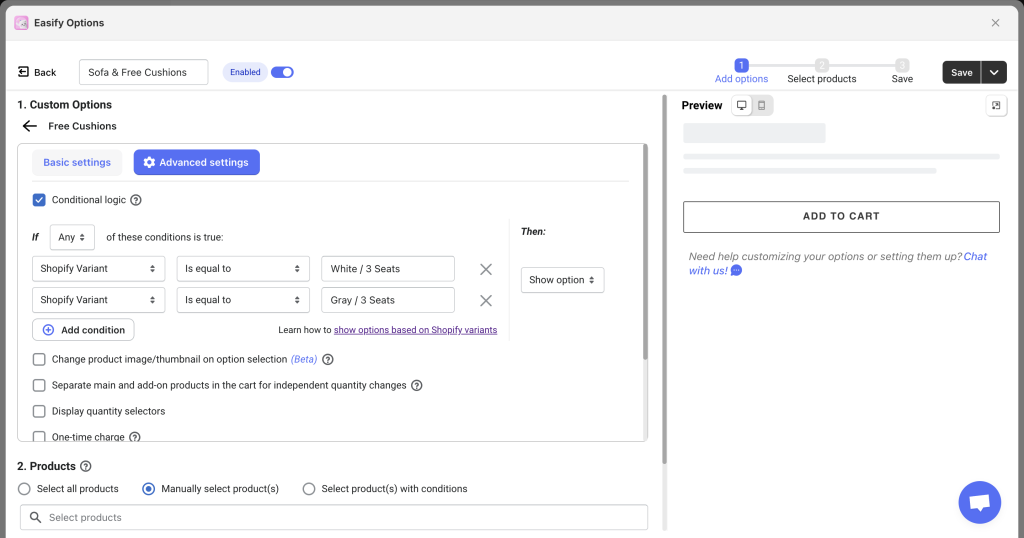
Correct Setup: Use either:
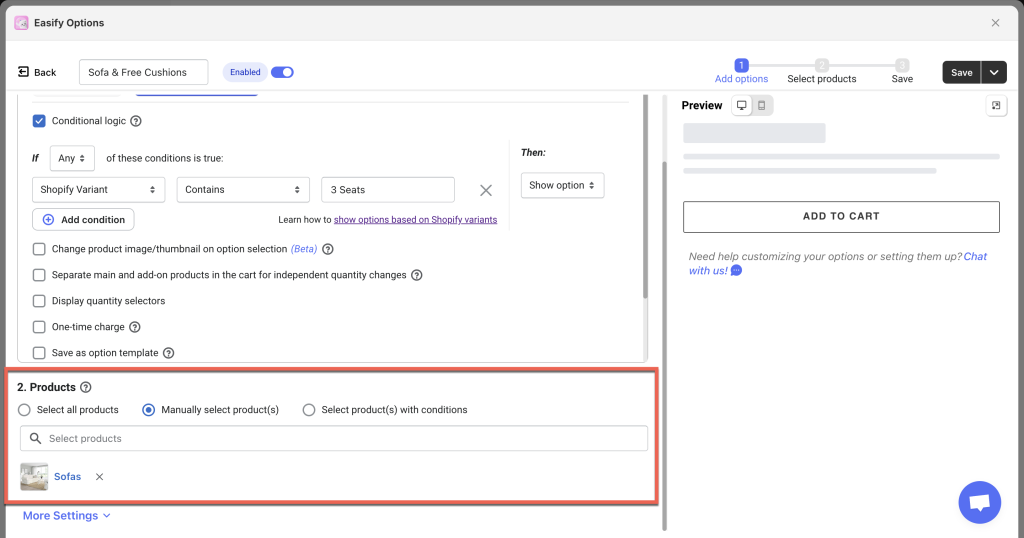
- 1 condition: Shopify variant – Contains – “3 Seats”
- Combine 2 conditions: (entering the full variant name into the value fields):
If Any …:
Shopify Variant – Is equal to – “White / 3 Seats”
Shopify Variant – Is equal to – “White / 3 Seats”
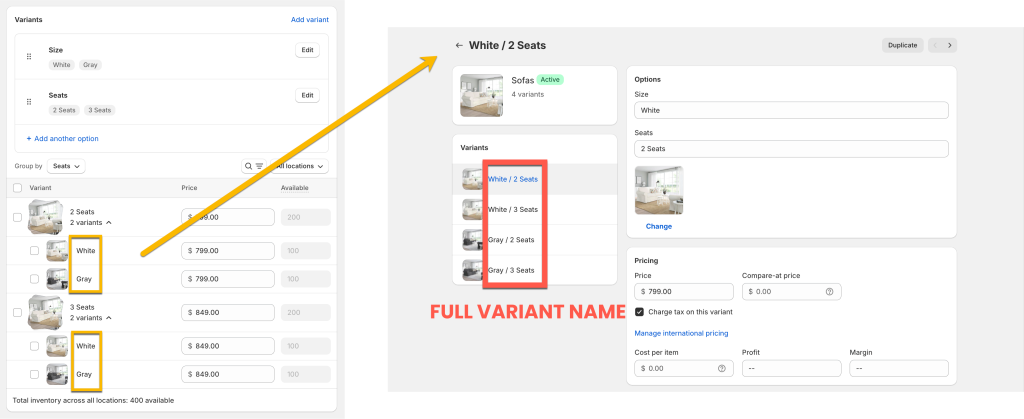
Where to Find the Full Variant Name?
You can access the full variant name by navigating to your Shopify Product details settings page.
Expand the variant group to reveal individual variants, then select the specific variant you need. The full names of all variants will be displayed for setting up conditional logic.
Step 3: Assign the Option Set to the Relevant Product(s) #
Add the option set to relevant sofa products, then it’s done.
Need Assistance? #
If you run into any challenges while setting up the Advanced Conditional Logic, feel free to reach out to us for assistance through our convenient in-app live chat. We’re here to help!