By default, all custom options created with the Easify Product Options app are displayed directly on the product page in your preferred placement (e.g., below/above Shopify variants, the Add to Cart button, or the Quantity selector). This makes it easy for customers to select options right away.
However, some Shopify stores may prefer not to display all options immediately on the product page. Instead, they may want to show a button (e.g., “Customize it”) or trigger the options when the customer clicks the “Add to Cart” button. In these cases, Easify Product Options offers the “Option Set Shown In Popup Triggered By Button Click” feature to meet that need.
This guide will walk you through configuring this feature for your store.
This feature is available on the Pro and Premium plans.
Common Use Cases #
Benefits of showing option sets in a popup:
- Cleaner product pages: If you have a long list of custom options, showing them in a popup keeps the product page neat and organized.
- Optional services or extras: When your options are additional services rather than core products, you might only want to show them when a customer needs them, triggered by a button.
- Focused selection: If you want customers to focus solely on option selection without distractions from other elements on the product page, displaying options in a popup can help achieve this.
Example applications in Shopify stores:
- Personalized Products: If you offer products like personalized jewelry or clothing, displaying customization options (such as engraving text or embroidery details) in a popup triggered by a “Customize it” button can keep the product page uncluttered.
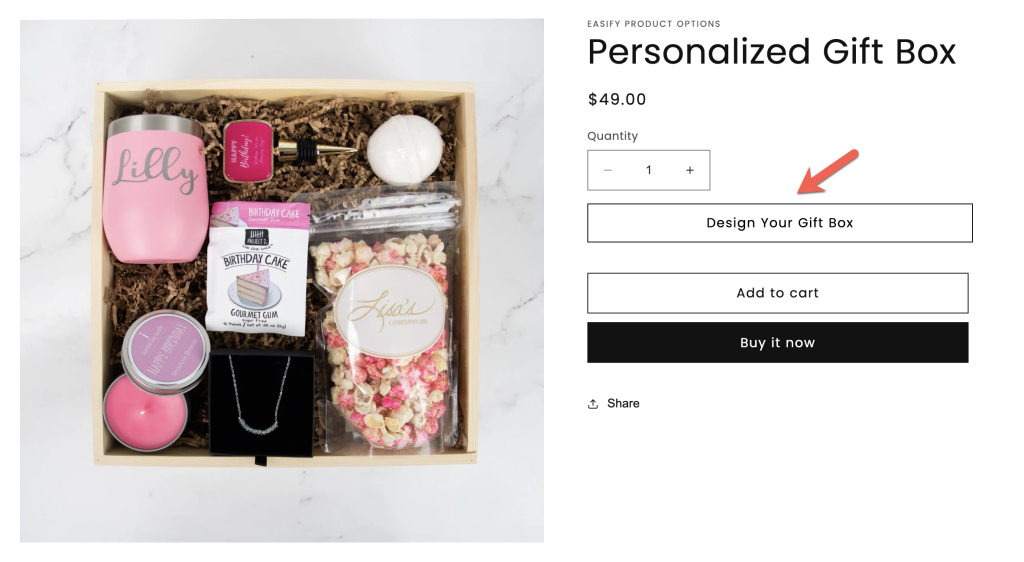
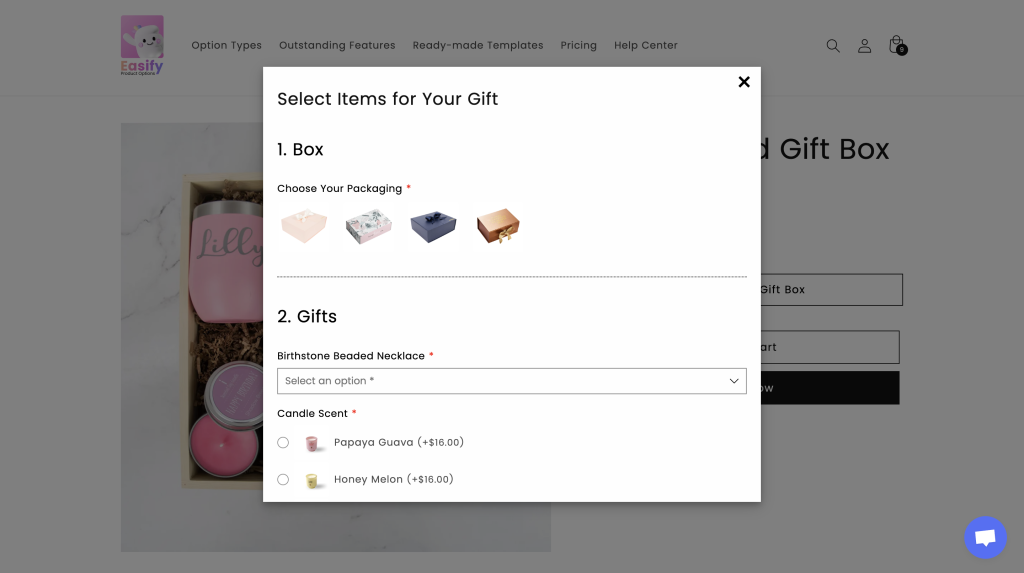
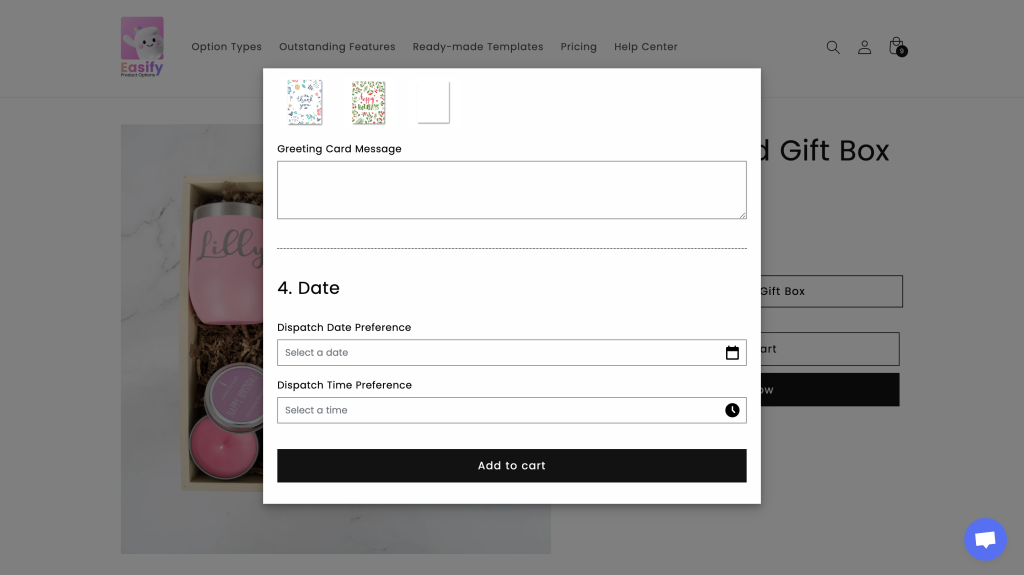
- Gift Sets: Stores that offer bundled products, such as gift boxes or skincare sets, can use this feature to let customers customize their bundles (e.g., selecting different items or packaging) in a popup without overwhelming the main product page.
Demo #
How To Set It Up #
From the app navigation menu, go to Settings.
In the General tab, scroll down to the “Option Set Shown in Popup Triggered by Button Click” section.
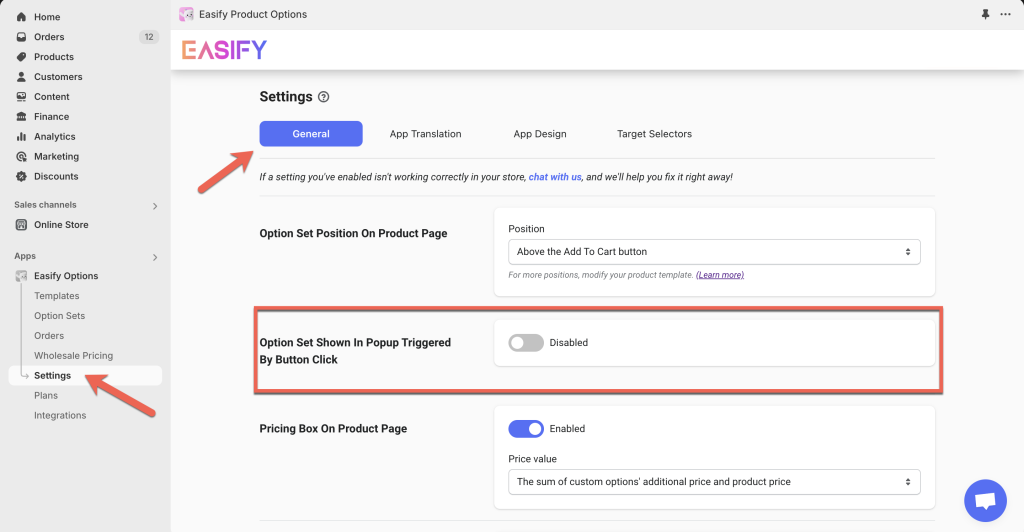
Enable the feature by toggling it on. You will then see more settings to customize your popup.
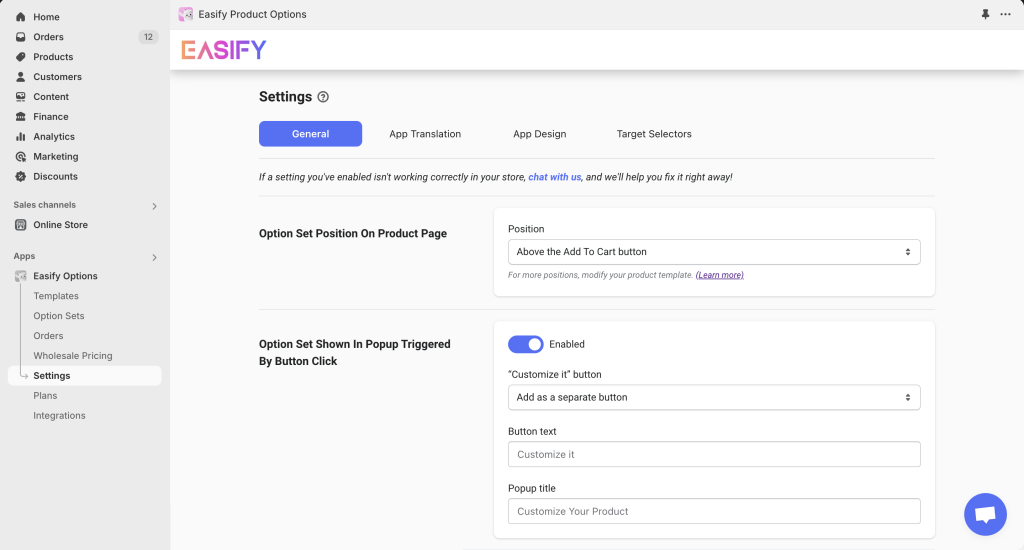
- “Customize it” button:
- Add a separate button: Create an additional button (e.g., “Customize it”) on your product page. When clicked, it will display a popup with all custom options.
- Replace the Add To Cart button: Instead of adding a new button, you can replace the Add To Cart button so that it opens the popup when clicked.
- Button text: Customize the text of the button, whether it’s “Customize it” (the default) or something else (e.g., “Personalize It”, “Add Personalization”, “Select Extras”, “Design Your Own”, “Make It Yours”, “Choose Your Style”, “Personalize My Gift”, “Design Your Gift Box”, “Create Your Perfect Gift”).
- Popup title: Set a title for the popup (e.g., “Customize Your Product”, “Customize Your Order”, “Select Your Options”, “Personalization Options”, “Design Your Own”, “Add Your Personal Touch”, “Select Items for Your Gift”, “Build Your Perfect Gift Box”). If you don’t need a title, leave this field blank.
Once your settings are complete, Save your changes and preview the product page to check how the popup works.
Additional Features for Cleaner Option Display #
Besides the “Option Set Shown In Popup Triggered By Button Click” feature, Easify Product Options also offers other useful tools to present your options in a cleaner, more organized way. You may want to consider these options:
- Option Group: Group multiple options into collapsible tabs, helping you neatly organize options and reduce clutter on your product page.
- Product List: When you have a long list of option values, you can display them in a popup triggered by a button.
Need Assistance? #
If you need help setting up the option set in a popup triggered by a button click, feel free to reach out to our support team via in-app live chat for quick assistance!