After installing and activating the Easify Box Builder app on your active theme, you’re ready to create your first custom box (or bundle). This guide will walk you through the setup process step by step.
✅ Step 1: Set Your Box Name & Type #
A. During App Onboarding #
Right after installing the app, you’ll be guided through the onboarding process. At the end of this flow, you’ll create your first box.


To get started:
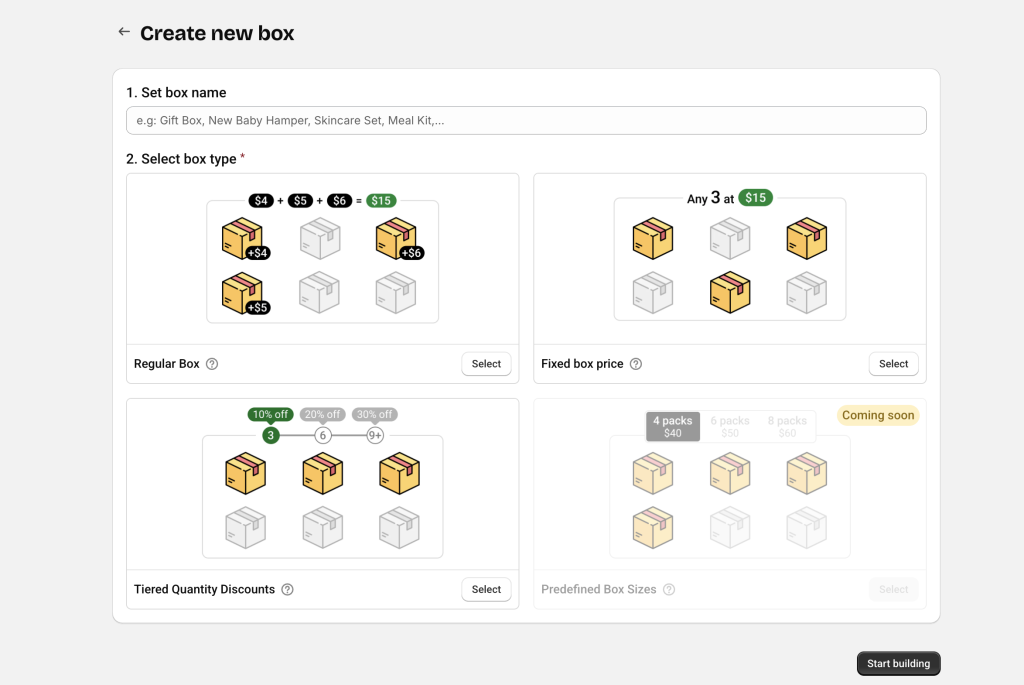
- Enter your Box name (e.g., Build A Box). Don’t worry, you can edit this later if needed.
- Choose the Box type. Easify Box Builder offers various types to match different selling strategies:
- Regular Box: Price equals the total of selected items. You can optionally apply discounts.
- Fixed Box Price: Customers buy exactly X items at a fixed box price of Y.
- Tiered Quantity Discounts: The more items customers add, the bigger the discount (e.g., buy 3 get 10% off, buy 5 get 20% off).
- Predefined Box Sizes (Coming Soon): Fixed price per quantity tier (e.g., 4 for $40, 6 for $50, etc.).
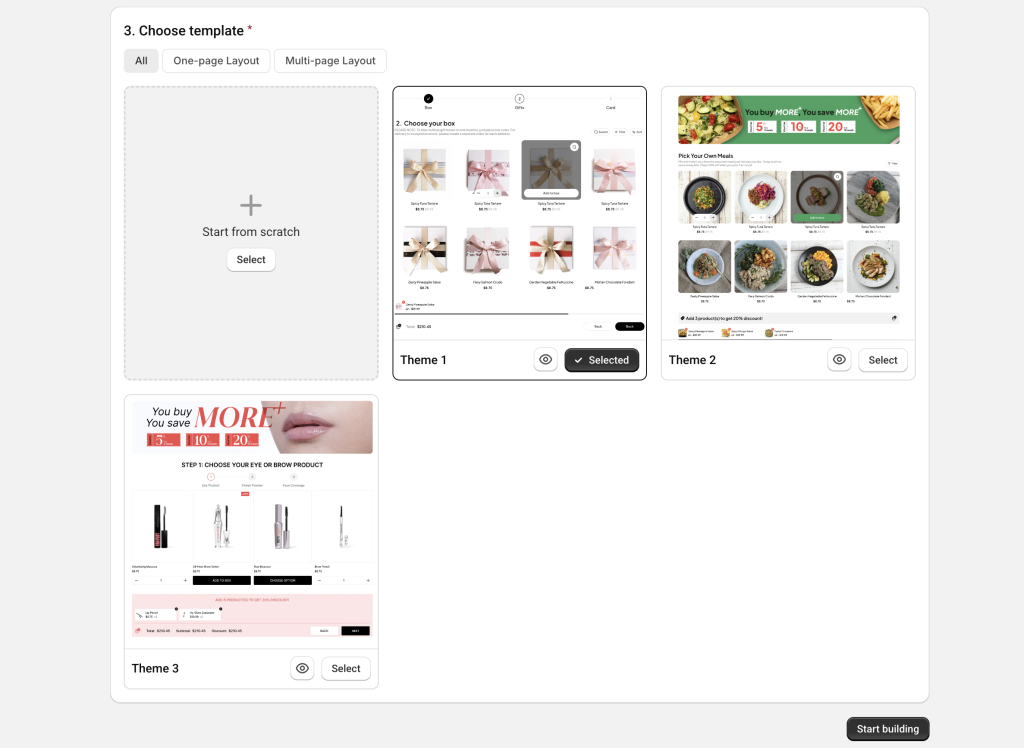
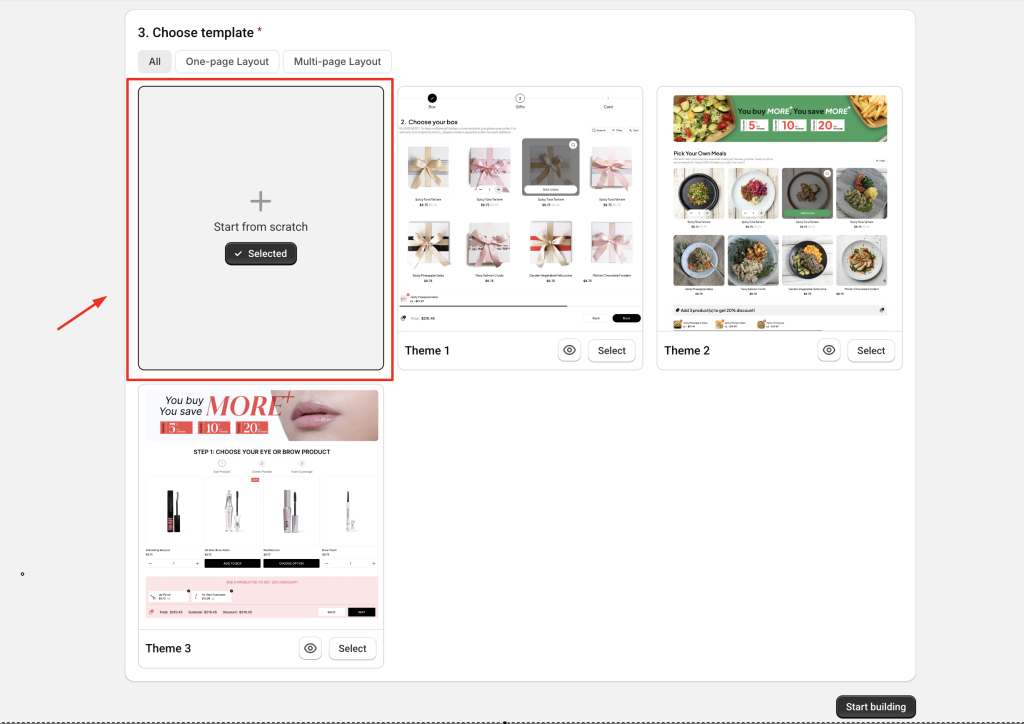
Once you’ve selected a box type, you’ll see a set of ready-to-use templates designed for that type. You can choose:
- Start with a template – Recommended for faster setup (fully customizable later), or
- Start from scratch – Build everything from the ground up.
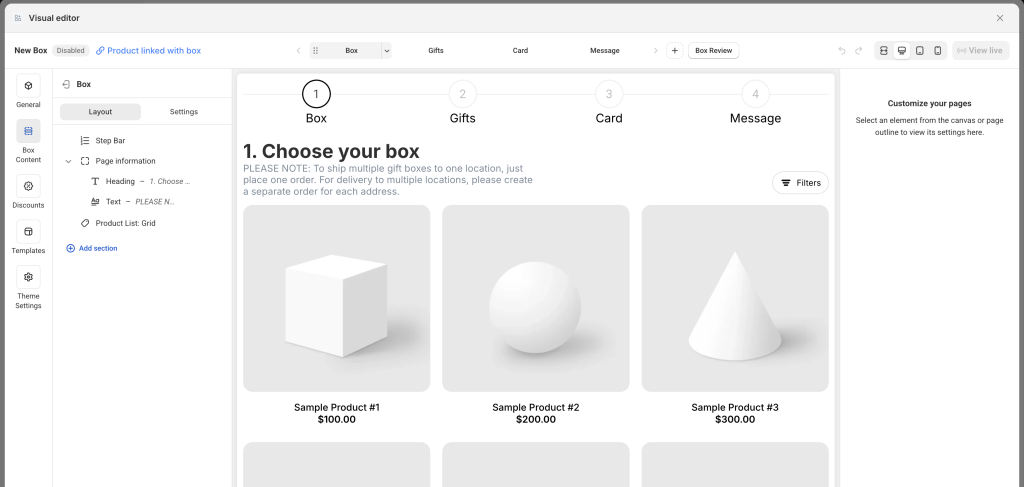
After choosing your option, you’ll be taken to the Visual Editor to design your box content and layout—the real fun begins!
B. Creating More Boxes Later #
Once you’ve created your first box through onboarding, you can easily create more boxes anytime.
Here’s how:
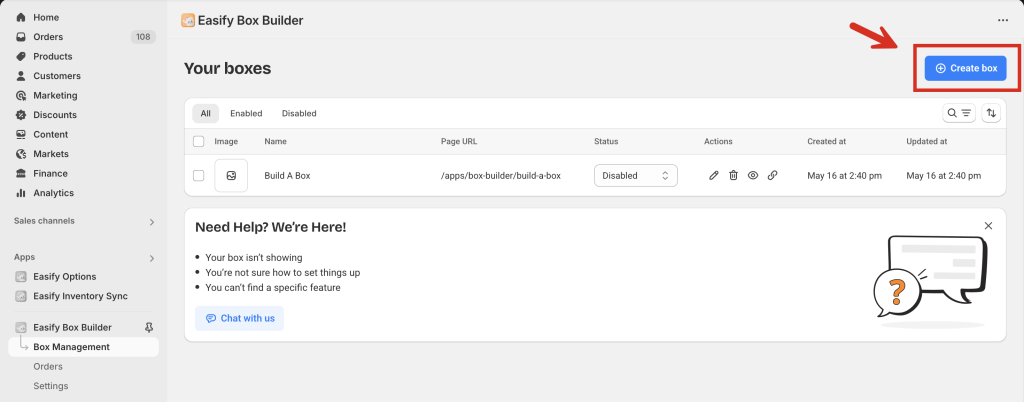
- In the app’s left-hand menu, go to the Box Management tab.
- Click the Create box.
- Choose your box type and template (or start from scratch), then move to the Visual Editor—just like the first time.
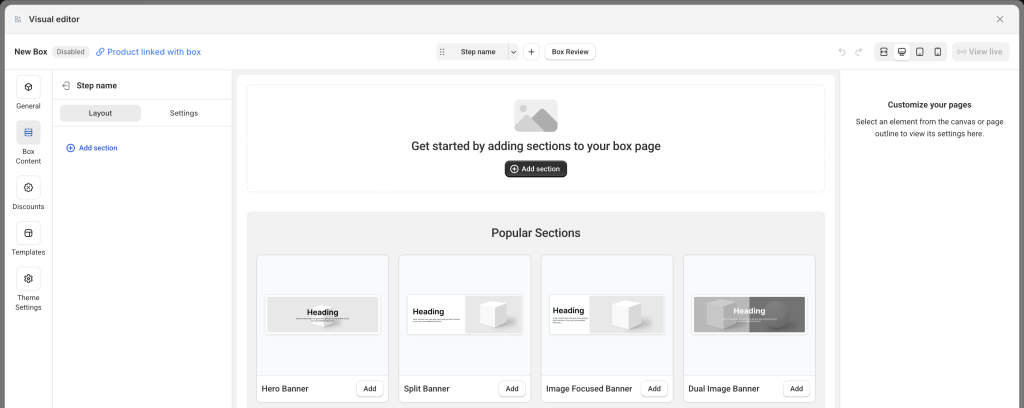
✅ Step 2: Build Your Box with the Visual Editor #
If you’ve used Shopify’s Theme Editor or a page builder before, the Easify Visual Editor will feel familiar. If not, don’t worry!
Watch the quick tour video below to explore the basics before getting started.
<video>
You can also check out our Key Terms guide to understand the most common terms used in the Visual Editor.
A. Build with a Template #
When you start with a template, it includes a layout and demo content to get you going. From there, you can freely customize everything:
- Steps: Edit step names, add/remove steps, reorder them, or rename them.
- Page title & description: Each template includes demo headings and text. You can edit or replace them with your own, using Heading/Text elements or a Banner section.
- Products: Add products to each step’s product list section.
- Custom fields: Edit, remove, or add fields as needed.
- Discounts: Templates may include pre-set discounts to help you understand how it works. If not, you can add your own from scratch based on your selected box type.
- Theme Settings: Customize everything from layout, step bar, product cards, quick view, quick summary, summary page, typography, loading icon, add-to-box behavior, and even custom code.
For a step-by-step example of creating a box with a template, check this guide.
Reminder: Templates don’t limit your creativity—they’re just a faster starting point. You can still fully customize the layout, content, and styling. Even developers will find using templates saves time compared to building from scratch.
B. Build from Scratch (No Template) #
Didn’t find a template that fits your needs? No problem, you can create your own unique box from a blank canvas.
Check this guide for a complete walkthrough on building a box page from scratch.
✅ Step 3: Publish Your Box #
New boxes are set to Disabled by default, and the View live button is inactive until enabled.
When your box setup is complete:
- Open the General tab in the left-hand navigation.
- Change the status to Enabled.
- Click Save.
Now, the View live button will become active—click it to preview your box page on your storefront.
💬 Need Help? #
Questions? Stuck somewhere?
We’re always here to help! Just reach out via our in-app live chat for 24/7 support.