EasifyApps EasifyApps
  • About
  • Apps
    Easify Product Options
    Easify Product Attachments
  • Resources
    Help Center
    Easify Product Options
    Easify Product Attachments
    Video Tutorials
    Easify Product Options
    Easify Product Attachments
  • Partners
  • Blog
  • Contact
All Easify Apps
EasifyApps EasifyApps
  • About
  • Apps
    Easify Product Options
    Easify Product Attachments
  • Resources
    Help Center
    Easify Product Options
    Easify Product Attachments
    Video Tutorials
    Easify Product Options
    Easify Product Attachments
  • Partners
  • Blog
  • Contact

Easify Product Options App

Getting Started
    Key Terminology Simplified
    • Custom options & variants
    • Option set
    • Option set templates
    • Option type (Option input)
    • Your option sets
    • Option label
    • Option name
    • Option value
    • Option group
    • Price Add-ons
    • Conditional logic
    • Live preview
    • Help text
    • Placeholder
    • Information (Tooltip)
    • Option widget
    Option Input Types
    • Design Layer
    • Text Box
    • Text Area
    • Number Text Box
    • Color Swatches
    • Image Swatches
    • Radio Buttons
    • Dropdown
    • Checkbox
    • Button(s)
    • Switch/ Toggle
    • Modal (Popup)
    • File Upload
    • Option Group
    • Product List
    • Date Range
    • Date Picker
    • Time Picker
    • Font Picker
    • Color Picker
    • Dimension
    • Quantity
    • Custom HTML
    • Heading
    • Paragraph
    • Spacer
    • Divider
    App Activation
    • Activate the app on your theme
    • Video Tutorial
User Guide (PO)
    Set Up Option Sets
    • Create A New Option Set From Scratch
    • Use Ready-made Templates To Create Your Option Set
    Conditional Logic
    • What is Conditional Logic (CL)?
    • Standard Conditional Logic – Among Easify Options
    • Advanced Conditional Logic – Show Easify Options Based On Shopify Variants
    Extra Pricing (Add Charges)
    • Set Up Extra Fees (New Version – From July 18, 2024)
    • Add-on Prices vs. Add-on Products (Old Version – Before July 18, 2024)
    • Set Up Add-on Prices (Old Version – Before July 18, 2024)
    • Set Up Add-on Products (Old Version – Before July 18, 2024)
    • Convert Add-on Prices To Add-on Products (Old Version – Before July 18, 2024)
    • Hide Specific Products from Shopify Storefront while Keeping Them Buyable
    Option URL
    • What is Option URL?
    • Establish Cross-Product Links Using Option URL
    • Include Detail Links For Add-on Products/Custom Options
    Option Design
    • Customize Option Styles
    • Distinct Option Styles for Light & Dark Themes
    • Modern and Classic Option Styles
    App Settings
    • General Settings
    • App Translation
    Tiered Wholesale Pricing
    • What is Tiered Wholesale Pricing?
    • Set Up Tiered Wholesale Pricing
    • Customize Tiered Wholesale Pricing Table
    Option Import/Export
      Option Export
      • Export All Option Sets
      • Export Specific Option Sets
    • Option Import
  • Add Option Value Descriptions & Tooltips
  • Show Image/ Color Swatch Slider
  • Track Real-time Analytics
  • View & Export Orders With Easify Options
  • Enable Image Editor for File Upload
  • Hide Main Product Price & Shopify Quantity Selector
  • Set Up Product Bundles
  • Set Up One-time Charge
  • Set Up Quantity Selector Per Option Value
  • Display Option Set In Popup Triggered By Button Click
  • Switch Product Images Upon Option Selection
  • Set Up Option/ Option Set Templates
  • Translate Option Set Into Multiple Languages
  • Separate or Combine Add-ons with Main Product in Cart
  • Reposition Option Set On Product Page
  • Show Custom Options On Order Confirmation Emails (To Customers)
  • Show Custom Options On New Order Notification Emails (To Staff)
  • Show Custom Options On Packing Slips
Product Personalizer (Live Preview)
  • What Is Product Personalizer – Live Preview?
  • How It Works
  • Ready-to-use Templates with Product Personalizer
  • Upcoming Features
Subscription & Billing
  • Pricing Plans
  • How to upgrade
  • How to cancel subscription
Customization & Support
  • App Maintenance Notification
  • Get support
  • Request a new feature
Frequently Asked Questions
  • Why does the app remain “Inactive” even after activation?
  • What to do if custom options aren’t visible on product pages?
  • Why weren’t custom option prices included in my customer orders?
  • How many custom options can I create per product?
  • Does the app work with Shopify Online Store 2.0?
  • Will the app slow down my website?
  • How can I stay informed about updates for the app?
  • What happens if I uninstall the app, and how does it affect my store?
Integrations
  • Easify Product Options x GemPages Landing Page Builder

Easify Box Builder App

Getting Started
  • Activate the app
  • Create New Box
  • Frequently Asked Questions
  • Get Support

Easify Inventory Sync App

Getting Started
  • Quick Start Guide
  • Frequently Asked Questions
  • Get Support
Inventory Groups
  • Create Inventory Groups Automatically by SKUs
  • Create Inventory Groups Manually
  • Events Triggering Syncs among Products in Inventory Groups
  • When do Inventory groups Fail to sync?
  • How to Set Up Common Cases
Bundle Groups
  • Create A New Bundle Group
  • How Master product inventory is Calculated from Component product inventory (Modified Quantity)
  • Events Triggering Syncs among Products in Bundle Groups
  • When do Bundle groups Fail to sync?
  • How to Set Up Common Cases
Inventory Thresholds
  • What is Inventory Threshold?
  • Set Up Universal Inventory Threshold
  • Create A New Inventory Threshold
Advanced Features
  • Bulk Edit Inventory Groups
  • Import/ Export Inventory Groups
  • Import/ Export Bundle Groups
  • Export Product Variant & Location IDs
  • Bulk Duplicate Products
Subscription & Billing
  • Pricing Plans (& FAQs)
  • How to Change Plans
Common Scenarios & Setup Guides
  • Roast Coffee
  • Loose Leaf Tea
  • Stationery Set
  • Retail & Wholesale Items
  • Blank & Personalized Tees
  • Unisex Tees
  • Baby Gift Hamper
  • Flowers
  • Chocolate Cookies
  • 3-Pack T-Shirts (mixed sizes & colors)
  • Batteries
  • Beverage (Inventory by Cans)
  • Beverage (Inventory by Packs)
  • Multivitamins (from Single Pack)
  • Multivitamins (from Double Pack)
  • Incense Sticks (Inventory by Packs)
  • Incense Sticks (Inventory by Sticks)
  • Candle Trio Set
  • Perfume Set
  • Pick n Mix Sweets
  • Top & Skirt Set (Same Size)
  • Top & Skirt Set (Mixed Sizes)
  • 2-Pack Tops (1 Color)
  • 2-Pack Tops (1 Color) – Only in Packs
  • 2-Pack Tops (Multicolor – Fixed)
  • 2-Pack Tops (Multicolor – Optional)
  • Custom Print Shirts
  • Shoes & Free Socks

Easify Product Attachments App

App Activation
  • Activate the app on your theme
  • Video Tutorial
User Guide
  • Upload Product Attachments
  • Upload Attachment Icons
  • Add Attachments To Templates
  • Import Bulk Product Attachments
  • Export Product Attachments
  • Add Attachments To Collapsible Rows On Product Pages
Customization & Support
  • Get support
  • Request a new feature

Recommended Shopify Apps

  • Page builder
  • Affiliate programs
  • Marketing
  • Invoices and receipts

Announcements

  • Limited Support During Lunar New Year (Jan 25th- Feb 3rd, 2025) – Your Patience Is Our Greatest Gift!
  • Go Beyond Options: Easify Product Options Premium Is Here!

Create A New Bundle Group

Table of Contents
  • Need Assistance?

To create a new bundle group, follow these steps:

  • Navigate to the app navigation menu and select Bundle Groups.
  • Click on the Create new group button.

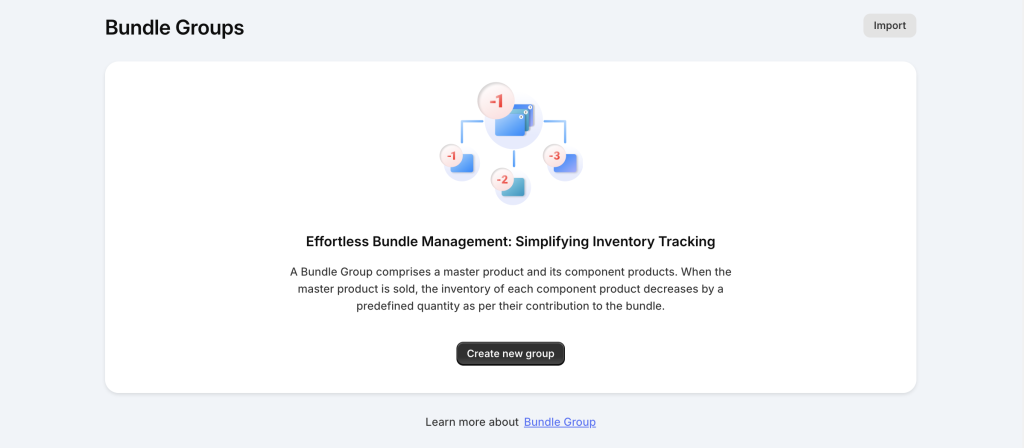
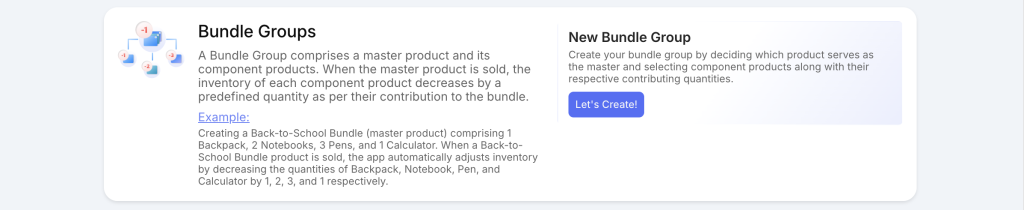
Tips: For a quick shortcut, click the Let’s Create! button in the Bundle Groups section on the app dashboard to go directly to the page of creating a new group.

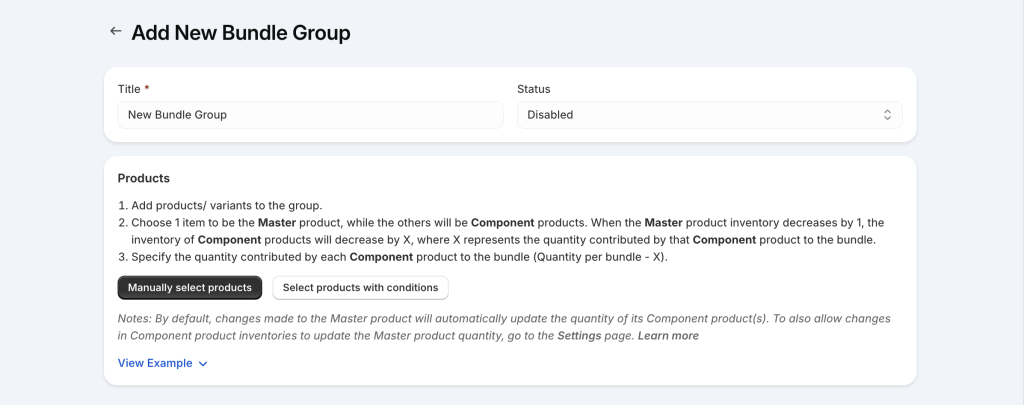
1. Enter general information

  • Title: Enter a name for the group (e.g.: Stationery Set).
  • Status: The default status of the new group is “Disabled”. Change it to “Enabled” before saving to publish the group and start syncing.

2. Add products to the group

There are 2 ways to add products to the group:

  • Manually select products: If your group contains only a few products, manually select each one.
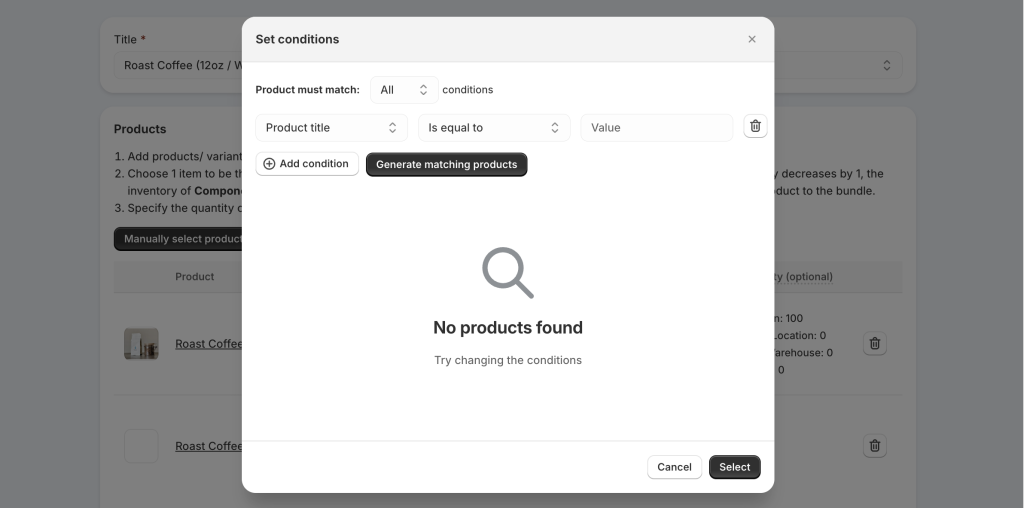
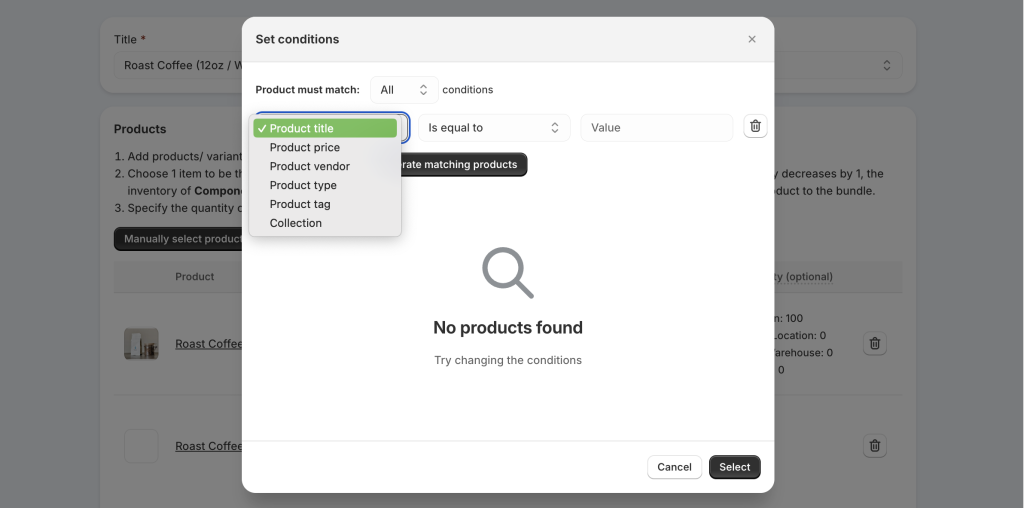
  • Select products with conditions: If your group includes products with similar characteristics, utilize conditions to swiftly identify them for grouping. In the “Set conditions” popup, set conditions for Product Title/SKU, Price, Vendor, Type, Tag, or Collection. After defining the conditions, click the Generate matching products button to preview the list of matching products (optional step). Finally, click the Select button to add those products to the group.

3. Set Master product and Quantity per bundle for Component products

  • Master product:

Each bundle group requires one Master product. When a customer purchases the Master product, the inventory of the Component products included in the bundle will be deducted accordingly.

  • Quantity per bundle:

You need to set the quantity per bundle (X) for each Component product. When one Master product is purchased, the quantity of the Component product will be reduced by X, reflecting the amount it contributes to the bundle.

  • Modified quantity (optional):

The quantity of the Master product is usually determined by the available quantities of the Component products. Once you set the Master product, the app will automatically calculate its quantity based on the available Component quantities and display it in the Modified quantity column.

Learn more about how the modified quantity is calculated here.

If the quantity in the Modified quantity column differs from the actual quantity of the Master product, it will be shown in red. If they match, the value will appear in black.

Notes:

The modified quantity only applies to the Master product if you enable “Update Master based on changes in Component inventory” in the Settings page. By default, this feature is disabled.

If you don’t want to apply the modified quantity, meaning you don’t want to change the Master quantity based on Component product inventory, you can simply ignore the Modified quantity column.

Below are 2 examples of setting the Master product and quantity per bundle for Component products:
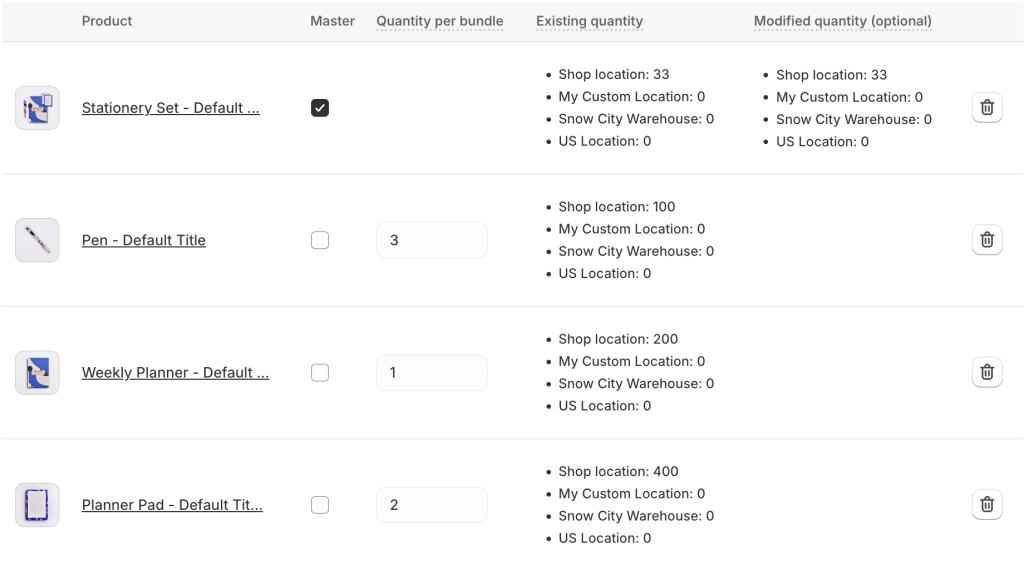
  • Stationery Set:

Creating the Stationery Set with 1 Weekly Planner, 2 Planner Pads, and 3 Pens.

In this example, the “Stationery Set” is the Master product; the “Weekly Planner”, “Planner Pad”, and “Pen” are the Component products.

When a “Stationery Set” is sold, the app automatically adjusts the inventory by decreasing the quantities of the “Weekly Planner”, “Planner Pad”, and “Pen” products by 1, 2, and 3 respectively.

Therefore, the quantity per bundle for the “Weekly Planner”, “Planner Pad”, and “Pen” will be 1, 2, and 3.
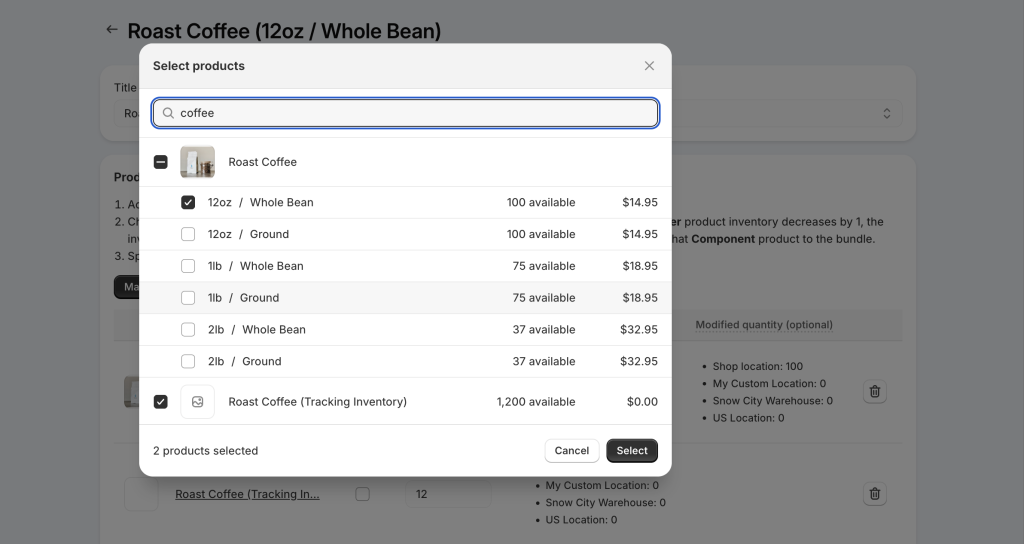
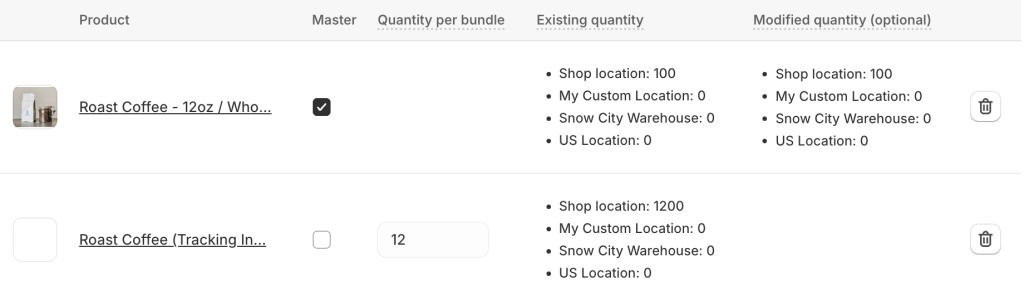
  • Roast Coffee:

Selling Roast Coffee in small packs (e.g., 12 oz).

In this example, “Roast Coffee – 12oz” is the Master product, and the “Roast Coffee (Tracking Inventory)” (tracking product) is the Component product.

When the 12oz option is purchased, the inventory of the tracking product will be reduced by 12. Thus, the quantity per bundle for the “Roast Coffee (Tracking Inventory)” product will be 12.

Learn more about setting up this case here.

Notes:

  • Once a product is designated as the Master product within a bundle group, it cannot serve as a Component product within another bundle group.
  • However, a product can act as a Component product in multiple bundle groups simultaneously.

4. Save the group

After configuring all the above, click the Save button at the top of the page to save the new group settings.

To understand when inventory sync among products in the bundle groups occurs, learn more here.

Need Assistance? #

If you run into any challenges while setting up the bundle groups, feel free to reach out to us for assistance through our convenient in-app live chat, by submitting your request via our contact form, or by sending an email to support@tigren.com. We’re here to help!

Table of Contents
  • Need Assistance?
Essentials Logo

Make the Complex Simple for Shopify Stores

Our AppsHelp CenterPartner ProgramAffiliate ProgramBlogContact Us

Copyright © 2023 Easify. All rights reserved.

Close
Search

Hit enter to search or ESC to close

cookie By using this website, you agree to our cookie policy. Close