The integration of Option details links offers customers a smooth avenue to access supplementary information regarding associated add-on products/ custom options before finalizing their choices.
This becomes especially advantageous when dealing with required product options, complimentary gifts, items for upselling/cross-selling, or those bundled together.
But what makes the use of Option details links so beneficial in these instances?
- Traditionally, store owners present a simple list of upselling/cross-selling products on a product page, utilizing conventional checkboxes with displayed product names. However, this approach may lead to reduced conversion rates, particularly when the prices of these additional items are relatively high.
- Potential consequences include customers either overlooking the offers entirely or, for those more inclined to make a purchase, having to navigate through the store to find detailed information about the upselling/cross-selling items. This additional step can complicate the purchasing process.
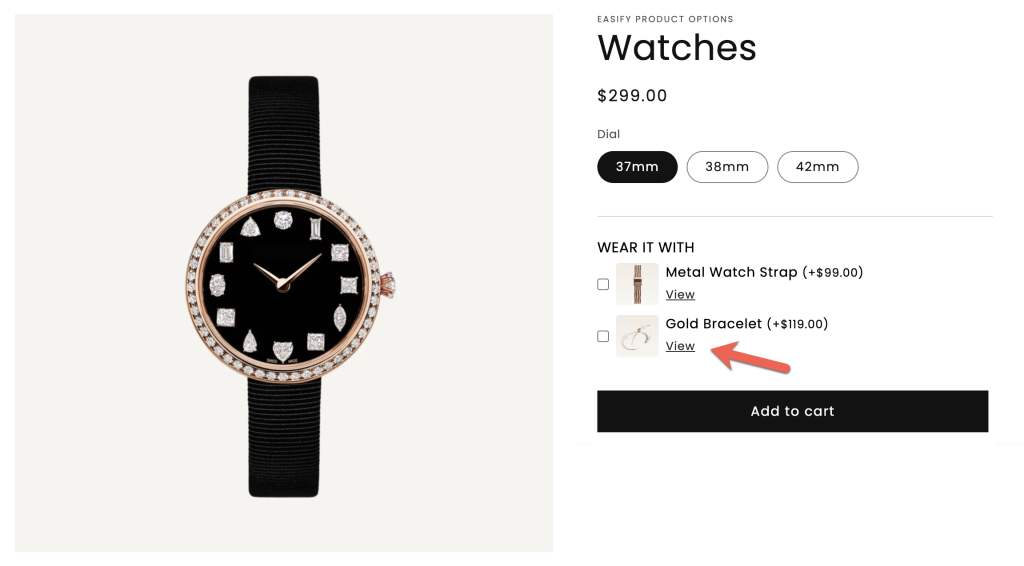
- In contrast, the adoption of the Option details links feature proves remarkably effective. By attaching a link to each upselling/cross-selling item, customers can effortlessly click on the link, opening a new tab to delve into the details of these items. This seamless transition allows them to easily return to the main product page, streamlining the purchasing process and elevating the overall shopping experience.
Furthermore, an unforeseen yet noteworthy benefit of incorporating Option details links to include detailed links within your product pages is its positive impact on strengthening Internal Link Building for your store.
Demo #
Supported Option Types #
Please be aware that the creation of Option details links for additional product/ option details purposes is limited to the following option types:
In other option types, the links will be designated for cross-product linking purposes.
Examples #
- Case 1: A “Heater” product requires a “Sauna” product, necessitating customers to know more about the required “Sauna” before adding both to the cart.
- Case 2: When purchasing a CD, customers receive a free T-shirt, and they can view more details about the free T-shirt.
- Case 3: When buying an iPhone, frequently bought together products like a phone case, charger, or air pods are shown. Customers need to click on these products to gather more information before deciding.
- Case 4: When buying a custom PC, each component has various options (addon products). Customers need detailed information about each product before making selections.
Settings #
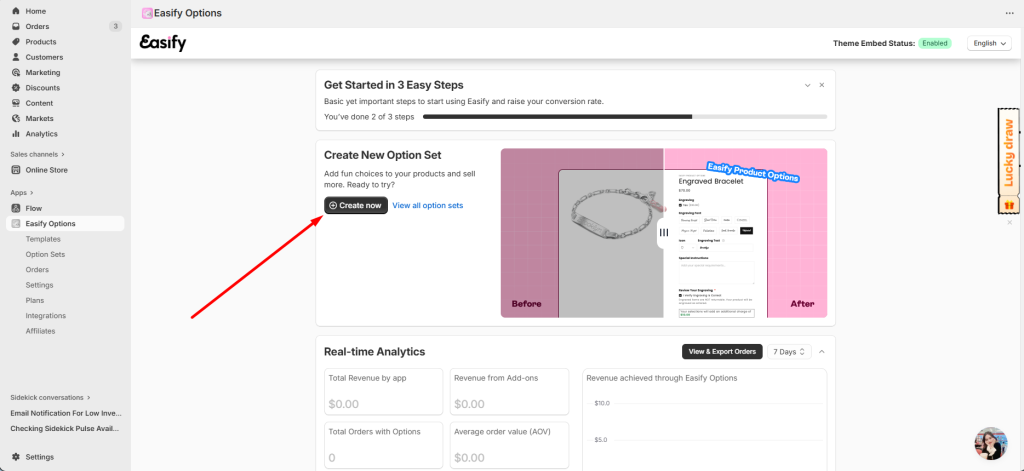
Step 1: Create a new option set #
Begin by creating a new option set within the app.
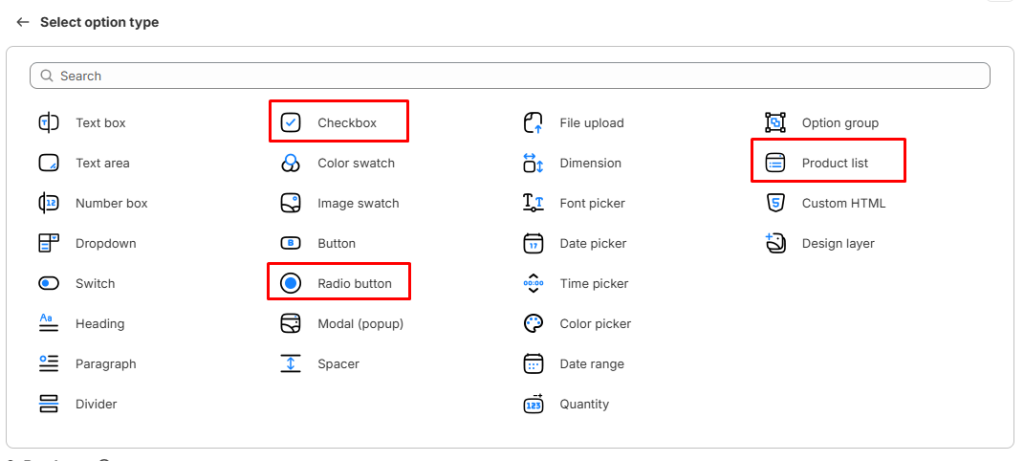
Step 2: Add options #
Utilizing one of the 3 option types that support the addition of Option URLs for additional detail link purposes (Checkbox, Radio Buttons, and Product List).
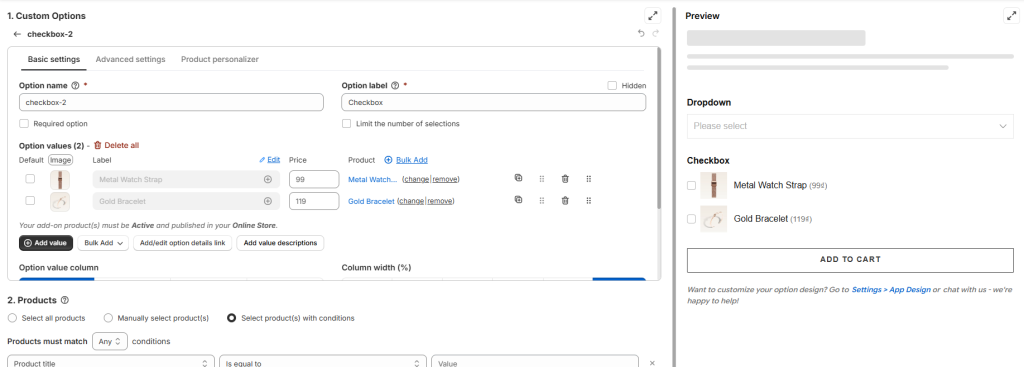
Add the option values (label, image, price) if you just want to use a regular option or select add-on product for each option value and auto-update product name, image, price to the option values.
Notes:
The Option details links feature for the purpose of adding view additional information link can be applied for both option values associated or not associated with add-on products.
For option values associated with add-on products, in most cases, the feature will play a role in showing the link of that product, and customers can click to view that product page to find more information.
On the other hand, for regular option values without associated add-on products, the feature can link to a CMS page that provides more info related to that option but not necessarily the product page.
Step 3: Enable & configure the Option details links #
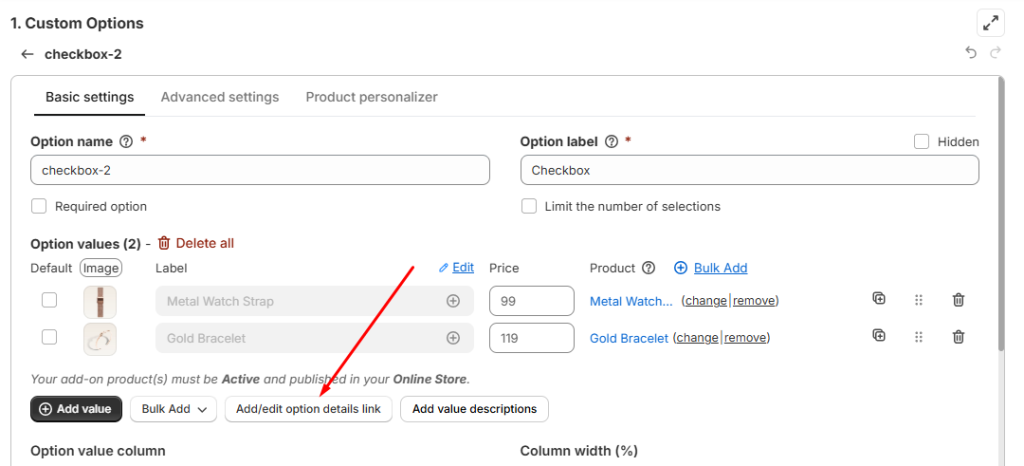
Firstly, click at the Add option details links or Add/edit option details link button right below the option values.
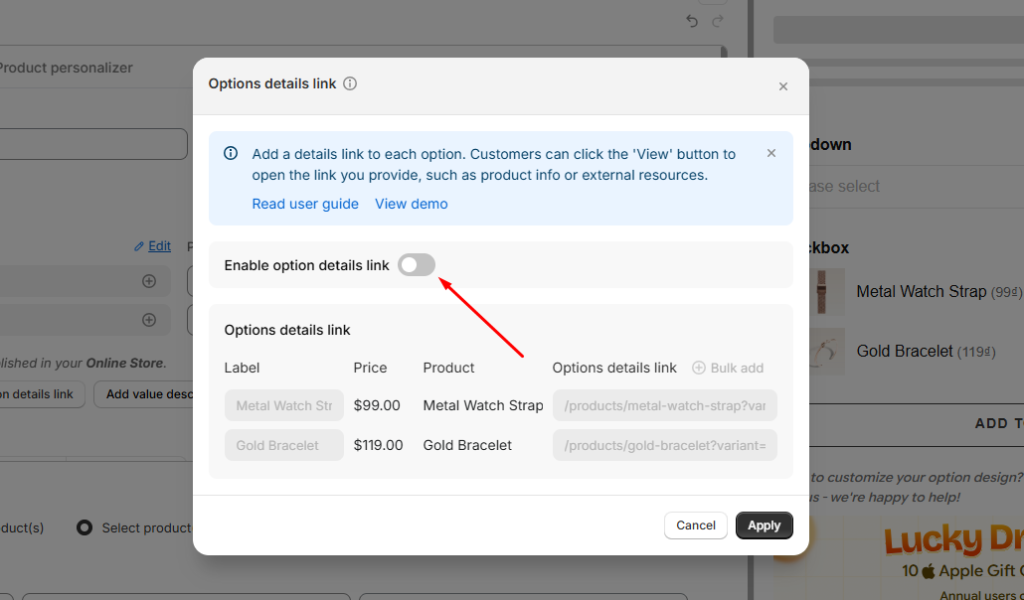
Secondly, switch on the Enable option details links to start configuring.
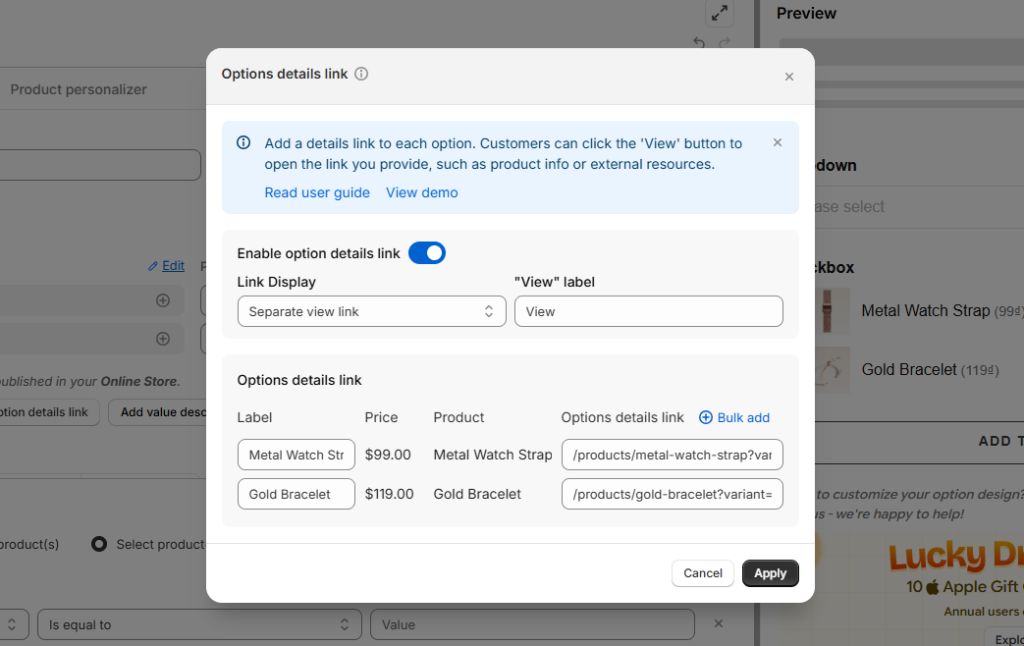
- Link display:
Choose “Separate view link” from the dropdown if you prefer displaying the link separately from the option value label (e.g., under the anchor text “View”).
The default anchor text is “View”, but feel free to customize it to “Details”, “View more”, “More details”, “View details”, “Explore”, or any other text that suits your preference.
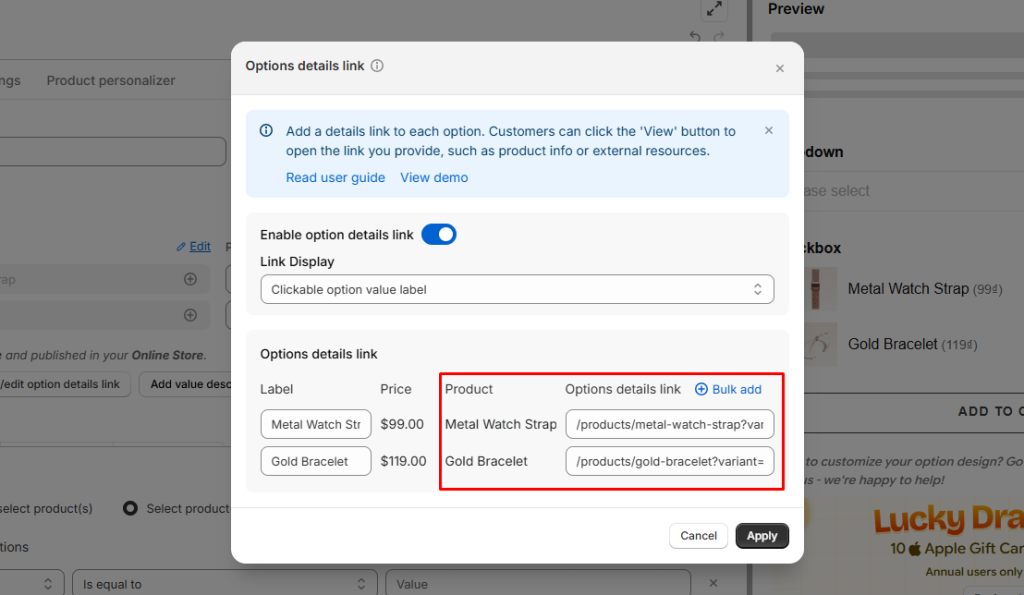
Alternatively, opt for “Clickable option value label” to attach the link directly to the option value label.

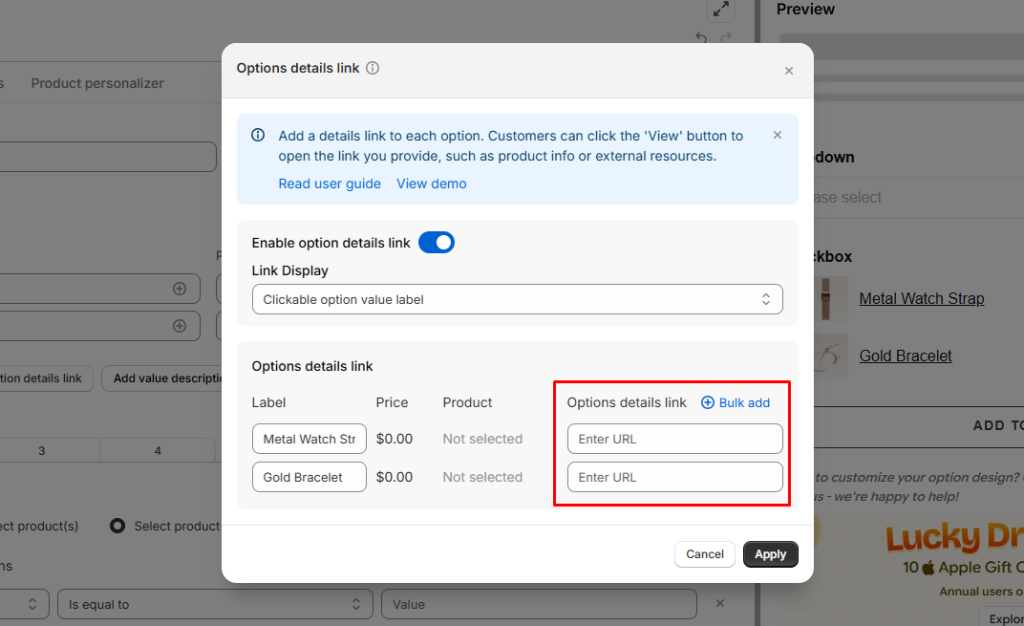
- Option details links:
If add-on products are used for option values and you want customers to navigate to the add-on product’s product page by clicking the URL, the links of the add-on products will be auto-entered into the URL field after selecting the add-on product, requiring no further adjustments.
Notes: If add-on products are associated with option values, and you prefer customers to click on another link that is not the product page of the add-on product for additional information, feel free to edit the URL field accordingly.
In cases where you don’t use add-on products, you will need to manually enter the more information links for each option value. The entered URL can either include or exclude the store domain:
- Include domain: https://easify-product-options.com/products/product-name
- Exclude domain: /products/product-name
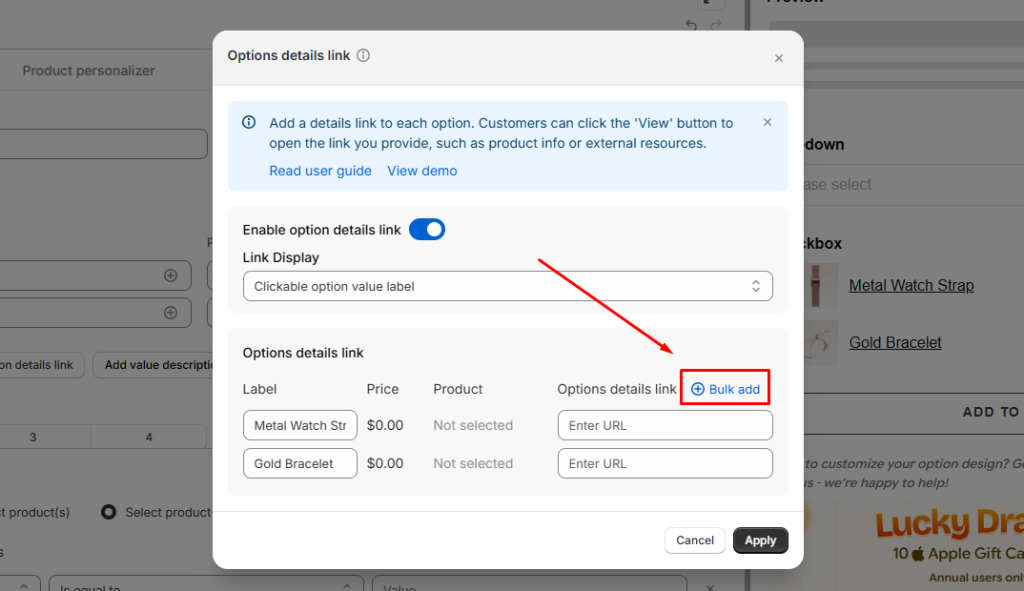
💡 Tip: You can use the Bulk Add feature to save time when entering URLs. The Bulk Add feature can be accessed in two ways:
- From Bulk Add → Option details links
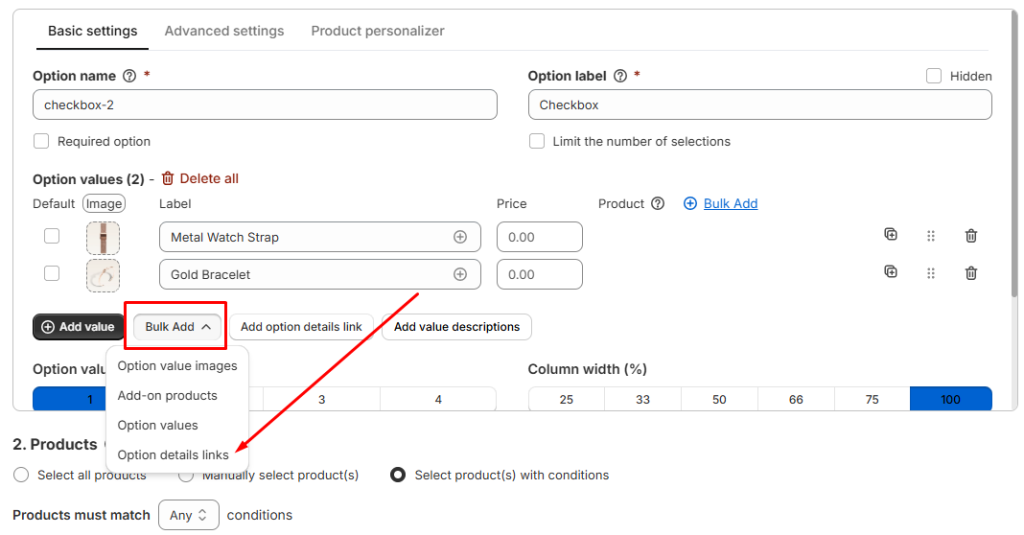
- Or in the Cross‑product links popup, select Bulk Add
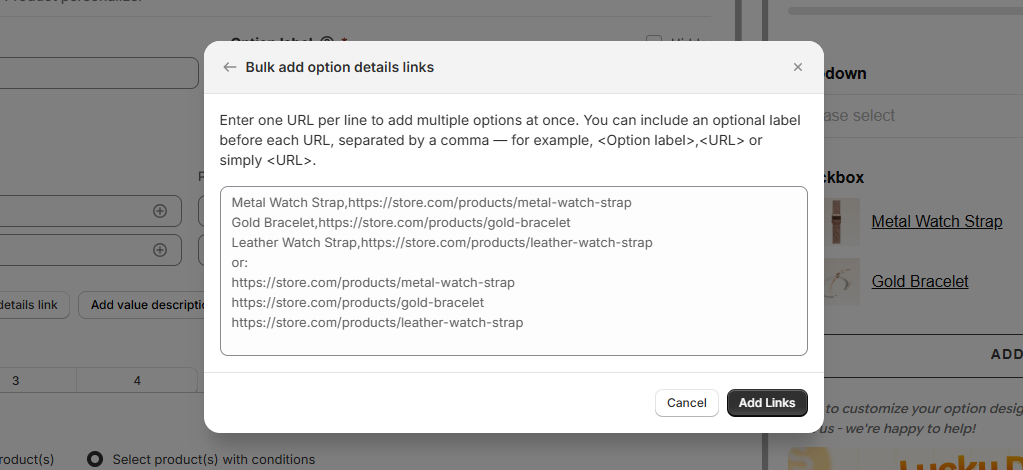
ℹ️Note: When you use Bulk Add to insert links, it will automatically create new options in the option set. If you have a large number of cross‑product links, it’s best to use Bulk Add before adding or editing options in the option set.
Step 4: Add The Option Set to Main Product #
Finally, add the option set to the main product it belongs to, and click “Save” to complete the option set.

Need Assistance? #
If you encounter any difficulties in setting up Option URL for additional product/option detail purposes, don’t hesitate to contact us for assistance. You can reach out via our in-app live chat, submit your request through our contact form, or simply email us at support@tigren.com. We’re here to help!