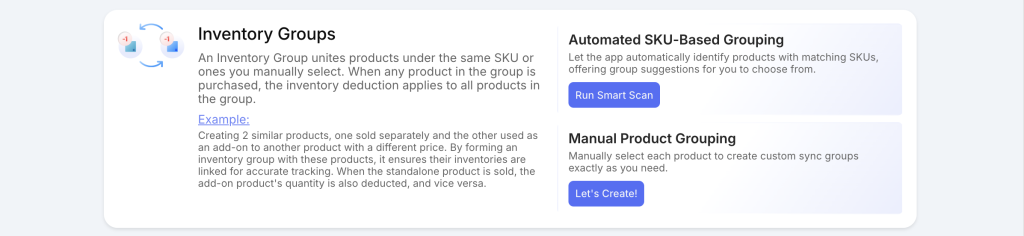
If you want to create Inventory Groups including products with the same SKUs, you can use the Smart Scan feature to automatically detect and group these products.
On the contrary, if your inventory groups include products with different SKUs, you need to create these groups manually, learn more here.
Step 1: Run Smart Scan for Auto-Detect & Suggest Inventory Groups #
Manually creating each inventory group for products with the same or duplicated SKUs can be time-consuming. Our “Smart Scan” feature simplifies this by scanning your entire store to find products with the same SKUs and grouping them into suggested inventory groups for your review.
To start the scan:
- Select Inventory Groups from the app navigation menu.
- Click on the Run smart scan button to initiate the scanning.
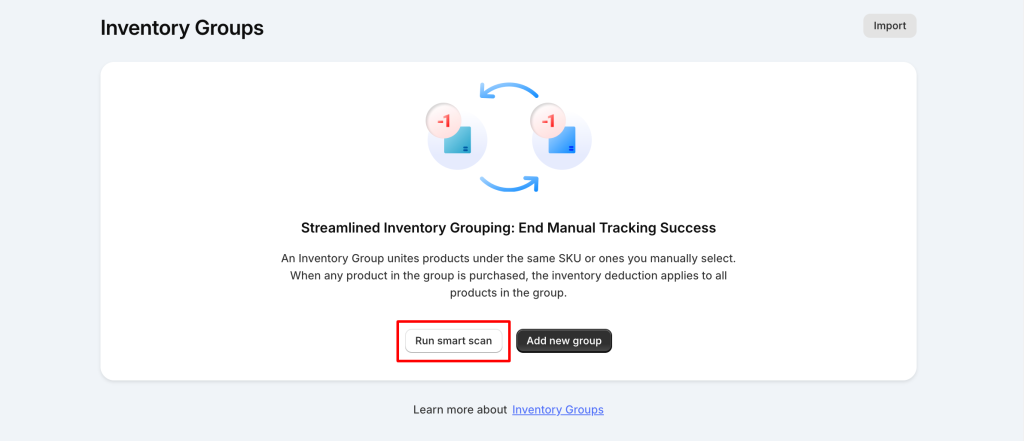
Tips: You can also find a shortcut to the smart scan on the app dashboard.
Notes:
- Depending on the number of products, the scan might take a few seconds to a few minutes to return the list of groups with same-SKU products.
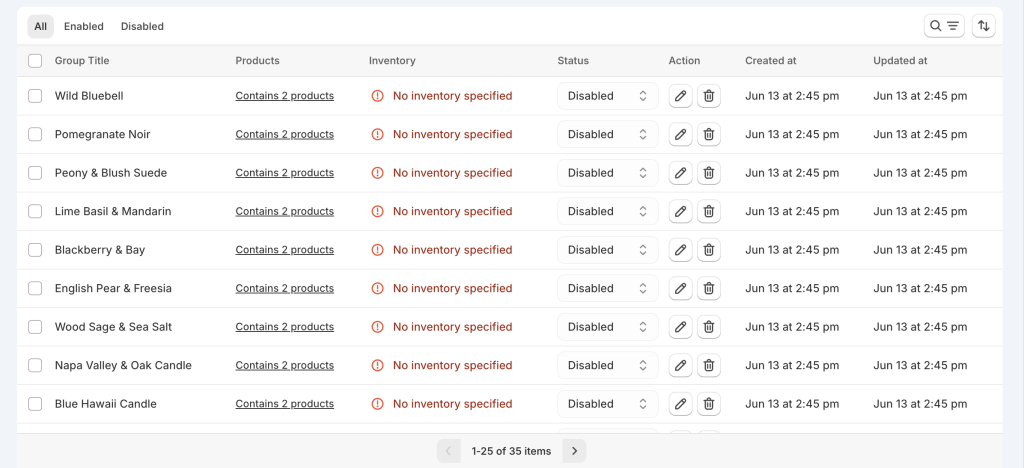
- After the scan, you’ll see all suggested groups. These groups are initially disabled and will require further setup before they can be used officially.
Step 2: Select & Edit Suggested Inventory Groups #
After reviewing the suggested groups, you can select one or multiple groups for further editing.
To activate a group:
- Set mutual inventory for all products in the selected group. If mutual inventory is not set, the inventory group cannot be enabled and saved.
- Change the group status to “Enabled”.
- Save the group.
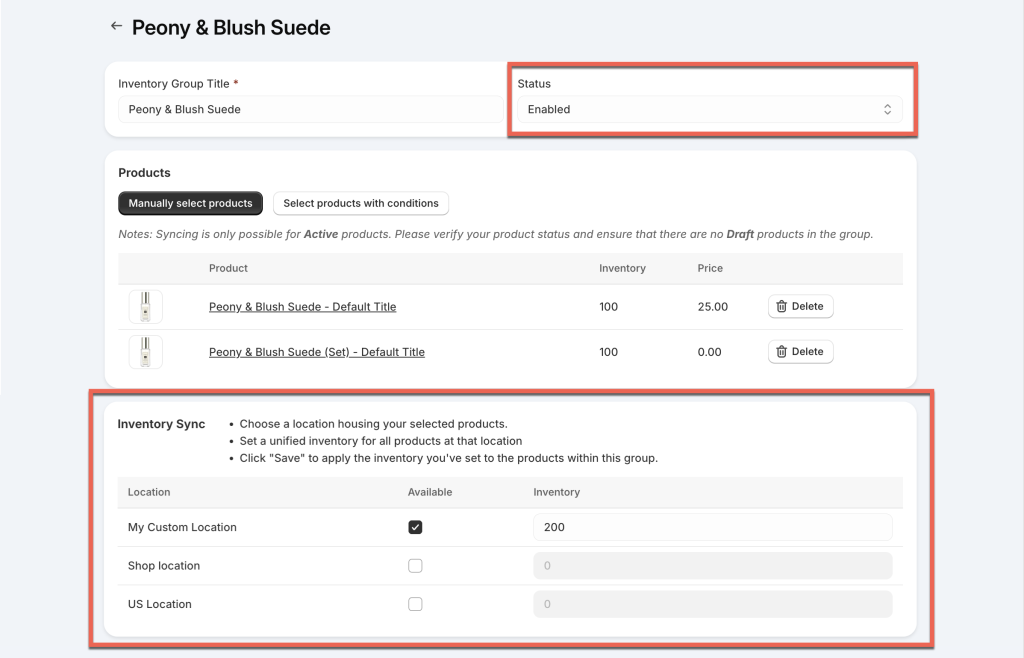
Once you’ve saved your inventory group, the inventory sync process will begin automatically. Any shared inventory you’ve configured will promptly update across all products within that group. You can review all events that prompt inventory syncs among products in the inventory groups here.
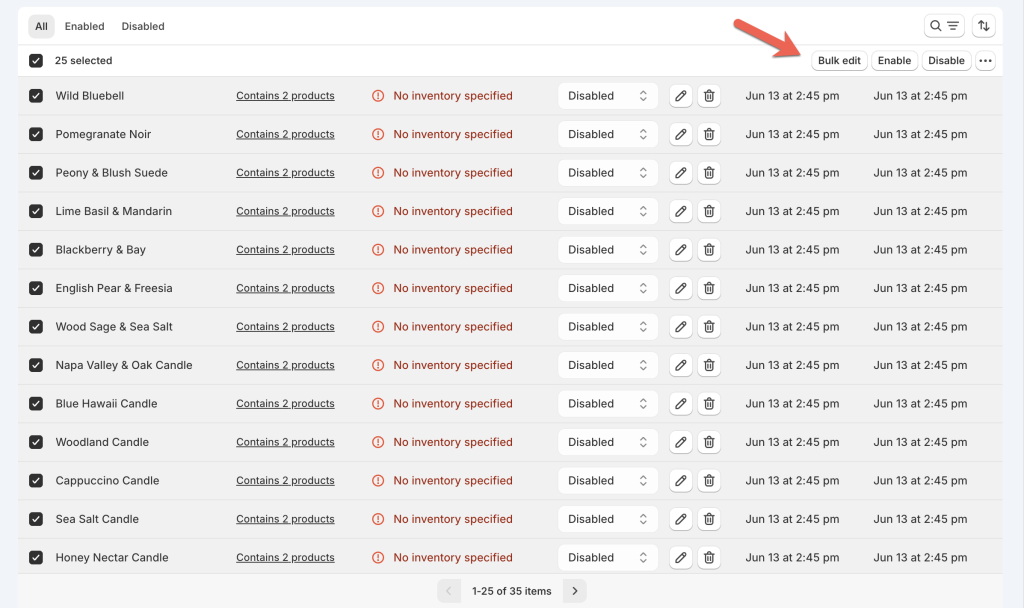
Tips: To save time, use the “Bulk Edit” feature to set inventory for multiple groups on one page, instead of editing each group individually. Learn more about the bulk editor here.
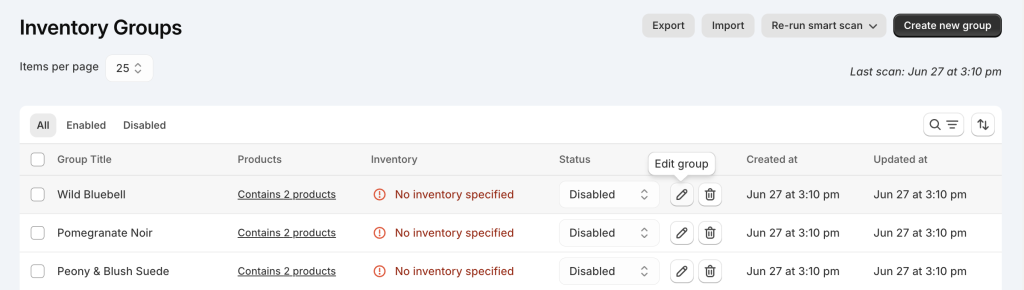
Re-run Smart Scan (Optional) #

Regarding the Smart Scan feature, you can rerun the scan whenever necessary. For instance, if you’ve added new products, deleted existing ones, or changed SKUs for your products or variants, you’ll need to re-scan the SKUs to update and refresh the list of Inventory Groups accordingly. This ensures that your inventory management remains accurate and up-to-date with the latest changes in your product catalog.
There are 2 options available:
- Add new and update groups:
- Add new groups: The app will scan for any products with the same SKUs that haven’t been grouped yet and add them to the suggested list.
- Update groups: The app will scan for any updates in the suggested groups from the previous scan and incorporate those updates into the existing groups. Here are a couple of examples:
- Example 1: If group A originally contained 2 products with the same SKU, and during a re-run, the app finds another product with that SKU, it will add this new product to the existing group.
- Example 2: If Group B initially had 3 products with the same SKU, and during the re-run the app detects that one of these products has changed its SKU, it will update the SKU of that product within Group B while keeping it in the group.
- Replace all existing groups: If you select this option, all suggested groups from the last scan will be replaced entirely. The app will perform a fresh scan from the beginning.
Notes:
- All changes made to the inventory of each group in the last scan will be removed.
- You will need to set up the inventory for the newly suggested groups again.
- Only groups created by the Smart Scan will be replaced. Groups you created manually will remain after re-running Smart Scan.
Need Assistance? #
If you run into any challenges while setting up the Inventory Groups, feel free to reach out to us for assistance through our convenient in-app live chat, by submitting your request via our contact form, or by sending an email to support@tigren.com. We’re here to help!