With the Easify Product Options app, you can easily enhance your product options by adding Help text and Tooltips. By default, Tooltips appear next to the option name, while Help text is displayed beneath the option content.
But what if your store needs to offer more tailored, detailed information for each option value? That’s where our advanced Descriptions & Tooltips feature comes in! This advanced capability lets you offer specific, tailored information for every option value, giving your customers the clarity they need to make the best choice.
Transform Your Store with Descriptions & Tooltips #
This feature is crucial for optimizing the shopping experience and can transform your store in several compelling ways:
- Enhances Customer Understanding: Provide clear, specific information that empowers customers to make informed choices, reducing confusion and minimizing returns.
- Increases Engagement: Capture customer interest with tailored descriptions that encourage exploration, leading to higher conversion rates.
- Streamlines Communication: Effectively convey critical information about availability and delivery times, setting clear expectations and building trust.
In this guide, we’ll show you how this feature can be useful in various scenarios. If you’ve been searching for a solution to customize individual option values, this is exactly what you need.
Even if you hadn’t thought of it before, you’ll see how this feature can enhance your options, making them more engaging and functional for your store.
And most importantly, we’ll guide you through setting up descriptions and tooltips for option values with ease.
Supported option types: Dropdown, Color Swatch, Image Swatch, Checkbox, and Radio Button. The option value description and tooltip feature will be extended to more option types in the future.
Availability: This feature is exclusive to the Premium plan.
How to Set Up Descriptions & Tooltips for Option Values #
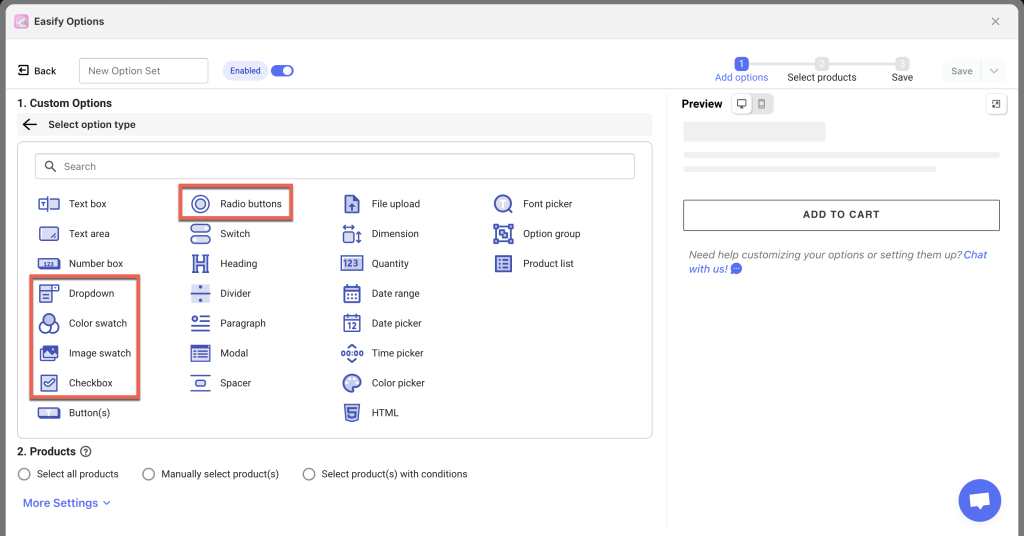
Step 1: Add a supported option type to your option set #
Currently, 5 option types (Dropdown, Color Swatch, Image Swatch, Checkbox, and Radio Button) support adding descriptions and tooltips for individual values.
Choose the one you want and add it to your option set to get started:
Step 2: Add all option values #
As usual, add all the values for your option before adding descriptions and tooltips to one, several, or all of them.

Step 3: Add descriptions & tooltips #
Click the Add value descriptions button under the option values you’ve added.
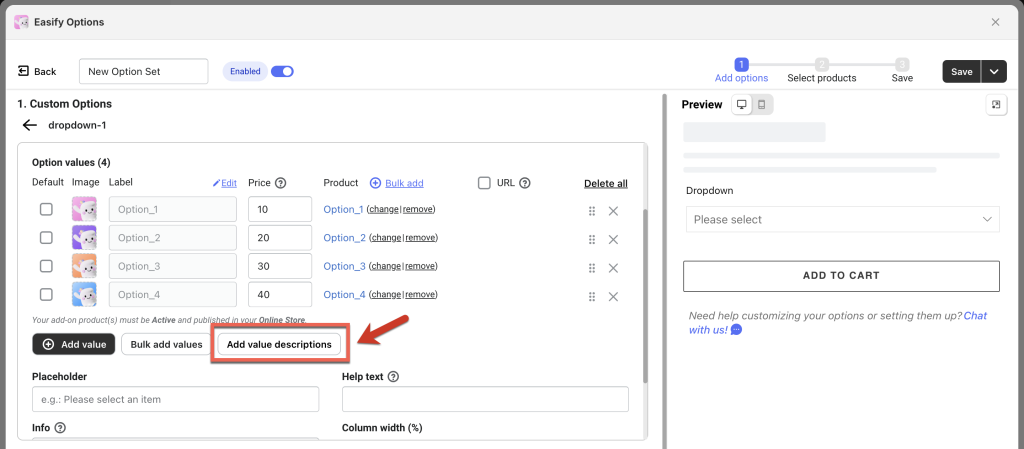
A popup will appear, listing all your option values. From there, select which ones you want to add a description or tooltip to.
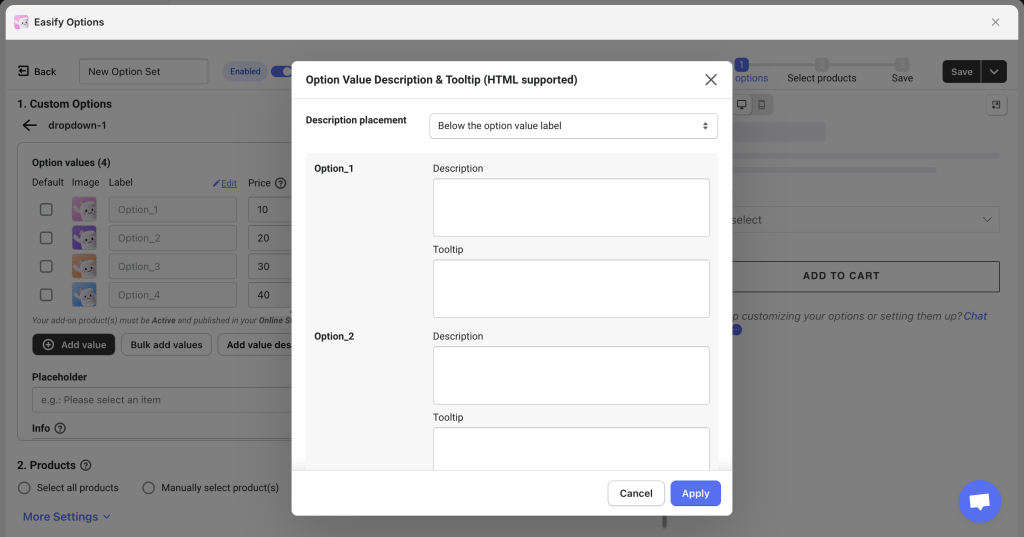
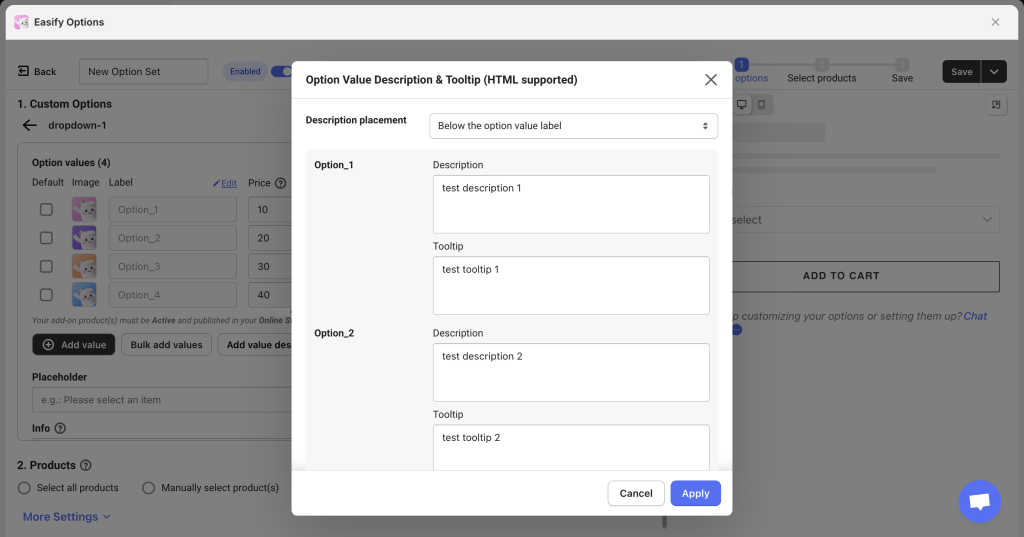
After adding your descriptions and tooltips, click the Apply button to save them to your option values. Then, use the Preview to ensure they’ve been applied correctly.
If you need to add more or make edits to the descriptions and tooltips, simply click the Add/edit value descriptions button again to reopen the popup and modify your content.

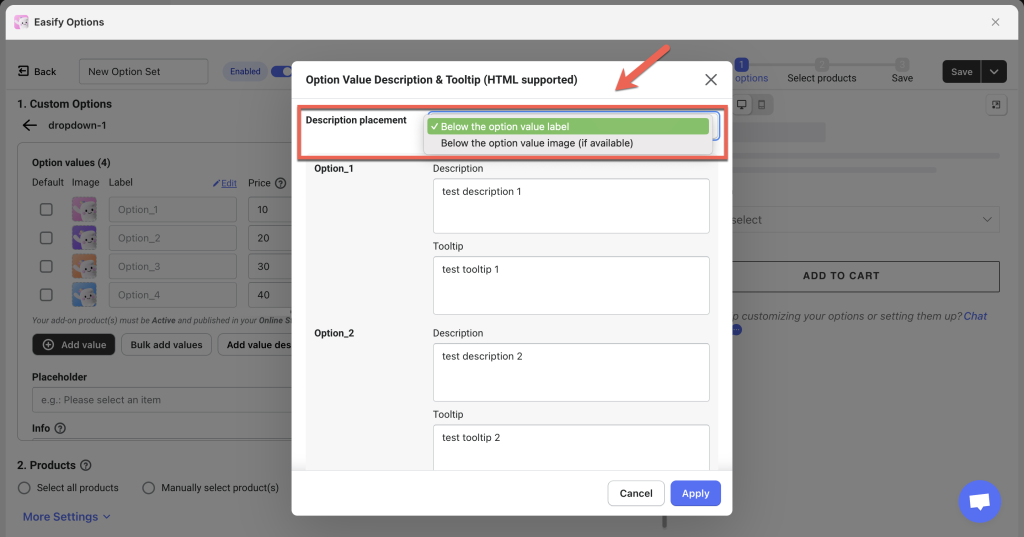
Step 4: Choose the placement of your descriptions #
- For Dropdown, Radio Button, and Checkbox option types:
You can decide where the Descriptions should appear – either below the option value label or image.
Depending on the option type, label length, or image, choose the best placement to ensure everything looks great. For example, if your option value labels are short, placing the description right beneath the labels works best. However, for longer labels, it’s better to place the description under the option value images for a more balanced layout.
Below are examples of the 2 positions:
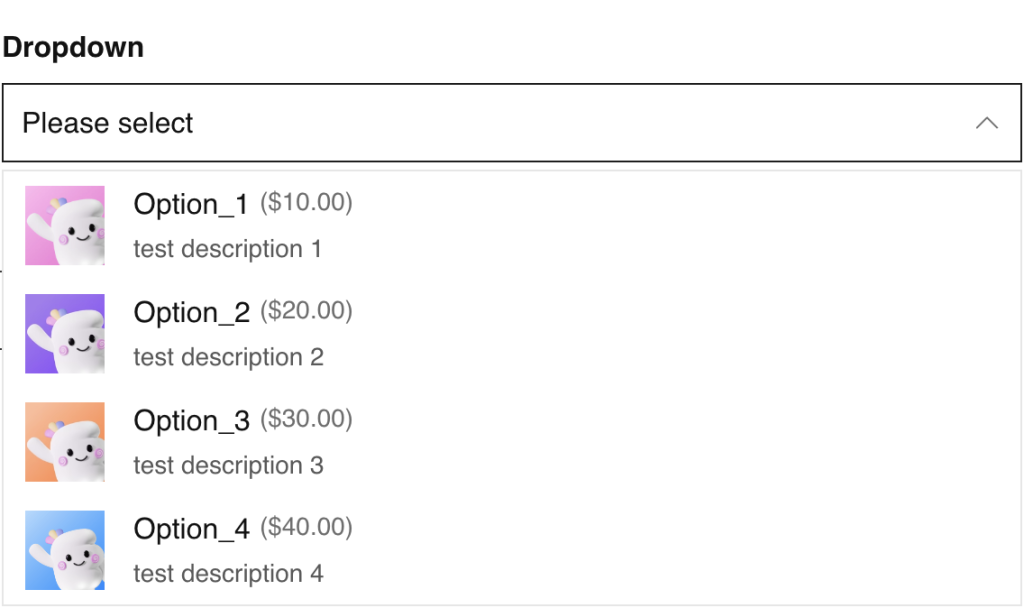
- Below the option value label:
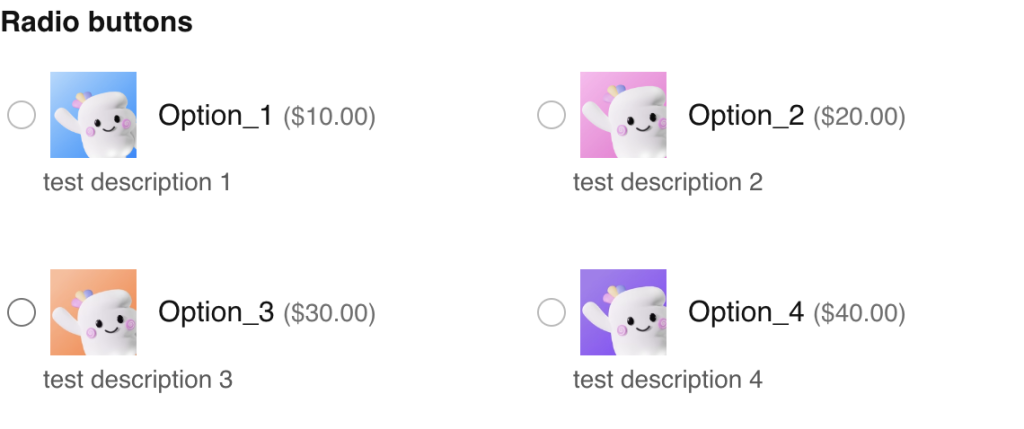
- Below the option value image:
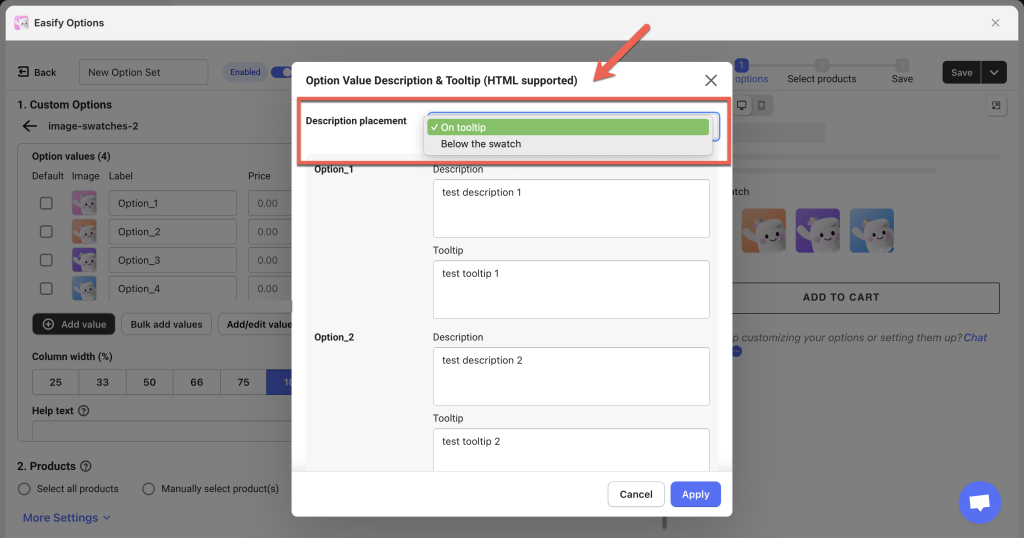
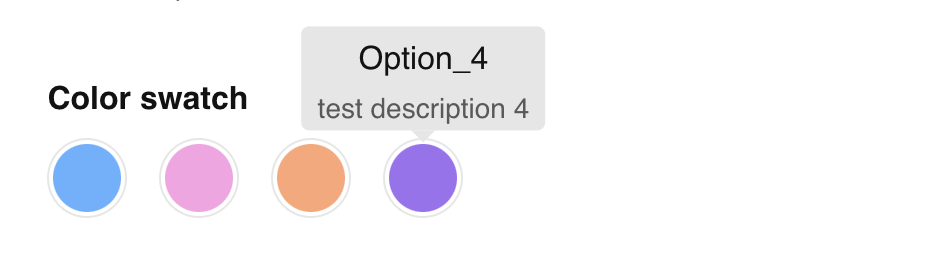
- For Color Swatch and Image Swatch option types:
You can decide where the Descriptions should appear – either On tooltip (default) or Below the swatch.
Below are examples of the 2 positions:
- On tooltip:
- Below the swatch:
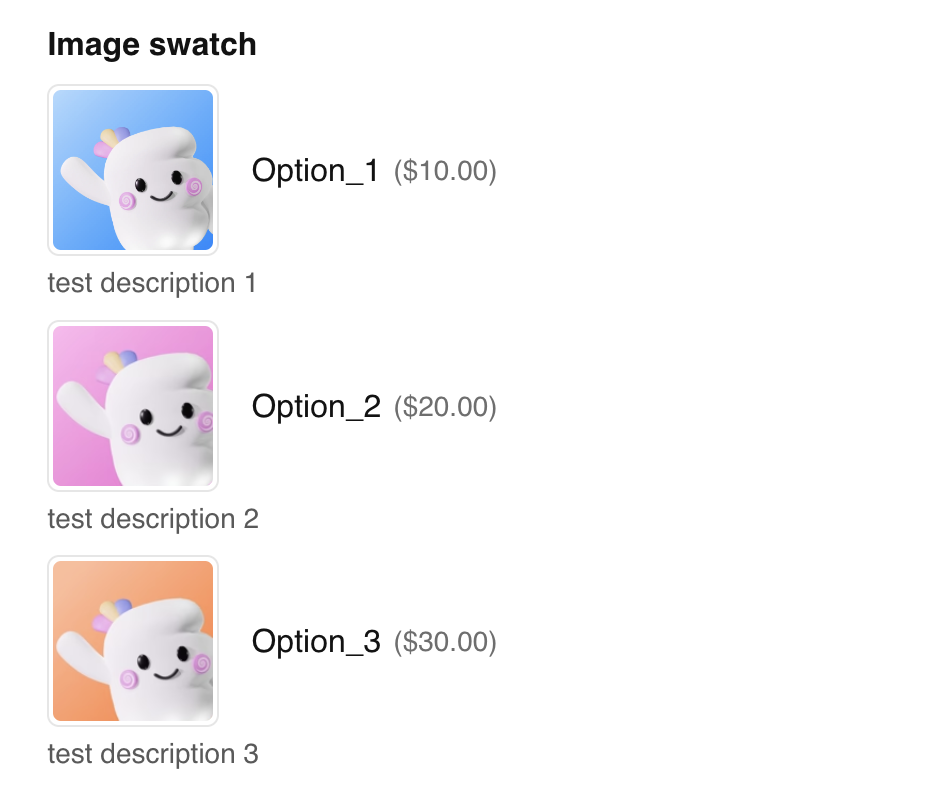
or:

Step 5: Finalize and publish #
Once you’ve added the necessary descriptions and tooltips, finish setting up your option set (such as assigning relevant products).
Save your changes and publish them. Finally, preview your storefront to make sure everything looks just the way you want.
Common Use Cases #
Delivery time #
- Personalized Products: For items like custom-made jewelry, engraved gifts, each customization option could display different delivery times (e.g., “Engraving – Ships in 7 days”, “No customization – Standard delivery”).
- Apparel with Custom Prints: Offering custom T-shirt prints may have different lead times based on the complexity of the design (e.g., “Standard Print – Ships in 3-5 days”, “Custom Design – Ships in 7-10 days”).
- Limited Edition Items: Some color or size options for limited-edition products could have extended delivery times due to low stock or high demand (e.g., “Red – Ships in 3-4 weeks”, “Blue – Ships immediately”).
Availability status #
- Pre-Order: For upcoming products, allow customers to pre-order with estimated availability (e.g., “Pre-Order Now – Ships Dec 1”).
- Limited Edition or Restocking Soon: For products available in limited quantities or awaiting restock, options like “Limited Edition – Only a few left” or “Restocking Soon – Available in 2 weeks” could include detailed tooltips on availability.
- Seasonal Items: For seasonal products like holiday items, specific availability periods could be displayed (e.g., “Available until Dec 31”).
Specific details for each option #
- Jewelry: For rings, each gemstone option could provide specific descriptions of the stone’s origin, clarity, and symbolic meanings (e.g., “Emerald – Known for Clarity and Strength”, “Sapphire – Represents Loyalty”).
- Frame Materials for Art: For wall art or photos, each frame material could provide details (e.g., “Wood – Warm and Classic”, “Acrylic – Modern and Minimalist”).
- Fabric Choices for Clothing: For clothing items, each fabric could offer details (e.g., “Organic Cotton – Soft and Breathable”, “Polyester – Durable and Quick Dry”).
- Scent Descriptions: For products like perfumes or candles, each scent could have a unique description (e.g., “Lavender – Calming and Relaxing”, “Citrus Fresh – Light and Airy for Summer”).
- Laptops with Custom Components: For build-to-order laptops, each component could include specific descriptions (e.g., “8GB RAM – Ideal for Multitasking”, “16GB RAM – Best for Gaming and Video Editing”).
- Cosmetics with Skin Type Specifics: For foundation or skincare products, each option could include details about skin type compatibility (e.g., “Shade 1 – For Fair, Cool-Toned Skin”, “Shade 5 – For Medium, Warm-Toned Skin”).
- Sofa Upholstery: Each fabric or leather option could include descriptions (e.g., “Velvet – Soft and Luxurious”, “Leather – Durable and Easy to Clean”).
- Lens Coatings: For eyewear, each lens coating could explain its benefits (e.g., “Anti-Glare – Reduces Reflections”, “Blue Light Filter – Reduces Eye Strain”).
- Bag Sizes: For backpacks or handbags, each size could describe its capacity and use (e.g., “Mini – Ideal for Daily Essentials”, “Large – Perfect for Travel”).
Emphasizing unique features #
- Best Seller or Recommended: Use labels (descriptions) like “Best Seller” or “Recommended” to highlight popular options.
- Eco-Friendly or Sustainable: Emphasize eco-conscious options with labels like “Eco-Friendly” or “Sustainable” (e.g., “Eco-Friendly – Made from 100% Recycled Materials”, “Sustainable Choice – Reduces Carbon Footprint”).
- Exclusive or Limited Time Offer: Use labels like “Exclusive” or “Limited Edition” to draw attention to special options (e.g., “Exclusive – Only Available Online”, “Limited Edition – Only 100 Units Available”).
- Recommended by Experts: Highlight expert recommendations for certain options (e.g., “Recommended by Stylists – Perfect for Any Occasion”, “Most Popular Choice – Durable and Long-Lasting”).
- Dietary Info: Provide specific dietary labels and allergen information (e.g., “Gluten-Free – Safe for Celiacs”, “Vegan – 100% Plant-Based Ingredients”).
Material-specific information #
- Furniture Material: For tables or chairs, different materials could have detailed descriptions (e.g., “Solid Oak – Long-Lasting and Heavy Duty”, “Glass – Modern and Requires Regular Cleaning”).
- Outdoor Gear: For tents or jackets, each material could describe its durability and use (e.g., “Gore-Tex – Waterproof and Breathable”, “Polyester – Lightweight and Easy to Pack”).
- Phone Case Materials: For phone cases, different materials could describe protection and style (e.g., “Silicone – Flexible and Shock-Absorbent”, “Hard Plastic – Rigid and Protective”).
Benefits from Descriptions & Tooltips for Option Values #
The Descriptions & Tooltips for Option Values feature can be a game changer for your store. Here’s how it can enhance both your customers’ shopping experience and your sales performance:
Enhanced customer understanding #
With detailed descriptions and tooltips for each option value, customers gain a clearer understanding of what they are purchasing. This transparency helps customers make informed decisions, reducing the chances of post-purchase dissatisfaction and returns.
Improved engagement #
By offering unique information for each option value, you can create a more engaging shopping experience. Customers are more likely to spend time exploring your products when they have access to interesting and relevant details, leading to higher conversion rates.
Clear communication of availability and delivery time #
Clearly communicating estimated delivery times and availability through tooltips helps set customer expectations. This is particularly valuable for items with varying shipping schedules or limited stock, fostering trust and customer satisfaction.
Showcasing unique features #
Use descriptions to highlight the unique attributes of your products, such as material benefits, compatibility, or care instructions. This level of detail can differentiate your offerings in a competitive market and inform customers about what makes your product special.
Supporting marketing strategies #
Tooltips can be strategically used to promote sales, highlight best sellers, or draw attention to exclusive offers. This feature allows you to reinforce your marketing messages at the point of sale, guiding customers toward informed decisions.
Boosting customer confidence #
Providing comprehensive information fosters confidence in your products. When customers feel well-informed, they are more likely to complete their purchases, leading to increased sales and customer loyalty.
The Descriptions & Tooltips for Option Values feature is more than just an enhancement; it’s a strategic tool that can transform how customers interact with your store. By leveraging this capability, you can create a more informative, engaging, and customer-centric shopping experience that drives sales and satisfaction.
Need Assistance? #
If you have any questions about setting up option value descriptions & tooltips, don’t hesitate to reach out! Our support team is available via the in-app live chat to assist you.