Customizing product options on Shopify can be challenging due to the platform’s limitations. With only basic variant support, a cap on the number of options and variants per product, and limited display styles (pills or dropdowns), many store owners turn to third-party apps for greater flexibility.
Easify Product Options is a standout solution, offering unlimited options, 26 versatile display types, and an easy way to add extra charges for custom selections.
In this blog post, we’ll dive into two powerful methods within Easify—Add-on Price and Add-on Product—to help you implement additional charges for custom product options and choose the best approach for your Shopify store.
- Add-on Price: Directly assign extra costs to specific option values for seamless pricing customization.
- Add-on Product: Link custom options to predefined products with set prices, offering a structured way to manage additional charges.
TL;DR
Easify Product Options simplifies adding extra charges for custom Shopify product options with two methods:
- Add-on Price: Quick setup to assign extra costs to option values. Ideal for simple stores but lacks discount compatibility and may show blank images at checkout.
- Add-on Product: Links options to predefined products for discount compatibility, better checkout button support, and enhanced visuals, though setup is more involved.
Choose Add-on Price for speed or Add-on Product for advanced features like discounts and inventory management. Easily switch from Add-on Price to Add-on Product if needed.
A. Using The Add-on Price Feature
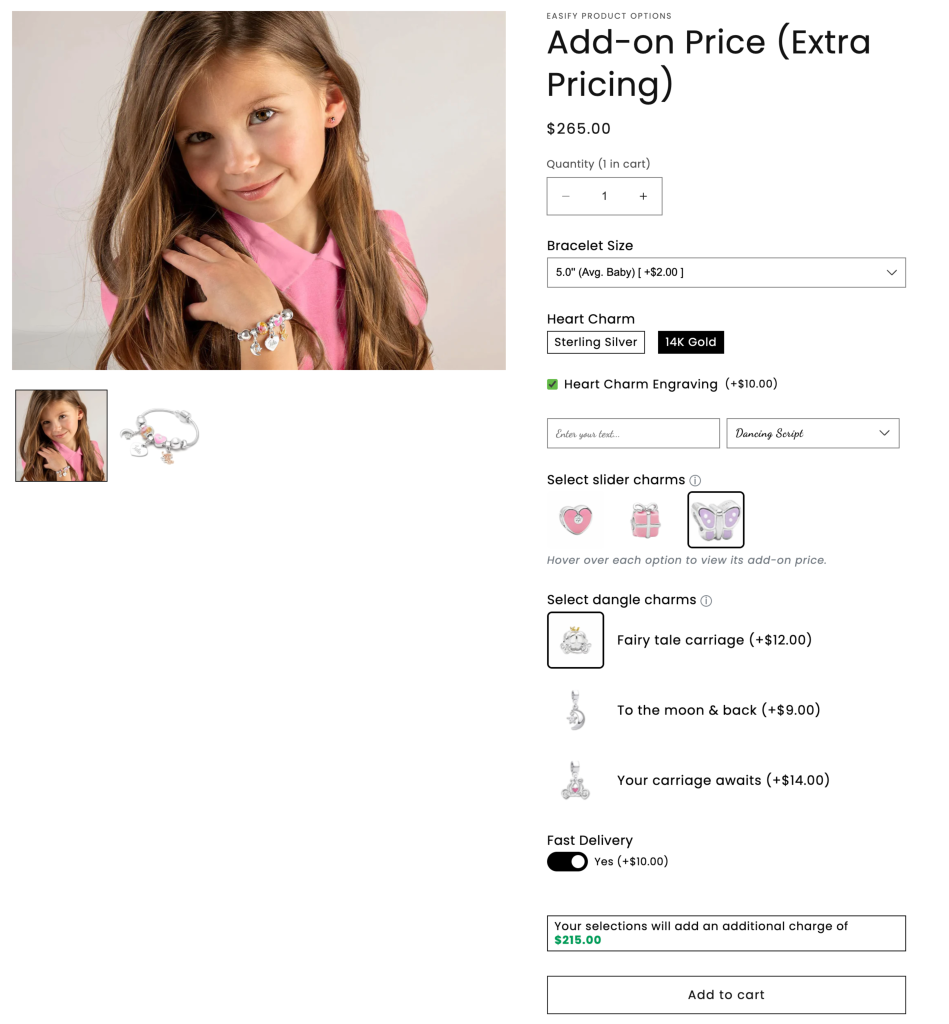
The Add-on Price feature in Easify Product Options provides a quick and convenient setup for adding extra charges to custom product options. It supports various option types, such as text boxes, file uploads, dimensions, quantities, and more. Setting up additional prices is a breeze, allowing you to enhance the product’s value effortlessly.
Demo:
Pros:
- Quick and Convenient Setup: Adding extra prices is seamlessly integrated into most option types during the option set creation.
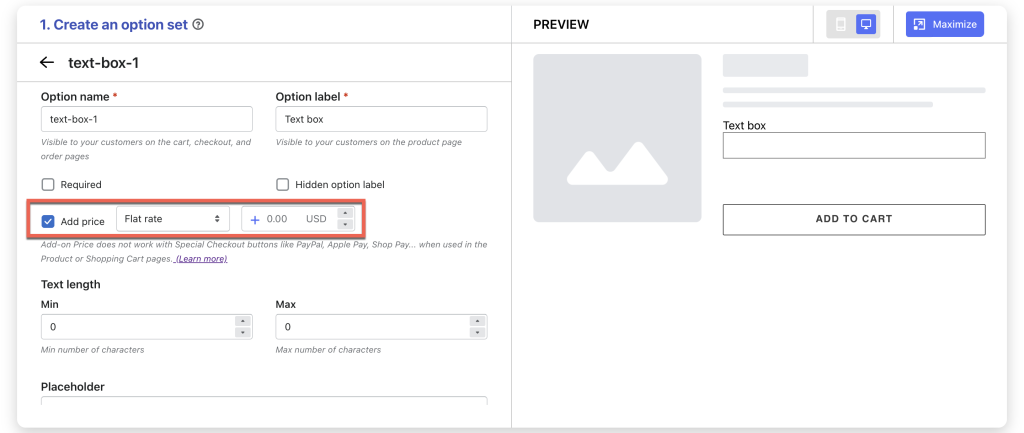
- For certain option types like Text box, File upload, Dimension, Quantity, Date/Time/Color/Font picker, you can simply click the “Add price” checkbox and input the desired additional cost.
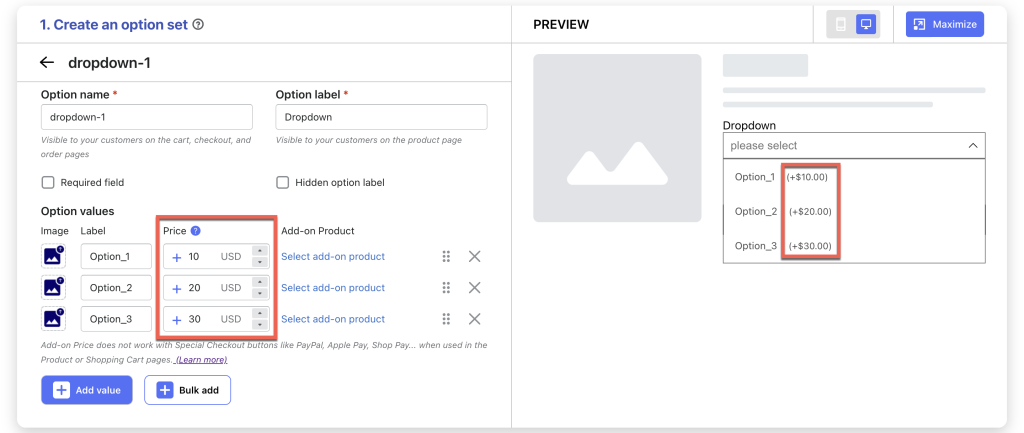
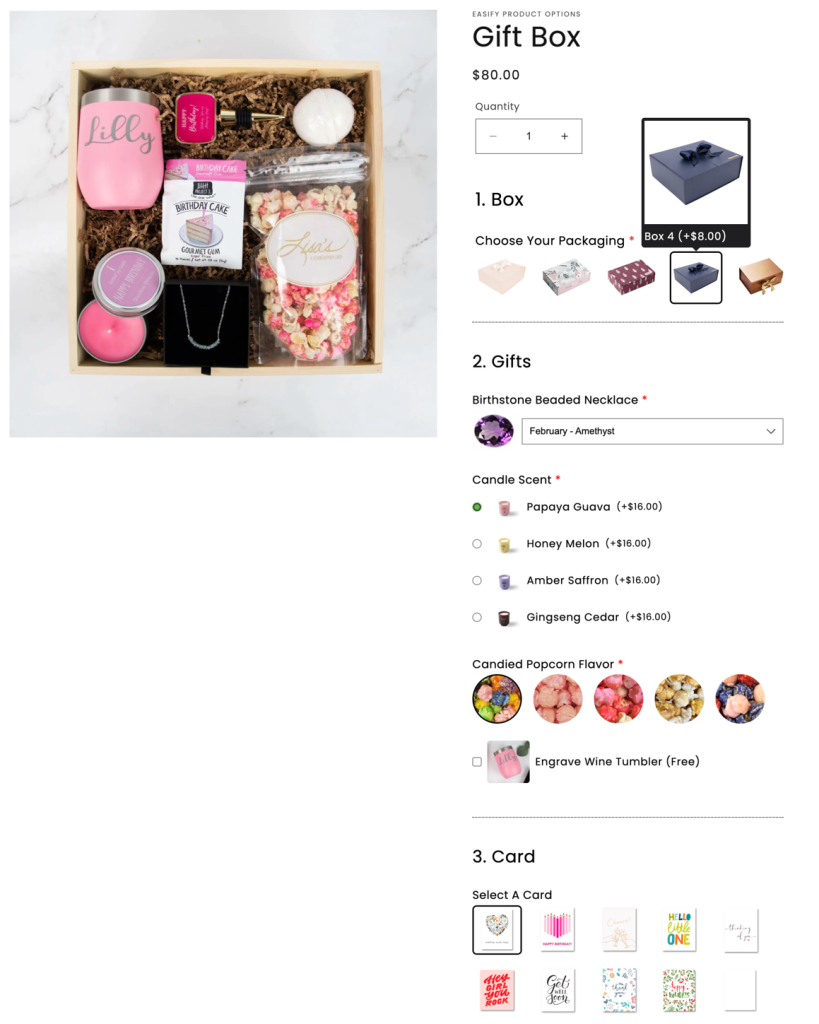
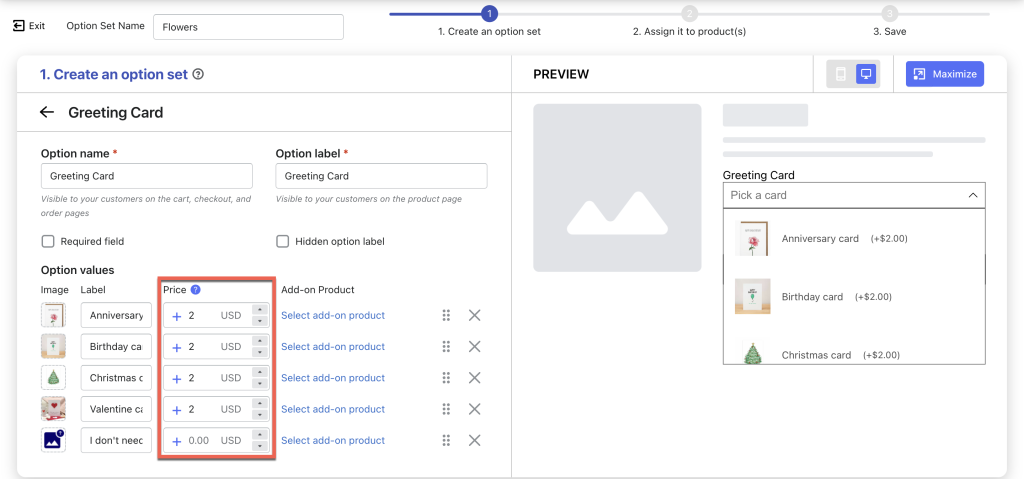
- For option types with multiple values, like Dropdown, Checkbox, Color/Image Swatch, and Button, you can set specific prices for each value.
Cons:
- Incompatibility with Discounts: One significant drawback is that Add-on Price cannot be applied with discounts. Discounts will only affect the main product price, leaving the option price unaffected.
- Checkout Button Compatibility: While the Add-on Price feature seamlessly integrates with distinctive checkout buttons on checkout pages, it currently lacks compatibility with specialized checkout buttons on the product and cart page, thereby affecting the overall user experience.
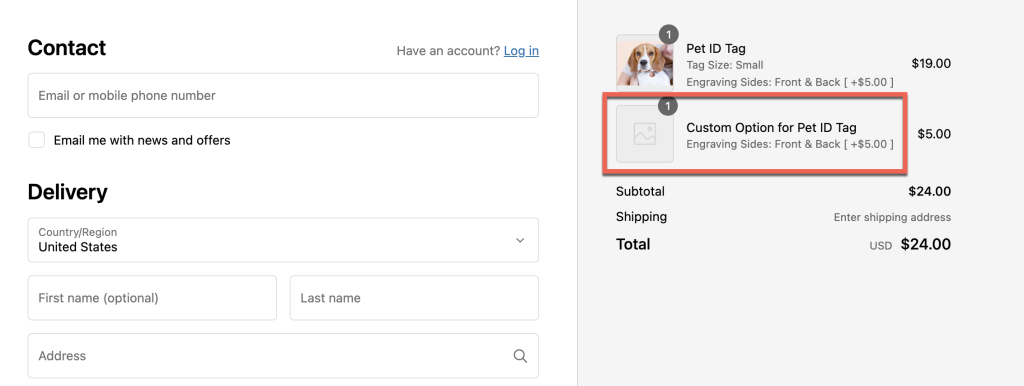
- Visual Representation on Checkout: The selected option with Add-on Price may display as a blank image on the checkout page, making it less visually appealing.
To summarize, if your store doesn’t heavily rely on discounts, doesn’t require special checkout buttons on the product and cart page, and can tolerate the absence of custom option images on the checkout page, the Add-on Price feature provides a quick and efficient setup.
However, if your store demands discounts or special checkout buttons, or if the absence of custom option images is a concern, you should explore the Add-on Product feature as an alternative.
Learn more about setting up Add-on Price here.
B. Using The Add-on Product Feature
For a more comprehensive approach that addresses discount compatibility and enhances visual representation, the Add-on Product feature in Easify Product Options comes into play.
Demo:
Pros:
- Discount Compatibility: Unlike Add-on Price, Add-on Product can work seamlessly with various types of discounts.
- Checkout Button Compatibility: It is compatible with special checkout buttons all pages, ensuring a smooth transaction process.
- Enhanced Visual Representation: The selected option linked with Add-on Product displays the product image and name on the checkout page, providing a more polished and professional look.
- Inventory Management: If your custom option is linked to a product with limited quantity, Add-on Product helps manage inventories efficiently. When the main product is purchased with a selected option linked to a product, the inventory of that linked product is also deducted.
Cons:
- More Complex Setup: Setting up Add-on Product involves a few more steps compared to Add-on Price. You need to create the product first, link each option value with the add-on product, and update product variants’ details.
- Discount Calculation Challenges: For scenarios where discounts are applied based on the number of products in the cart, the use of Add-on products can potentially lead to inaccuracies. For instance, if you intend to apply a discount solely to the main product quantity, the inclusion of several options linked to add-on products in the cart may result in an incorrect total count.
Learn more about setting up Add-on Product here.
How To Convert Add-on Prices To Add-on Products
For situations where you initially set up extra prices using Add-on Price but later decide to switch to Add-on Product (e.g., to apply discounts based on the total cart price), you can easily make the transition. Here’s a step-by-step guide using an example:
Example Scenario: Consider a situation where you’ve created custom options for “Greeting Cards” using the Dropdown option type with Add-on Price.
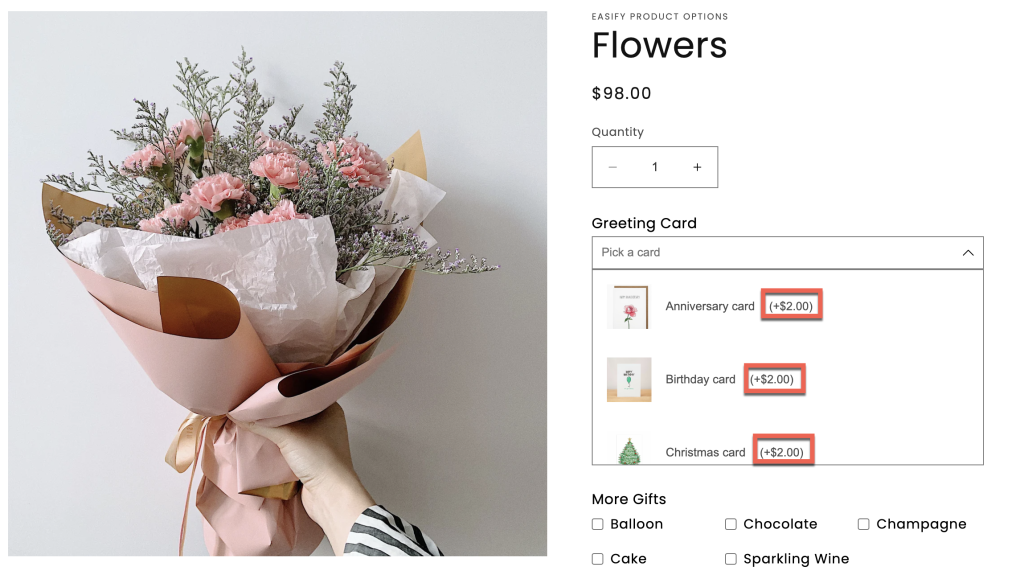
Step 1: Create a Product Representing Extra Costs
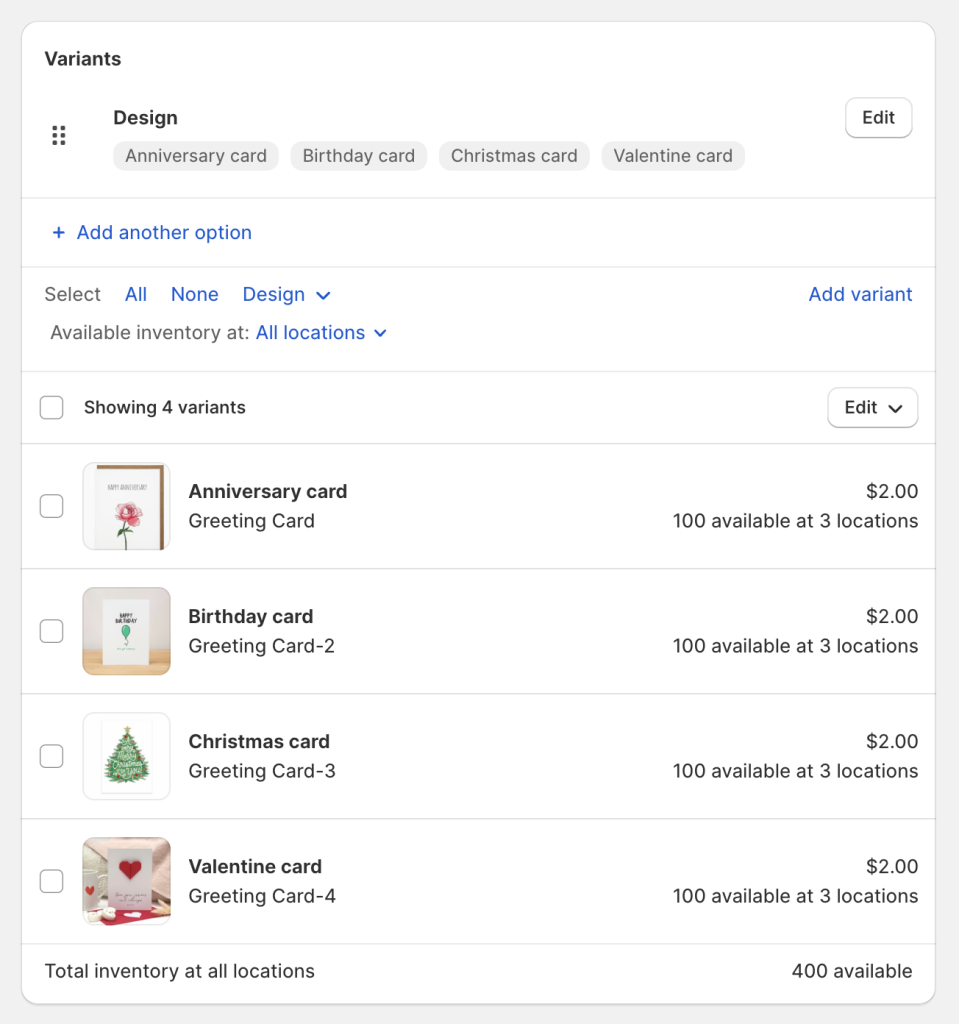
In this step, you’ll create a new “Greeting Cards” product, complete with a Type option and various variants representing different card options.
Include the price, image, and quantity for each card variant.
Note: The variant values should match the option value labels in the option set. The variant images correspond to the option values’ images in the option set, and the variant prices mirror the prices of the option values.
Step 2: Replace Existing Add-on Prices with Add-on Products
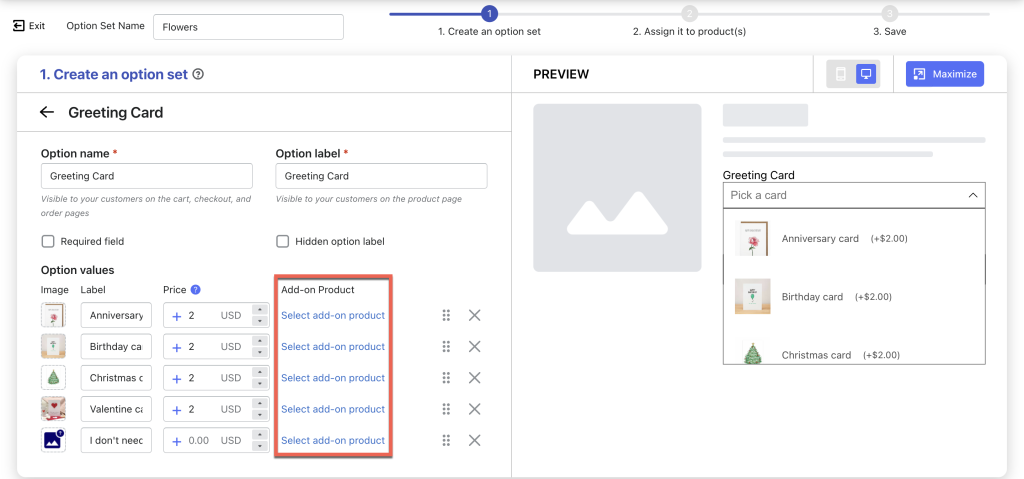
Access your option set settings and click on the option that contains the Add-on Price you want to replace with the Add-on Product.
Click “Select add-on product” next to the (Add-on) Price. There’s no need to remove the current price, as selecting the Add-on Product will automatically overwrite and replace the old option values’ price, image, and label with the linked product’s information.
You’ll need to add each variant with the corresponding option value.
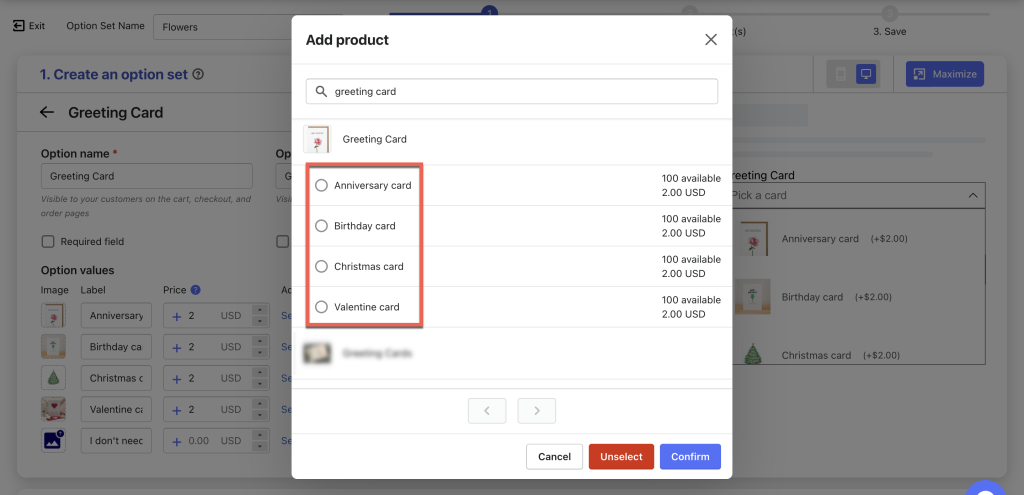
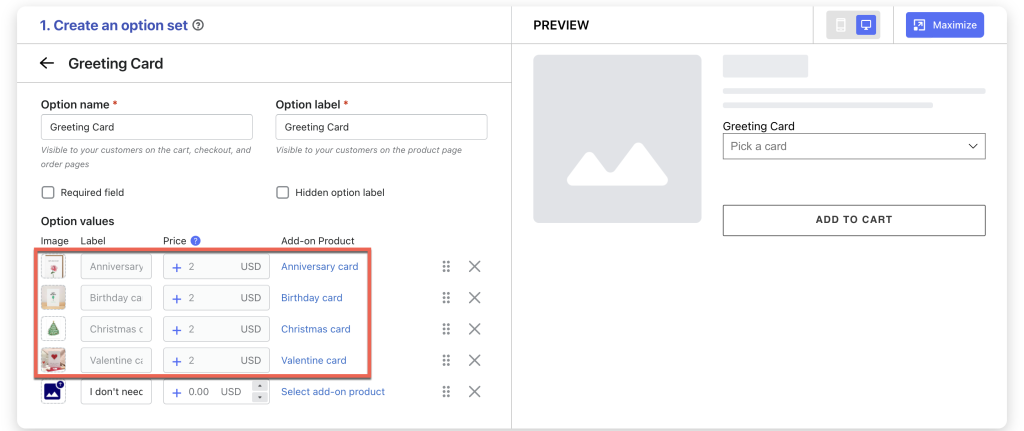
After selecting all relevant product variants for option values, save the option set, and your old Add-on Price is successfully replaced by the Add-on Product.
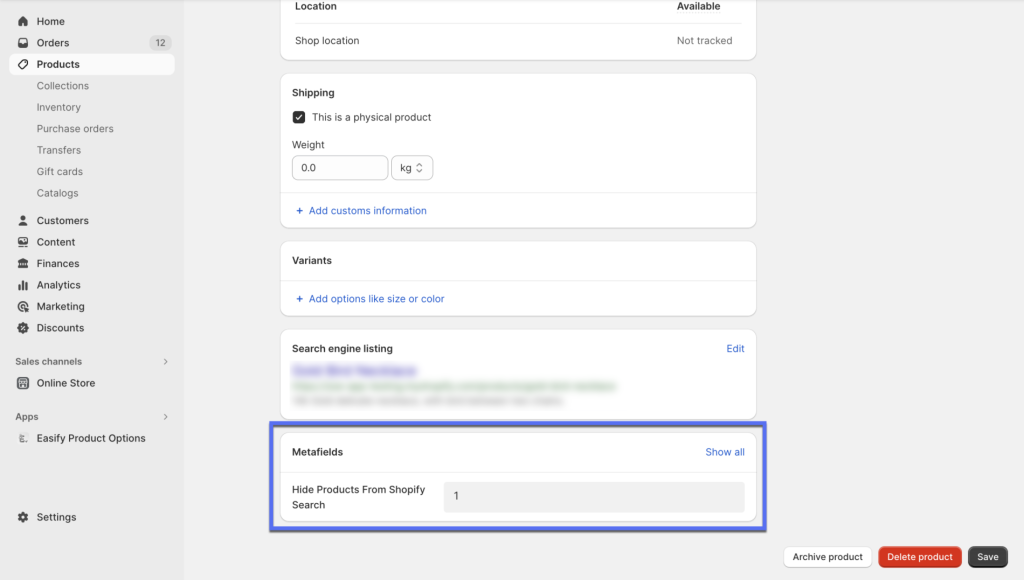
Step 3 (Optional): Hide Add-on Products On Your Storefront
If you’re looking to swap out add-on prices with actual products to sidestep some pricing limitations but don’t want these items visible on your storefront, there’s a simple fix. Just hide them using the seo.hidden metafield. Follow this guide to set up seo.hidden for the products you want to keep on the down-low.
Final Thoughts
Choosing between Easify’s Add-on Price and Add-on Product features depends on your Shopify store’s specific needs. If simplicity and speed are your priorities, Add-on Price offers a straightforward way to add extra charges for custom options, ideal for stores with minimal reliance on discounts or specialized checkout buttons.
However, if your store requires discount compatibility, seamless checkout experiences across all pages, or enhanced visual appeal with product images at checkout, Add-on Product is the better choice, despite its slightly more complex setup. For those who start with Add-on Price and later need advanced features, transitioning to Add-on Product is a breeze with Easify’s intuitive process.
Ultimately, both methods empower you to unlock greater flexibility in customizing product options, enhancing customer experience, and boosting revenue. Evaluate your store’s priorities—whether it’s ease of setup, discount integration, or inventory management—and choose the approach that aligns best.
Ready to get started? Explore Easify Product Options today and elevate your Shopify store with tailored pricing solutions.


