Personalized products are a game-changer for Shopify stores, and offering custom engraving options can elevate your customer experience and boost sales. While you could hire a developer to code engraving features, this approach often requires ongoing costs for future updates or theme changes.
Instead, a no-code solution like a Shopify app simplifies the process, giving you flexibility and control without the need for technical expertise. In this blog post, we’ll guide you through adding engraving options to your Shopify store using Easify Product Options app, from setup to advanced configurations, with a demo and upcoming features to inspire your personalization journey.
Key Takeaways
- Use Easify Product Options app to add custom engraving to your Shopify store without coding, avoiding the recurring costs of hiring a developer for updates or theme changes.
- Create tailored engraving experiences with 26 option types, including Text Boxes, Checkboxes, Font Pickers, and more, enhanced by features like Conditional Logic and Add-on Pricing.
- Assign engraving options to all products or specific ones manually or via condition-based rules, ensuring a seamless fit for your store’s needs.
See It in Action: Engraving Demo with Easify Product Options
Discover how easy it is to offer personalized engraving on your Shopify store! In this demo, we showcase how Easify Product Options transforms your product pages, letting customers add custom engravings effortlessly while enhancing their shopping experience.
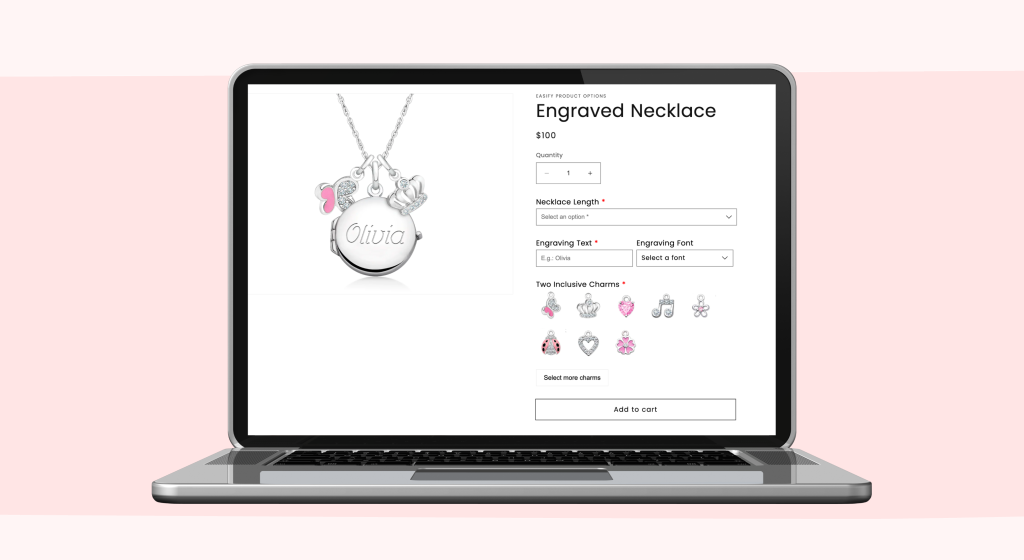
How to Create Engraving Options with Easify Product Options
Adding custom engraving options to your Shopify store is simple with Easify Product Options. Follow these straightforward steps to set up personalized engraving features that delight your customers and boost your product appeal.
Step 1: Install and Set Up Easify Product Options
- Start by installing the app from the Shopify App Store.
- Once installed, follow the intuitive setup guide to activate the app.
- Create a new option set, which will serve as the foundation for all your custom engraving options.
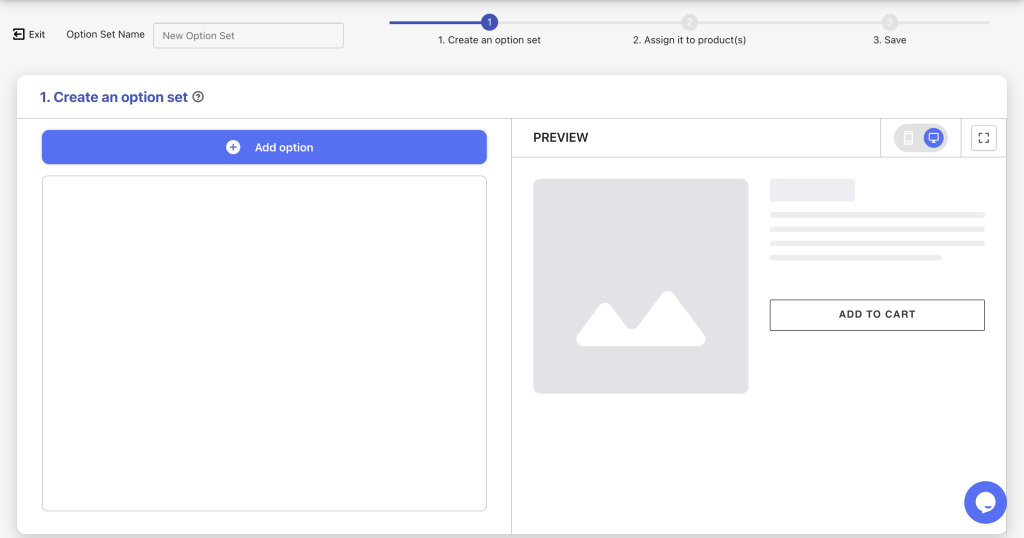
Step 2: Configure Custom Engraving Options
With Easify Product Options, you can leverage 26 option types to create personalized engraving experiences tailored to your Shopify store. Below, we outline two basic and two advanced configurations, plus bonus ideas to spark creativity.
Basic Configurations
Case 1: Mandatory Engraving (No Extra Cost)
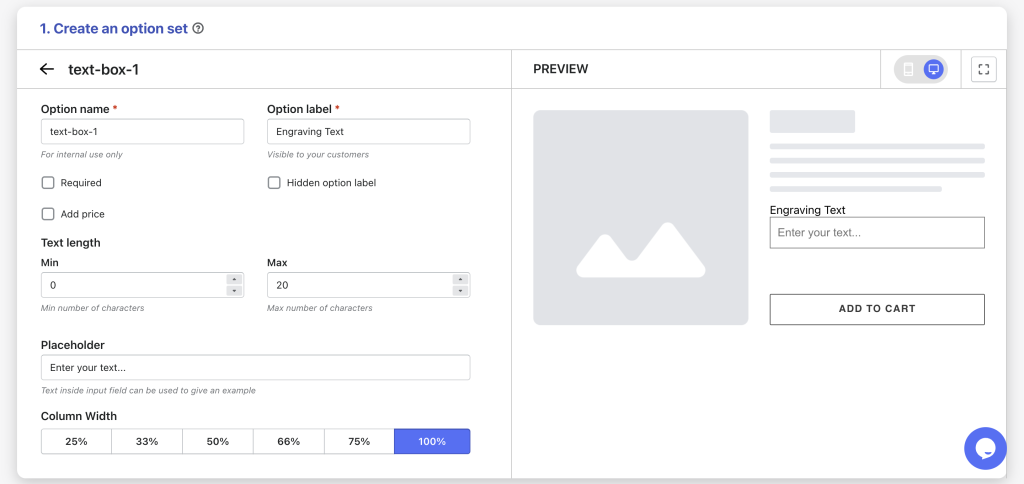
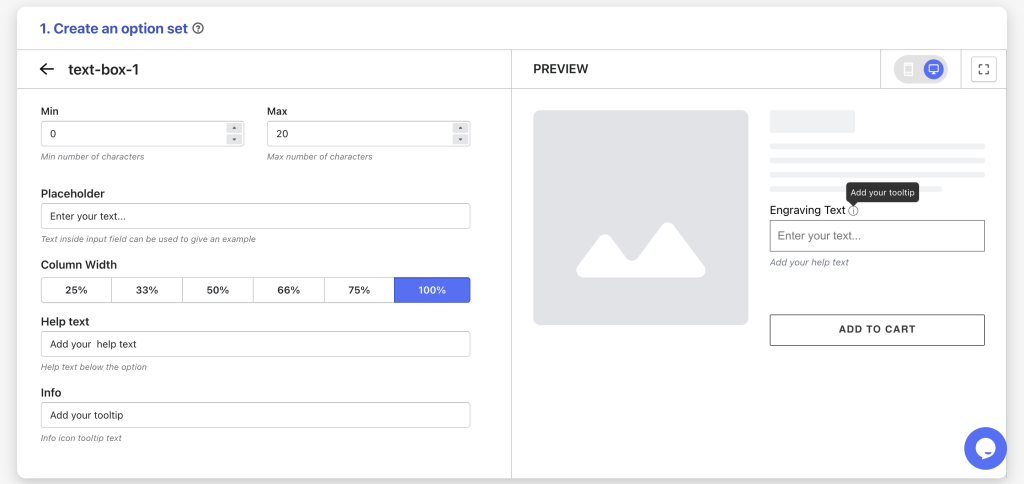
Add a Text Box labeled “Engraving Text” to let customers input their desired message. Customize this field to suit your needs:
- Set a maximum text length to control engraving limits.
- Adjust the field width for a seamless fit on your product page.
- Add placeholder text or an info tool tip to guide customers on what to enter.
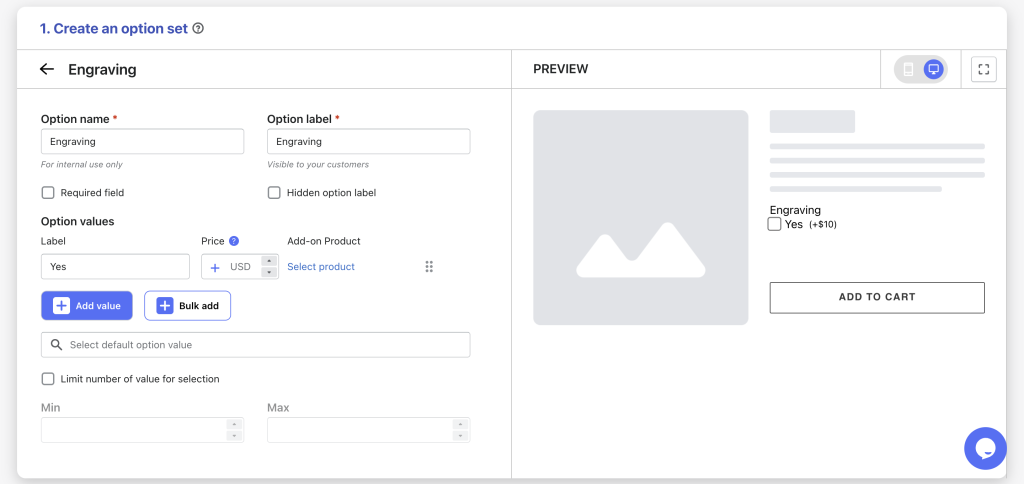
Case 2: Optional Engraving (With Additional Fee)
For businesses charging for engraving, use a Checkbox or Switch to ask customers if they want the engraving option. When selected, a Text Box appears for their message.
- Use the Add-on Price feature to assign an extra fee, which integrates into the final checkout price.
- Apply Conditional Logic to show the Text Box only when the Checkbox is checked, ensuring a clean and intuitive interface.
Advanced Configurations
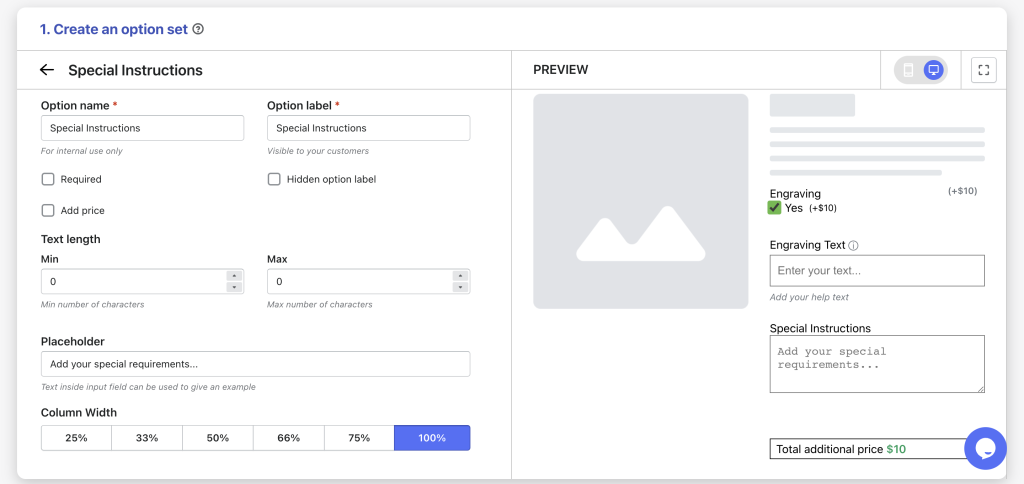
Example 1: Detailed Engraving Instructions
Some customers may want to specify engraving details, like style or alignment. Add a Text Area to provide ample space for their instructions. Like the Text Box, you can customize this field with:
- Character limits to manage input length.
- Placeholder text to prompt specific details.
- Help text or tool tips for additional guidance.
Example 2: Font Selection
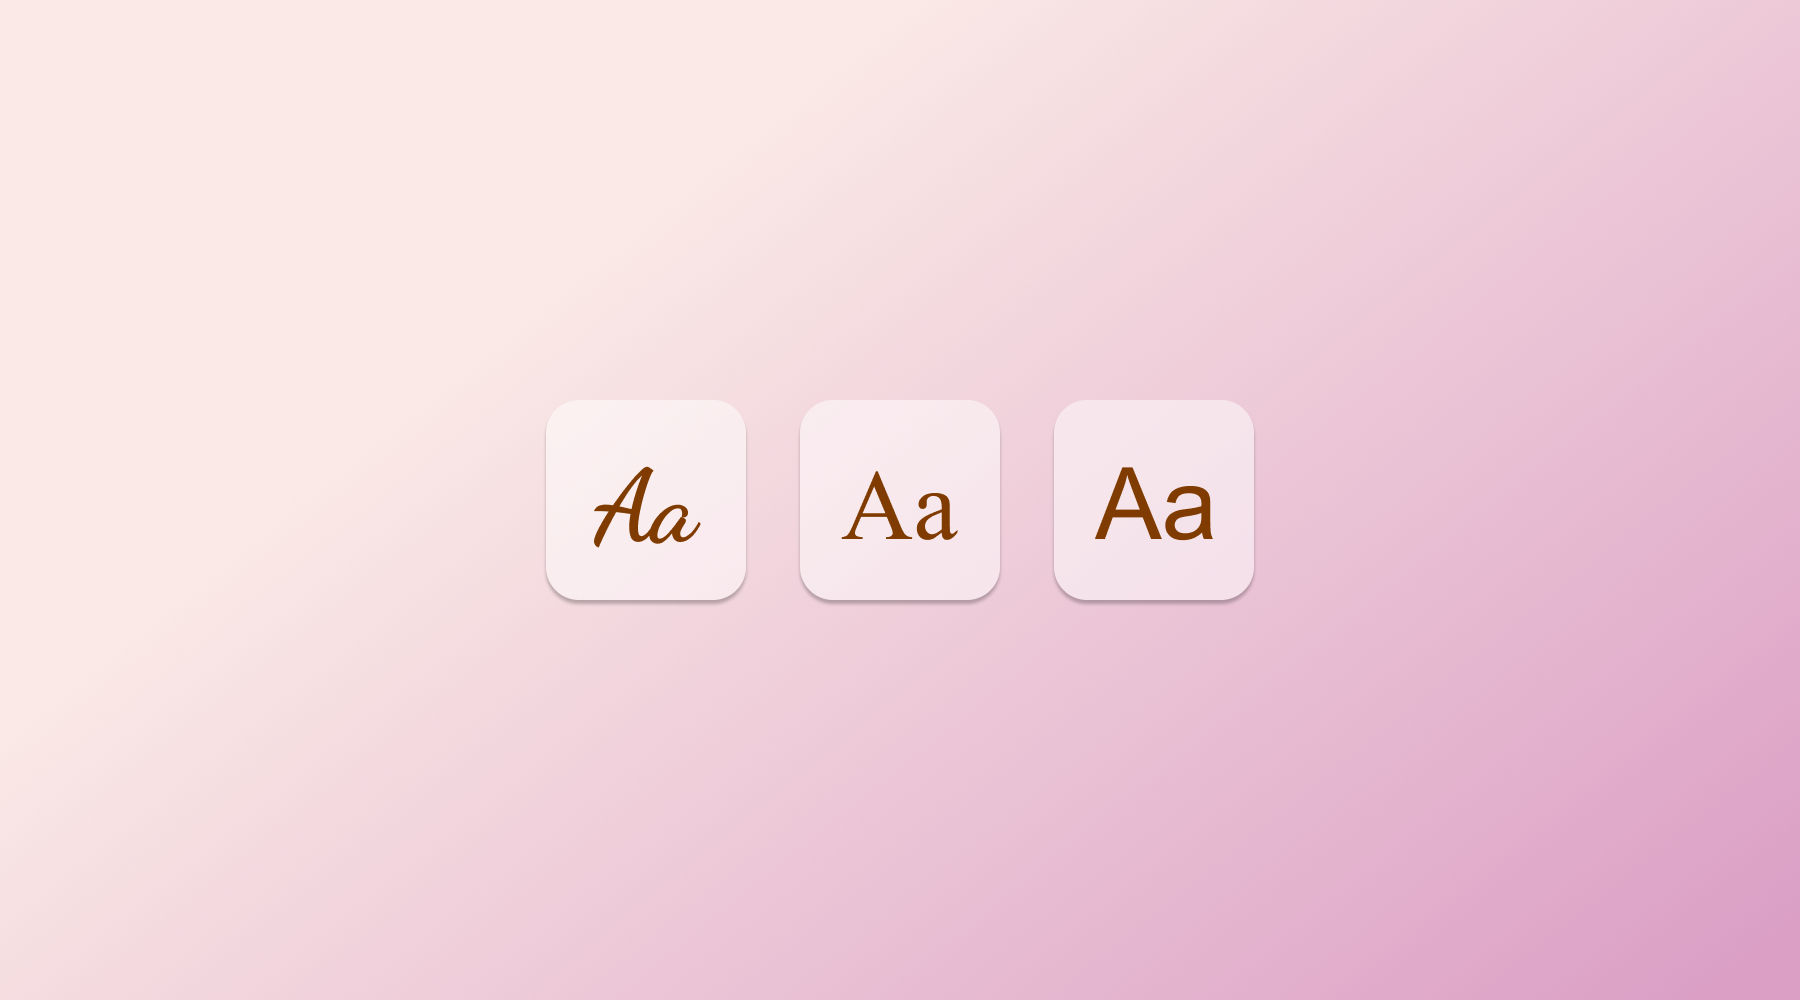
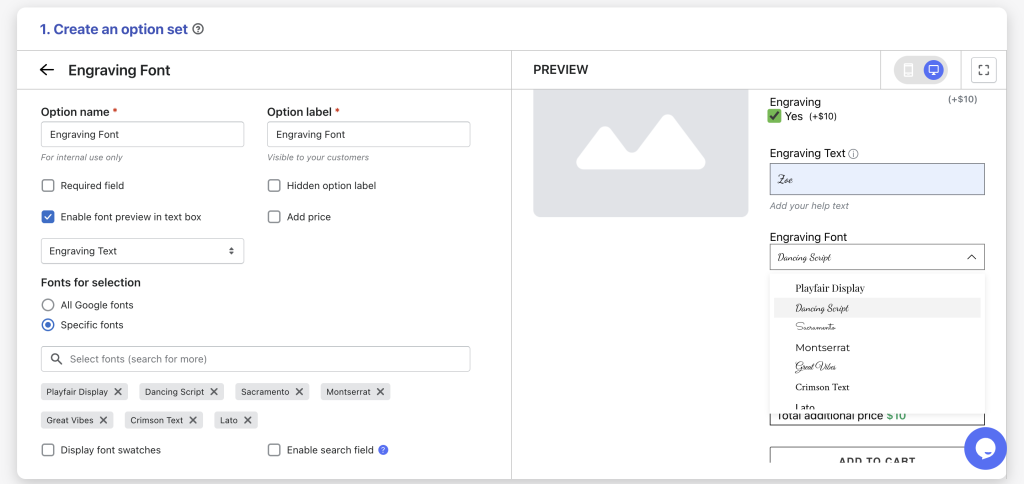
Let customers choose their preferred engraving font with the Font Picker option. This feature allows them to:
- Browse a wide range of Google Fonts or a curated list you define.
- Preview their text in the selected font, creating an interactive and engaging experience. Customize the Font Picker to align with your brand by selecting specific fonts or enabling the preview feature.
Bonus Insights
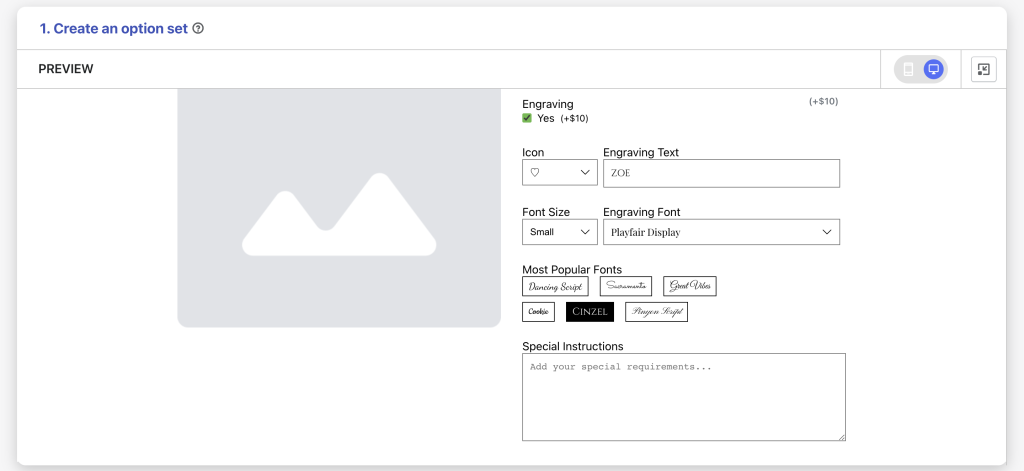
Beyond Text Box, Text Area, Checkbox, and Font Picker, Easify Product Options offers a variety of dynamic option types to enhance engraving customization:
- Use a Dropdown to let customers select engraving font sizes or styles.
- Add a Number Text Box for precise inputs, like character counts or engraving depth.
- Include an Icon Picker to allow customers to add decorative icons to their engraving.
Explore these options to create a functional and delightful personalization experience for your customers.
Step 3: Assign Engraving Options to Products
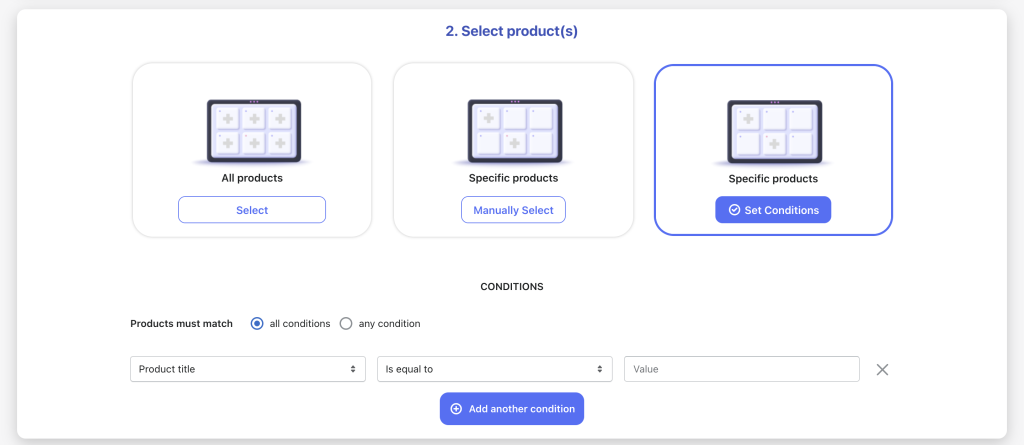
Once your engraving options are set up, the next step is to assign them to your Shopify products. Easify Product Options offers flexible assignment methods:
- Apply the engraving options to all products for a store-wide personalization feature.
- Select specific products manually for targeted customization.
- Use condition-based rules to automatically assign options to products that meet your criteria (e.g., specific collections or product types).
Choose the method that best fits your store’s needs to ensure your engraving options appear exactly where you want them.
Upcoming Features
Easify Product Options is continuously improving to enhance your Shopify store’s personalization capabilities. A highly anticipated feature in development is Advanced Pricing, which will allow you to set engraving costs based on the number of characters a customer selects.
As a store owner, you’ll have flexible pricing options:
- Set a fixed price for any engraving.
- Charge a per-character price for precise cost calculations.
- Implement tiered pricing based on character count ranges for tailored pricing structures.
Stay tuned for this update to offer even more dynamic and customizable engraving options for your customers.
Final Thoughts
Adding custom engraving options to your Shopify store is a powerful way to enhance customer engagement and boost product appeal. With Easify Product Options, you can seamlessly create personalized engraving experiences, from simple text inputs to advanced font selection and pricing models.
By following the steps outlined—installing the app, configuring tailored options, and assigning them to products—you can elevate your store’s offerings in just a few clicks.
Ready to get started?
Explore the demo and transform your Shopify store with Easify Product Options today.
