When selling online, customers often want to personalize their orders — whether it’s adding an engraving, leaving a gift message, choosing a custom size, or even uploading a file. To make this possible, you’ll need to add custom fields (also known as product options) to your Shopify products.
So, can you add custom fields to Shopify products?
👉 The short answer is yes — and there are a couple of ways to do it. By the end, you’ll know exactly which method is best for your store.
Key Takeaways
- Shopify supports custom fields, you can collect extra details like gift notes, engravings, or special requests by adding input fields to your product pages.
- The no-app method is free but basic. Using Shopify’s built-in line item properties, you can add simple fields with a bit of code, though customization is limited.
- Apps like Easify Product Options make it easy. With no coding required, you can create advanced fields (file uploads, swatches, conditional logic) and apply them across multiple selected products in minutes.
Method 1: Adding Custom Fields Without Apps
Shopify lets you add simple custom fields to your products using line item properties. This method doesn’t require installing any apps, but it does involve a little theme customization.
Here’s how you can do it:
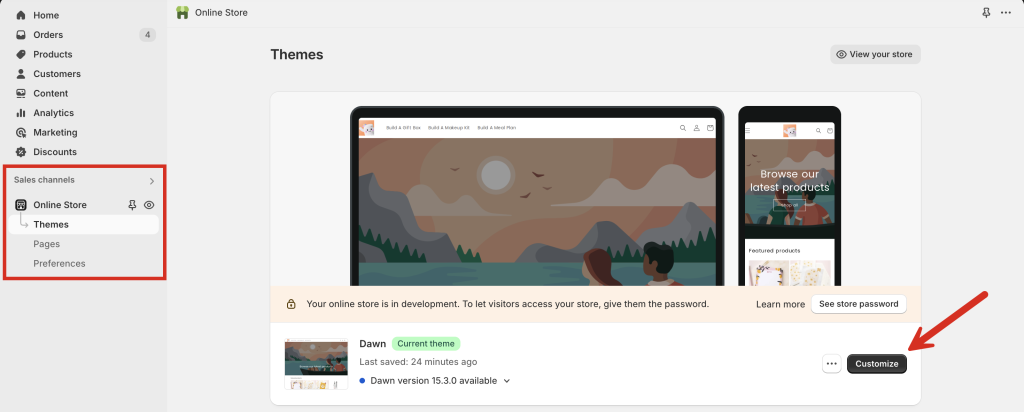
Step 1: Open Your Theme Editor
- From your Shopify admin, go to Online Store > Themes > Customize.
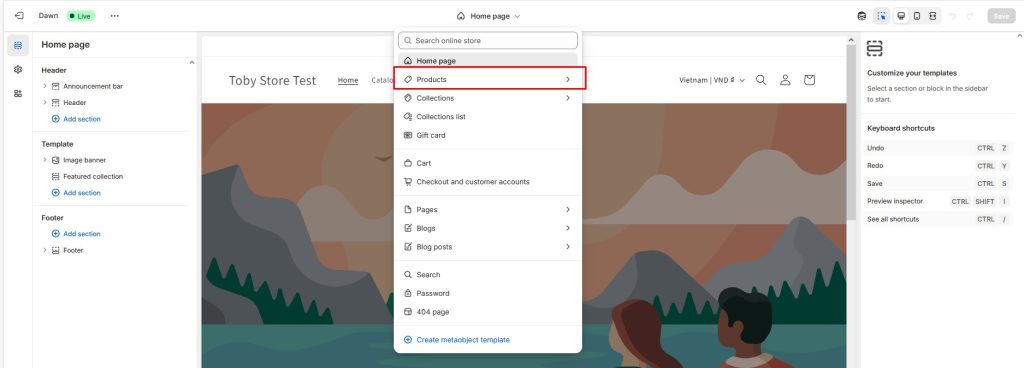
Step 2: Select the Default Product Template
- In the drop-down menu at the top of the editor, select Default Product (or whichever product template you want to edit).
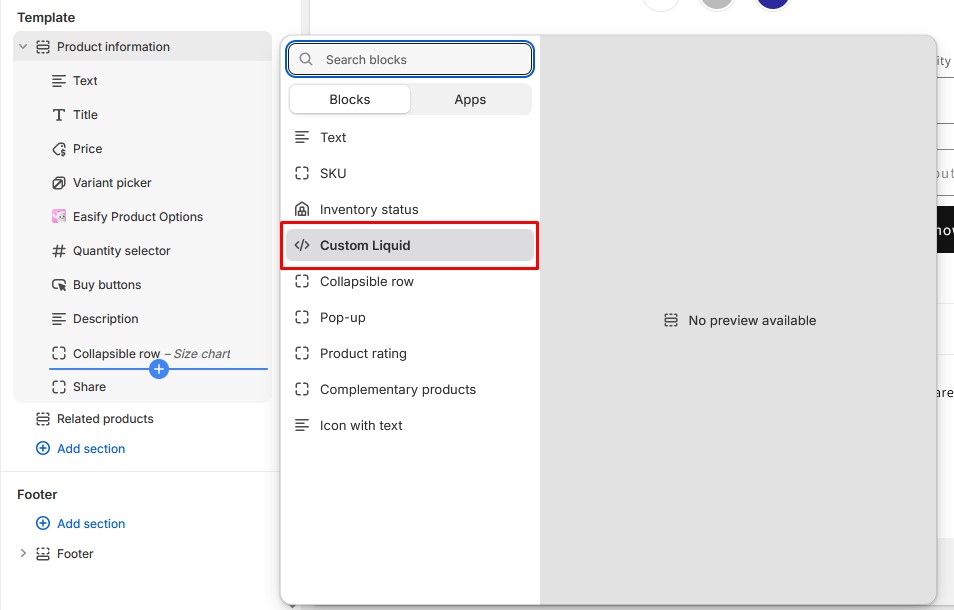
Step 3: Add a Custom Liquid Block
- In the left-hand sidebar, go to Product Information > Add Block > Custom Liquid.
Step 4: Insert the Custom Field Code
- Paste the following code into the Custom Liquid block:
<div class="custom-field" style="display: block; width: 100%; margin-bottom: 1rem;">
{{ product.custom_field }}
</div>
<textarea id="custom-print-message"
placeholder="Custom Print Message"
name="properties[Message]"
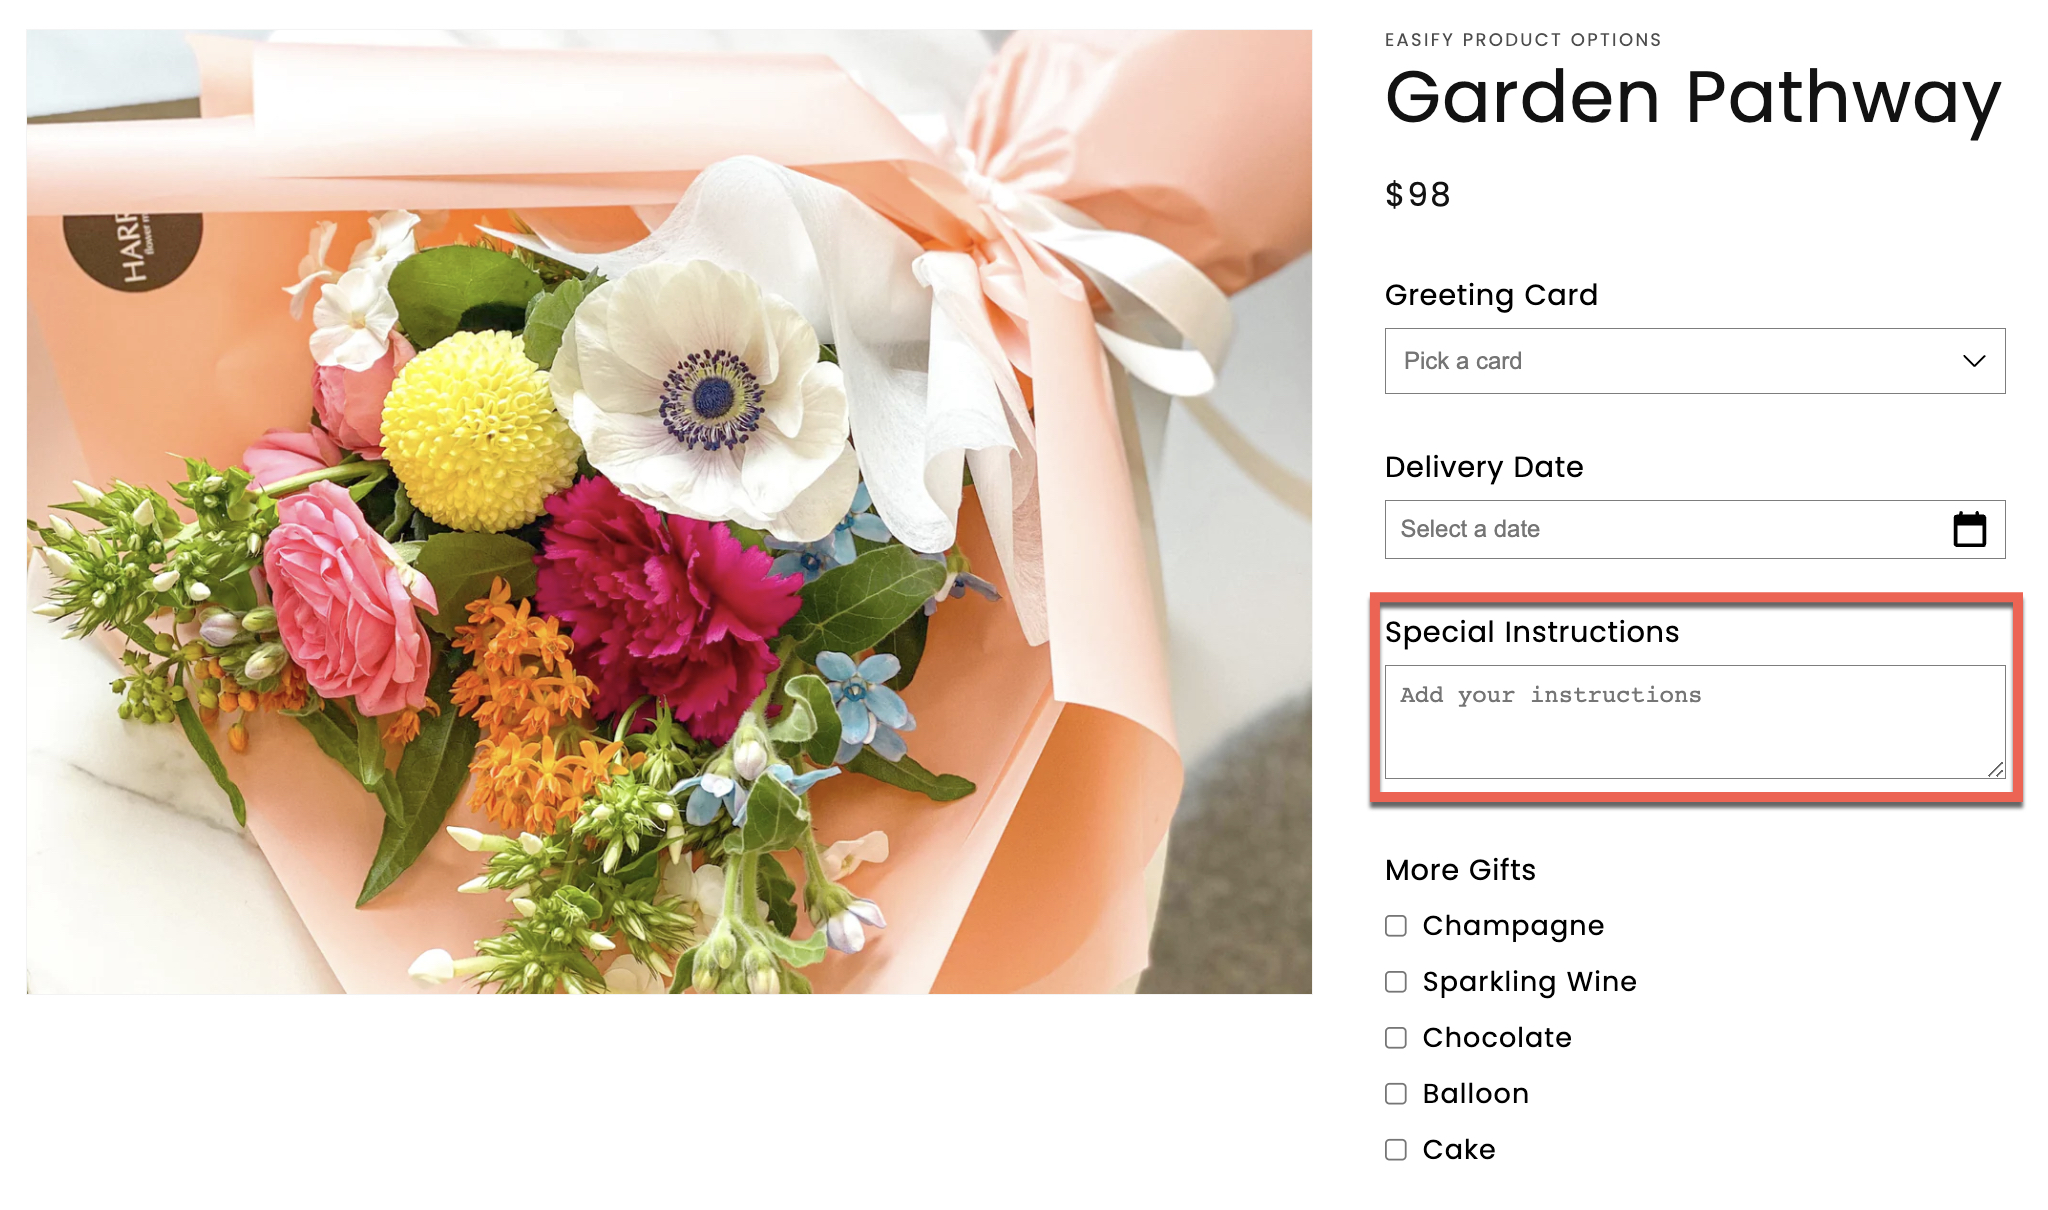
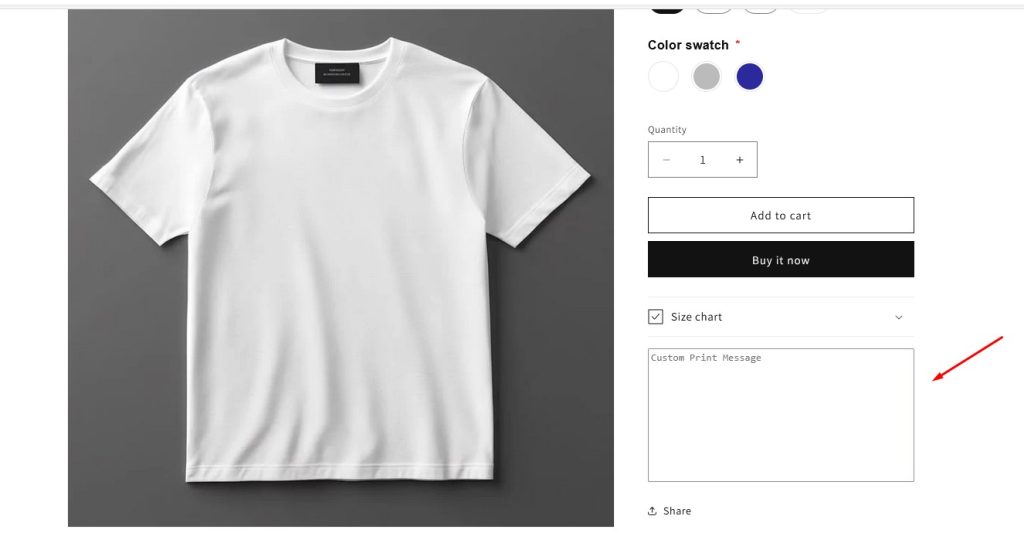
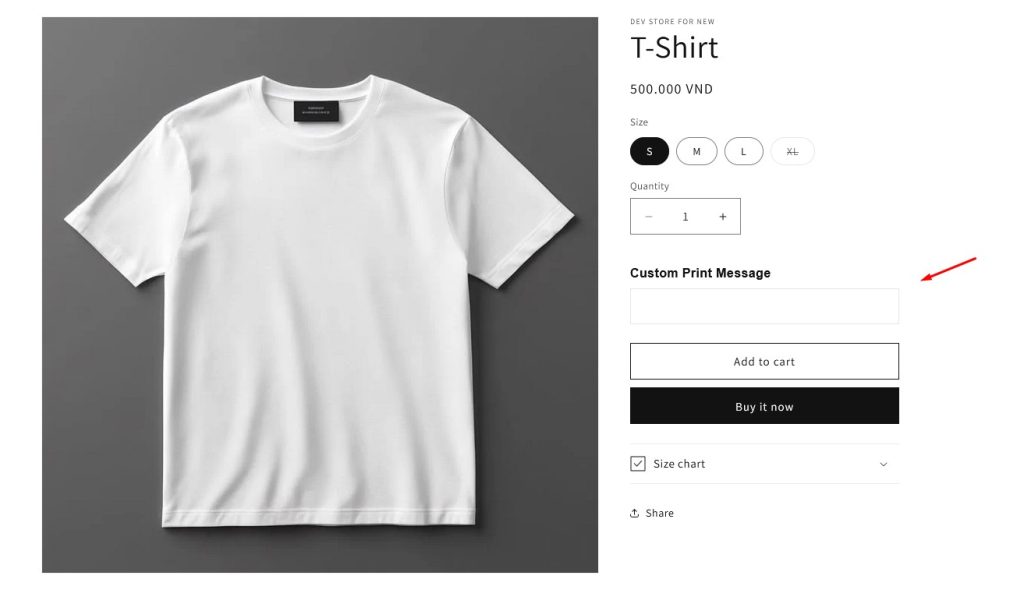
style="display: block; width: 100%; aspect-ratio: 2 / 1; resize: none; margin-bottom: 1rem;"></textarea>👉 This example creates a text area where customers can enter a message (e.g., for engraving, printing, or gift notes). The properties[Message] part ensures Shopify saves this text along with the order.
Step 5: Save Your Changes
- Click Save to apply your changes.
- Test it by going to a product page, adding a message in the custom field, and checking that it shows up in the cart and order details.
Method 2: Adding Custom Fields with Easify Product Options
While Shopify’s built-in method works for simple cases, it requires editing theme code and has some limitations (no conditional logic, only basic field types, harder to manage). If you want an easier, more flexible solution, using an app like Easify Product Options is the way to go.
This app lets you add custom fields to your products without coding, supports advanced option types (like swatches, file uploads, date pickers), and makes managing product options much faster.
Here’s how to set it up:
Step 1: Install and Activate the App
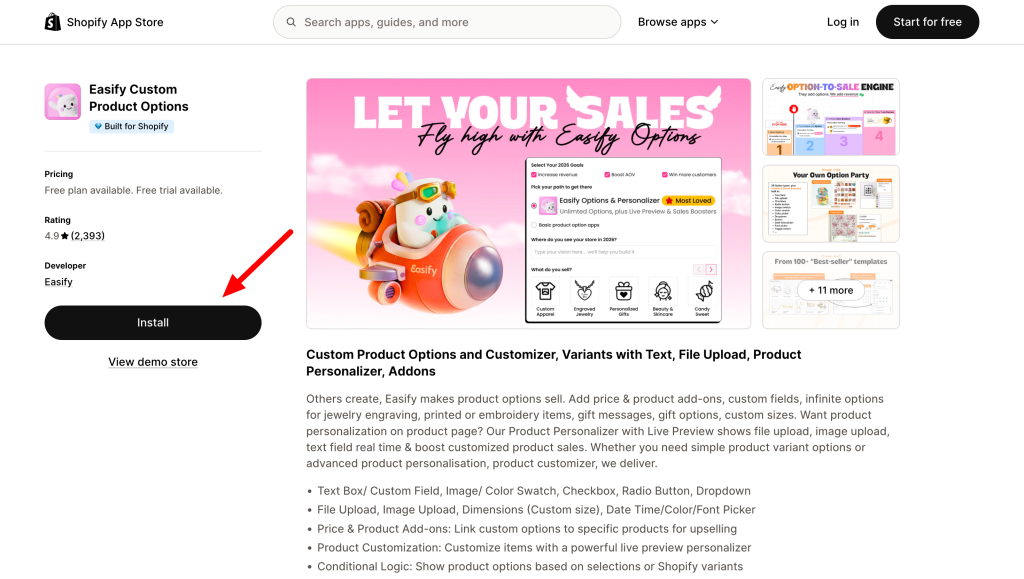
- From your Shopify Admin, go to the Shopify App Store, search for Easify Product Options, and install it.
- Once installed, activate the app by following the steps in the dashboard.
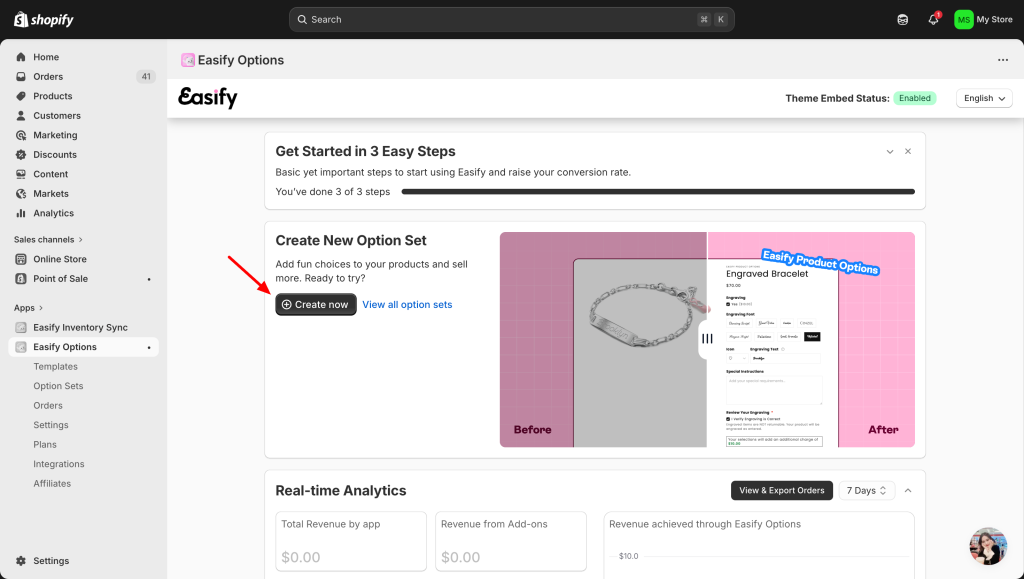
Step 2: Create an Option Set
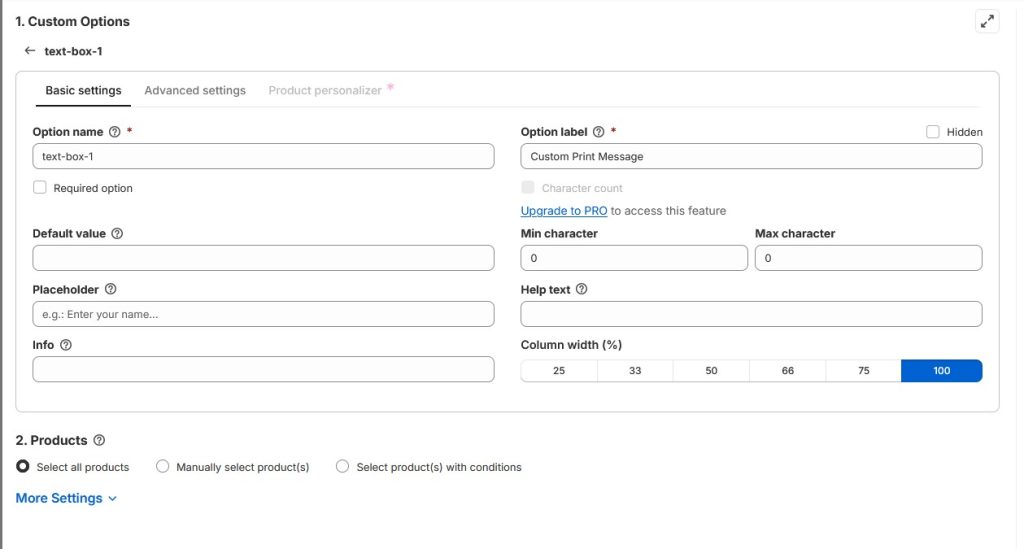
- Open the app and click Create Option Set.
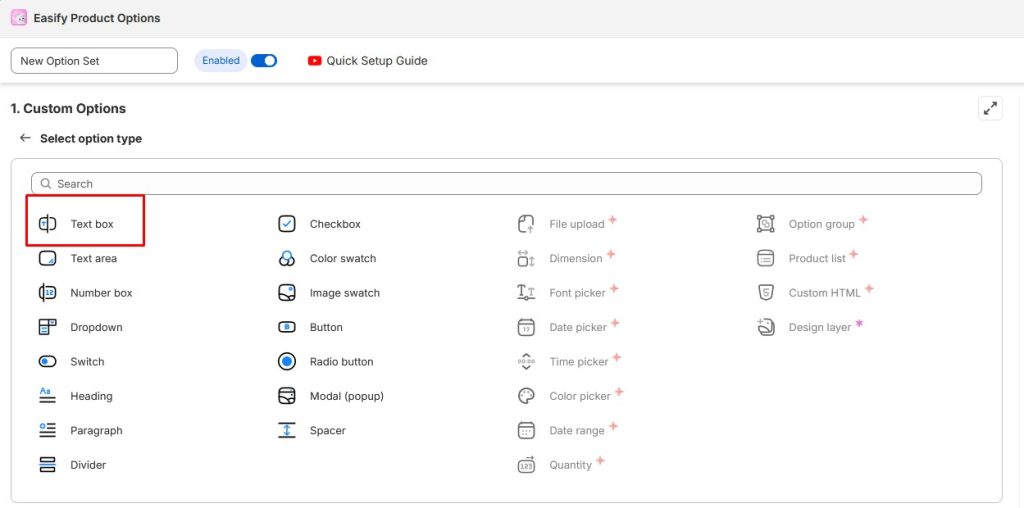
- Click Add Option and select Text Box as the option type (this will allow customers to input custom text, such as engraving or gift messages).
Step 3: Customize Your Text Box
- Fill in the details:
- Option Name – Internal label for your reference (e.g., “Custom Message”).
- Option Label – What customers will see on the storefront (e.g., “Enter your message”).
- Placeholder – Example text shown in the field (e.g., “Type your message here…”).
- Character Limits – Set min/max characters if needed.
- Assign Products – Choose which product(s) this option set should apply to.
Step 4: Save and Preview
- Click Save.
- Go to your storefront, open the assigned product, and test the new custom text box.
Why Use Easify Product Options Instead of Coding?
- No coding required – perfect for non-technical store owners.
- Advanced input types – not just text fields, but also dropdowns, swatches, file uploads, date pickers, and more.
- Conditional logic – show/hide fields based on customer selections.
- Easier management – apply option sets to selected products at once instead of all product like the no app method.
Comparison Table: No-App vs Easify Product Options
| Feature | Line Item Properties (No App) | Easify Product Options App |
|---|---|---|
| Cost | Free | Free & Paid Plans |
| Coding Required | Yes | No |
| Field Types Supported | Basic (text, checkbox) | Advanced (upload, swatch, date picker, etc.) |
| Conditional Logic | No | Yes |
| Ease of Use | Moderate (dev skills needed) | Very easy (UI-based) |
Final Thoughts
Adding custom fields to your Shopify products is absolutely possible — and you have two main ways to do it.
- If you only need simple fields (like a text box for engraving or a gift note), Shopify’s built-in method using line item properties is free and works well.
- If you want more flexibility and advanced options (like file uploads, swatches, conditional logic, or applying options across multiple products), using an app such as Easify Product Options is the smarter choice.
Both methods help you offer personalization and better shopping experiences for your customers. The best option depends on your store’s needs and how comfortable you are with editing code.
👉 If you’d like to keep things simple, go with the no-app method. But if you want a professional, scalable solution that saves you time, try out Easify Product Options.
FAQ
To add a custom box on Shopify, you can either edit your theme code by adding a simple text field inside the product form using line item properties—so customer input appears in the order details—or use a third-party app like Easify Product Options for a no-code solution that lets you easily create and style custom text boxes, dropdowns, or other input fields directly from your Shopify admin.
You can add a personalization box to Shopify either by using Shopify’s built-in line item properties with a bit of theme code for a simple text field or, for a no-code and more advanced option, by installing an app like Easify Product Options to quickly add customizable text boxes, file uploads, conditional logic, and other input types across products.


