
Offering optional add-ons—such as gift wrapping, product insurance, or priority processing—is one of the most effective ways to increase your store’s average order value. To make this process seamless for your customers, you need a simple, intuitive interface that doesn’t clutter the page.
A checkbox is the perfect solution for these “Yes/No” decisions. In this guide, we will show you exactly how to add a functional checkbox to your product page, helping you capture extra revenue or offer more services with ease.
The Benefits of Checkbox Option
While standard Shopify variants are perfect for size and color, they are not designed for optional add-ons. A checkbox fills this gap perfectly. It offers a clean way to collect specific “Yes or No” information without complicating your inventory management or cluttering the page.
This tool is also a powerful revenue driver. It allows you to add extra charges to custom product options—such as “Rush My Order” or “Add Insurance”—capitalizing on impulsive decisions. Presenting them as a simple tick-box makes it incredibly easy for customers to say “yes,” directly improving your bottom line with minimal effort.
Additionally, checkboxes are vital for compliance. Whether for age verification or pre-order acknowledgement, you can require the box to be ticked before adding to cart. This ensures you always capture the necessary consent without making the process difficult for the user.
How to Add a Checkbox to Shopify Product Page
When tackling the “Shopify Add Checkbox to Product Page” task, merchants generally have two paths to choose from. You can either manually insert a code snippet into your theme files, or utilize a third-party app for a completely code-free experience.
While the manual route is cost-effective for those with technical skills, using an app provides a faster, drag-and-drop alternative that often includes powerful extras like conditional logic or add-on pricing.
Method #1: Edit Your Shopify Theme Code
This method involves directly editing your Shopify theme files. Here is how you can insert the necessary code snippet into your product template to create a functional checkbox.
Note: Editing theme code can be risky if you are not tech-savvy. Always duplicate your theme to create a backup before making any changes.
Step 1: Go to the Theme Editor
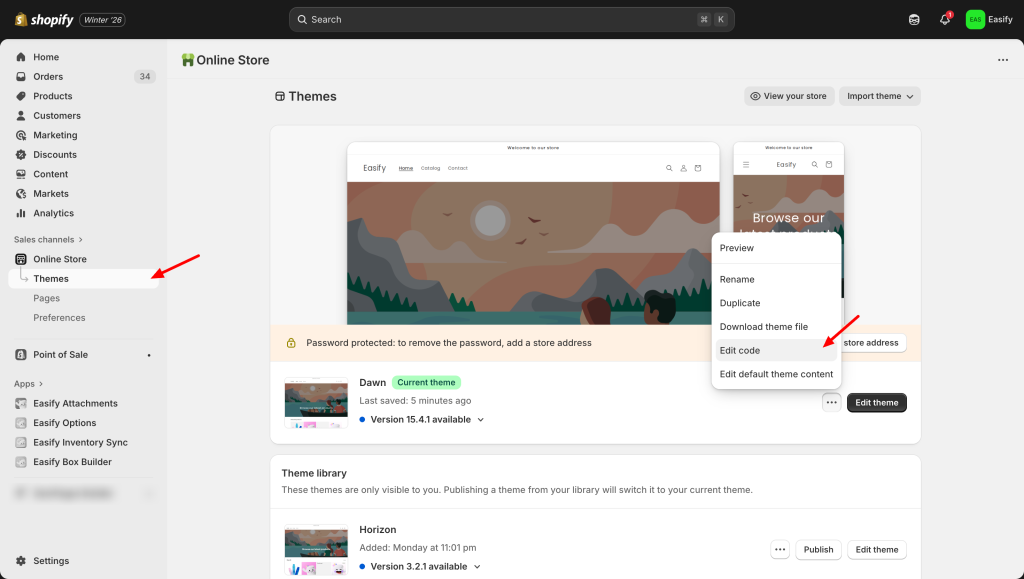
From the Shopify Admin dashboard, navigate to Online Store > Themes. Locate the current active theme and click the three dots icon and select Edit code. This will open the backend file directory.
Step 2: Add the Custom Code
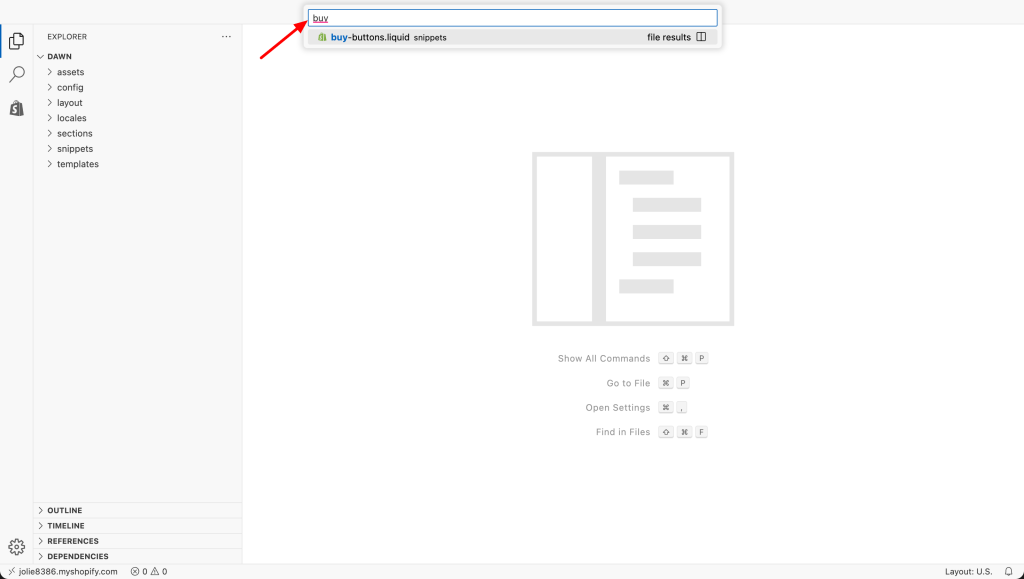
In the search bar on the left side, type buy-buttons.liquid to locate the file, then click to open it.
Inside the file, press Ctrl + F (on Windows) or Command + F (on Mac) and search for the word: submit. This will locate the code for the “Add to Cart” button.
Paste this code snippet directly above the line that contains the word submit.
<p class="line-item-property__field">
  <input type="hidden" name="properties[Gift Wrap]" value="No">
  <input id="gift-wrap" type="checkbox" name="properties[Gift Wrap]" value="Yes">
  <label for="gift-wrap">Tick here for Free Gift Wrap</label>
</p>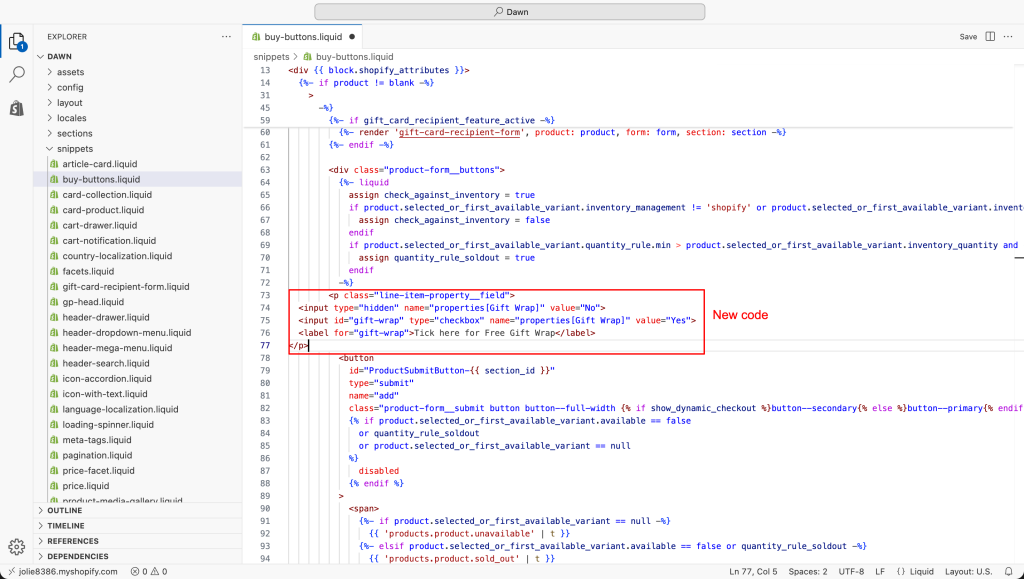
The code snippet you just pasted is set up for a “Gift Wrap” checkbox. However, you can easily customize the text within the code to create any option you need, such as “Weekend Delivery” or “Hide Product Name.”
Step 4: Save and Check
Click the Save button in the top-right corner to apply the changes.
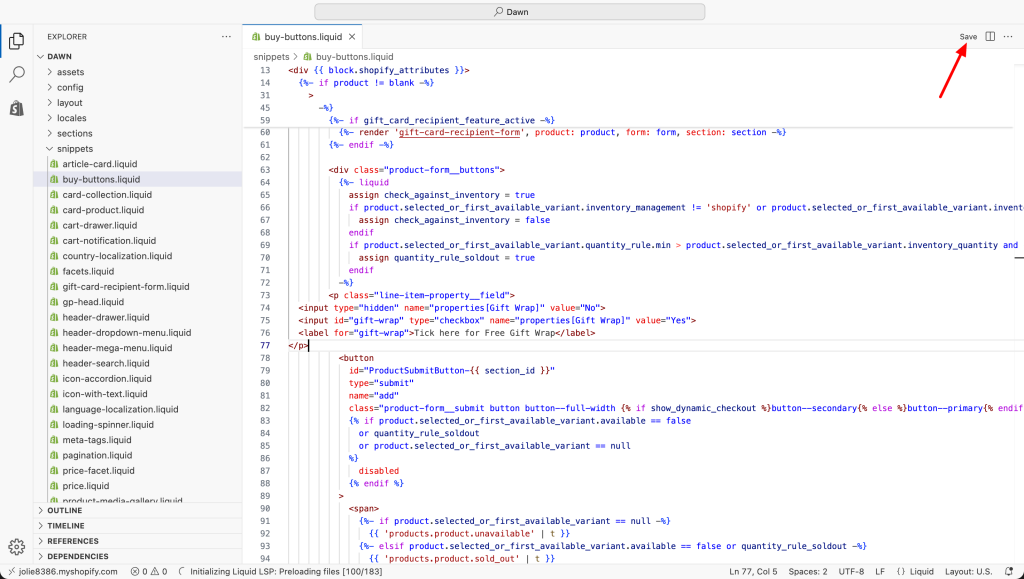
You now have a functional checkbox on your store. However, keep in mind that this is a basic implementation. Adding advanced logic, such as making the checkbox mandatory, charging an add-on fee, or showing it on different products, requires extensive coding knowledge and is not covered in this tutorial.

Method #2: Using Easify Custom Product Options App
If you prefer a solution that requires absolutely no coding, the Easify Custom Product Options app is an excellent choice. This tool makes it incredibly simple to add advanced features like required fields, price add-ons, and conditional logic to your product pages.
You can set up these powerful options in just a few clicks, making it perfect for anyone who wants full functionality without the technical hassle.
Step 1: Find and Install the App
Go to the Shopify App Store, search for Easify Custom Product Options, and click Install. Once added to your store, open the app and follow the quick setup guide to get started.
Step 2: Create a New Option Set
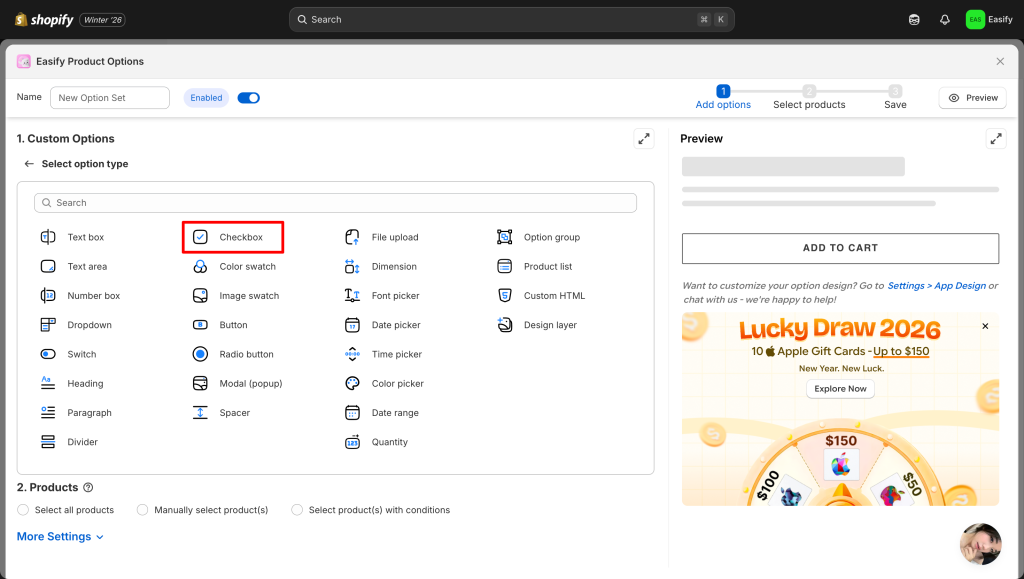
From your Easify dashboard, click the Add New Option Set button. Next, select Checkbox.
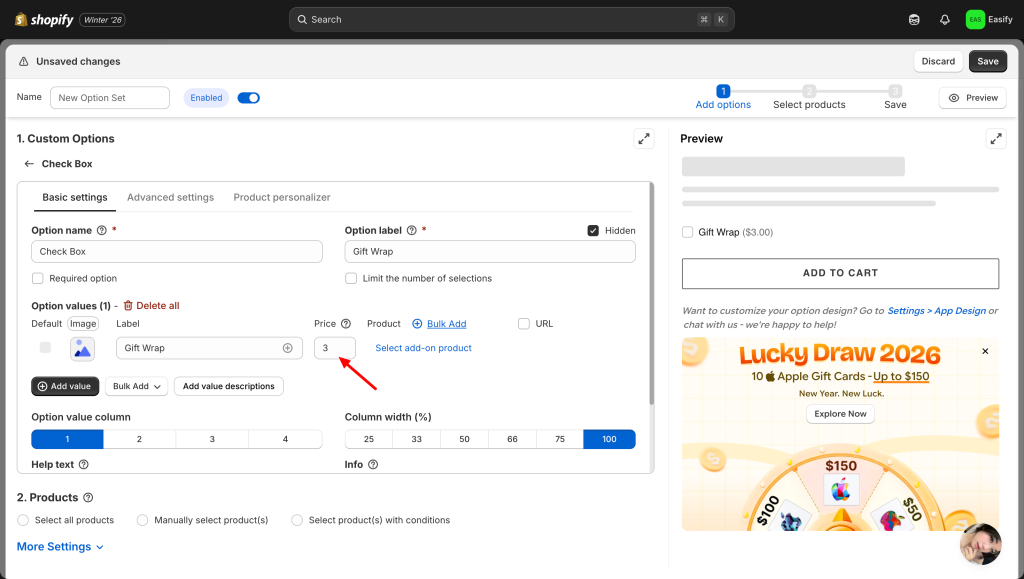
Step 3: Edit the Checkbox
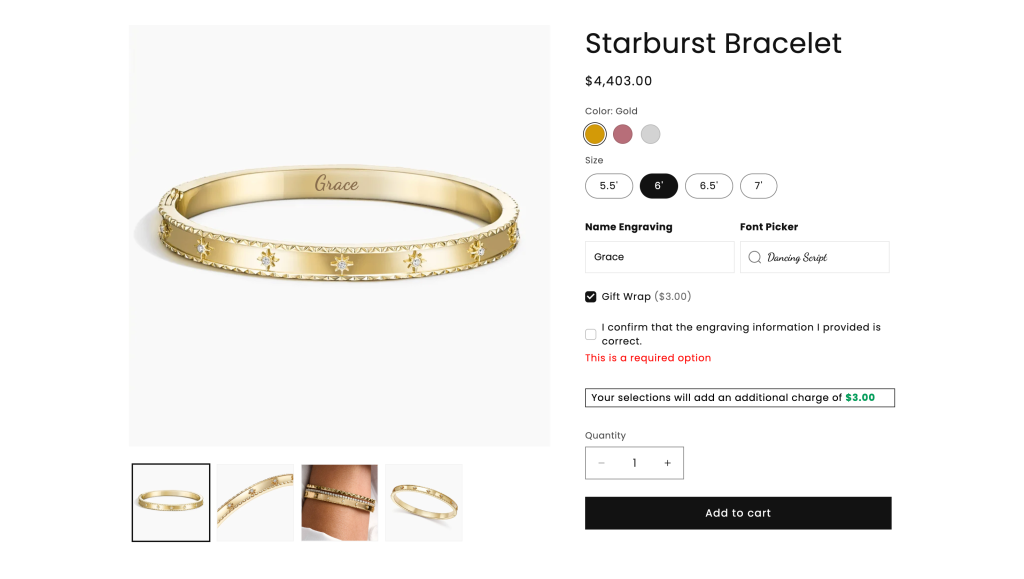
Click on the checkbox option you just created to open its settings. Here, you can enter the label text and optionally set an add-on price (e.g., adding $3 for “Gift Wrap”).
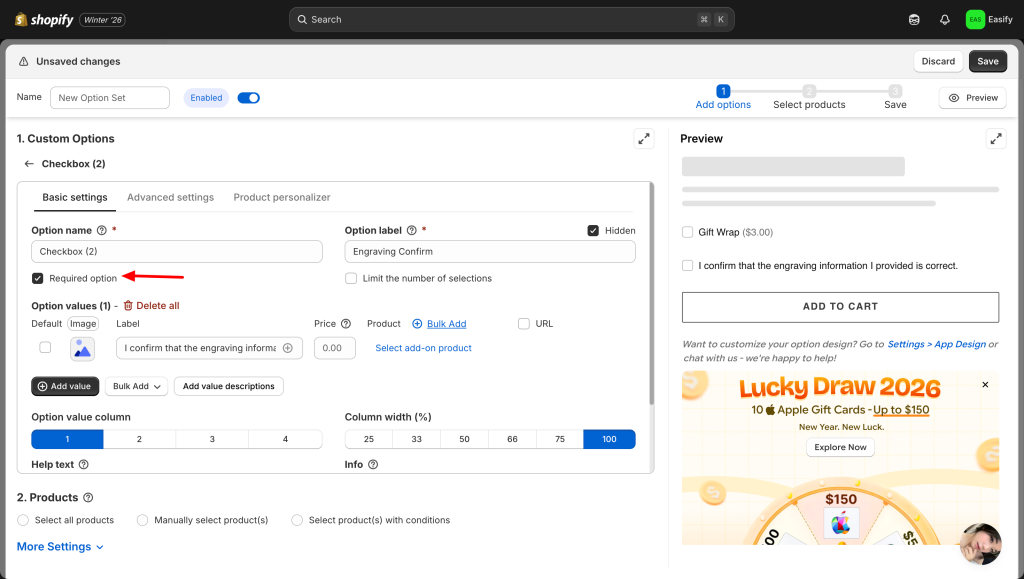
If this is a mandatory step, such as “Engraving Confirm” when you learn how to add an engraving option on Shopify, make sure to select the Required option. This ensures customers must tick the box before they can add the item to their cart.
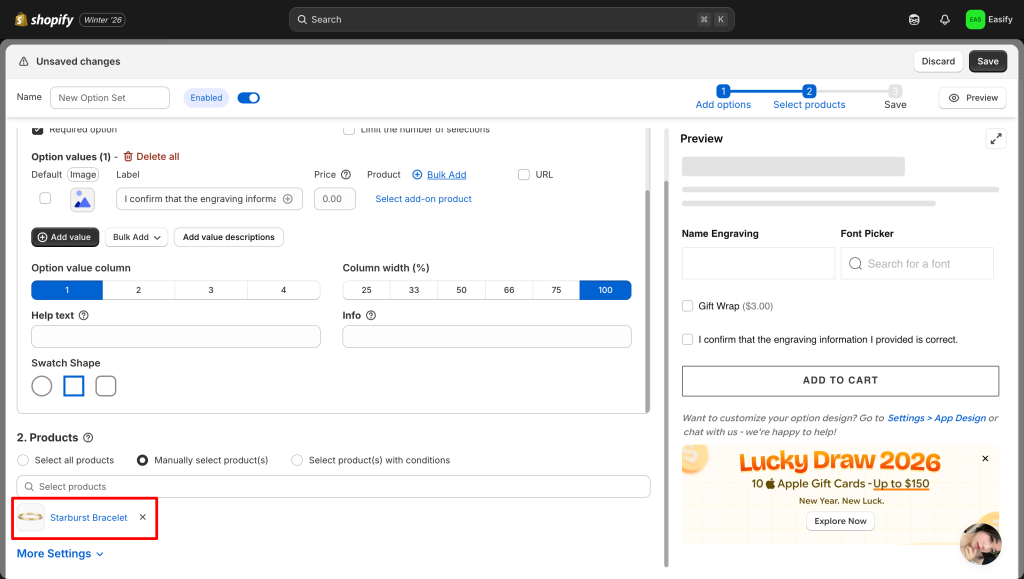
Step 4: Apply to Products
Choose the product(s) where you want the checkbox to appear. You can apply the option set to a single item or multiple products at once.
Step 5: Save Changes
Click Save to finish. Your checkbox will now appear on the product page — giving customers a quick way to say yes or no.
Final Thoughts
Customizing your product page with a checkbox is a great way to bridge the gap between standard variants and custom requests. You now have the necessary knowledge to implement this feature using either a manual code snippet or a dedicated application.
For those who enjoy technical challenges, editing the theme code is a robust and free option. However, if you prefer a plug-and-play solution that handles the heavy lifting for you, Easify Custom Product Options serves as an excellent no-code alternative. Simply choose the method that aligns with your workflow and start optimizing your store today.


