
Every color of your product tells a different story. A “Midnight Black” dress might need a moody, elegant vibe, while the “Summer Yellow” version deserves bright, sunny photography.
Sometimes, a single product page just isn’t big enough to hold all that personality. Instead of crowding these unique styles together, why not give each one its own stage?
By treating variations as separate products, you can create a dedicated “spotlight” for every color—complete with its own curated gallery and specific description. In this guide, we will show you how to connect these pages using “Link Options,” so your customers can browse smoothly between styles while enjoying a fully immersive experience for each one.
Key Takeaways
- Creating separate pages helps you rank better on Google and curate dedicated image galleries for a cleaner visual experience.
- Link options connect these standalone products to behave like standard swatches so customers can navigate seamlessly.
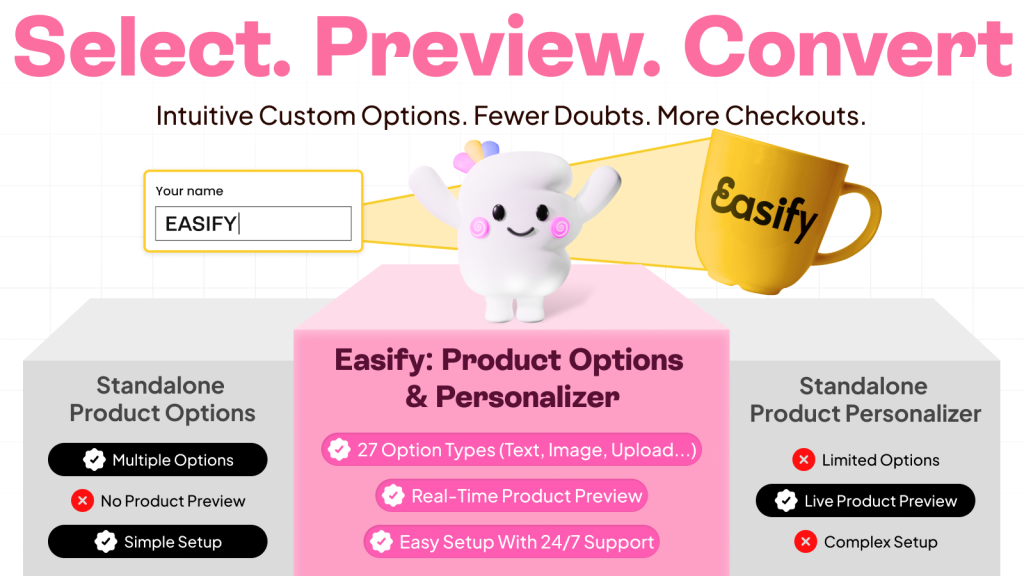
- You can easily set up these connections without any technical skills using the Easify Product Options app.
Why Link Separate Products? The SEO and Visual Advantage
The primary reason to use link options is to significantly boost your store’s search engine visibility.
When you split variations into separate product pages, you generate a unique URL for every specific style. This creates more distinct pages for Google to index, rather than consolidating everything into one link.
This allows you to optimize each page for precise, long-tail keywords. Instead of competing for a generic term like “Silk Dress,” you can specifically target high-intent searches like “Emerald Green Silk Dress,” helping you capture more targeted traffic.
Beyond SEO, this approach elevates the user experience by decluttering your product display. You avoid the mess of a shared gallery where all color variations are mixed together.
Instead, each linked page showcases a dedicated image set and description. When a shopper clicks on a specific color, they are immediately immersed in relevant visuals, leading to less confusion and higher conversion rates.
How to Set Up Link Options to Different Product Pages on Shopify
It is important to note that Shopify’s native variant system is designed to switch options within a single product page. The platform does not currently have a built-in feature to link completely separate product URLs together as swatches.
To achieve this advanced setup, you will need the help of a third-party app.
Easify Product Options is the recommended solution for this setup. This app simplifies the process by providing a URL option feature, allowing you to connect separate products and redirect customers seamlessly without needing any technical coding skills.
Below is a detailed step-by-step guide on how to set this up for your store.
Step 1: Find and Install the App
Go to the Shopify App Store, search for Easify Product Options, and click Install. Once added to your store, open the app and follow the quick setup guide to get started.
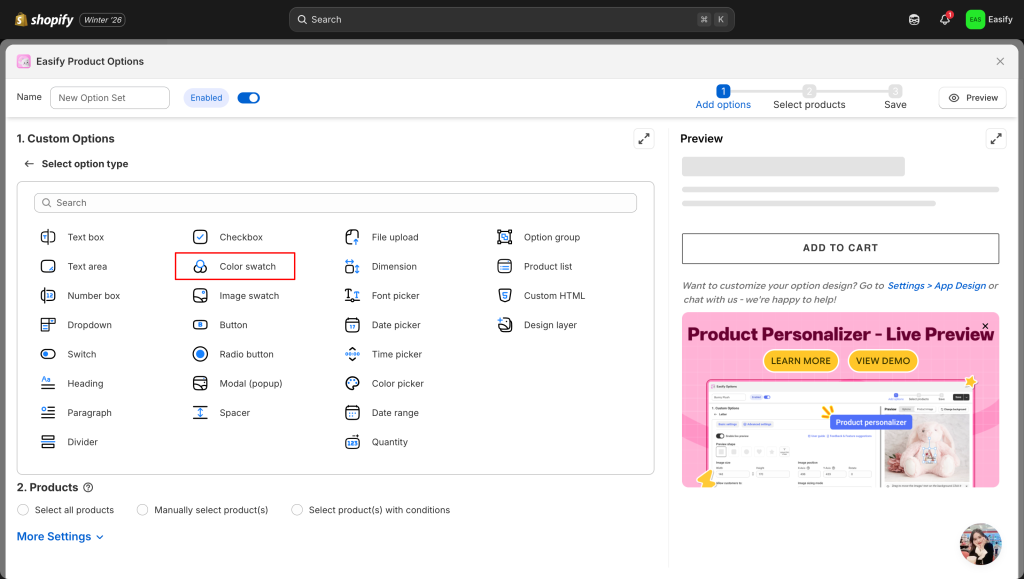
Step 2: Create a New Option Set
From your Easify dashboard, click the Add New Option Set button. Next, select the display type for your option. Easify supports all standard formats, including buttons, dropdowns, and images.
For this example, we will choose Color Swatch to create a visual color picker.
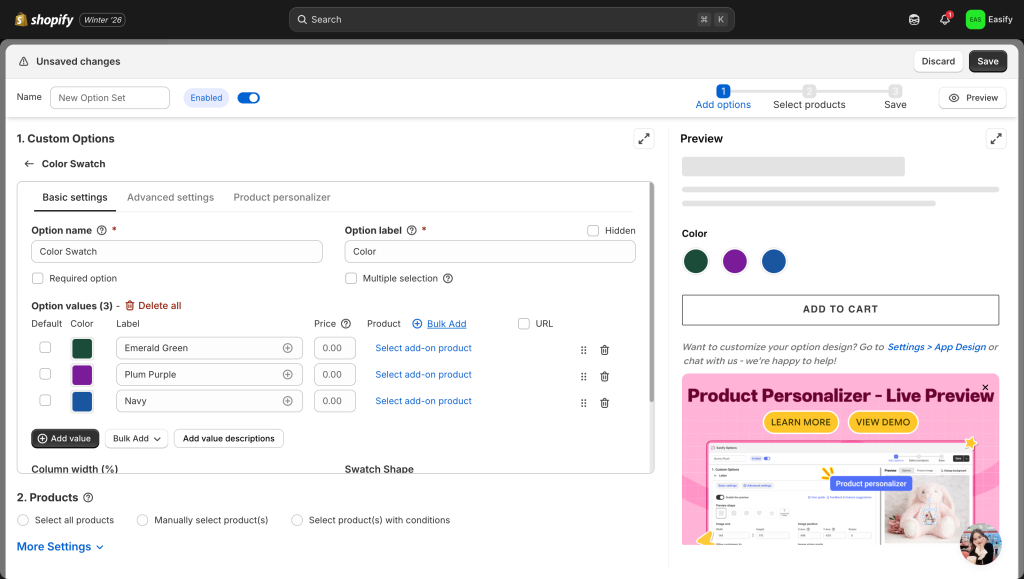
Step 3: Add Option Values
Click on the option you just created to configure its details. Here, you will add your Option Values corresponding to your actual product variations.
Example: If you are setting up a Silk Dress, you might add values like Emerald Green, Plum Purple, and Navy.
Step 4: Link the URLs
To the right of each option value, tick the URL checkbox. A text field will appear for each value where you can paste the specific link.
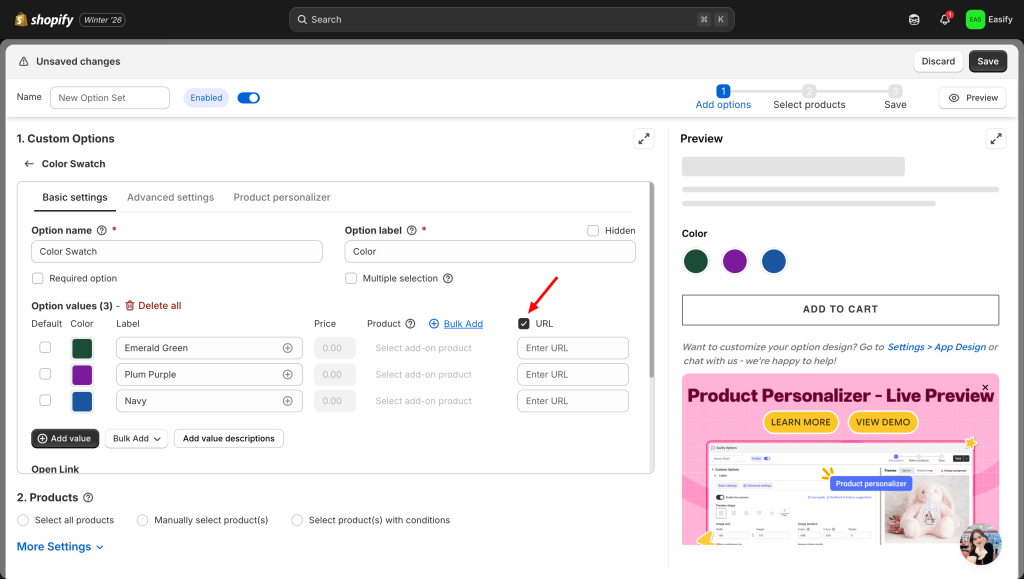
Note: Make sure you have already created these variations as separate products in your Shopify admin. You will need to copy the live URL of each specific product (e.g., the link for the “Emerald Green” dress) and paste it into the corresponding field here.
Step 5: Assign the Option Set
Scroll down to the Products section. Choose Specific Products and select all the products involved in this group (e.g., select all three color versions of the dress).
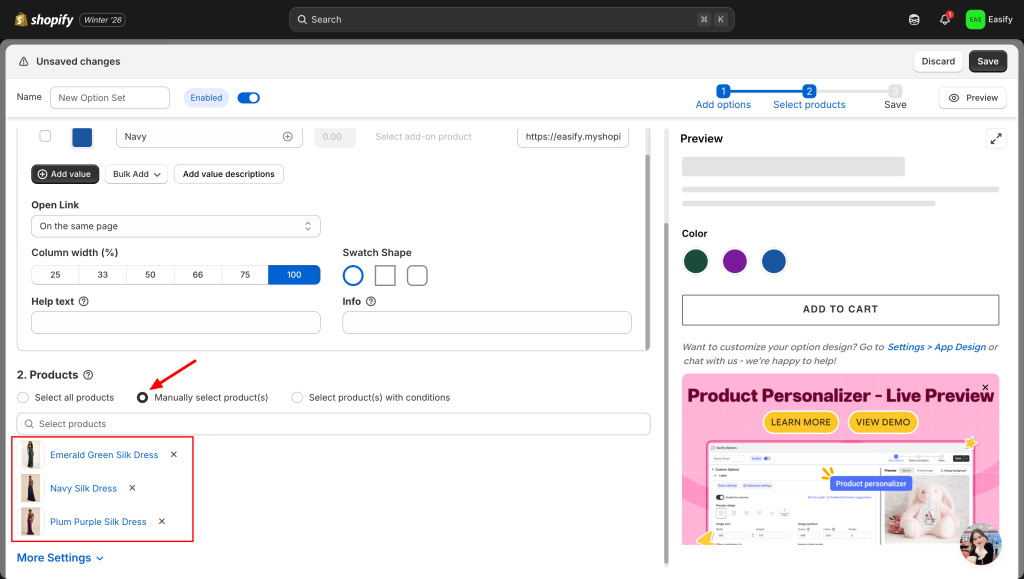
This ensures that the navigation options appear on every product page in the loop.
Step 6: Save and Check
Finally, click the Save button to apply your changes. Head over to your live storefront to verify that the options are visible. When you click on a different color, the page should seamlessly redirect you to that specific product’s URL.


Final Thoughts
Whether you are looking to dominate niche keywords on Google or simply want to clean up a messy product gallery, moving to a “linked product” structure is a smart move. It optimizes your store for both search engines and human shoppers.
The best part is that you can implement this strategy immediately. Get started with Easify Product Options now to create smart, linked swatches that drive traffic and keep your customers engaged.
You might also find these articles helpful:


