
While Shopify’s native variant system handles basic options like size and color perfectly, it often hits a wall when you need more specific details. If you want to collect unique customer inputs, such as a name for engraving, a file upload, or a delivery date, standard variants simply aren’t enough. This is where learning how to add custom field to product Shopify becomes essential to bridging that gap.
Key Takeaways
- Custom fields let you sell personalized products that go beyond Shopify’s basic size and color options.
- Getting all the details right on the product page saves you time and prevents mistakes by removing the need to email customers later.
- Using the Easify Custom Product Options app is the easiest way to add these features instantly without needing to know how to code.
What Are Custom Fields and How Do They Help?
At its core, a custom field is a specialized input element embedded directly into your product page to capture unique information from your customers. While Shopify’s native system is designed to handle basic inventory variants like Size or Color, it is not built to process dynamic customer data.
Custom fields fill this void by allowing you to add a wide range of input types, such as text boxes for engraving, file upload option for custom printing, or date pickers for delivery scheduling, without affecting your inventory count.
The primary benefit of using custom fields is that they eliminate the operational friction caused by Shopify’s “100-variant limit.” Instead of trying to create a separate variant for every possible combination (which is often impossible), custom fields function as additional data layers attached to a single product.
This ensures that you receive all the necessary order details upfront, removing the need for time-consuming follow-up emails and ensuring that every personalized order is ready for fulfillment the moment it is placed.
How to Add Custom Field to Product Page?
Implementing custom fields on Shopify generally involves two distinct paths. The native method requires a combination of Shopify Metafields and Liquid code customization. You will need to define the fields in your admin settings and then manually edit your theme’s template files to ensure the input forms appear correctly on the frontend.
While this offers total control, it requires a solid understanding of coding to avoid breaking your page layout. If you want to attempt this manual method, you can read more details in these related blog post:
- How to Add Dimensions on Shopify for Better Product Clarity
- How to Add a Custom Text Field on a Shopify Product Page
For those who prefer a safer and faster solution, using a dedicated third-party app is the industry standard. Tools like Easify Custom Product Options are designed specifically to handle this complexity. Easify allows you to drag and drop unlimited custom fields, such as text boxes or image uploads, directly onto your product page without touching a single line of code, making it an excellent choice for non-technical merchants.
To help you get set up quickly, here is a step-by-step walkthrough on how to use the app to customize your product pages without any coding
Step 1: Find and Install the App
Go to the Shopify App Store, search for Easify Custom Product Options, and click Install. Once added to your store, open the app and follow the quick setup guide to get started.
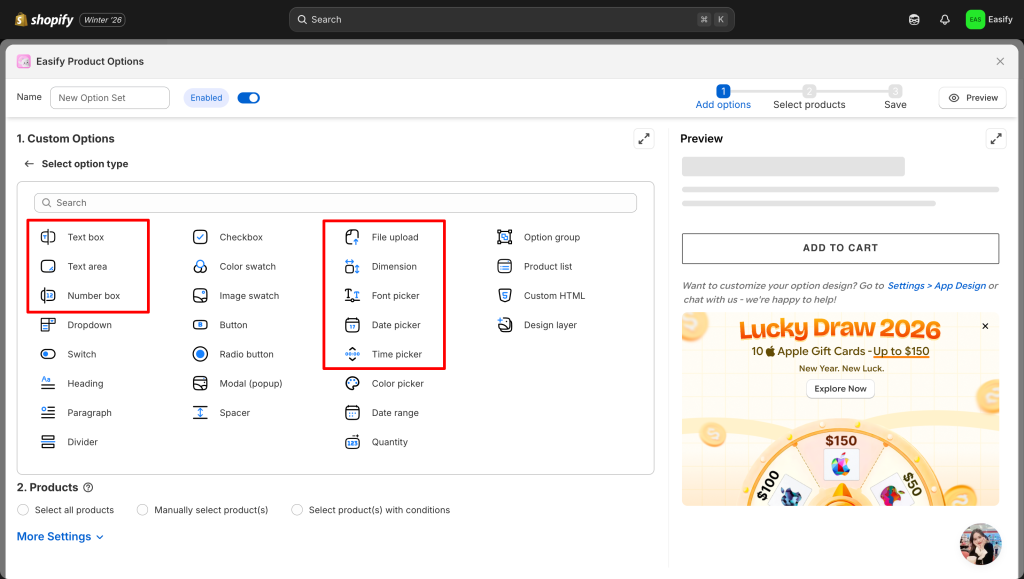
Step 2: Create a New Option Set
From your Easify dashboard, click the Add New Option Set button. Next, select the display type for your option/ custom field. Easify supports all standard formats, including text box, file upload, date picker, dropdowns, etc.
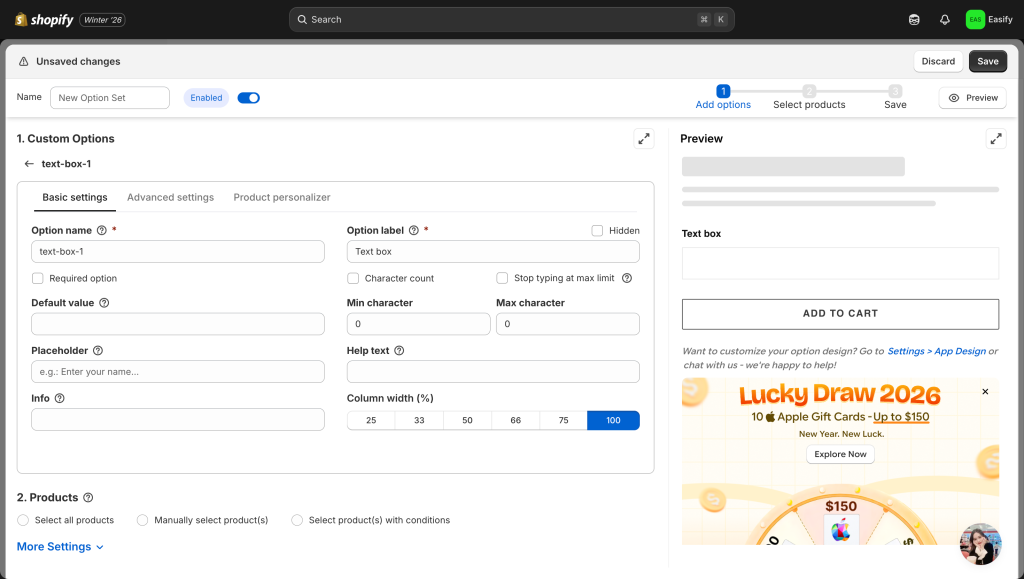
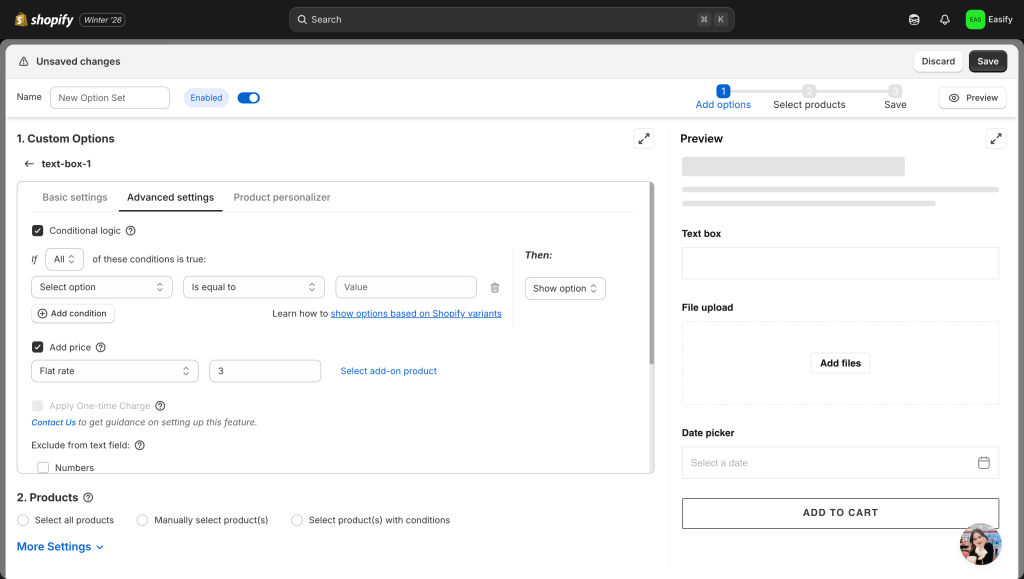
Step 3: Edit the option
Click on the option you just created to open its specific settings:
For Text Boxes: You can set minimum and maximum character limits to guide the customer.
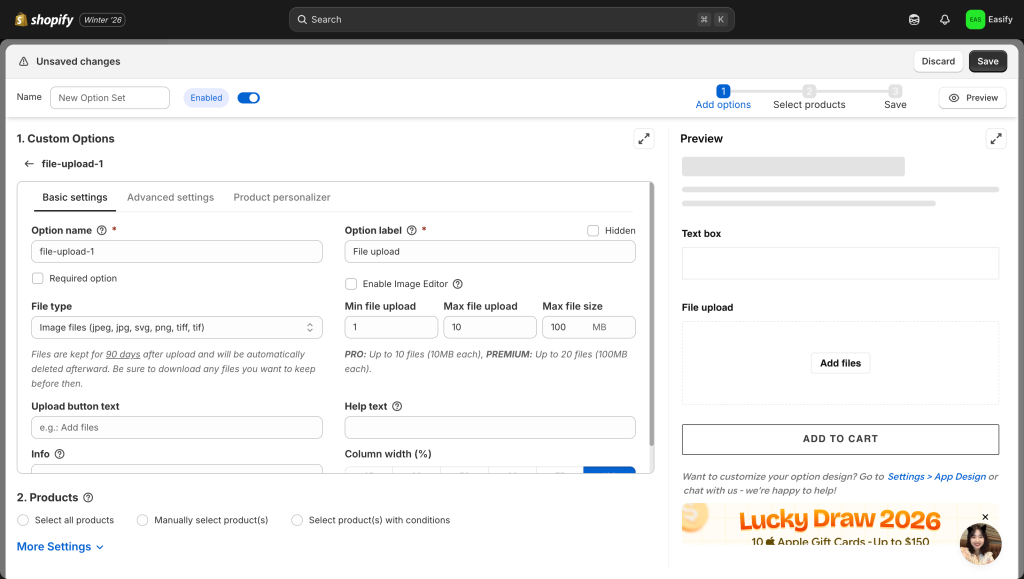
File Uploads: You can restrict specific file types, file size that customers are allowed to upload.
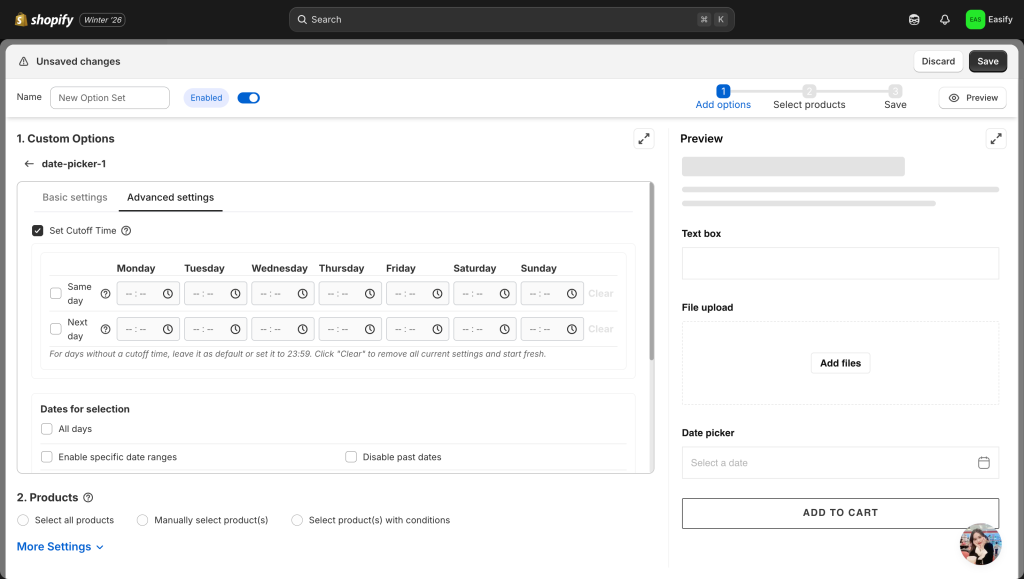
Date/Time Pickers: You can apply smart rules, such as excluding weekends or setting cut-off times for same-day and next-day delivery.
Advanced Features: For any field type, you can enable powerful extras like Add-on Pricing (to charge extra fees) or Conditional Logic (to show/hide options based on previous choices) and more
Step 4: Add More Options
Continue building your perfect product page by adding as many additional fields as needed. You can combine multiple types into the same set.
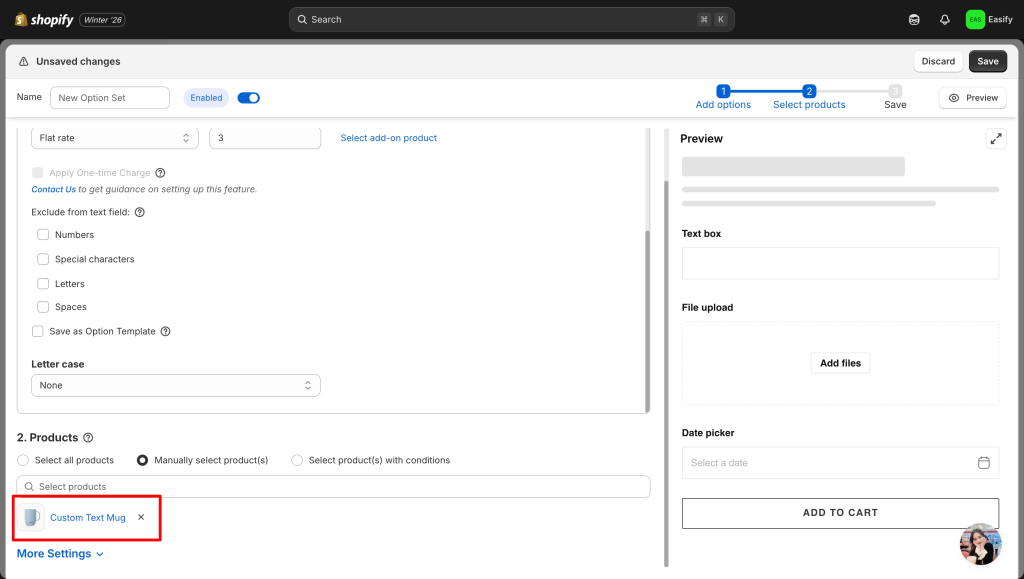
Step 5: Apply to Products
Navigate to the Products section within the option set. Select the product(s) where you want these custom fields to appear. You can apply the set to a single item, specific collections, or all products at once.
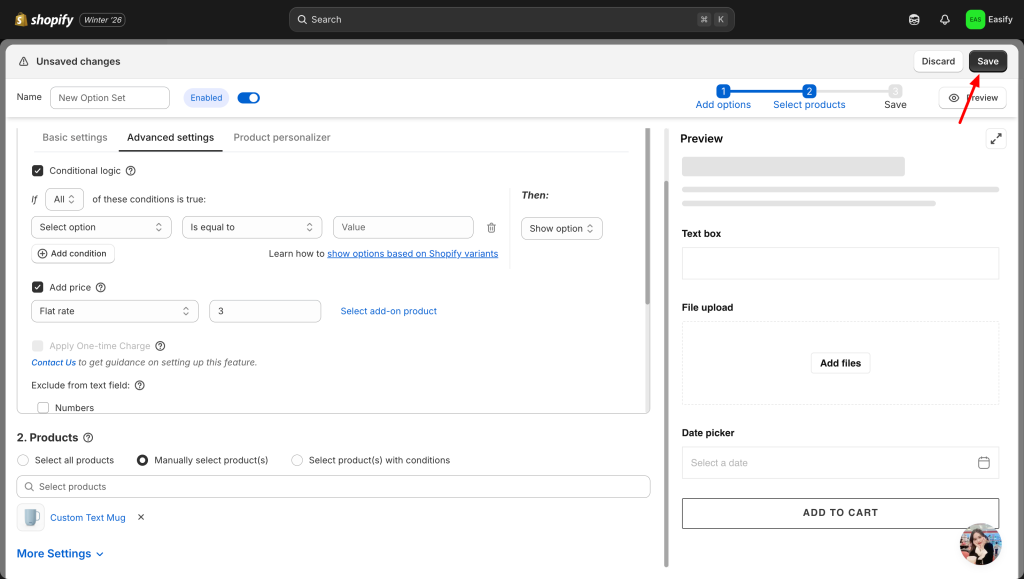
Step 6: Save Changes
Click Save to finish. Your custom fields will now appear on the product page, giving customers a simple, frictionless way to personalize their purchase.
Final Thoughts
Learning how to add custom field to product Shopify is more than just a technical tweak. It is a strategic move to unlock your store’s full potential. By breaking free from the default 100-variant limit, you empower your customers to personalize their purchases, which significantly increases satisfaction and perceived value.
While the manual coding method works for simple needs, it can quickly become complex to manage. For most merchants, using a dedicated tool like Easify Custom Product Options offers the perfect balance of power and simplicity, allowing you to build a seamless, high-converting product page without writing a single line of code.


