
Upselling is one of the most effective ways to increase revenue in your Shopify store, and one of the smartest ways to do it is directly on the product page. By offering additional product options—like premium upgrades, add-ons, or accessories—customers can enhance their purchase right at the moment they’re making a decision.
In this guide, we’ll show you how to use product options to create seamless upsell opportunities on Shopify, helping you boost sales while delighting your customers.
Why Use Product Options to Upsell on Shopify
Using product options to upsell on Shopify is one of the easiest ways to increase average order value without adding new traffic or interrupting the buying process. Instead of relying on post-purchase popups or follow-up emails, upsells appear directly on the product page—right when the customer is already motivated to buy.
This makes add-ons feel natural rather than pushy, whether you’re offering accessories, premium versions, gift wrapping, engraving, or extended protection. It also improves the shopping experience by letting customers customize or enhance their purchase in one place, reducing friction and helping them finalize decisions quickly.
No matter what type of store you run, product options can turn a standard product into a personalized, higher-value sale with just a few clicks.
Types of Upsells You Can Offer With Product Options
When it comes to using product options as upsells, the possibilities are vast, but the most effective offers are those that feel relevant and valuable to the customer. Here are some common types of upsells you can implement on Shopify:
Add-On Products
These are extra items that complement the main purchase. For example, a camera could include a memory card, tripod, or carrying case as selectable options. Customers see the convenience of getting everything they need in one purchase.
To offer add-on products more effectively, you can use an upsell and cross-sell app such as Selleasy. This app helps you increase average order value by displaying complementary products and product bundles at key moments in the buying journey—on the product page, in the cart, at checkout, and even after purchase.
Premium Versions or Tiered Packages
Offering upgraded versions of the product lets customers choose more features or better quality. Think “Standard,” “Pro,” or “Deluxe” packages for electronics, furniture, or subscription products.
Paid Customizations
Personalization is a big motivator for buyers. Options like engraving, monogramming, gift wrapping, or custom color choices let customers make the product their own while generating extra revenue.
Extended Warranty or Protection Plans
Offering service plans or extended warranties directly on the product page makes sense for higher-priced or fragile items. A simple checkbox or dropdown lets customers protect their purchase without needing a separate sales pitch.
These upsells are most effective when they feel like a natural extension of the product, are easy to understand, and clearly show the value of upgrading or adding on. By presenting these options directly on the product page, you make it simple for customers to increase their purchase in a way that benefits both them and your store.
How to Create Upsell Options on Shopify
While Shopify allows you to create basic product variants, its built-in features have limitations that make upselling through product options challenging. You can’t easily charge extra for individual options, and the variant structure is limited, making complex upsells cumbersome.
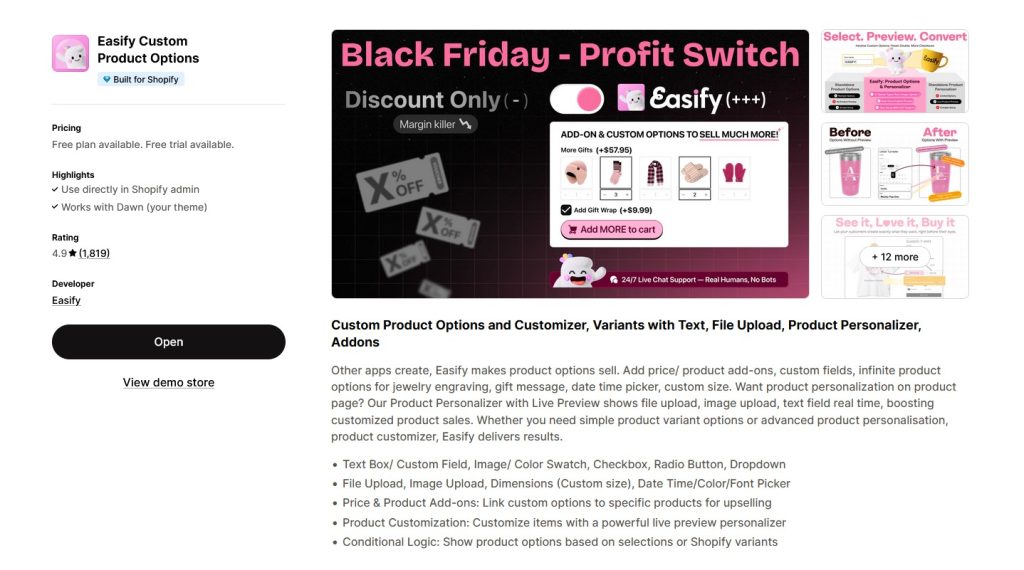
This is where Easify Custom Product Options comes in. The app allows you to create unlimited custom options, assign price add-ons for upgrades or add-ons, display options visually for a better shopping experience, and set everything up quickly without any coding. With Easify, turning your product page into a high-converting upsell engine becomes simple and scalable.
Step 1: Install and Activate the Easify App
Start by installing Easify Custom Product Options from the Shopify App Store.
Once installed, follow the instructions to activate the app so it’s ready to use on your store.
Step 2: Create a New Option Set
Open the Option Sets tab and click on the Create option set. Then, set a proper name for this new option set.
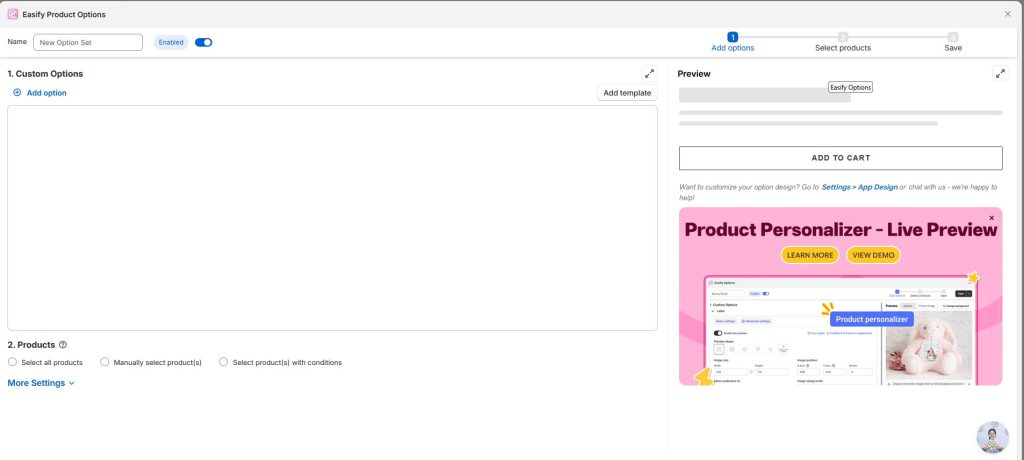
This set will group the upsell options you want to offer for a specific product or product type.
Step 3: Choose an Option Type
Click Add option and choose the type of option you want to offer. Easify provides a wide range of option types for merchants to choose. Selecting the right option type ensures your upsell feels intuitive for the customer.
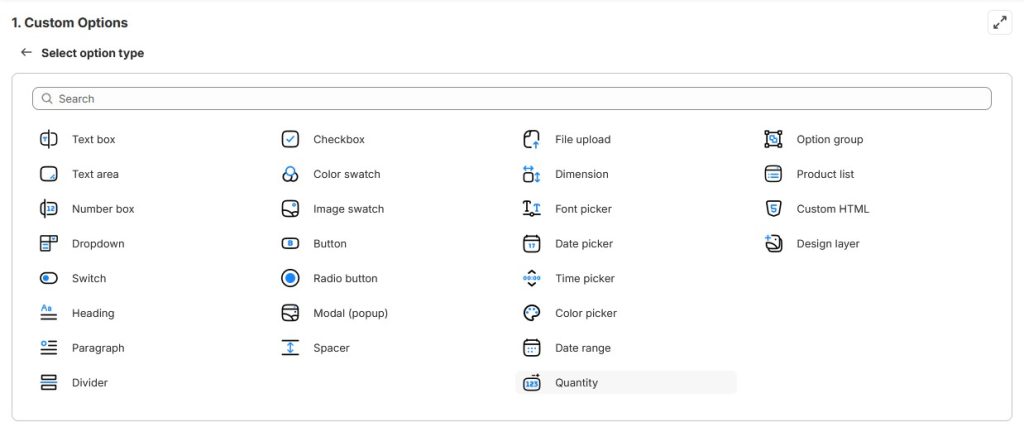
For example, use a checkbox for optional add-ons, a radio button for selecting one upgrade from several tiers, or a dropdown when you have multiple variations but want to save space on the page.
The option type you choose determines how customers will interact with the upsell and select their desired add-on or upgrade.
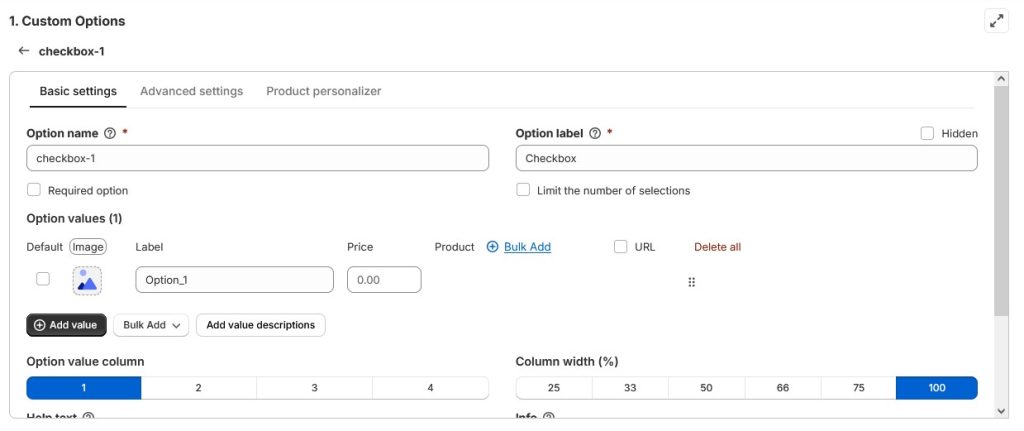
Step 4: Add the Upsell Options
After selecting the option type, click on the edit icon (pencil) to configure the option.
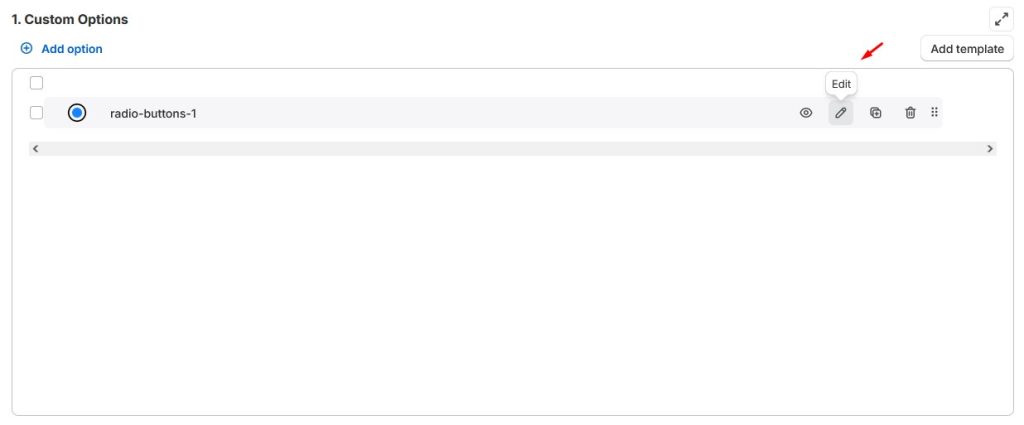
Here’s what you need to do:
- Option Name
- Enter a name for the option.
- This name will appear on the cart, checkout, and order pages, so make it clear and descriptive.
- Example: “Gift Wrap,” “Extended Warranty,” “Premium Finish.”
- Option Label
- Add a label that customers will see on the product page.
- This is usually shorter and more user-friendly.
- Example: “Add Gift Wrap?” or “Upgrade to Premium Version.”
- Option Value
- Define the actual value of the option, which may include:
- Label – the text shown on the selection input.
- Image – a visual representation of the option (optional but recommended for clarity).
- Price – the additional cost added to the base product if the option is selected.
- Define the actual value of the option, which may include:
- Customization Settings
- Explore additional settings to control how the option looks and behaves on the product page:
- Help text, layout, etc.
- Whether the option is required or optional.
- Default selection (if any).
- These settings help ensure the options integrate seamlessly with the store’s design and improve the customer experience.
- Explore additional settings to control how the option looks and behaves on the product page:
- Repeat for Multiple Options
- If you have more than one upsell, repeat this process for each additional option.
Once all upsell items are added, merchants can move on to Step 5 to assign the option set to the relevant products.
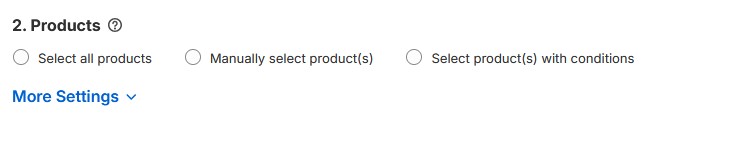
Step 5: Assign the Option Set to Relevant Products
Select the products where this option set should appear. You can assign it to a single product, multiple products, or an entire product category.
Step 6: Preview and Save
Check the preview on the right to make sure everything looks correct, then save your changes. Your upsell options are now live and ready for customers to select.
Final Thoughts
Adding upsell options directly on your product pages is a powerful way to increase average order value and enhance the shopping experience. By offering customers relevant add-ons—like gift wrapping, premium versions, or extended warranties—you give them more ways to personalize their purchase while boosting your revenue.
Start small and experiment with a few meaningful upsell options to see what resonates best with your customers. Over time, you can refine and expand your offerings to maximize impact.
Ready to get started? Try the Easify app today and make it easy for your customers to discover and select valuable product upgrades.


