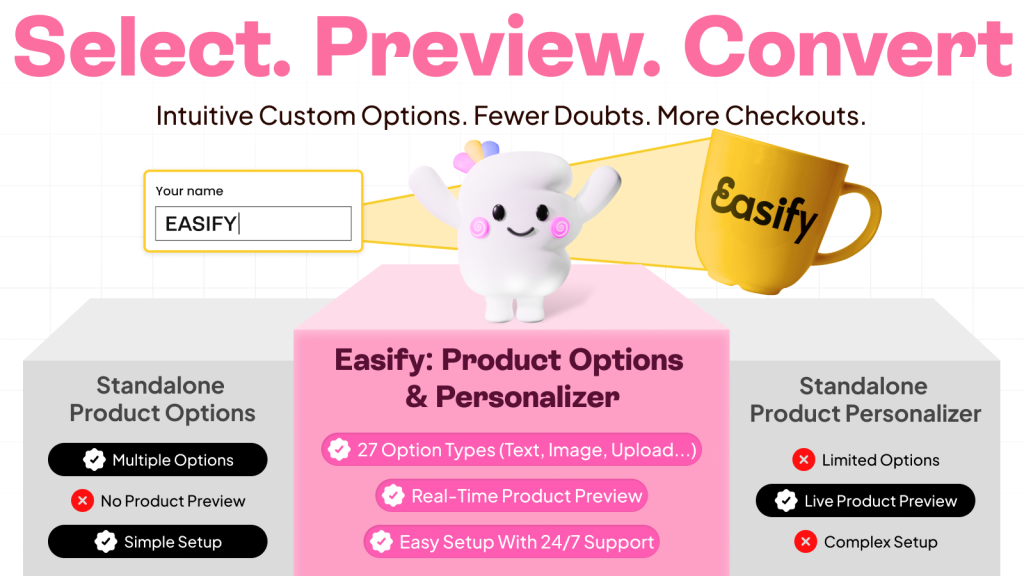
Selling customizable products on Shopify comes with a unique challenge: how do you offer customers enough choices without overwhelming them? When you have complex options—like gift wrapping, engraving, or specific material selections—displaying everything at once can make your product page look cluttered and confusing.
This is where conditional logic becomes a game-changer. Instead of presenting a static list of unnecessary fields, it allows you to build a dynamic, streamlined shopping experience that looks professional and keeps your customers focused on buying.
Ready to turn your complex options into a clean, high-converting flow? Let’s get started.
What is Conditional Logic?
At its core, conditional logic is a system of rules based on the simple concept of “If This, Then That.” It allows your website to react and adapt dynamically based on the specific actions a customer takes. In the context of a Shopify store, this technology is used to create dependent options, ensuring that certain fields, such as file uploads, dropdowns, or extra text inputs, only appear when they are actually needed.
To put it simply, imagine you are offering a custom engraving service. You can set up a rule where the text input field remains hidden by default to save space. It will only reveal itself once the customer explicitly checks a box saying “Add Engraving.” If they do not select that option, the extra field stays invisible, keeping your product page clean, organized, and free of unnecessary clutter.
Why You Should Use Conditional Logic
Implementing conditional logic is more than just a design choice; it is a strategic move to optimize your store’s user experience. The most immediate benefit is a cleaner, less cluttered product page.
Instead of overwhelming shoppers with a long list of every possible customization, you present a streamlined interface where fields only appear when they are needed. This prevents “analysis paralysis” and keeps the customer focused on moving forward in the buying journey.
Furthermore, this approach significantly reduces customer confusion. When shoppers are presented with irrelevant options, such as an “Upload File” button for a non-customizable item, they often hesitate, wondering if they are missing a step or making a mistake.
Finally, using logic helps prevent costly order errors. By strictly guiding the flow of choices, you ensure that customers can only select valid combinations. This minimizes friction during checkout and saves your support team from the hassle of fixing incorrect orders later.
How to Add Conditional Logic to Shopify
When adding conditional logic to Shopify, you essentially have two choices. The first method is to manually edit your theme code. While this gives you total control, it is a complex task that is prone to errors. If you are not comfortable with programming, a single mistake could break your product page layout or disrupt the buying process.
The second, and much safer, approach is to use a third-party app. This allows you to build “smart” forms visually without ever touching your theme files, ensuring your store remains stable while saving you significant time.
Easify Custom Product Options is the perfect tool for this job. It is designed to be user-friendly, allowing you to create complex rules effortlessly – no coding skills required.
Here is a quick step-by-step guide on how to set it up:
Step 1: Find and Install the App
Go to the Shopify App Store, search for Easify Custom Product Options, and click Install. Once added to your store, open the app and follow the quick setup guide to get started.
Step 2: Create a New Option Set
From the Easify dashboard, click the Add New Option Set button to begin.
To demonstrate how conditional logic works, we will create two specific options. First, we will add a Checkbox to act as the “trigger” (e.g., Add Engraving?). Then, we will add a Text Box which will serve as the dependent field (e.g., Name) that appears only when needed.
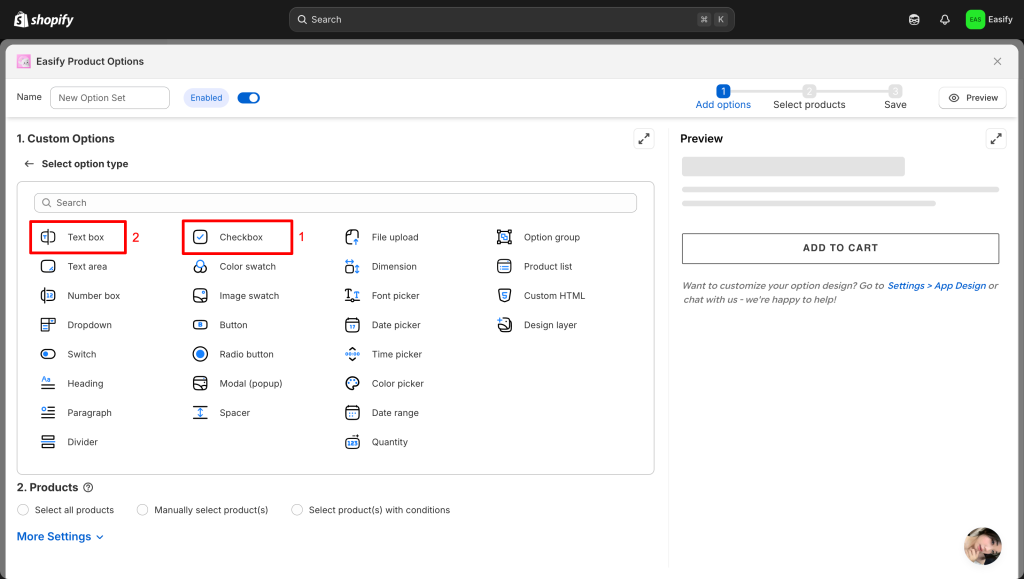
Of course, this setup is completely flexible. You can freely mix and match different display styles, such as dropdowns, buttons, or image swatches, to create the perfect “If This, Then That” flow for your store.
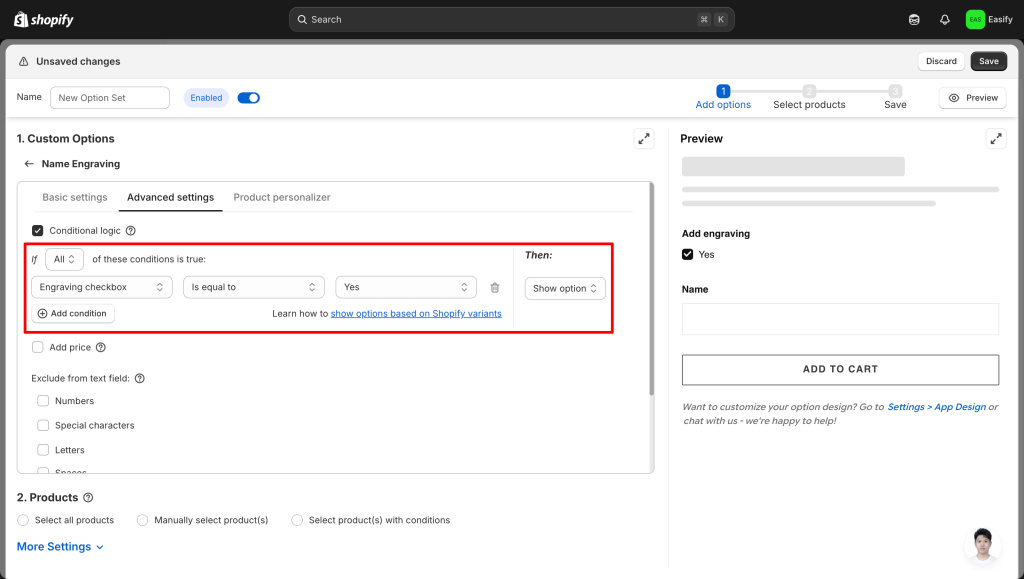
Step 3: Add Conditional logic
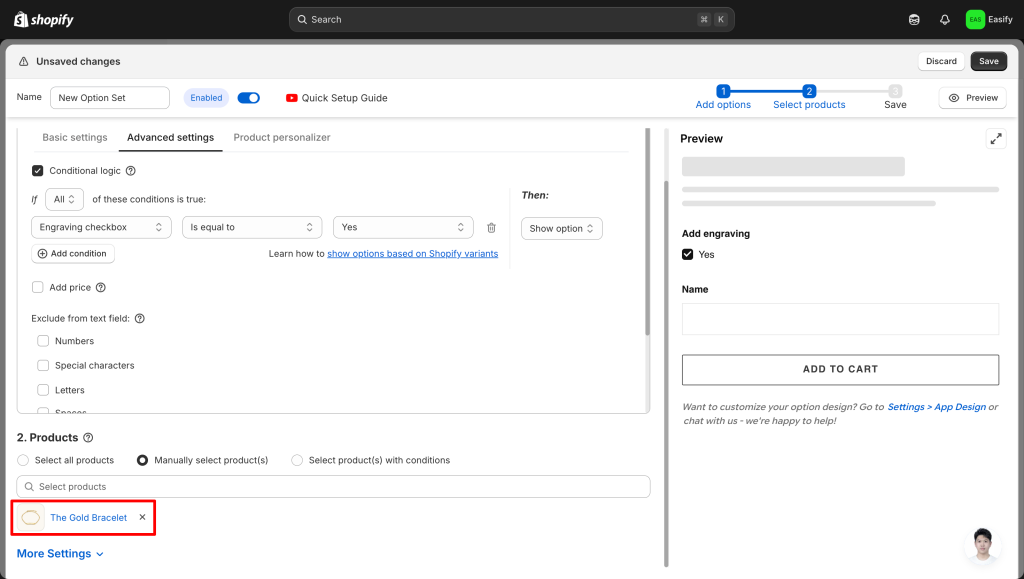
Now, open the settings for your dependent field—in this case, the Engraving Name text box. Navigate to the Advanced Settings tab and tick the checkbox to enable Conditional Logic.
From here, you can customize exactly how the rule behaves. Depending on your needs, you can choose whether the rule triggers when All or Any conditions are met, and use specific operators such as Is equal to, Is not equal to, Starts with, Ends with, Contains, or Does not contain.
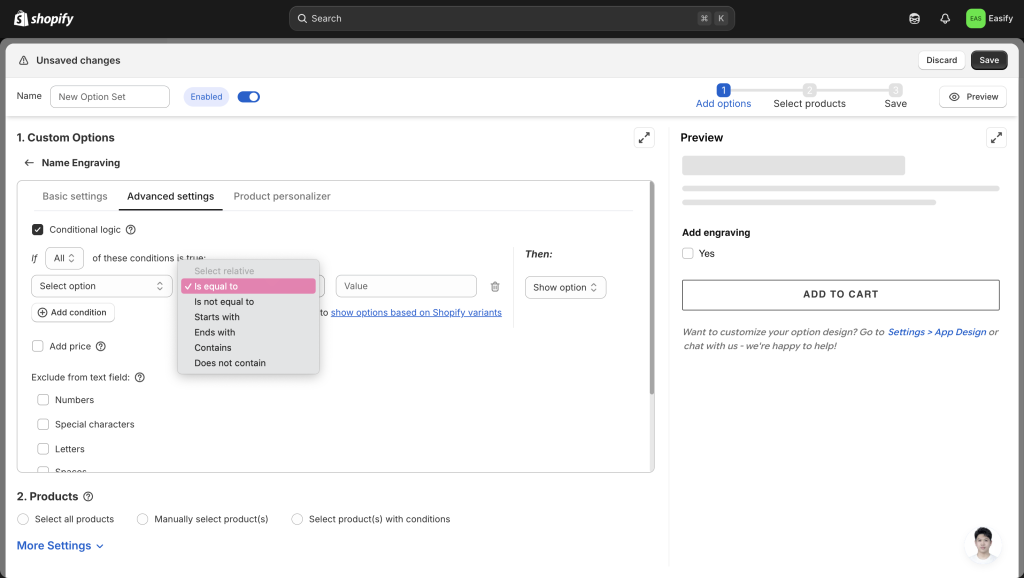
For this example, we will simply set the rule to: Show this option if the Engraving Checkbox is equal to Yes.
Step 4: Apply to Products
Once your logic rules are set, choose which products will feature these smart options. Navigate to the Products section within the option set to make your selection. You can assign this set to a single item or apply it to an entire collection simultaneously for faster setup.
Step 5: Save Changes
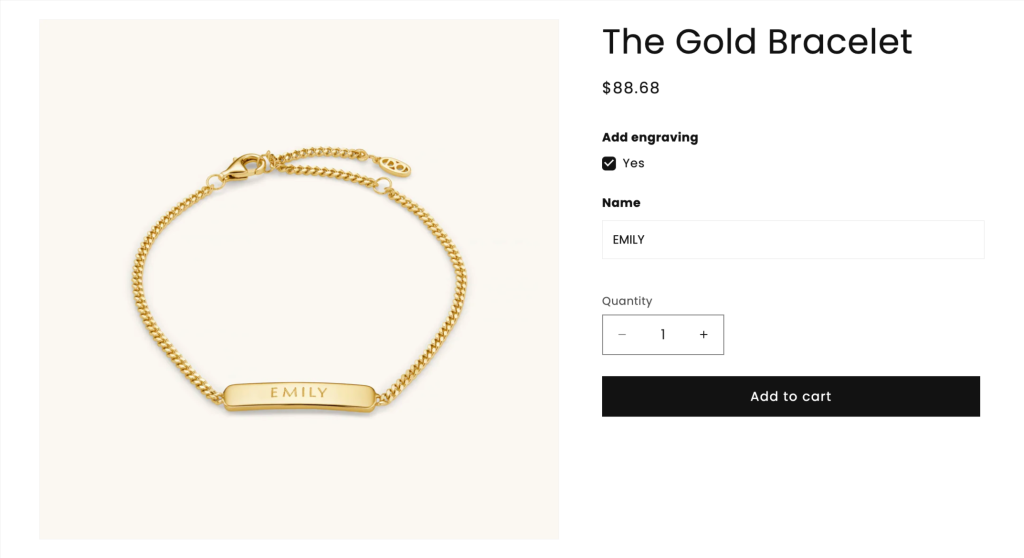
Finally, click Save to apply your changes. Your dynamic options will appear on your storefront immediately, ready to provide a cleaner and smarter shopping experience for your customers
Conclusion
Creating a seamless shopping experience doesn’t require complex coding or a complete store redesign. By simply implementing conditional logic, you can transform clunky product forms into intuitive, guided conversations that help your customers buy with confidence.
Whether you are selling personalized gifts, custom furniture, or made-to-order apparel, this small change makes a massive difference in how professional your store feels.
Ready to declutter your product pages? Give Easify Custom Product Options a try today and start building a smarter, high-converting store.
Looking for more ways to customize your store? Check out these related guides below: