
If you’re looking to add an additional description in Shopify, it’s actually simpler than you might think. While Shopify gives you only one main description box by default, you can still include extra text sections to share more details — like materials, size guides, or shipping information.
Adding these sections helps your product pages look cleaner and makes it easier for customers to find the information they need. In this guide, Easify’ll show you different ways to add an extra description to your Shopify store, whether through metafields or third-party apps.
Key Takeaways
- Shopify’s default setup includes only one product description field.
- You can add additional descriptions using metafields or third-party apps like Easify Product Options.
- Extra description sections help organize product details like size guides, materials, or shipping info.
- A clearer layout improves the shopping experience and can boost conversion rates.
How Can Detailed Descriptions Help You Improve Conversions?
A detailed product description does more than just tell customers what you’re selling — it helps them feel confident about buying. When shoppers understand exactly what they’re getting, they’re less likely to hesitate or leave your page to look for more information elsewhere.
Adding extra details, such as materials, care instructions, sizing guides, or use cases, helps remove doubts and builds trust. It also allows you to highlight unique product benefits that might not stand out in photos alone.
From an SEO perspective, richer descriptions can improve your search visibility, bringing in more qualified visitors. And once they land on your store, those clear, helpful descriptions guide them toward making a purchase — meaning better engagement and higher conversion rates.
How to Add Additional Description to your products?
There are two main ways to add an additional description in Shopify. The first is by using Shopify Metafields, which let you create custom text fields directly in your admin. This method is great if you’re comfortable working with Shopify’s built-in settings. The second option is to use a third-party app, which often provides a simpler, no-code way to add extra description sections and manage them visually. Both methods can help you display more detailed and organized product information on your store.
Method #1: Using Shopify Metafield
Shopify Metafields let you add extra text fields to your products, making it easy to include details like size guides or care instructions. You can create and manage these fields directly in your Shopify admin, then display them on your product page through your theme settings — no app needed.
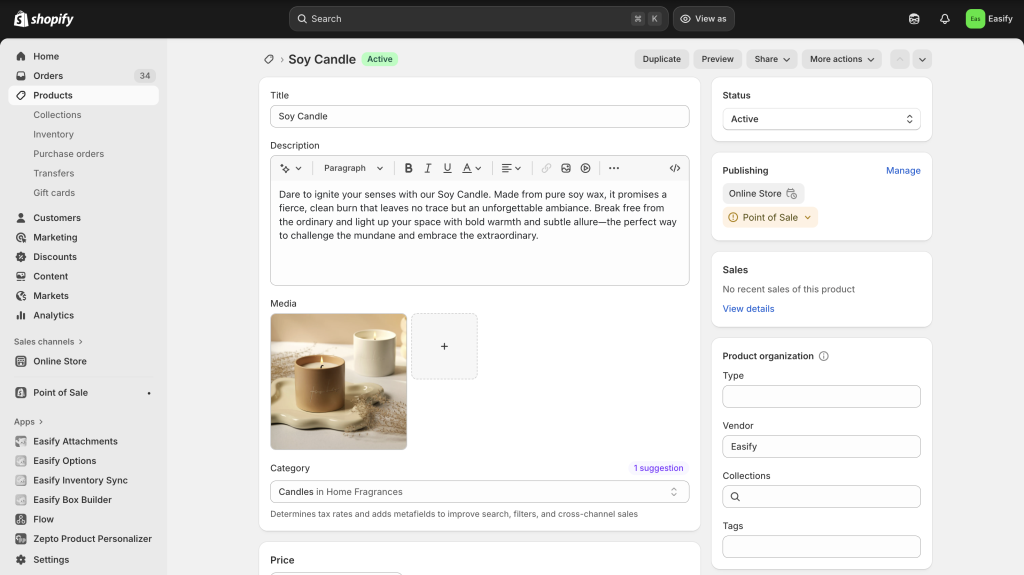
Step 1: Go to Your Product and Set Up the Basics
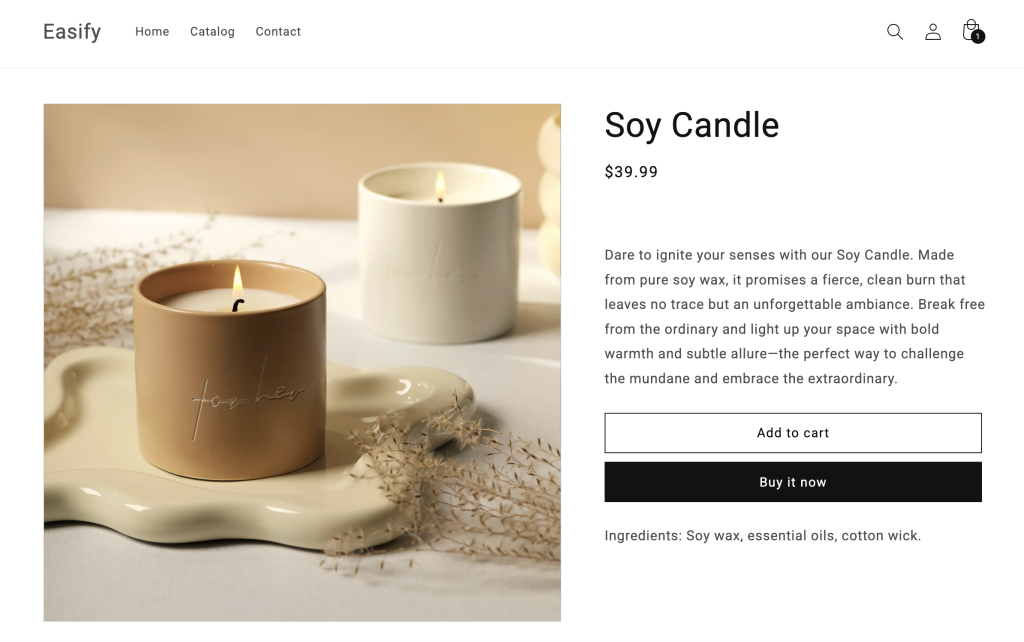
In Shopify Admin, open the product you want to edit (or create a new one), then fill in the name, description, price, and images as usual.
Step 2: Go to Shopify settings
From your Shopify Admin, go to Settings → Metafields and metaobjects.
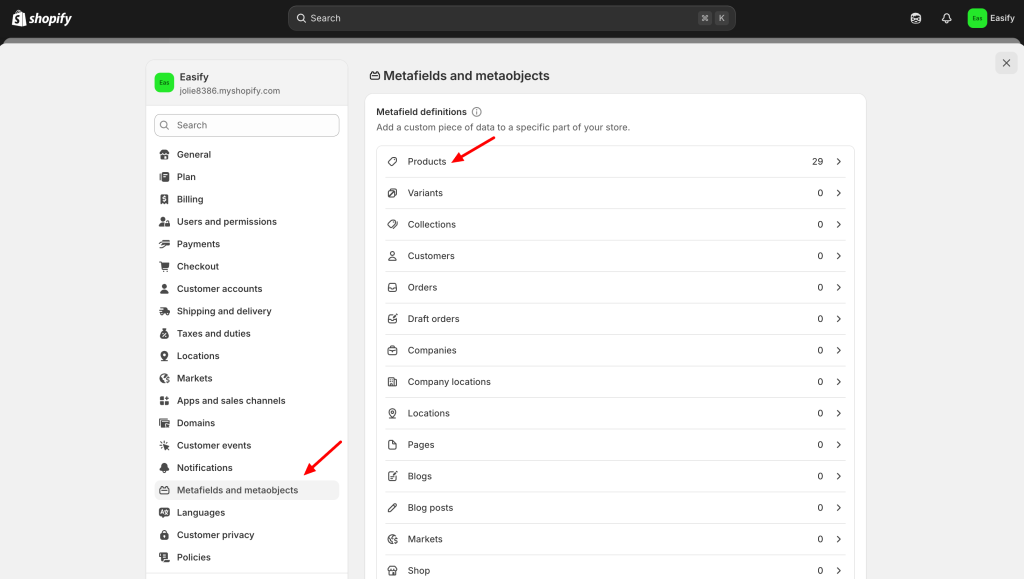
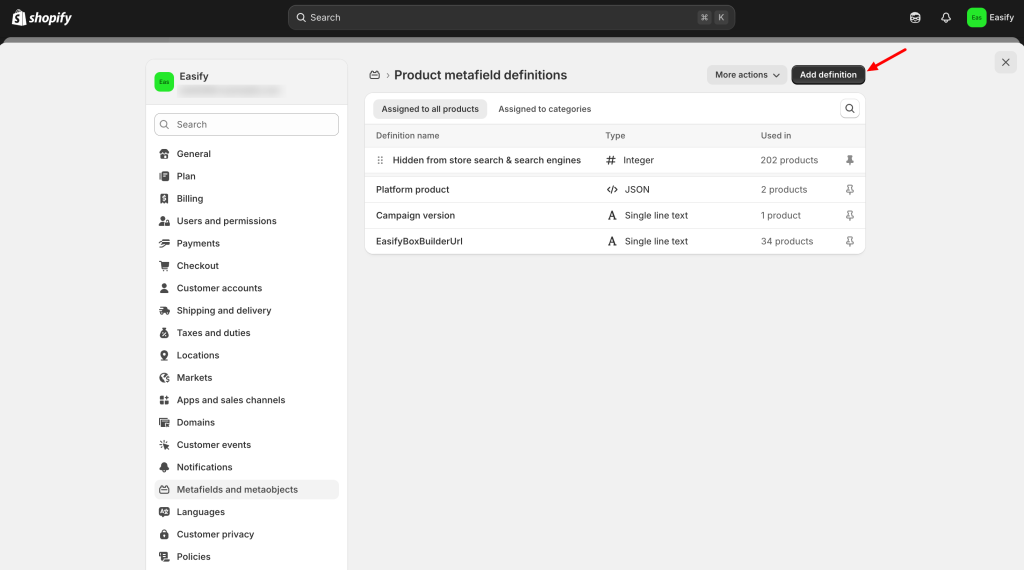
Under Metafields definition, select Products, then click Add definition.
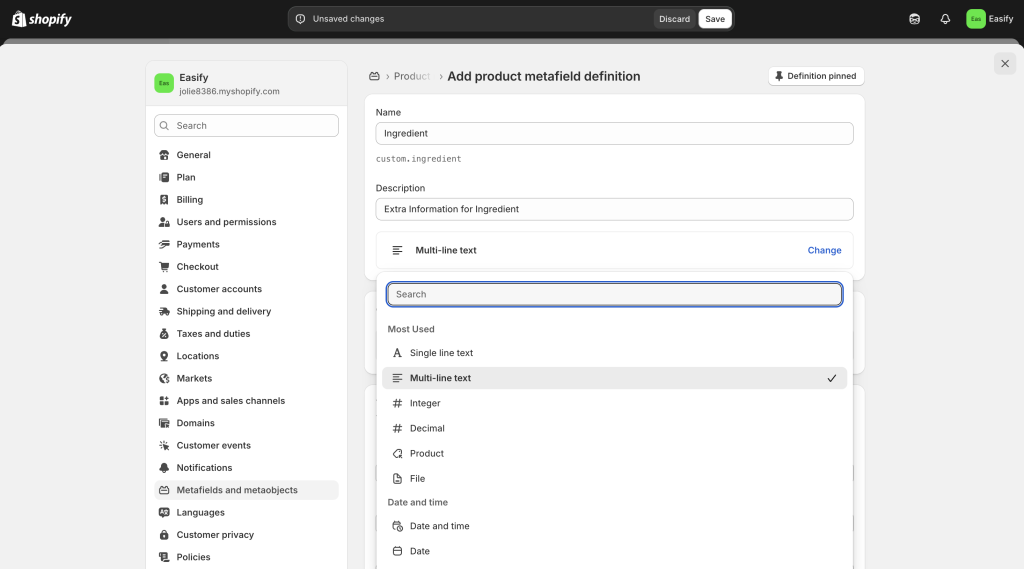
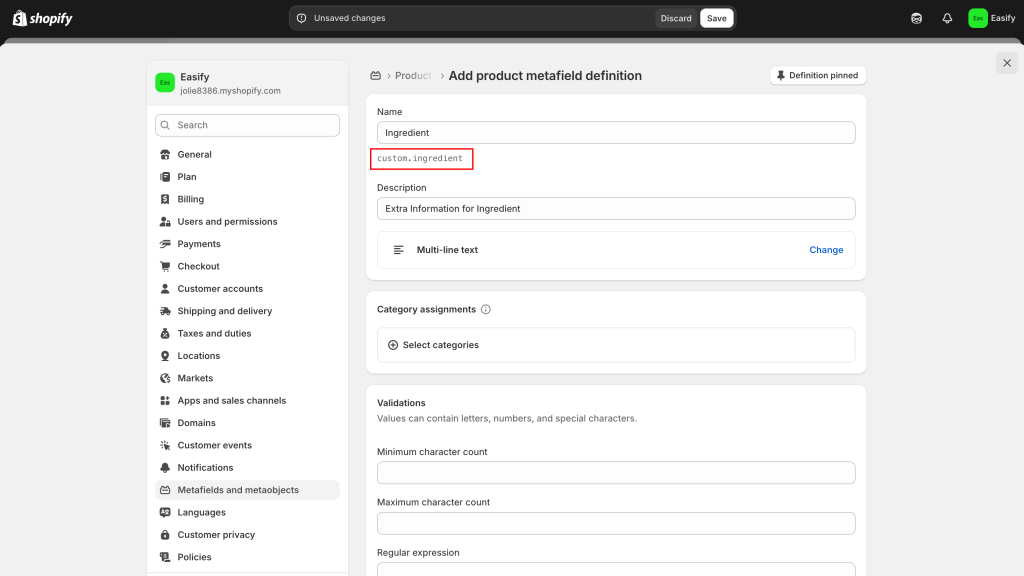
Step 3: Create the Metafield Definition
Enter a name (e.g., Ingredients). The description field is for internal use only — it helps you remember what the metafield is for (customers won’t see it).
Then choose the content type (for example: single line text, multi-line text, or file if you want to add an image).
Step 4: Click save
Click Save. After saving, copy the Namespace and key — you’ll need this in the next step.
Example: custom.ingredient
Step 5: Add the Metafield to Your Product Page (Theme Editor)
Go to the theme editor. Open your Product Page template.
Add a new Block → Custom Liquid
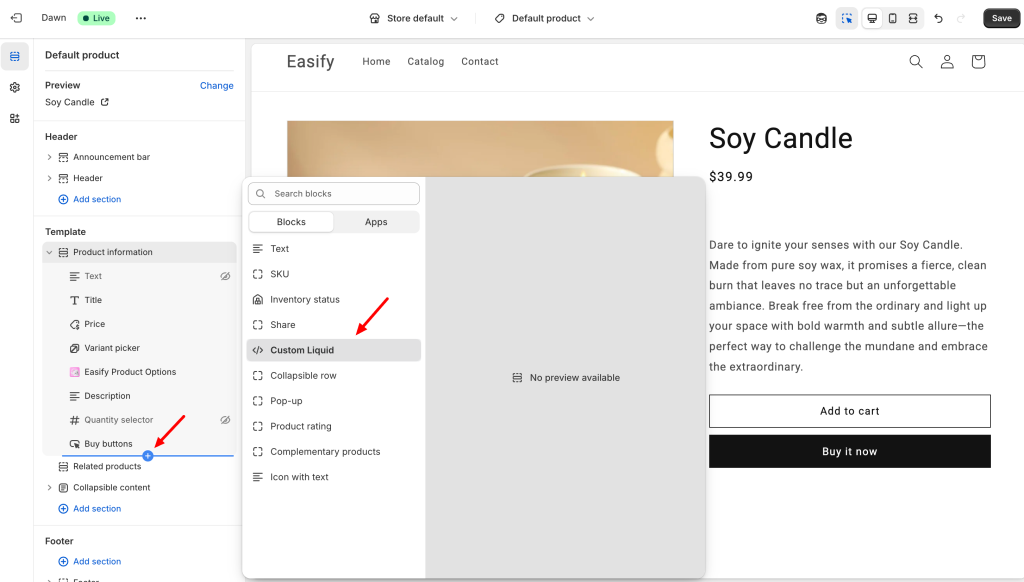
And paste this code:
{{ product.metafields.custom.additional_description }}If your namespace and key are “custom.ingredients”, then use:
{{ product.metafields.custom.ingredients }}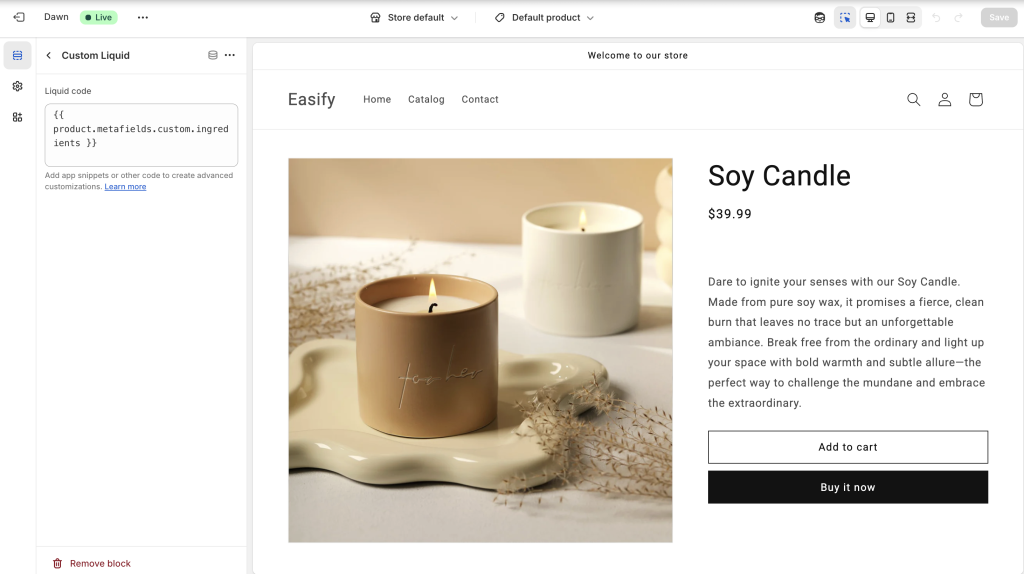
Then click Save.
Step 6: Fill in Your Metafield Content
Go back to your product page in Shopify Admin. Scroll down — you’ll see the new metafield field (e.g., Ingredients). Enter your content there.
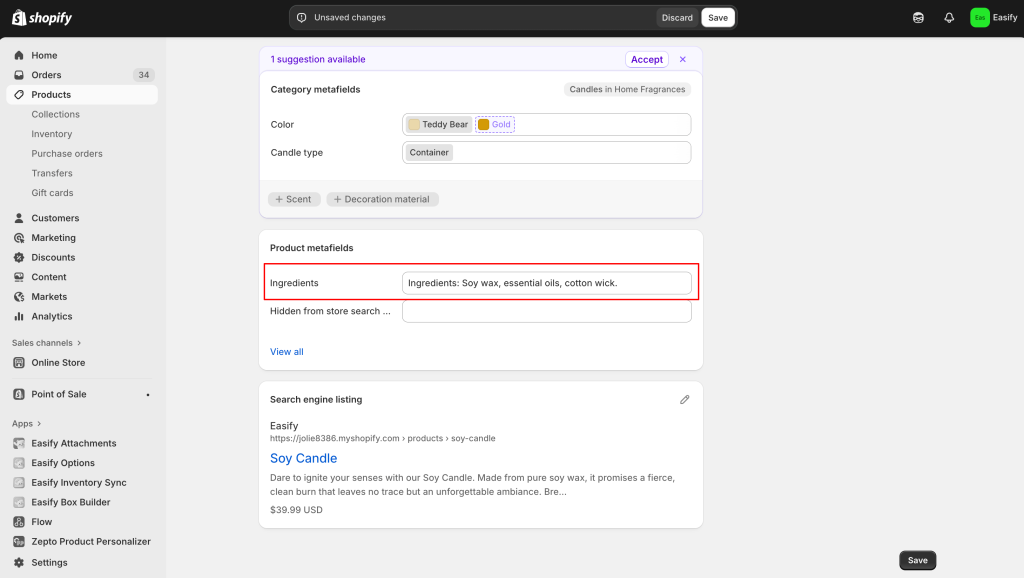
Important: if the field is left empty, Shopify won’t show anything on the frontend.
Step 7: Save and Preview Your Product
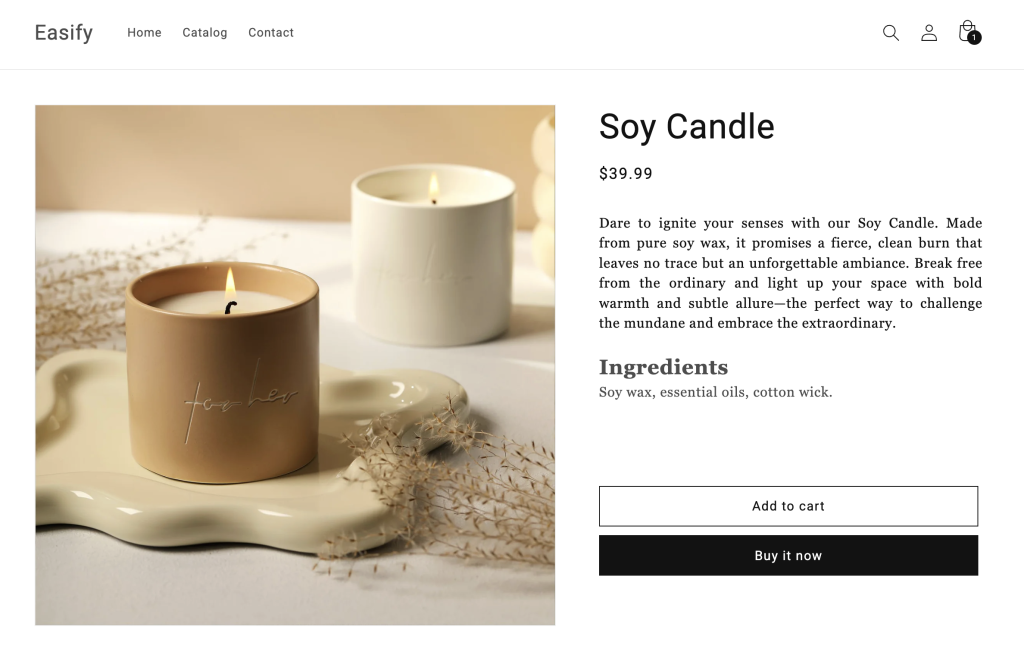
Once everything’s filled in, click Save, then preview your product page to check how it looks.
If you want to make the section look cleaner — for example, display the ingredients in a dropdown or tab, or customize the text style (like bold, italic, or underline), you can add a few extra lines of code.
Method #2: Using Easify Product Options App
If you prefer a quicker, no-code solution, you can use an app like Easify Product Options. It lets you create additional text sections right on your product page with just a few clicks. You can easily add extra descriptions, highlight special notes, or display product details without touching any code — perfect for store owners who want flexibility and simplicity.
Step 1: Find and Install the App
Go to the Shopify App Store, search for Easify Product Options, and click Install. Once added to your store, open the app and follow the quick setup process to get started.
Step 2: Create a New Option Set
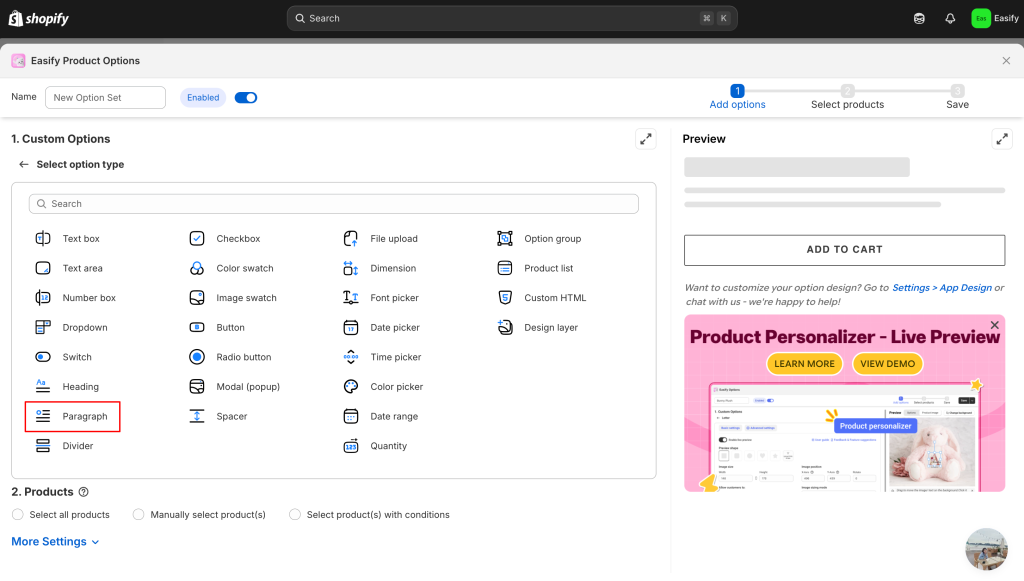
From your Easify dashboard, click Create New Option Set, then select the Description option type.
Step 3: Add Your Content
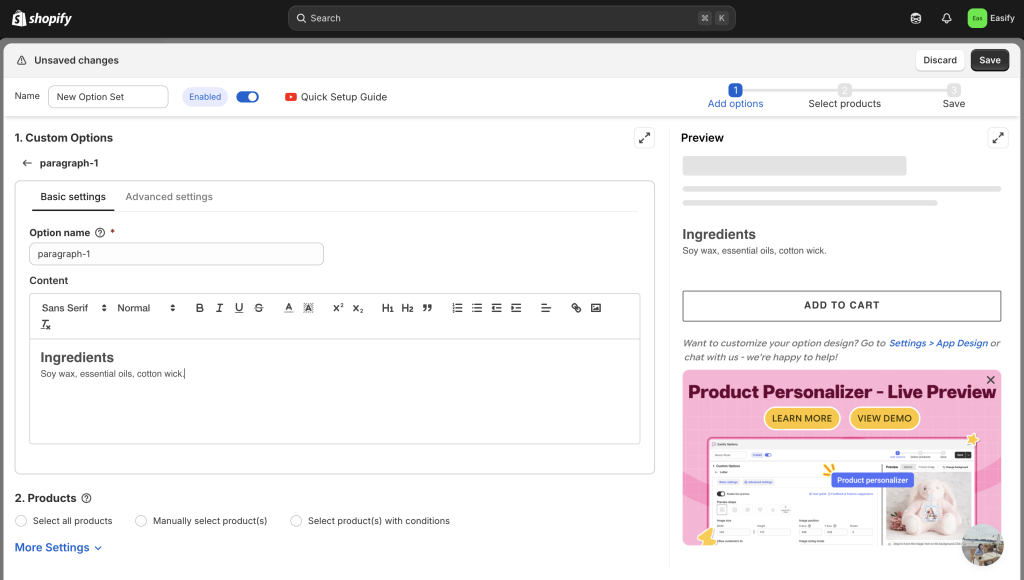
Enter your description text. You can customize it using formatting options like bold, italic, underline, and text alignment to make it more visually appealing.
Step 4: Add More Descriptions
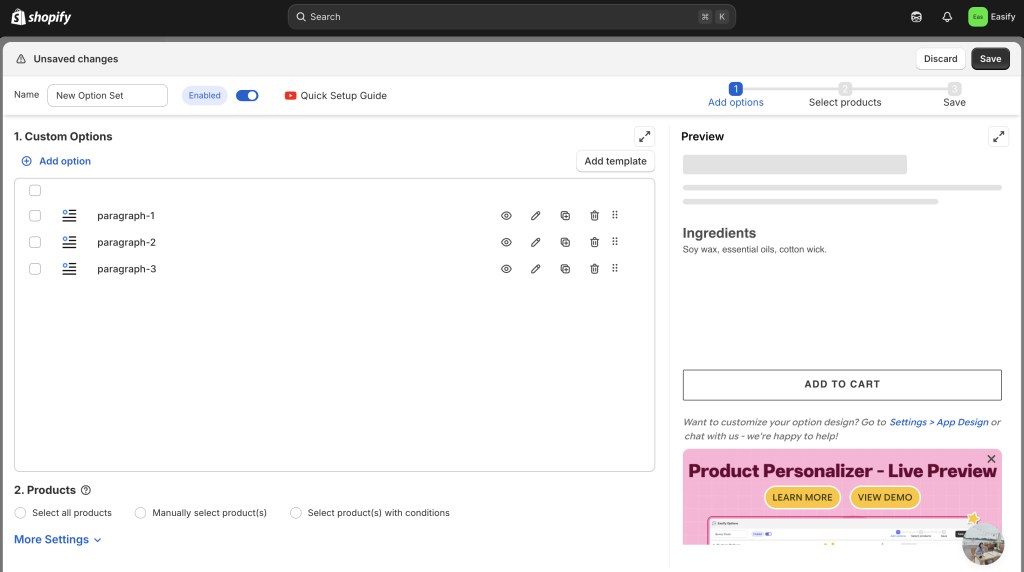
If you need more than one description, simply repeat the same step and create as many description fields as you like.
Step 5: Apply to Products
Choose the product(s) where you want the description to appear. You can apply the option set to a single item or multiple products at once.
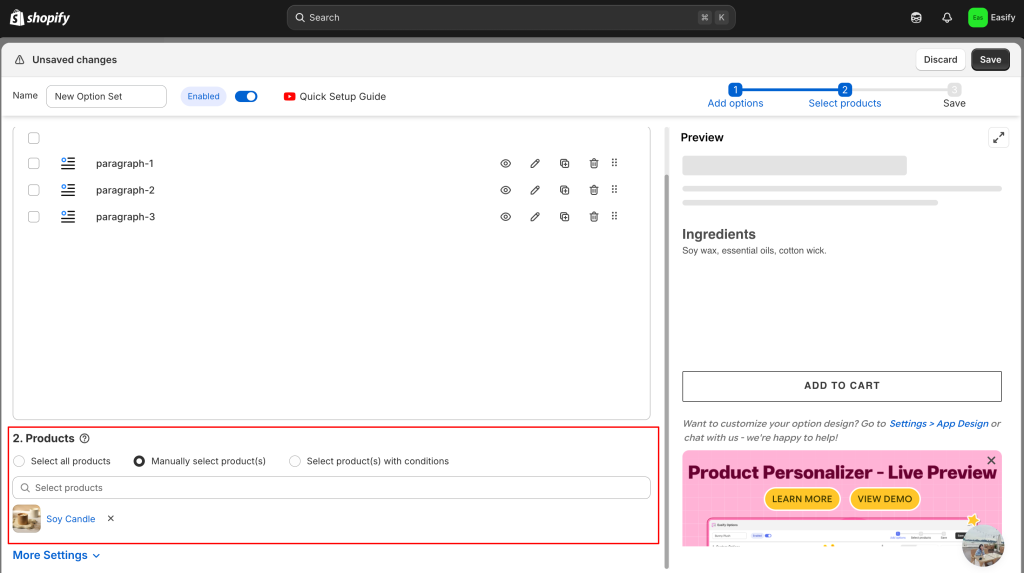
Step 6: Save Changes
Click Save to finish. Your additional description will now appear on the product page — giving customers more information before making a purchase.
Final Thoughts
Adding an additional description in Shopify is a simple but effective way to make your product pages more informative and organized. Whether you choose to use Shopify Metafields for a built-in solution or Easify Product Options for a faster, no-code setup, both methods help you present details more clearly and improve the overall shopping experience.
A well-structured product page not only answers customer questions but also builds trust and confidence — key factors that can lead to higher conversions. So, take a few minutes to add those extra details — your customers (and your sales) will thank you.
And if you want the easiest way to do it, give Easify Product Options a try — it takes just a few clicks to make your product pages look cleaner and more engaging!


