Chasing customers for photos is a nightmare. If you ask buyers to email their artwork after they check out, you know exactly what happens next. You wait days for a reply, or play detective trying to match a random email address to a specific order. It is slow, messy, and ruins your workflow.
The easiest fix is adding a Shopify file upload box right on your product page. Shoppers attach their images before buying, giving you exactly what you need instantly. Let’s figure out how to easily add this feature to your store so you can stop tracking down emails and start shipping faster.
What Is a Shopify File Upload?
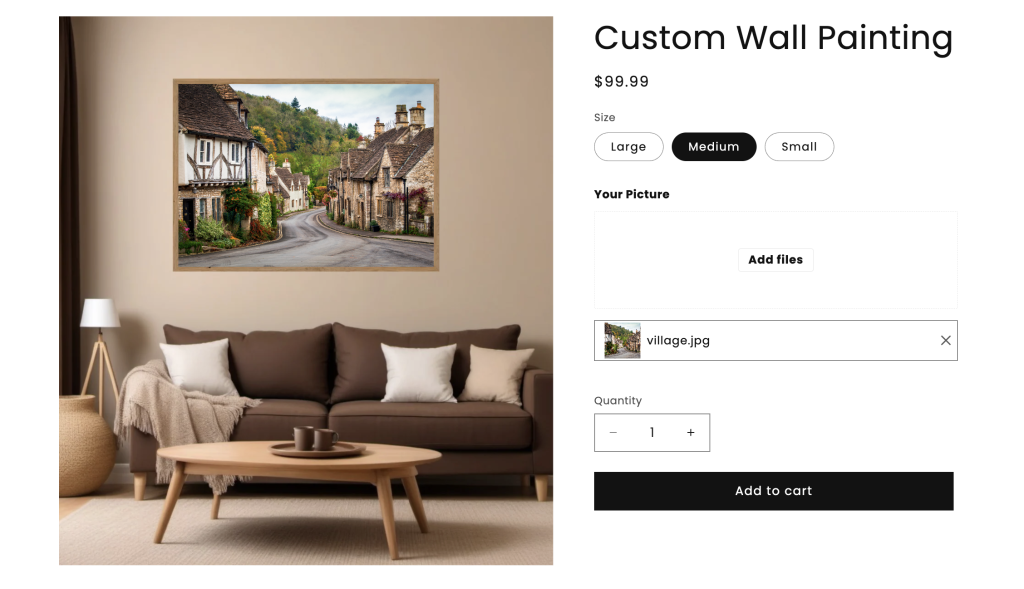
Think of a Shopify file upload as a digital dropbox right on your product page. Instead of a customer buying a blank t-shirt and emailing you their design later, they attach the image before they even click “Add to Cart.” That file links directly to their order in your dashboard. You avoid guessing which photo belongs to which customer, hunting down missing attachments, and untangling messy email chains. You just get the order and the artwork at the exact same time.
If you sell anything that needs a personal touch from the buyer, you need this feature. It saves the day for things like:
- Custom Apparel: Shoppers uploading a band logo or a funny graphic to print on a hoodie.
- Personalized Gifts: Buyers attaching a high-quality family photo for a canvas or coffee mug.
- Engraved Jewelry: Customers submitting a picture of a fingerprint or handwritten note to stamp on a necklace.
For you as the merchant, the biggest advantage is getting your time back. You no longer have to pause your entire day to chase down a missing picture or clarify an email attachment. Plus, it completely eliminates costly mistakes.
When a buyer drops their file right next to their order details, there is zero chance of you printing the wrong dog’s face on a custom mug. It speeds up your shipping process, keeps your inbox clean, and lets you focus on actually making money instead of playing customer service detective.
How to Add a Shopify File Upload to Your Store
When adding a Shopify file upload to your store, you basically have two choices. Option one is digging into your theme code. Sure, it gives you complete control. But unless you dream in HTML, editing code is risky business. One tiny typo can completely break your product page or make your checkout button disappear into thin air.
Option two is much smarter. You just use a dedicated app. This lets you add an upload box visually without ever opening a single theme file. Your store stays perfectly safe, and you save hours of stress.
Easify Custom Product Options is exactly what you need for this. It handles the heavy lifting so you can let customers attach their photos, logos, or documents in minutes, completely code-free.
Here is exactly how to get it running:
Step 1: Find and Install the App
Go to the Shopify App Store, search for Easify Custom Product Options, and click Install. Once added to your store, open the app and follow the quick setup guide to get started.
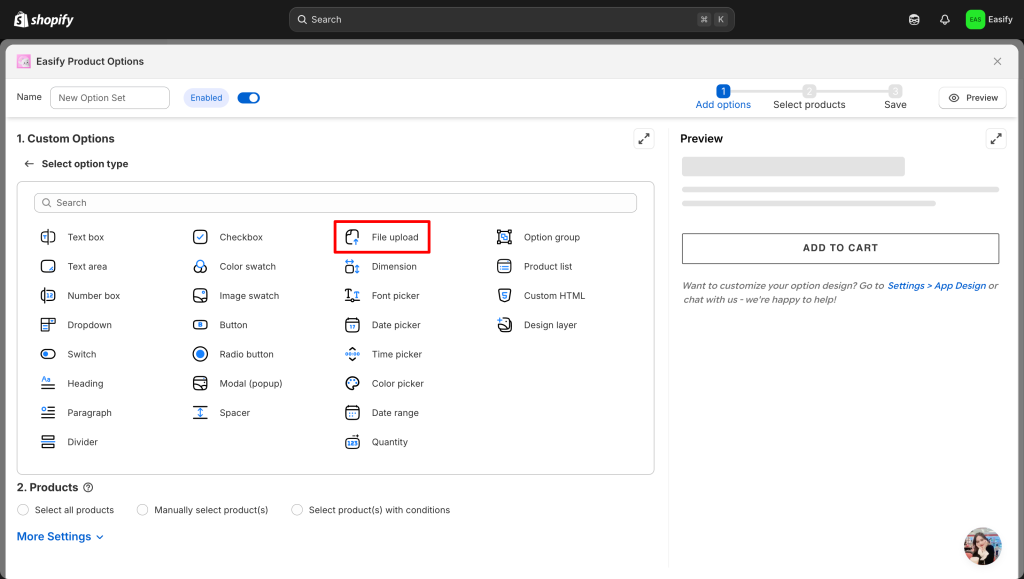
Step 2: Create a New Option Set
From the Easify dashboard, click the Add New Option Set button to begin. Next, select File upload.
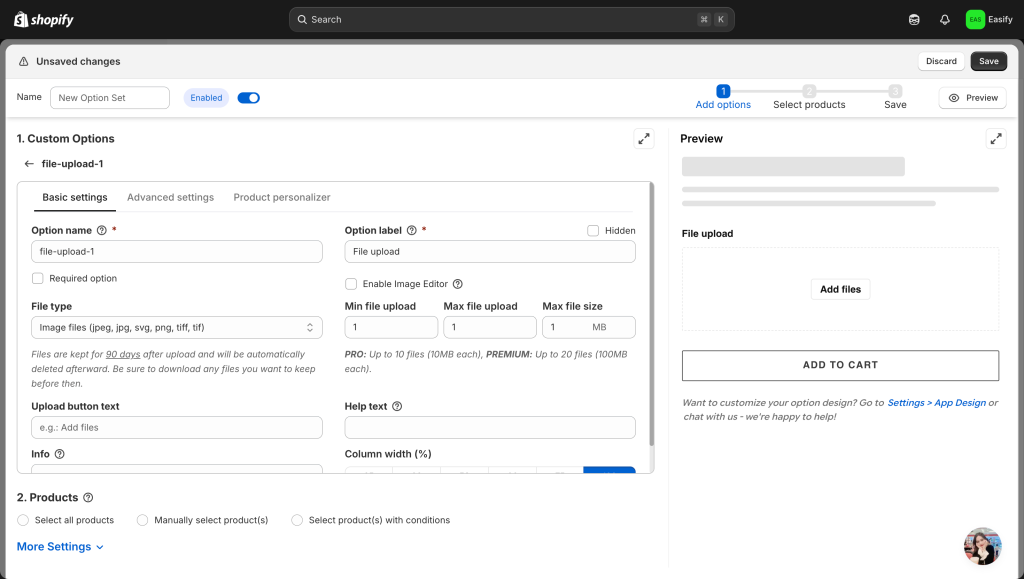
Step 3: Edit File Upload Option
Click on your new File Upload option to open its settings. Here, you define exactly what shoppers can attach by limiting file types, setting a maximum file size, and choosing how many files they can upload at once.
To improve the customer experience, turn on the Image Editor. This feature lets buyers crop their photos or apply filters directly on the page before checking out.
You can also access advanced settings to optimize your product page. For example, you can set an Add-on Price to charge a fee for custom files. Additionally, enabling Live Preview lets customers see exactly how their image looks on your product in real time.
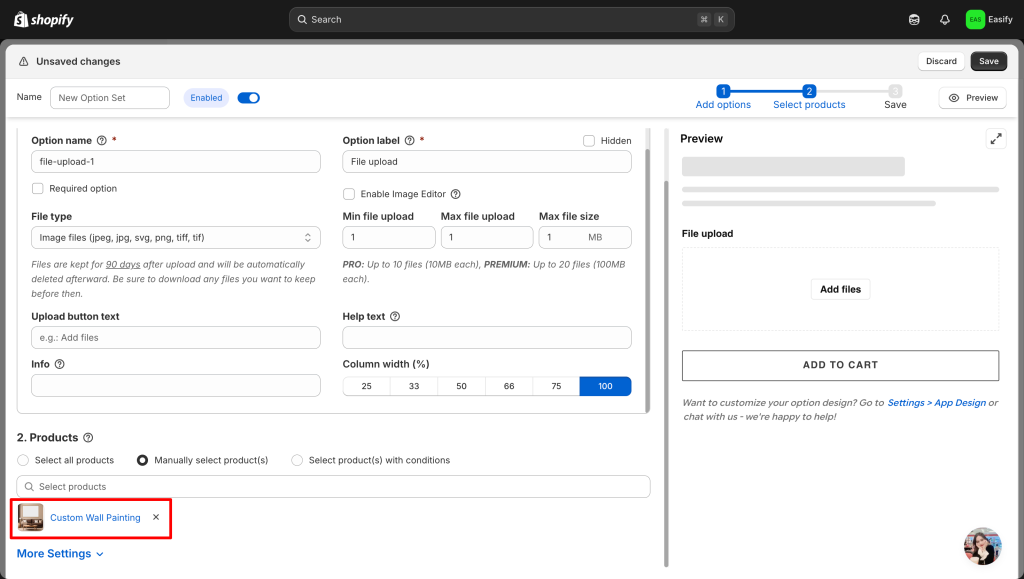
Step 4: Apply to Products
Once your file upload option is ready, you need to choose where it appears on your store. Go to the Products section inside your option set to make your choice. You can assign this feature to a single product or apply it to an entire collection at once to save time.
Step 5: Save Changes
Finally, click Save to apply your changes. Your file upload option will appear on your storefront immediately, making it easy for shoppers to attach their designs right at the product page.
Final Thoughts
Selling custom products should be profitable, not a frustrating mess of missing attachments. By adding a Shopify file upload directly to your product pages, you take total control of your order process.
Customers get a smooth checkout experience, and you get their artwork exactly when you need it. You can choose to build this feature manually by editing your store’s code, or you can use an app like Easify Custom Product Options to set everything up visually in minutes.
Whichever path you choose, adding this feature helps you stop playing detective with your orders and start shipping custom items faster than ever.
Want to add even more cool features to your shop? Dive into our other quick guides right here: