
You might be leaving money on the table with every order. If you are just selling the base product without offering paid extras like gift wrapping or premium materials, you are missing the easiest way to boost your revenue. Scaling isn’t just about finding new customers; it’s about maximizing the value of every single cart.
Shopify Add-ons allow you to easily charge for these customizations, turning standard orders into higher-value purchases without extra ad spend. In this post, we will show you how to set up paid options to instantly increase your Average Order Value. Let’s get started.
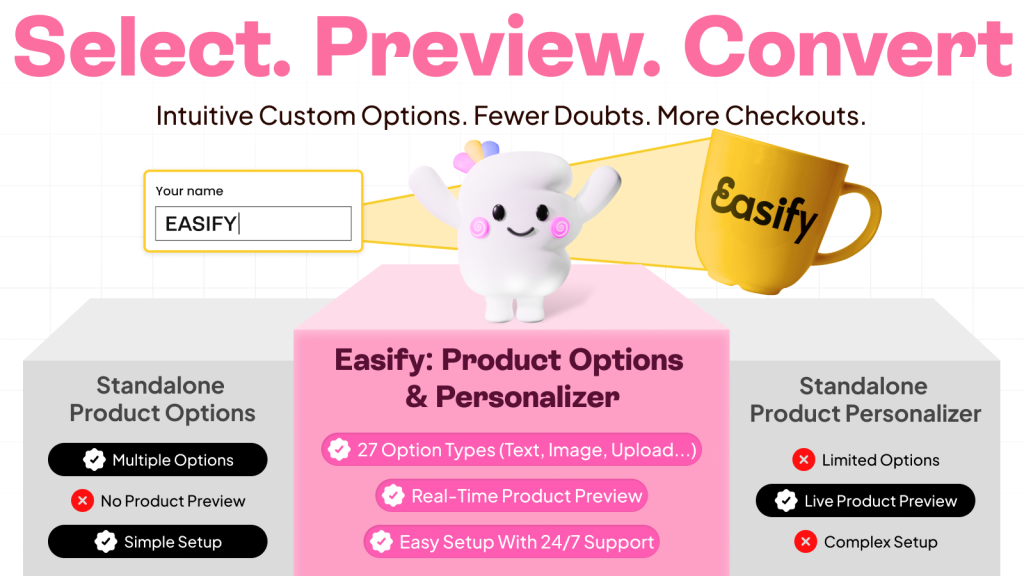
What are Shopify Add-ons and Why Do You Need Them?
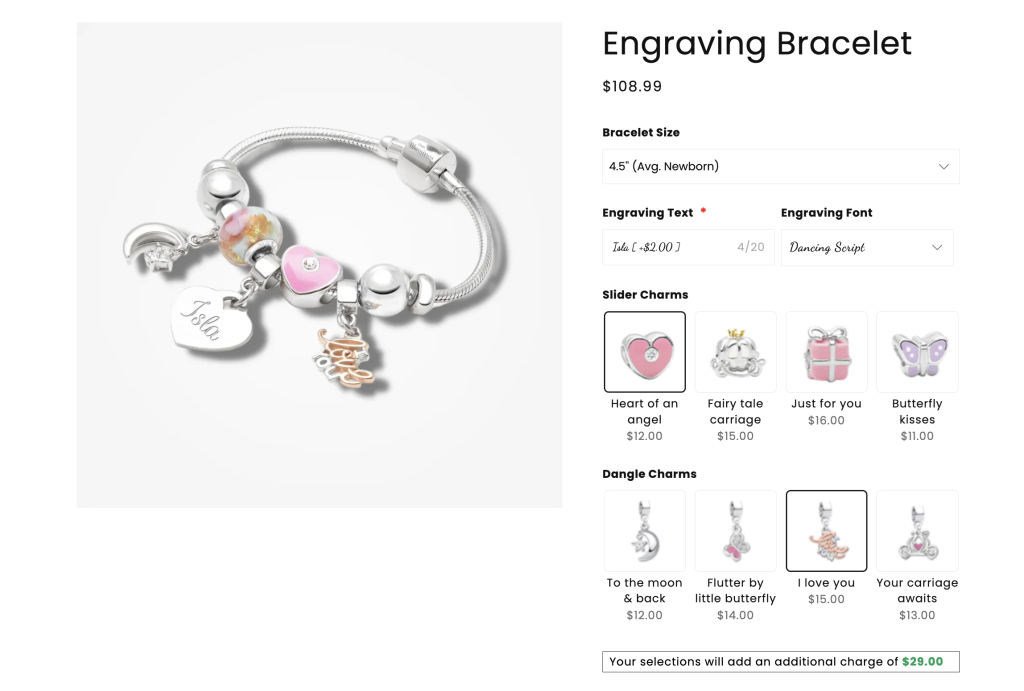
A Shopify Add-on is any extra option, service, or accessory that a customer can attach to their main purchase. This ranges from customization fields like text engraving to tangible extras like adding batteries, extended warranties, or premium gift packaging.
For your customers, these add-ons create a convenient “one-stop” shopping experience where they can find everything they need instantly. Instead of searching your site for compatible accessories or separate services, they can “complete the look” or upgrade their order without ever leaving the product page.
From a business perspective, add-ons serve as a powerful upsell engine that maximizes the value of every single transaction. By offering relevant extras right when buying intent is highest, you effortlessly boost your Average Order Value (AOV) and turn a standard sale into a highly profitable bundle.
Step-by-Step Guide: Setting Up Your Shopify Add-on
There are two main ways to add custom options to a Shopify store. The first method involves manually editing the theme code to add new fields yourself.
However, this approach can be complicated and risky for those who are not tech-savvy. One small mistake in the code could break the page layout or stop the checkout from working properly.
A simpler and safer alternative is to use an app. This allows store owners to add features visually without touching any code, preventing accidental errors and saving a lot of time.
Easify Custom Product Options is a great choice for this purpose. It is designed to be easy to use, helping anyone set up professional add-ons and upsells in minutes without needing technical skills.
Here is a simple walkthrough on how to configure these upsells with the app:
Step 1: Find and Install the App
Go to the Shopify App Store, search for Easify Custom Product Options, and click Install. Once added to your store, open the app and follow the quick setup guide to get started.
Step 2: Create a New Option Set
From the Easify dashboard, click the Add New Option Set button to begin. To demonstrate the two main types of add-ons, Easify will select a Text Box to configure an Add-on Price and an Image Swatch option to configure some Add-on Products.
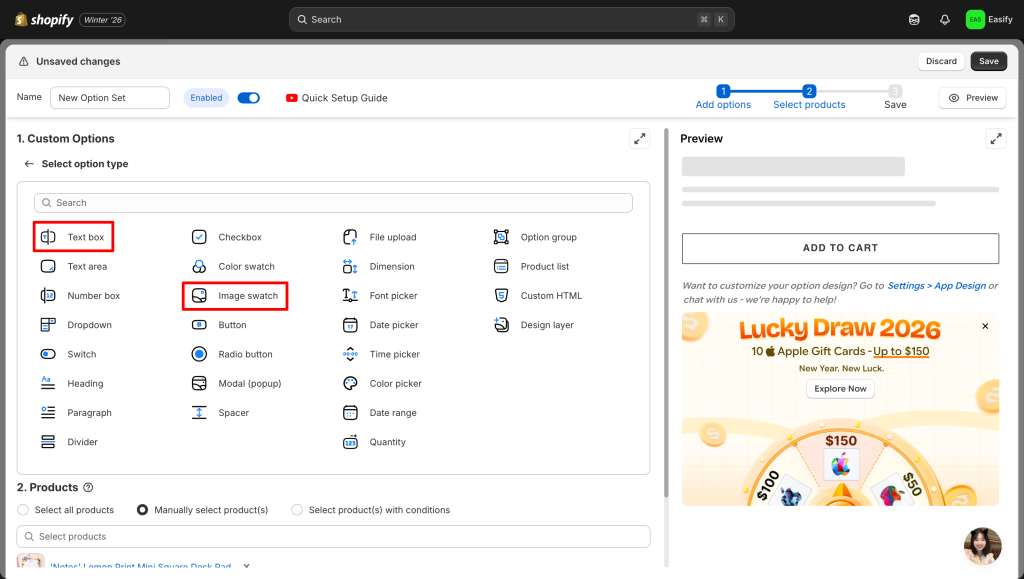
Of course, this setup is completely flexible and depends on the specific use case. Merchants can freely mix and match different display styles, such as dropdowns, buttons, or checkbox, to suit the store’s design preferences.
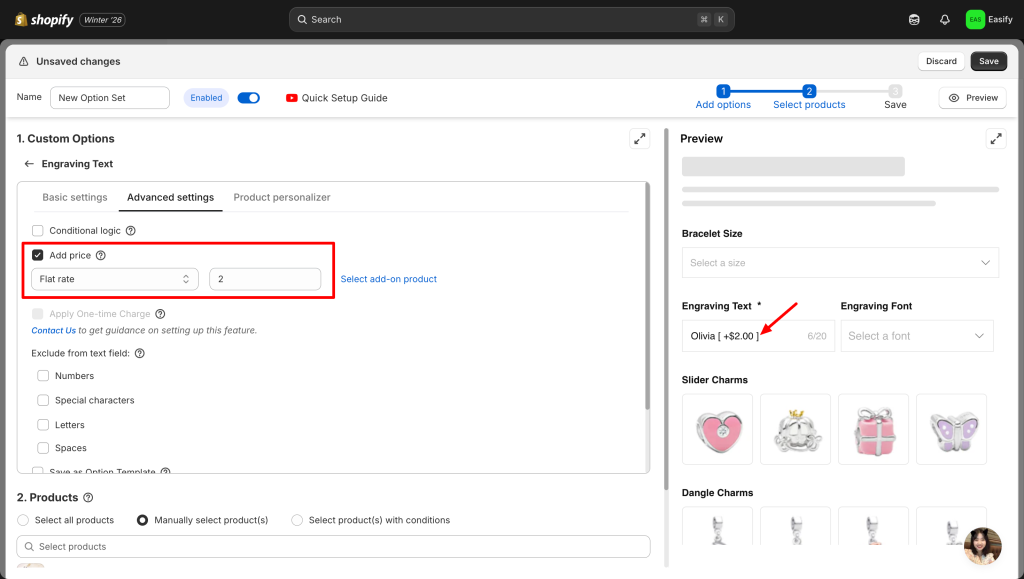
Step 3: Add the Add-ons
For the Add-on Price: This setting allows charging an extra fee for the customization. In this example, if offering name engraving via the Text Box, simply enter “2” in the price field to automatically add a $2 charge to the final bill.
For the Add-on Product: This setting allows upselling an actual inventory item. Using the Image Swatch, link a specific product (e.g., Bracelet Charm) that is already sold in the store. When a customer selects it, the item is added to the cart and inventory is tracked automatically.
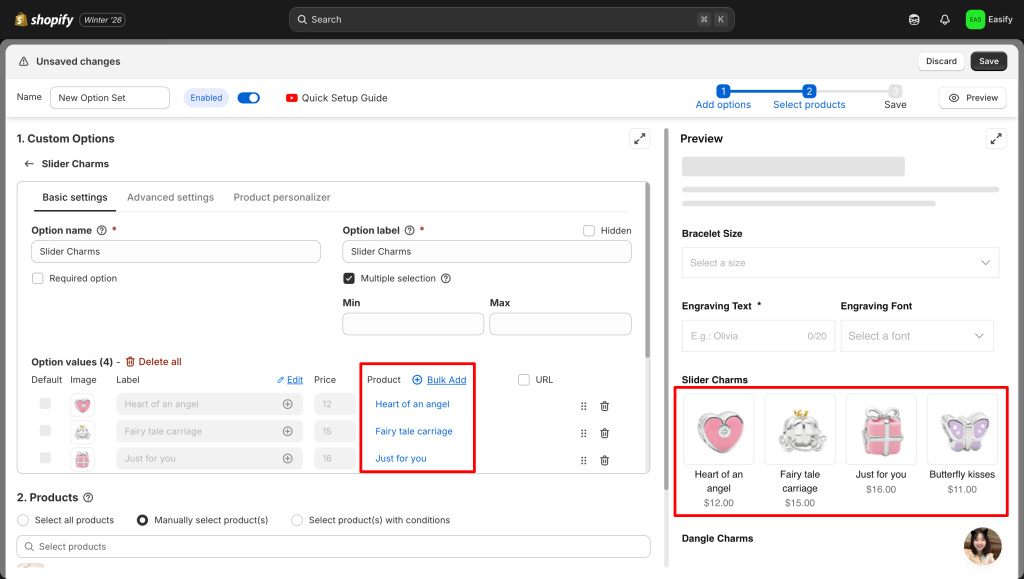
These tools are highly versatile, you can adapt for various sales strategies. Use add-on prices for services like gift wrapping or rush handling, and use add-on products to cross-sell accessories like batteries without losing track of stock.
Step 4: Apply to Products
Next, choose which products will feature these new options. Navigate to the “Products” section within the app to make the selection. The option set can be assigned to a single item or applied to multiple products simultaneously for faster setup.
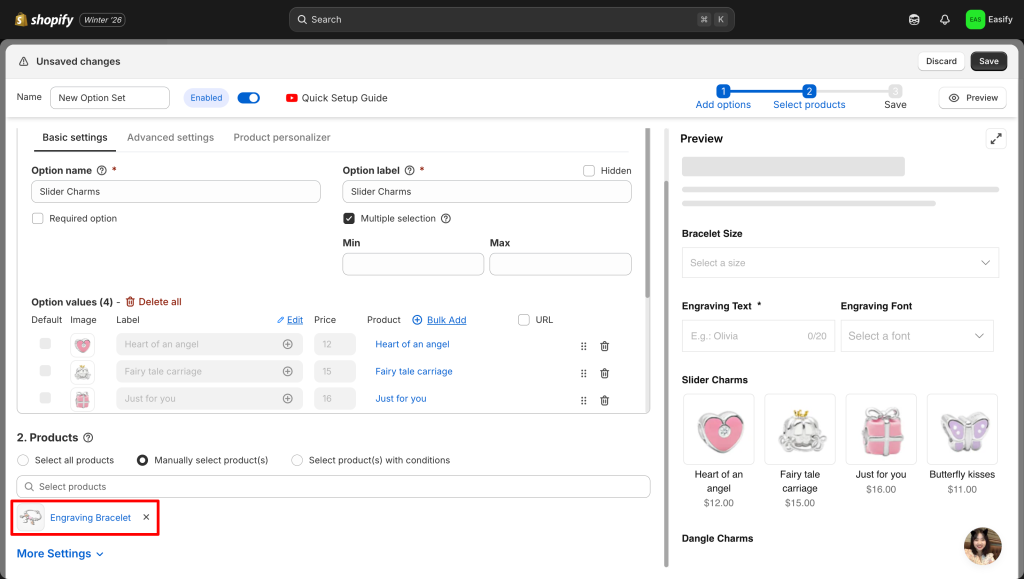
Step 5: Save Changes
Click Save to apply changes. Your add-ons will appear immediately, ready to drive extra revenue from every custom order.
Conclusion
Product add-ons are essential for bypassing Shopify’s limits and boosting your Average Order Value. They transform static pages into profitable, personalized experiences that customers are happy to pay for.
While manual coding is possible, it is risky and prone to breaking your site. Easify Custom Product Options offers a safer, code-free alternative, allowing you to launch professional upsells instantly without the technical headaches.
This simple upgrade can significantly impact your store’s success. Start monetizing your customizations today – your bottom line will thank you for the extra revenue.
For more tips on customizing your Shopify store, check out these related guides


