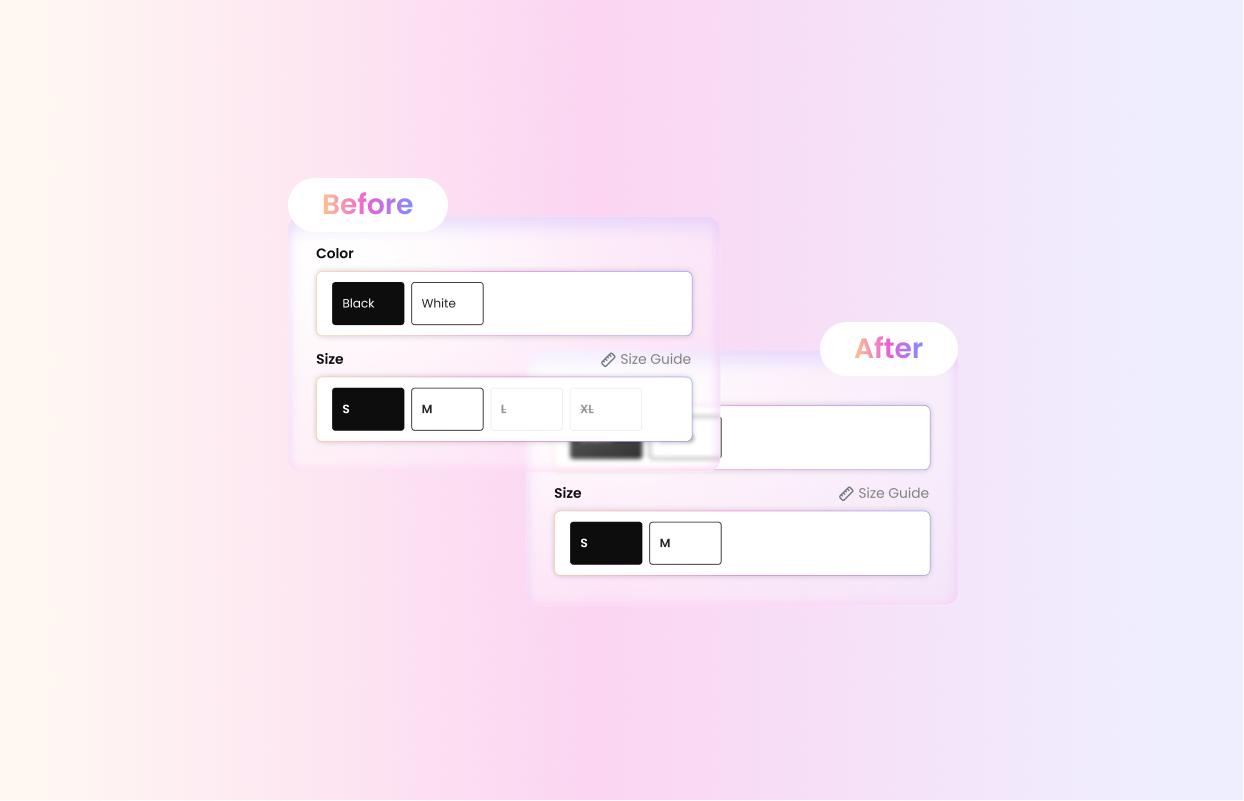
Shopify empowers online store owners with the ability to create diverse product options and variants, streamlining the shopping experience for customers. However, managing unavailable variants in the storefront can be challenging, as default settings often display grey-out options. In this blog post, we’ll guide you through a simple yet effective solution to hide unavailable variants, ensuring a clean and user-friendly product page.
The Challenge: Unwanted Variants on Display
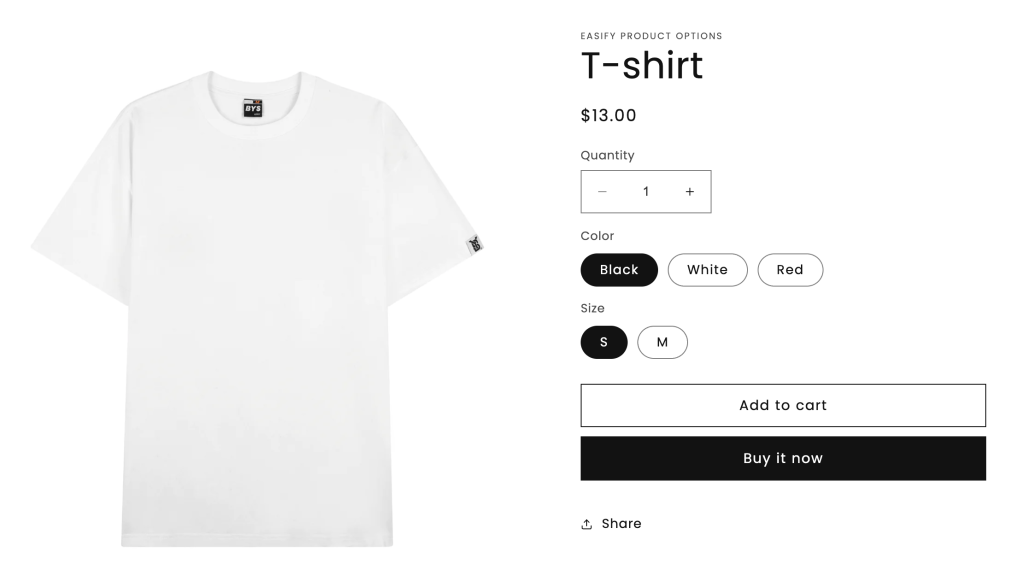
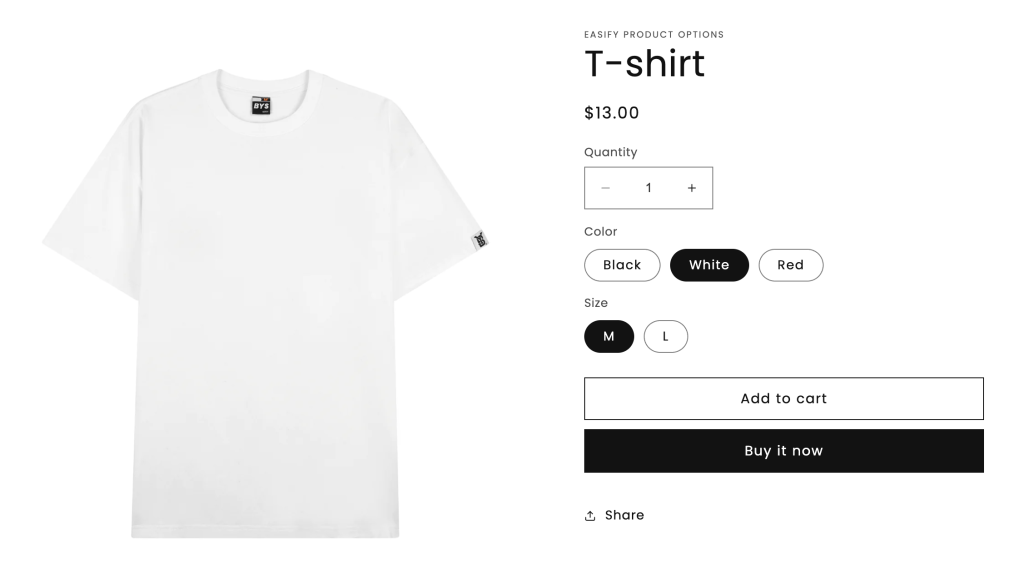
Imagine you’re selling T-shirts with different color and size options. While you might have Black shirts available in sizes S and M, White shirts in M and L, and Red shirts in L and XL, the default behavior of Shopify is to display all possible variants on the product page. This includes those that are unavailable, resulting in a cluttered and confusing interface for your customers.
- Color: Black, White, and Red
- Size:
- Black: S, M
- White: M, L
- Red: L, XL
As an example, Black shirts in XL might be shown, even though they are not in stock. Furthermore, deleted variants are typically crossed out, a less-than-ideal presentation that can impact the overall aesthetics of your store.
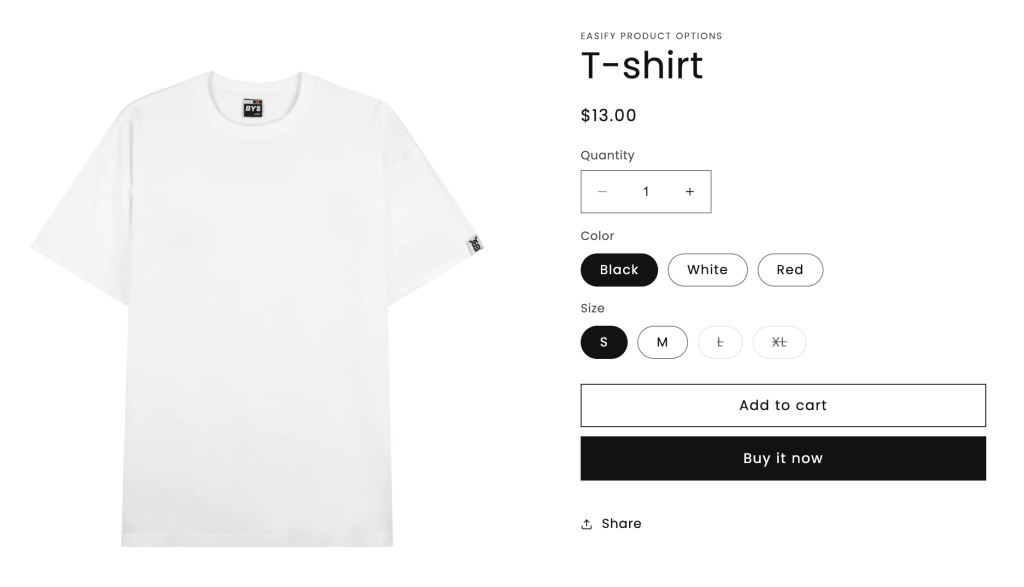
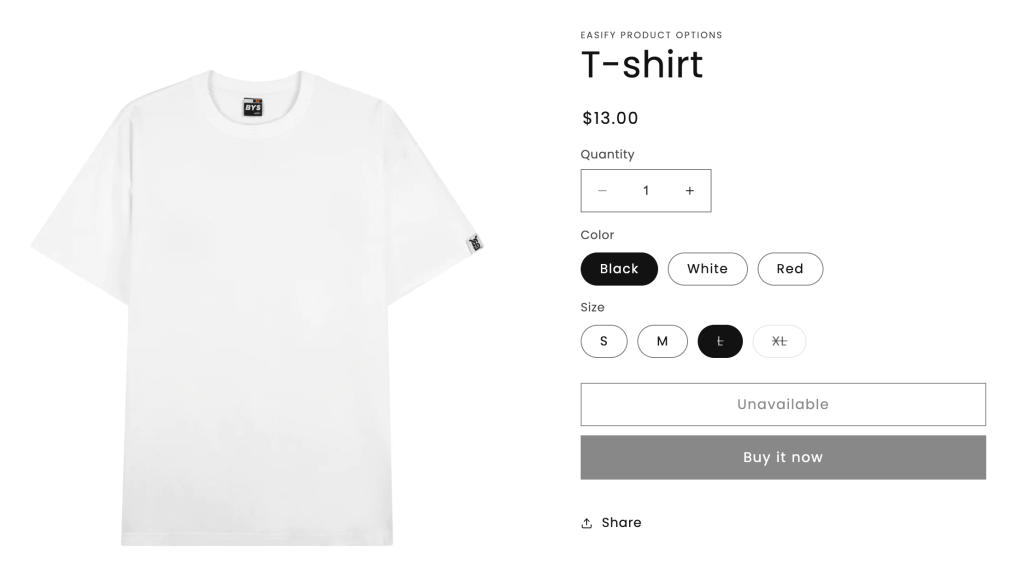
Most store owners prefer a streamlined approach: when a customer selects a color, only the available size options for that color should be displayed. While Shopify doesn’t provide this feature by default, the good news is that a simple custom code can be added to your theme to achieve this functionality.
Another common case: Phone Case store
- Brand: Samsung and iPhone
- Model:
- Samsung: Galaxy S23, Galaxy S23 Ultra, Galaxy S23 Plus
- iPhone: iPhone 15, iPhone 15 Pro, iPhone 15 Pro Max
Herein lies a challenge: when a customer selects a specific brand, such as Samsung, the default behavior of the Shopify platform presents all models, including those belonging to the iPhone category. Conversely, if a customer opts for the iPhone brand, Samsung models are still visible on the product page, albeit grayed out to indicate unavailability.
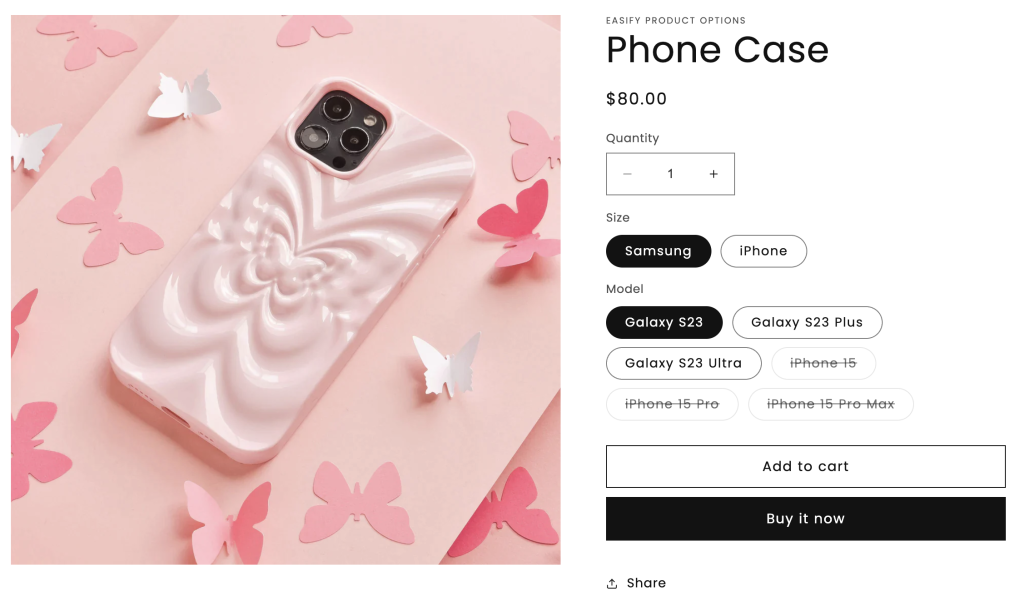
This can lead to a potentially confusing and cluttered display, as customers may be presented with choices that are not relevant to their selected brand preference. Even though these non-matching models are visually distinguished by being greyed out, the user experience can be improved by dynamically adjusting the available options based on the selected brand.
Steps To Hide Unavailable Variants In Shopify
Solution Overview: While Shopify doesn’t natively support this feature, we can overcome this limitation by integrating a small snippet of custom code into your theme. The following steps will guide you through the process, and the setup will take just a few minutes.
- Navigate to your Shopify admin panel.
- Go to Sale Channels > Online Store > Themes > Customize.
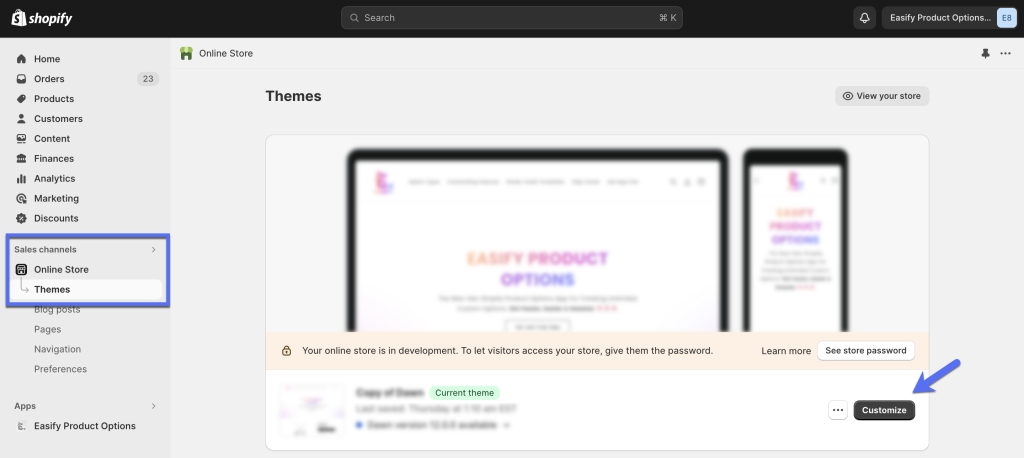
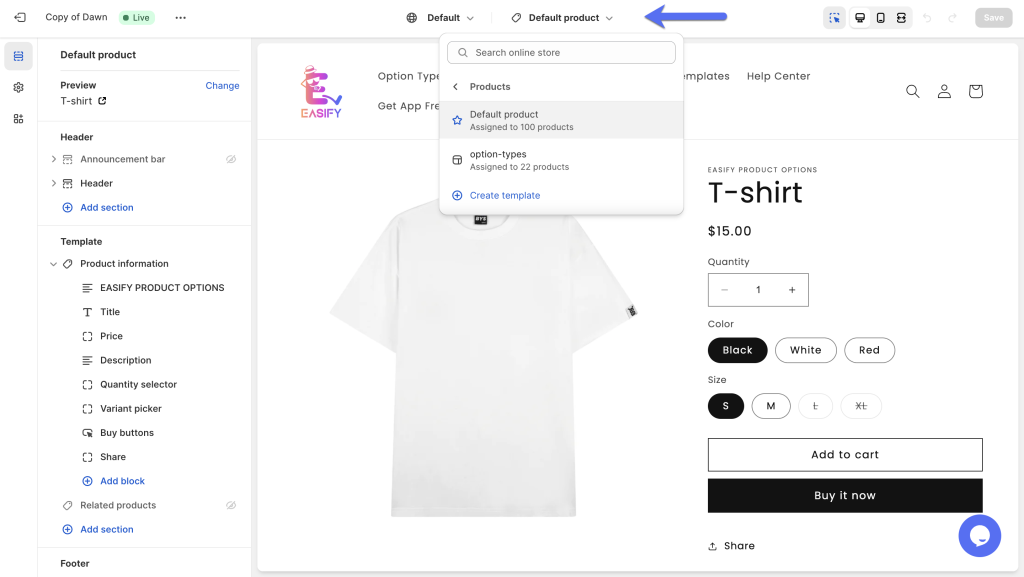
- Select your Product template.
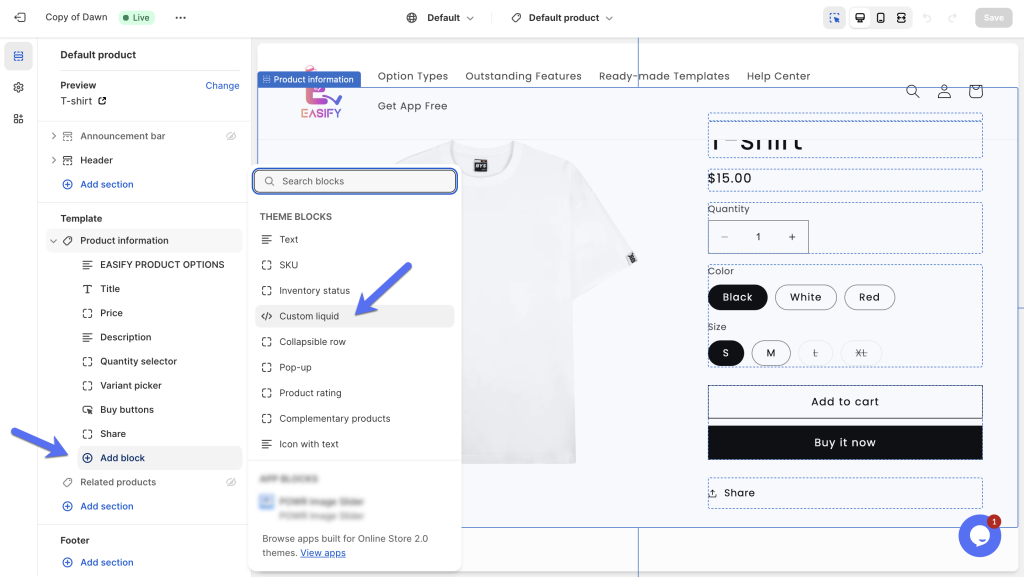
- Within the “Product Information” section, click on “+ Add block” and select the “Custom liquid” block.
- Copy and paste the provided custom code into the Custom liquid field. This code is designed to automatically hide any unavailable variant combinations.
<script language="javascript" type="text/javascript">
const pickerType = (document.querySelector('variant-radios')) ? 'radios' : 'selects';
const variantSelects = (pickerType == 'radios') ? document.querySelector('variant-radios') : document.querySelector('variant-selects');
const fieldsets = (pickerType == 'radios') ? Array.from(variantSelects.querySelectorAll('fieldset')) : Array.from(variantSelects.querySelectorAll('.product-form__input--dropdown'));
const productJson = JSON.parse(variantSelects.querySelector('[type="application/json"]').textContent);
let selectedOptions = [];

variantSelects.addEventListener('change', rebuildOptions);
this.rebuildOptions();

// gather a list of valid combinations of options, check to see if the input passed to it matches in a chain of valid options.
function validCombo(inputValue, optionLevel) {
  for(let i = 0; i < productJson.length; i++) {
    if(optionLevel == 1){
      if (productJson[i].option1 == selectedOptions[0] && productJson[i].option2 == inputValue) { return true; }
    } else {
      if (productJson[i].option1 == selectedOptions[0] && productJson[i].option2 == selectedOptions[1] && productJson[i].option3 == inputValue) { return true; }
    }
  }
  return false;
}

function rebuildOptions() {
  selectedOptions = fieldsets.map((fieldset) => {
    return (pickerType == 'radios') ? Array.from(fieldset.querySelectorAll('input')).find((radio) => radio.checked).value : Array.from(fieldset.querySelectorAll('select'), (select) => select.value);
  });
  //loop through the option sets starting from the 2nd set and disable any invalid options
  for(let optionLevel = 1, n = fieldsets.length; optionLevel < n; optionLevel++) {
    const inputs = (pickerType == 'radios') ? fieldsets[optionLevel].querySelectorAll('input') : fieldsets[optionLevel].querySelectorAll('option');

    inputs.forEach(input => {
      input.disabled = (validCombo(input.value,optionLevel)) ? false : true;
      if(pickerType == 'radios'){
        //get the label for the current input (this is what the user clicks, the "pill")
        const label = fieldsets[optionLevel].querySelector(`label[for="${input.id}"]`);

        label.style.display = (input.disabled) ? "none" : ""; //Hide the option, or comment this line out and use the following lines to style it..
        //label.style.opacity = (input.disabled) ? 0.5 : 1;
        //label.style.borderStyle = (input.disabled) ? "dashed" : "solid";
        //label.style.textDecoration = (input.disabled) ? "none" : "";
      } else {
        input.hidden = (validCombo(input.value,optionLevel)) ? false : true;
      }
    });
  }

  //if the default selected option is disabled with the function above, select the first available option instead
  for (let optionLevel = 1, fieldsetsLength = fieldsets.length, change = false; optionLevel < fieldsetsLength && !change; optionLevel++) {
    if(pickerType == 'radios'){
      if(fieldsets[optionLevel].querySelector('input:checked').disabled === true) {
        change = (fieldsets[optionLevel].querySelector('input:not(:disabled)').checked = true);
      }
    } else {
      if(fieldsets[optionLevel].querySelector('option:checked').disabled === true) {
        change = (fieldsets[optionLevel].querySelector('option:not(:disabled)').selected = "selected");
      }
    }
    //if a new option has been selected, restart the whole process
    if(change) variantSelects.dispatchEvent(new Event('change', { bubbles: true }));
  }
}
</script>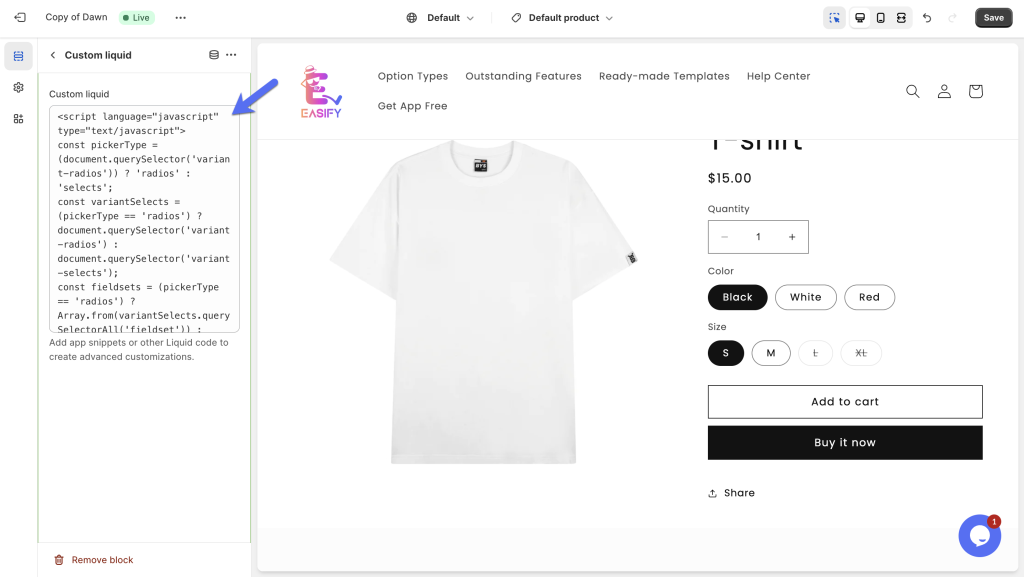
- Click Save and refresh the editing page to witness the immediate results.
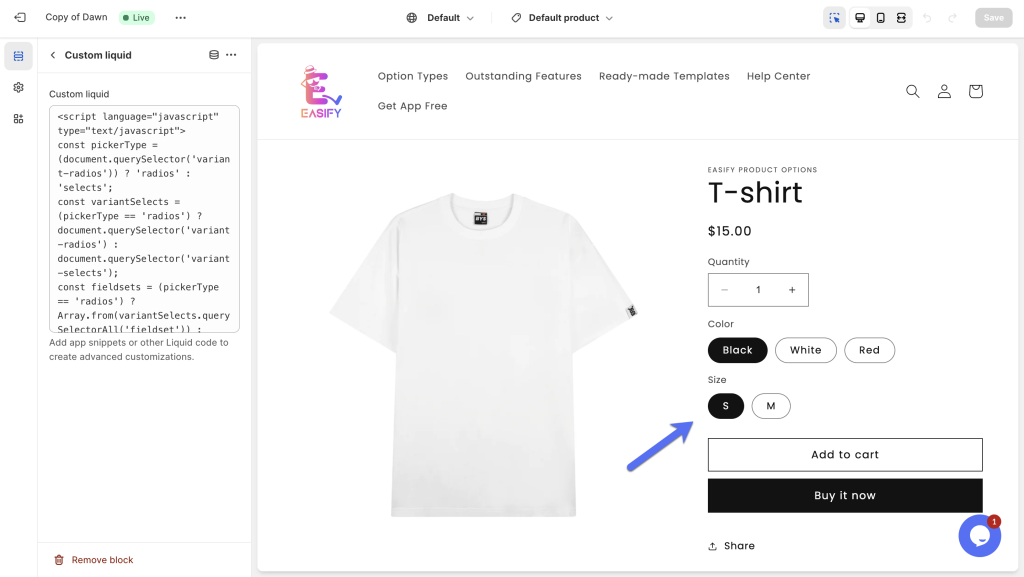
By following these steps, you can enhance the user experience on your Shopify store by ensuring that only available variant combinations are displayed, creating a cleaner and more intuitive interface for your customers.
Final Thoughts
In the ever-evolving landscape of e-commerce, optimizing the presentation of your products is key to attracting and retaining customers. With a small but impactful custom code, you can seamlessly manage variant visibility on your Shopify store, providing a more user-friendly and visually appealing shopping experience. Implement these steps today and elevate your online store to new heights of professionalism and customer satisfaction.
